10、ABPZero系列教程之拼多多卖家工具 拼团提醒逻辑功能实现
上篇文章已经封装好了类库,现在继续实现功能,在ABPZero框架的基础上来实现一个完整的功能。
Redis缓存
编写功能前先在本机安装好Redis,需要用到Redis做缓存,以下分享2个Windows安装Redis的教程
博客园:http://www.cnblogs.com/mzws/p/redis1.html
我的笔记:http://note.youdao.com/noteshare?id=a25fc319c5a38285ab7cab2e81857b31&sub=675165188B214E6CA0660B8EEB0A1C35(请记得及时收藏,可能不知哪天就失效了)
Core项目
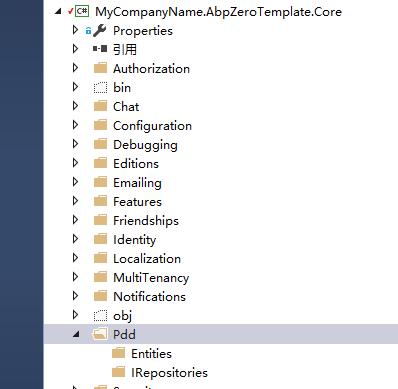
在Core项目下新建Pdd目录,继续在Pdd目录下新建Entities、IRepositories目录,建完如下图所示:
接着在Entities目录下新建PddMall实体类,代码如下:
/// <summary>

    /// 店铺

    /// </summary>

    public class PddMall : FullAuditedEntity

    {

        /// <summary>

        /// 店铺id

        /// </summary>

        public string MallId { get; set; }

        /// <summary>

        /// 店铺名称

        /// </summary>

        public string Name { get; set; }

        /// <summary>

        /// logo

        /// </summary>

        public string Logo { get; set; }

        /// <summary>

        /// 描述

        /// </summary>

        public string Desc { get; set; }

        /// <summary>

        /// 退款地址

        /// </summary>

        public string RefundAddress { get; set; }

        /// <summary>

        /// 销售量

        /// </summary>

        public long Sales { get; set; }

        /// <summary>

        /// 商品数量

        /// </summary>

        public int GoodNum { get; set; }

    }
继续在IRepositories目录下新建IMallRepository仓储接口,代码如下:
public interface IMallRepository : IRepository<PddMall>

{

}
EntityFramework项目
打开AbpZeroTemplateDbContext.cs文件,添加如下代码:
文件路径:D:\abpweb\PddSellerAssistant\PddSellerAssistant.EntityFramework\EntityFramework\AbpZeroTemplateDbContext.cs
/************拼多多相关*********************************/

public virtual IDbSet<PddMall> PddMalls { get; set; }

/************拼多多相关*********************************/
打开VS的包管理控制台,并在包管理控制台中选择 .EntityFramework 项目作为默认项目。然后在控制台中执行下面命令:
Add-Migration "Add_PddMall"

看到上图黄色提示说明创建迁移文件成功
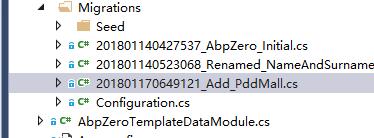
同时Migrations目录多了一个文件,这个就是刚刚创建的迁移文件。
现在你可以使用下面命令来创建数据库:
Update-Database
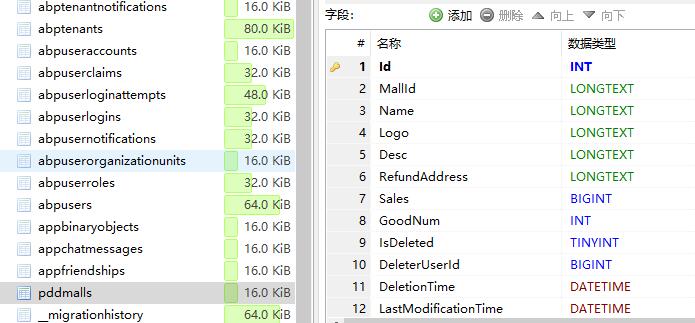
命令执行成功,查看数据库也创建了对应的表(如下):
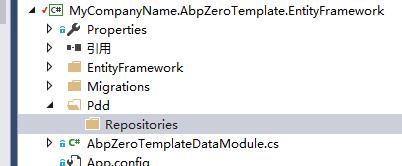
再EntityFramework项目下新建Pdd目录,接着再创建Repositories目录,结构如下:
Repositories目录下新建MallRepository仓储实现类,代码如下:
public class MallRepository : AbpZeroTemplateRepositoryBase<PddMall>, IMallRepository

    {

        public MallRepository(IDbContextProvider<AbpZeroTemplateDbContext> dbContextProvider) : base(dbContextProvider)

        {

        }

    }
Application项目
首先引用类库PddTool
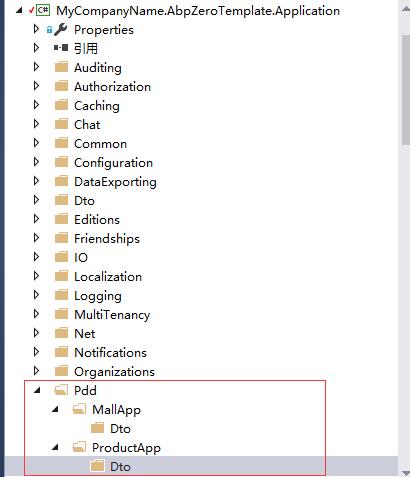
同样新建Pdd目录,此目录下再新建MallApp、ProductApp,这两个目录分别再创建Dto目录,效果如下:
MallApp目录下新建IMallAppService接口,代码如下:
public interface IMallAppService : IApplicationService

    {

        void CreateByMallId(CreateMallInput input);

        /// <summary>

        /// 获取店铺信息,返回店铺编号、店铺名称

        ///

        /// </summary>

        /// <returns></returns>

        MallOutput GetMallInfo(int id);

        /// <summary>

        /// 获取店铺列表

        /// </summary>

        /// <returns></returns>

        GetMallsOutput GetMalls();

    }
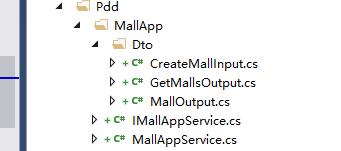
此时,Input、Output类会报错,接着在Dto目录下再创建这几个类,分别如下:
public class CreateMallInput

    {

        [Required]

        public string MallId { get; set; }

    }
public class MallOutput

    {

        public int Id { get; set; }

        /// <summary>

        /// 店铺名称

        /// </summary>

        public string Name { get; set; }

        /// <summary>

        /// 店铺id

        /// </summary>

        public string MallId { get; set; }

    }
public class GetMallsOutput

    {

        public List<MallOutput> Items { get; set; }

    }
MallApp目录下再新建MallAppService类,代码如下:
public class MallAppService : AbpZeroTemplateAppServiceBase, IMallAppService

    {

        private readonly IMallRepository _mallRepository;

        private readonly ICacheManager _cacheManager;

        public MallAppService(IMallRepository mallRepository, ICacheManager cacheManager)

        {

            _mallRepository = mallRepository;

            _cacheManager = cacheManager;

        }

        /// <summary>

        /// 获取店铺信息

        /// </summary>

        /// <param name="id"></param>

        /// <returns></returns>

        public MallOutput GetMallInfo(int id)

        {

            var mall = _mallRepository.Get(id);

            return new MallOutput()

            {

                Id = mall.Id,

                MallId = mall.MallId,

                Name = mall.Name

            };

        }

        /// <summary>

        /// 添加店铺

        /// </summary>

        /// <param name="input"></param>

        public void CreateByMallId(CreateMallInput input)

        {

            try

            {

                var mall = MallTool.GetInfo(input.MallId);

                var entity = new PddMall()

                {

                    Name = mall.mall_name,

                    Desc = mall.mall_desc,

                    GoodNum = mall.goods_num,

                    Logo = mall.logo,

                    MallId = input.MallId,

                    RefundAddress = mall.refund_address,

                    Sales = mall.mall_sales,

                };

                //按店铺id查询店铺资料

                var count = _mallRepository.Count(a => a.MallId.Equals(input.MallId) && a.CreatorUserId == AbpSession.UserId);

                if (count != )

                {

                    //数据库存在则更新

                    var m = _mallRepository.Single(a => a.MallId.Equals(input.MallId) && a.CreatorUserId == AbpSession.UserId);

                    m.Name = entity.Name;

                    m.Desc = entity.Desc;

                    m.GoodNum = entity.GoodNum;

                    m.Logo = entity.Logo;

                    m.MallId = entity.MallId;

                    m.RefundAddress = entity.RefundAddress;

                    m.Sales = entity.Sales;

                    _mallRepository.Update(m);

                }

                else

                {

                    //数据库不存在此店铺则使用API获取

                    _mallRepository.Insert(entity);

                }

            }

            catch (Exception ex)

            {

                throw new UserFriendlyException(ex.Message);

            }

        }

        /// <summary>

        /// 从数据库中获取店铺列表

        /// </summary>

        /// <returns></returns>

        public GetMallsOutput GetMalls()

        {

            var list = _mallRepository.GetAllList(a => a.CreatorUserId == AbpSession.UserId);

            //创建映射

            return new GetMallsOutput()

            {

                Items = Mapper.Map<List<MallOutput>>(list)

            };

        }

    }
目录结构如下:
ProductApp目录下继续新建IProductAppService接口,代码如下:
public interface IProductAppService : IApplicationService

    {

        Task<PagedResultDto<KaiTuanProductOutput>> GetKaiTuanProductsAsync(GetProductsInput input);

        /// <summary>

        /// 根据商品id获取此商品所有拼团信息

        /// </summary>

        /// <param name="input"></param>

        /// <returns></returns>

        //[HttpGet]

        PagedResultDto<ProductOutput> GetAllKaiTuansByGoodId(GetAllKaiTuansInput input);

    }
接着再新建ProductAppService类,代码如下:
public class ProductAppService : AbpZeroTemplateAppServiceBase, IProductAppService

    {

        /// <summary>

        /// 缓存管理

        /// </summary>

        private readonly ICacheManager _cacheManager;

        private string key;    //缓存key

        public ProductAppService(ICacheManager cacheManager)

        {

            _cacheManager = cacheManager;

        }

        /// <summary>

        ///根据店铺id, 获取有开团的商品

        /// </summary>

        /// <param name="input"></param>

        /// <returns></returns>

        public async Task<PagedResultDto<KaiTuanProductOutput>> GetKaiTuanProductsAsync(GetProductsInput input)

        {

            //获取所有商品的开团人数

            var list = MallTool.GetKaiTuanList(input.MallId);

            //清除缓存

            key = string.Format("{0}_{1}_KaiTuan", AbpSession.UserId, input.MallId);

            _cacheManager.GetCache(key).Clear();

            #region 数据转换

            var items = new List<KaiTuanProductOutput>();

            foreach (var localGroupItem in list)

            {

                var item = new KaiTuanProductOutput()

                {

                    GoodId = localGroupItem.GoodId,

                    Name = localGroupItem.Name,

                    KaiTuanCount = localGroupItem.KaiTuanCount,

                    Img = localGroupItem.Img,

                };

                items.Add(item);

            }

            #endregion

            int totalCount = list.Count;

            #region 处理排序

            if (input.Sorting.Equals("goodId ASC"))

            {

                items = items.OrderBy(a => a.GoodId).ToList();

            }

            else if (input.Sorting.Equals("goodId DESC"))

            {

                items = items.OrderByDescending(a => a.GoodId).ToList();

            }

            if (input.Sorting.Equals("name ASC"))

            {

                items = items.OrderBy(a => a.Name).ToList();

            }

            else if (input.Sorting.Equals("name DESC"))

            {

                items = items.OrderByDescending(a => a.Name).ToList();

            }

            if (input.Sorting.Equals("kaiTuanCount ASC"))

            {

                items = items.OrderBy(a => a.KaiTuanCount).ToList();

            }

            else if (input.Sorting.Equals("kaiTuanCount DESC"))

            {

                items = items.OrderByDescending(a => a.KaiTuanCount).ToList();

            }

            #endregion

            return new PagedResultDto<KaiTuanProductOutput>(totalCount, items);

        }

        /// <summary>

        /// 根据商品id,获取此商品所有开团

        /// </summary>

        /// <param name="input"></param>

        /// <returns></returns>

        public PagedResultDto<ProductOutput> GetAllKaiTuansByGoodId(GetAllKaiTuansInput input)

        {

            #region 使用redis缓存

            key = string.Format("{0}_{1}_KaiTuan", AbpSession.UserId, input.MallId);

            var list = _cacheManager.GetCache<string, List<KaiTuan>>(key).Get("GetAllKaiTuanByGoodId." + input.GoodId, () => MallTool.GetAllKaiTuanByGoodId(input.MallId, input.GoodId));

            #endregion

            #region 数据转换

            List<ProductOutput> productOutputs = Mapper.Map<List<ProductOutput>>(list);

            #endregion

            #region 处理排序

            if (input.Sorting.Equals("timeLeft ASC"))

            {

                productOutputs = productOutputs.OrderBy(a => a.TimeLeft).ToList();

            }

            else if (input.Sorting.Equals("timeLeft DESC"))

            {

                productOutputs = productOutputs.OrderByDescending(a => a.TimeLeft).ToList();

            }

            #endregion

            int total = productOutputs.Count;

            #region 处理分页

            productOutputs = productOutputs.Skip(input.SkipCount).Take(input.MaxResultCount).ToList();

            #endregion

            return new PagedResultDto<ProductOutput>(total, productOutputs);

        }

    }
同样Input、Output报错,在Dto分别创建如下类即可:
public class KaiTuanProductOutput

    {

        public int Id { get; set; }

        public int GoodId { get; set; }

        /// <summary>

        /// 商品名称

        /// </summary>

        public string Name { get; set; }

        /// <summary>

        /// 商品图片

        /// </summary>

        public string Img { get; set; }

        /// <summary>

        /// 开团人数

        /// </summary>

        public int KaiTuanCount { get; set; }

    }
public class GetProductsInput : PagedAndSortedInputDto, IShouldNormalize

    {

        /// <summary>

        /// 店铺id

        /// </summary>

        public string MallId { get; set; }

        /// <summary>

        /// 提醒间隔(分钟)

        /// </summary>

        public int Interval { get; set; }

        public void Normalize()

        {

            if (string.IsNullOrEmpty(Sorting))

            {

                Sorting = "Name";

            }

        }

    }
public class ProductOutput

    {

        /// <summary>

        /// 商品id

        /// </summary>

        public int Id { get; set; }

        /// <summary>

        /// 昵称

        /// </summary>

        public string  NickName { get; set; }

        /// <summary>

        ///

        /// </summary>

        public string SKU { get; set; }

        /// <summary>

        /// 订单号

        /// </summary>

        public string OrderNum { get; set; }

        /// <summary>

        /// 剩余时间

        /// </summary>

        public double TimeLeft { get; set; }

        /// <summary>

        /// 开团单号

        /// </summary>

        public string KaiTuanOrderNum { get; set; }

    }
public class GetAllKaiTuansInput : PagedAndSortedInputDto, IShouldNormalize

    {

        /// <summary>

        /// 店铺id

        /// </summary>

        public int MallId { get; set; }

        /// <summary>

        /// 商品id

        /// </summary>

        public int GoodId { get; set; }

public void Normalize()

        {

            if (string.IsNullOrEmpty(Sorting))

            {

                Sorting = "timeLeft ASC";

            }

        }

    }
再打开CustomDtoMapper.cs,添加如下代码(约定映射):
文件路径:D:\abp version\aspnet-zero-3.4.0\aspnet-zero-3.4.0\src\MyCompanyName.AbpZeroTemplate.Application\CustomDtoMapper.cs
private static void CreateMappingsInternal(IMapperConfigurationExpression mapper)

        {

            mapper.CreateMap<User, UserEditDto>()

                .ForMember(dto => dto.Password, options => options.Ignore())

                .ReverseMap()

                .ForMember(user => user.Password, options => options.Ignore());

            /**********************拼多多相关********************************/

            mapper.CreateMap<PddMall, MallOutput>();

            mapper.CreateMap<KaiTuan, ProductOutput>();

        }
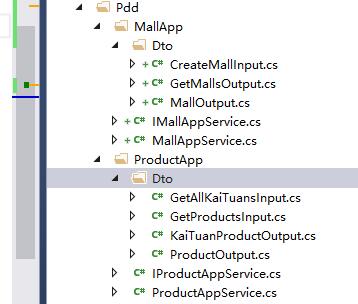
以上整个拼团提醒业务逻辑就完成了,最终Application项目中Pdd目录结构如下:
生成解决方案,浏览器打开框架后台登录。
浏览器再打开http://localhost:8088/swagger/ui/index,进行api测试。
按上一篇提到获取拼多多店铺编号的方法,找一个店铺编号:1227314,对刚刚编写的功能进行测试。
目前只有店铺资料会保存到数据库,商品信息或拼团信息保存到缓存。
本篇内容比较多,页面实现移到下一篇。
10、ABPZero系列教程之拼多多卖家工具 拼团提醒逻辑功能实现的更多相关文章
- 11、ABPZero系列教程之拼多多卖家工具 拼团提醒功能页面实现
上一篇讲解了拼团提醒逻辑功能实现,现在继续实现页面功能. Core项目 打开AbpZeroTemplate-zh-CN.xml语言文件,在末尾添加如下代码: 文件路径:D:\abp version\a ...
- 12、ABPZero系列教程之拼多多卖家工具 拼团提醒功能登录拼多多实现
上篇文章已经完成了整个拼多多拼团提醒功能,本篇继续完成拼多多帐号登录,拼多多帐号登录的目的是为了获取拼团商品的SKU和订单号,便于商家备货. 以下是拼多多官方的后台登录,要实现的功能并不是直接在这里登 ...
- 9、ABPZero系列教程之拼多多卖家工具 拼团提醒类库封装
本篇开始正式做功能,我在开发拼团提醒之前,拼多多并没有放出拼团人数不足就提醒卖家的功能. 有这个想法主要来源于朋友的抱怨,我想这应该是大部分卖家的心声吧. 经过分析,拿到了几个api,不要问我api怎 ...
- 8、ABPZero系列教程之拼多多卖家工具 添加手机注册登录功能
现在网站基本都用手机注册,很少用邮箱注册,本篇内容比较多,代码我会尽量加备注,有些操作需要连续添加几个文件才不报错,如果VS显示错误,请继续后续步骤. 前面已经有一篇文章讲到集成短信发送模块:http ...
- 1、ABPZero系列教程之拼多多卖家工具 前言
此系列文章围绕着拼多多卖家工具来介绍ABPZero的使用,内容包括手机登录.手机注册.拼团提醒.微信公众号绑定帐号.有拼团发送消息到微信公众号(只要关注过微信公众号并已绑定系统帐号). 学习此系列必备 ...
- 2、ABPZero系列教程之拼多多卖家工具 更改数据库为Mysql
因为要部署项目到云服务器,不想在服务器上装SqlServer,所以需要把项目改为Mysql. 项目初始化 1.下载项目压缩包,前面文章已经说到,可以加群到群文件里下载.解压缩下载的项目源码,使用VS2 ...
- 4、ABPZero系列教程之拼多多卖家工具 集成短信发送模块
ABPZero并没有手机短信发送功能,现在我们来集成一个,为后面注册.登录作铺垫. 阿里云短信服务 首先需要在阿里云开通短信服务,连接地址 开通后,在签名管理中添加一个签名 在模板管理中添加一个模板, ...
- 7、ABPZero系列教程之拼多多卖家工具 修改注册功能
本篇开始进入重头戏,之前的几篇文章都是为了现在的功能作准备.前面教程已经讲到修改User表结构,接下来就需要修改注册逻辑代码. 注册页面 修改Register.cshtml,备注如下代码: 文件路径: ...
- 13、ABPZero系列教程之拼多多卖家工具 微信公众号开发前的准备
因为是开发阶段,我需要在本地调试,而微信开发需要配置域名,这样natapp.cn就有了用武之地,应该说natapp就是为此而生的. natapp.cn是什么 这是一个内网映射的网站,支持微信公众号.小 ...
随机推荐
- sublime text 3配置使用python
1. 在sublime text的官网下载,是适合自己系统的版本.官网地址:https://www.sublimetext.com/3 2. 安装好后,在菜单栏打开:Preferences---> ...
- json api
from flask import Flask, redirect, url_for, jsonify, request app = Flask(__name__) users = [] ''' RE ...
- org.springframework.web.HttpMediaTypeNotAcceptableException: Could not find acceptable representation
异常信息 org.springframework.web.HttpMediaTypeNotAcceptableException: Could not find acceptable represen ...
- NodeJs学习笔记(五)---单元测试补充
今天早上继续研究Mocha,忽然发现一个问题,我的大部分程序都是需要登录验证的,所以需要预先登录之后才能进行下一步测试,就开始在网上找答案,发现没有这种资料,很疑惑,最后发现其实是自己太笨了,因为这个 ...
- 【java】网络socket编程简单示例
package 网络编程; import java.io.IOException; import java.io.PrintStream; import java.net.ServerSocket; ...
- EntityFramework Core数据查询
前言 本节我们再来讲讲EF Core,本节算是回归基础吧,当前项目EF Core还是处于1.1版本中,后续等待.net core等版本稳定了全部会更新到2.0版本中,到时再来更新相关文章分享给大家. ...
- iOS 网络监听、判断
一 网络监听 - (BOOL)application:(UIApplication *)application didFinishLaunchingWithOptions:(NSDictionary ...
- Kafka详细的设计和生态系统
欢迎大家前往云加社区,获取更多腾讯海量技术实践干货哦~ 译者:人工智能资讯小编 本译文自Jean-Paul Azar 在 https://dzone.com 发表的 Kafka Detailed De ...
- 使用Linux 安装MySQL
文章 link 在安装mysql数据库服务器前,确保你的linux系统是可以连接网络的,下面我们将通过源码方式来安装mysql首先通过putty登入进你的Linux系统,确保系统中已经安装的gcc ...
- JDK并发包常用的知识图
并发包需要注意的知识点 集合类的体系结构