从零开始学spring cloud(六) -------- Ribbon
一、Ribbon介绍
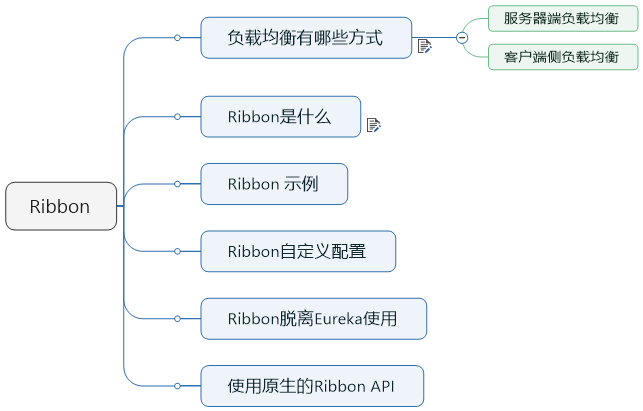
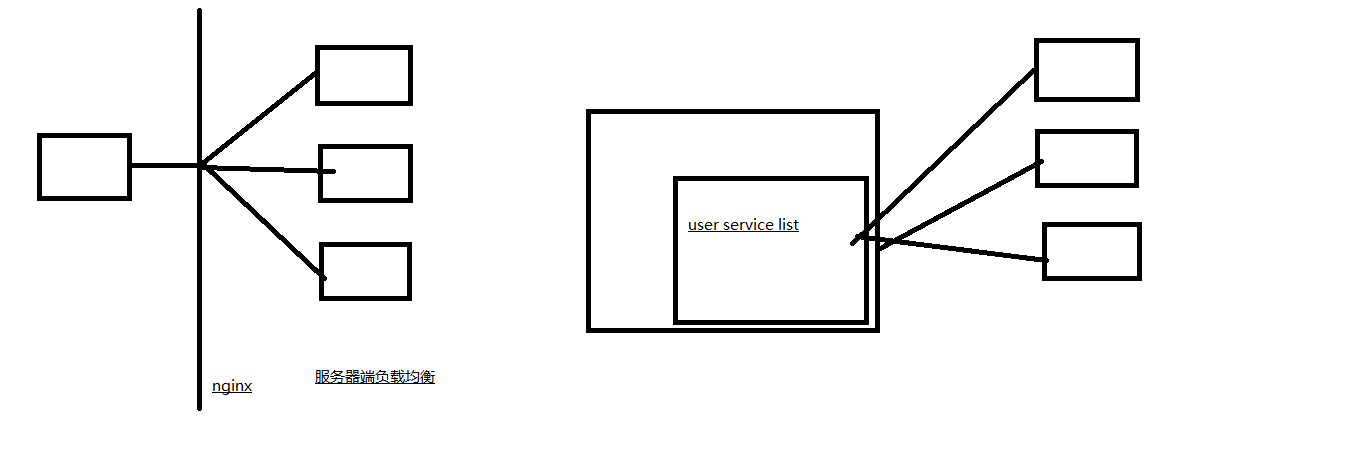
Ribbon就是客户端侧负责均衡实现的一种方式,那么Ribbon是什么呢?
Ribbon是Netflix发布的云中间层服务开源项目,其主要功能是提供客户端侧负载均衡算法。Ribbon客户端组件提供一系列完善的配置项如连接超时,重试等。简单的说,Ribbon是一个客户端负载均衡器,我们可以在配置文件中列出Load Balancer后面所有的机器,Ribbon会自动的帮助你基于某种规则(如简单轮询,随机连接等)去连接这些机器,我们也很容易使用Ribbon实现自定义的负载均衡算法。
下图展示了Eureka使用Ribbon时候的大致架构:
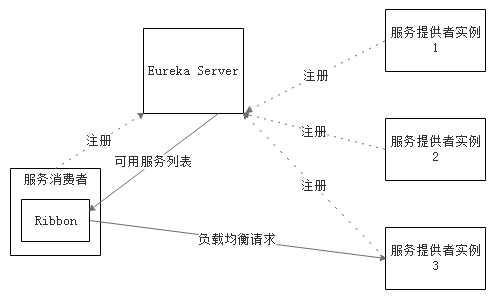
Ribbon工作时分为两步:第一步先选择 Eureka Server, 它优先选择在同一个Zone且负载较少的Server;第二步再根据用户指定的策略,在从Server取到的服务注册列表中选择一个地址。其中Ribbon提供了多种策略,例如轮询round robin、随机Random、根据响应时间加权等。
二、Ribbon示例
查看官方接口文档:https://cloud.spring.io/spring-cloud-static/spring-cloud-netflix/2.1.0.RELEASE/single/spring-cloud-netflix.html#netflix-ribbon-starter
To include Ribbon in your project, use the starter with a group ID of org.springframework.cloud and an artifact ID of spring-cloud-starter-netflix-ribbon. See the Spring Cloud Project page for details on setting up your build system with the current Spring Cloud Release Train.
我们现在MOVIE的微服务中,添加相应的依赖
        <dependency>

            <groupId>org.springframework.cloud</groupId>

            <artifactId>spring-cloud-starter-netflix-ribbon</artifactId>

        </dependency>
然后,我们只需要在启动类的中有个bean上面,增加一个@LoadBalanced,就可以实现客户端侧的负载均衡
 package com.zwjk.cloud;

 import org.springframework.boot.SpringApplication;

 import org.springframework.boot.autoconfigure.SpringBootApplication;

 import org.springframework.cloud.client.loadbalancer.LoadBalanced;

 import org.springframework.context.annotation.Bean;

 import org.springframework.web.client.RestTemplate;

 @SpringBootApplication

 public class MovieRibbonApplication {

     @Bean

     @LoadBalanced

     public RestTemplate restTemplate() {

         return new RestTemplate();

     }

     public static void main(String[] args) {

         SpringApplication.run(MovieRibbonApplication.class, args);

     }

 }
下面。我们启动两个user服务,端口分别是7901,7902,然后通过movie服务进行访问,通过查看两个的user的日志,展示请求的分发。这里我们需要修改一下配置文件,将原先的
userServicePath: http://localhost:7900/simple/
修改成:
userServicePath: http://microservice-provider-user/simple/
这是通过一个虚拟的host进行访问,这样,就能随机的访问两个user服务了
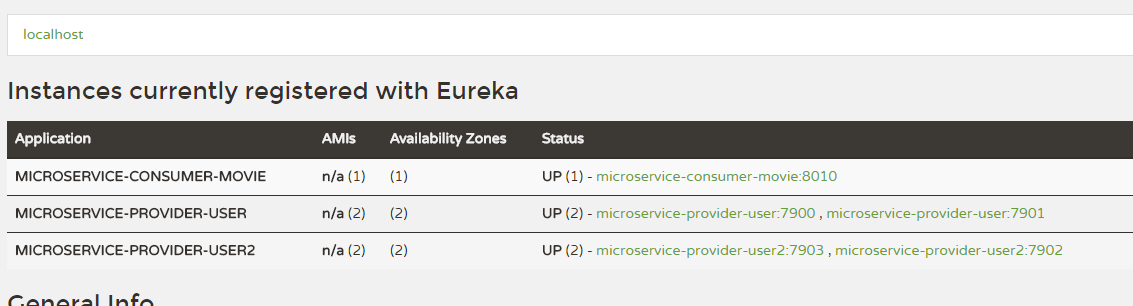
启动后,查看一下Eureka的控制台,可以看到一个服务的两个实例运行着

请求了4次后,发现,7901和7900各自获得两次请求。这是因为Ribbon默认的负载均衡的策略是轮询。
下面,我们看一下,如何来定制Ribbon的负载均衡策略,
You can configure some bits of a Ribbon client by using external properties in <client>.ribbon.*, which is similar to using the Netflix APIs natively, except that you can use Spring Boot configuration files. The native options can be inspected as static fields in CommonClientConfigKey (part of ribbon-core).
Spring Cloud also lets you take full control of the client by declaring additional configuration (on top of the RibbonClientConfiguration) using @RibbonClient, as shown in the following example:
您可以使用<client> .ribbon。*中的外部属性配置Ribbon客户端的某些位,这类似于本机使用Netflix API,但您可以使用Spring Boot配置文件。 可以在CommonClientConfigKey(ribbon-core的一部分)中将本机选项作为静态字段进行检查。
Spring Cloud还允许您通过使用@RibbonClient声明其他配置(在RibbonClientConfiguration之上)来完全控制客户端,如以下示例所示:

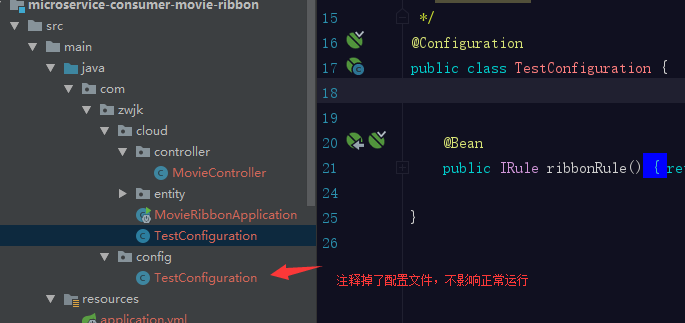
需要注意的是,这个有一个警告,说,@Confiuration 不能放在@ComponentScan和SpringBootApplication扫描的路径下,那就把这个配置文件,放在扫描的包的外面。
官方文档说,我们可以自定义配置,来实现自己的负载均衡的策略,我们在代码中来实现一下;
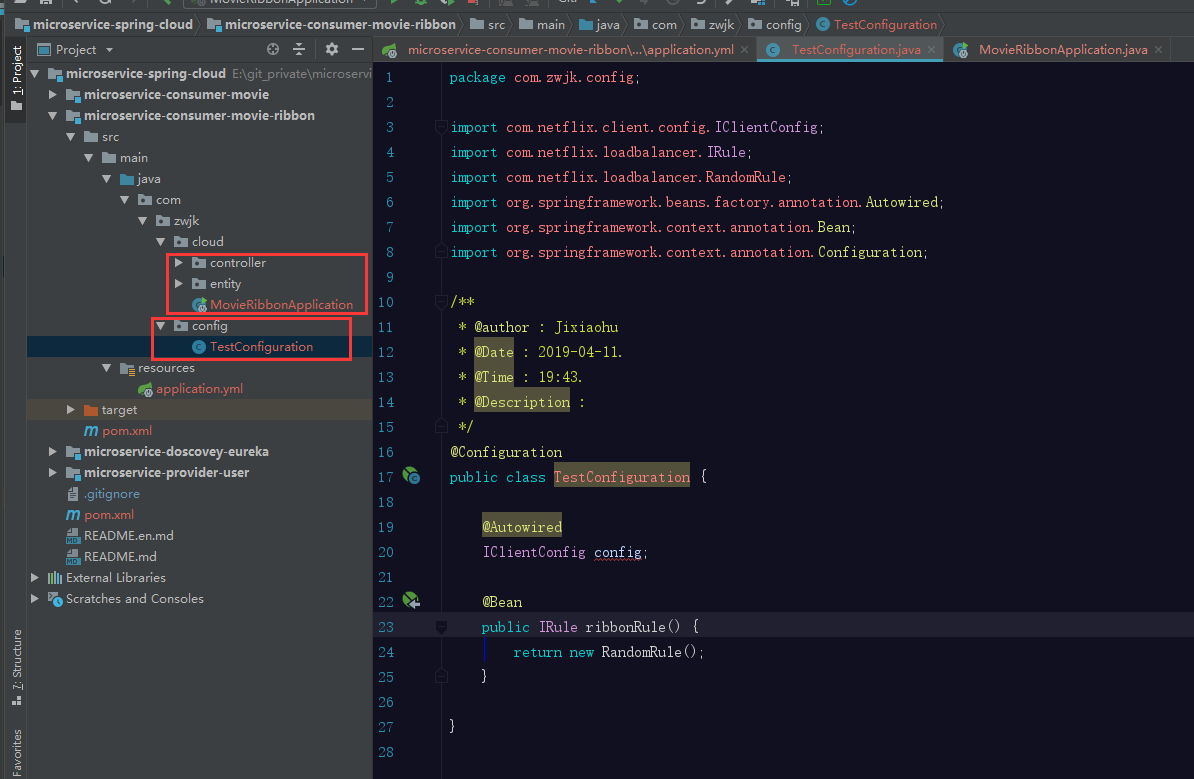
通过在外部,增加一个自定义的配置文件,要实现自定义的规则,规则设置为随机,启动Movie,并进行访问,查看user响应是否随机,
通过测试,可以发现,请求是随机的。
假设,我有多个ribbonClient,那么该怎么实现呢?(上述的方式,其实已经实现了这种方式,下面看一下多个ribbon的实现示例)
现在,我们在启动两个user,用两个新的服务名称
现在修改movie,使用两个不同的策略,访问两个不同的服务,
 package com.zwjk.cloud.controller;

 import com.zwjk.cloud.entity.User;

 import org.springframework.beans.factory.annotation.Autowired;

 import org.springframework.beans.factory.annotation.Value;

 import org.springframework.cloud.client.ServiceInstance;

 import org.springframework.cloud.client.loadbalancer.LoadBalancerClient;

 import org.springframework.web.bind.annotation.GetMapping;

 import org.springframework.web.bind.annotation.PathVariable;

 import org.springframework.web.bind.annotation.RestController;

 import org.springframework.web.client.RestTemplate;

 /**

  * @author : Jixiaohu

  * @Date : 2019-04-11.

  * @Time : 9:38.

  * @Description :

  */

 @RestController

 public class MovieController {

     @Autowired

     private RestTemplate restTemplate;

     @Value("${user.userServicePath}")

     private String userServicePath;

     @Autowired

     private LoadBalancerClient loadBalancerClient;

     @GetMapping("/movie/{id}")

     public User findById(@PathVariable Long id) {

         return this.restTemplate.getForObject(this.userServicePath + id, User.class);

     }

     @GetMapping("/test")

     public String test() {

         ServiceInstance serviceInstance = this.loadBalancerClient.choose("microservice-provider-user");

         System.out.println("111" + ":" + serviceInstance.getServiceId() + ":" + serviceInstance.getHost() + ":" + serviceInstance.getPort());

         ServiceInstance serviceInstance2 = this.loadBalancerClient.choose("microservice-provider-user2");

         System.out.println("222" + ":" + serviceInstance2.getServiceId() + ":" + serviceInstance2.getHost() + ":" + serviceInstance2.getPort());

         return "1";

     }

 }
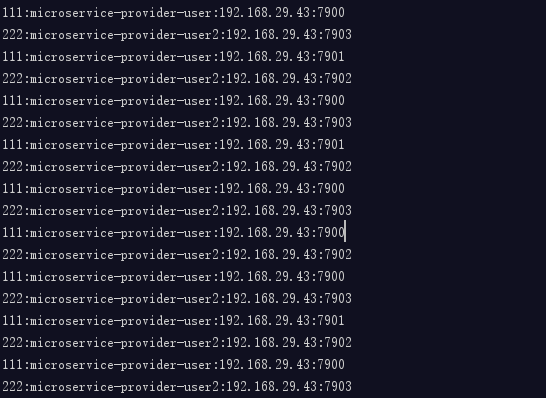
启动项目,然后访问,并查看控制台日志:
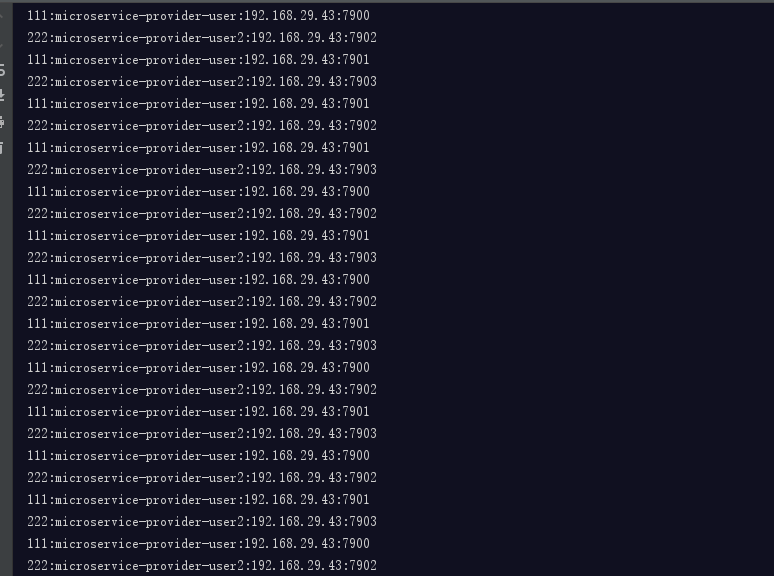
可以看出来,访问user服务是随机的,访问user2服务,是轮询的。
下面我们看一下,当我们把配置文件放在扫描包下的情况:
查看结果,发现,随机的策略对两个服务都产生了影响
假设,就是想要放在这里呢?当然可以,可以通过编写注解,在扫描包的时候,排除配置文件
我们编写一个空的注解
 package com.zwjk.cloud.exclude;

 /**

  * @author : Jixiaohu

  * @Date : 2019-04-11.

  * @Time : 20:11.

  * @Description :

  */

 public @interface ExcludeFromComponentScan {

 }
同时在Configuration类上增加该注解 @ExcludeFromComponentScan ,最后,在启动类上,使用@ComponentScan 注解扫描时,排除被@ExcludeFromComponentScan修饰的类
看一下启动类的注解:
 package com.itmuch.cloud;

 import org.springframework.boot.SpringApplication;

 import org.springframework.boot.autoconfigure.SpringBootApplication;

 import org.springframework.cloud.client.loadbalancer.LoadBalanced;

 import org.springframework.cloud.netflix.eureka.EnableEurekaClient;

 import org.springframework.cloud.netflix.ribbon.RibbonClient;

 import org.springframework.context.annotation.Bean;

 import org.springframework.context.annotation.ComponentScan;

 import org.springframework.context.annotation.FilterType;

 import org.springframework.web.client.RestTemplate;

 @SpringBootApplication

 @EnableEurekaClient

 @RibbonClient(name = "microservice-provider-user", configuration = TestConfiguration.class)

 @ComponentScan(excludeFilters = { @ComponentScan.Filter(type = FilterType.ANNOTATION, value = ExcludeFromComponentScan.class) })

 public class ConsumerMovieRibbonApplication {

   @Bean

   @LoadBalanced

   public RestTemplate restTemplate() {

     return new RestTemplate();

   }

   public static void main(String[] args) {

     SpringApplication.run(ConsumerMovieRibbonApplication.class, args);

   }

 }
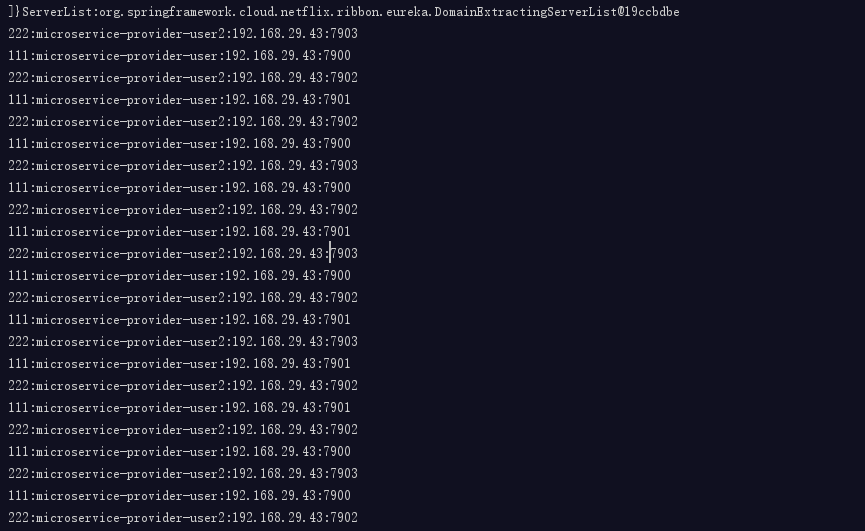
我们同样来启动一下代码,并测试一下效果:
user遵循的random的机制,user2遵循着round robin机制
负载均衡的机制,同样可以通过配置文件进行修改,通过配置文件配置的,优先级是最高的。
下面将通过配置文件,来修改负责均衡机制
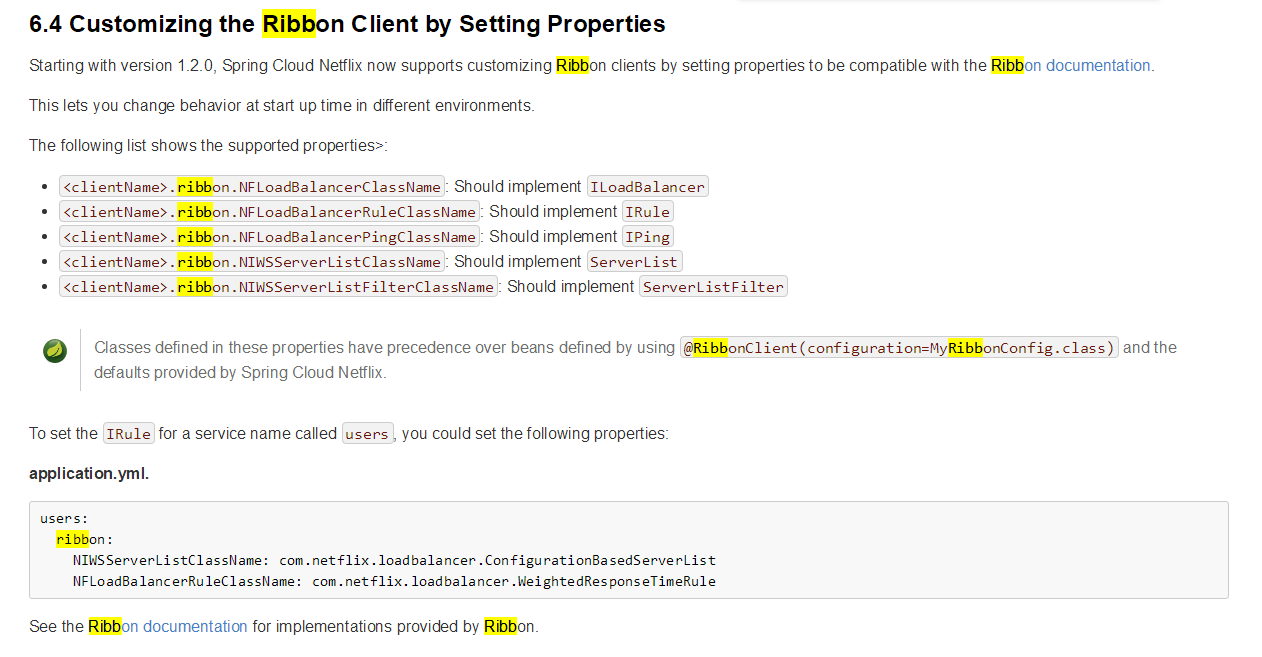
在配置文件中,增加<服务名>.ribbon.NFLoadBalancerRuleClassName,
spring:

  application:

    name: microservice-consumer-movie-ribbon-properties

server:

  port: 8010

eureka:

  client:

    healthcheck:

      enabled: true

    serviceUrl:

      defaultZone: http://user:password123@localhost:8761/eureka

  instance:

    prefer-ip-address: true

microservice-provider-user:

  ribbon:

    NFLoadBalancerRuleClassName: com.netflix.loadbalancer.RandomRule

查看结果,microservice-provider-user遵循着随机的原则,microservice-provider-user2 遵循着默认的轮询机制
Ribbon,可以脱离eureka使用,只要增加一个配置文件即可:
microservice-provider-user:

  ribbon:

    listOfServers: localhost:7900

ribbon:

  eureka:

    enabled: false
然后把controller中的 microservice-provider-user2请求删除,
 package com.zwjk.cloud.controller;

 import com.zwjk.cloud.entity.User;

 import org.springframework.beans.factory.annotation.Autowired;

 import org.springframework.beans.factory.annotation.Value;

 import org.springframework.cloud.client.ServiceInstance;

 import org.springframework.cloud.client.loadbalancer.LoadBalancerClient;

 import org.springframework.web.bind.annotation.GetMapping;

 import org.springframework.web.bind.annotation.PathVariable;

 import org.springframework.web.bind.annotation.RestController;

 import org.springframework.web.client.RestTemplate;

 /**

  * @author : Jixiaohu

  * @Date : 2019-04-11.

  * @Time : 9:38.

  * @Description :

  */

 @RestController

 public class MovieController {

     @Autowired

     private RestTemplate restTemplate;

     @Value("${user.userServicePath}")

     private String userServicePath;

     @Autowired

     private LoadBalancerClient loadBalancerClient;

     @GetMapping("/movie/{id}")

     public User findById(@PathVariable Long id) {

         return this.restTemplate.getForObject(this.userServicePath + id, User.class);

     }

     @GetMapping("/test")

     public String test() {

         ServiceInstance serviceInstance = this.loadBalancerClient.choose("microservice-provider-user");

         System.out.println("111" + ":" + serviceInstance.getServiceId() + ":" + serviceInstance.getHost() + ":" + serviceInstance.getPort());

         return "1";

     }

 }
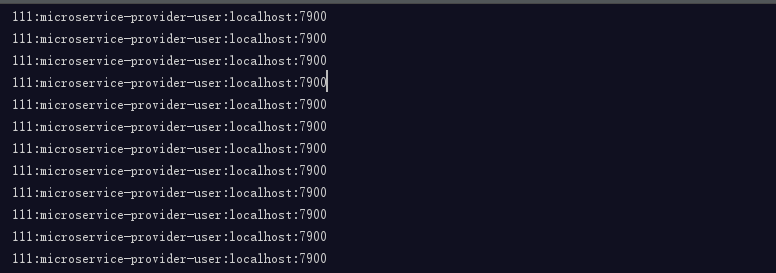
启动项目,请求http://localhost:8010/test,
查看控制台,会发现,请求全部按照配置文件配置的一样,全部发送给7900,
从零开始学spring cloud(六) -------- Ribbon的更多相关文章
- 从零开始学spring cloud(七) -------- Spring Cloud OpenFegin
一.OpenFegin 介绍 Feign是一个声明性的Web服务客户端. 它使编写Web服务客户端变得更容易. 要使用Feign,请创建一个界面并对其进行注释. 它具有可插入的注释支持,包括Feign ...
- 从零开始学spring cloud(四) -------- 基础项目搭建
1.创建一个spring cloud项目 1.1.使用工具创建--idea 点击creat new project,选择spring initializr 点击next,选择下一步 填入自己的Grou ...
- 从零开始学spring cloud(十一) -------- hystrix监控
一.官方文档阅读 服务启动后,可以通过/health和hystrix.stream查看效果,实际上,访问上述两个地址,会出现404,这是因为spring boot版本的问题, 我在这里使用的sprin ...
- 从零开始学spring cloud(五) -------- 将服务注册到Eureka上
一.开发前准备工作: 官方文档地址:https://cloud.spring.io/spring-cloud-static/spring-cloud-netflix/2.1.0.RELEASE/mul ...
- 从零开始学spring cloud(八) -------- Eureka 高可用机制
一.Eureka高可用机制介绍 Eureka服务器没有后端存储,但注册表中的服务实例都必须发送心跳以使其注册保持最新(因此可以在内存中完成). 客户端还有一个Eureka注册的内存缓存(因此,他们不必 ...
- 从零开始学spring cloud(十) -------- hystrix简单代码示例
一.官网文档阅读 较低级别的服务中的服务故障可能导致级联故障一直到用户. 当对特定服务的调用超过circuitBreaker.requestVolumeThreshold(默认值:20个请求)且失败百 ...
- 从零开始学spring cloud(三) -------- Eureka简介
1.服务发现组件:Eureka Eureka的开源文档介绍地址:https://github.com/Netflix/eureka/wiki/Eureka-at-a-glance What is Eu ...
- 从零开始学spring cloud(一) -------- spring cloud 简介
1.微服务简介 1.1.单体架构 一个归档包(例如war格式)包含了应用所有功能的应用程序,我们通常称之为单体应用.架构单体应用的方法论,我们称之为单体应用架构. 缺点:1. 复杂性高以笔者经手的一个 ...
- 从零开始学spring cloud(九) -------- 超时机制,断路器模式介绍
目前存在的问题: 现在我们假设一下,服务提供者响应非常缓慢,那么消费者对提供者的请求就会被强制等待,直到服务返回.在高负载场景下,如果不做任何处理,这种问题很可能造成所有处理用户请求的线程都被耗竭,而 ...
随机推荐
- web页面性能
一.资源压缩合并,减少HTTP请求 二.非核心代码异步加载 1.异步加载的方式 动态脚本加载 defer async 2.异步加载的区别 (1)defer是在HTML解析完之后才会执行,如果是多个,按 ...
- visual studio 2015引入开源控件DockPanel(最简单的方法)
一.DockPanel简介 DockPanel是一个开源控件,能够实现子窗口的浮动,在官方给的demo有演示,在vs2017微软已经集成进入常用控件中.我主要使用的是多窗口浮动,和tabControl ...
- 了解原型设计工具pencil project
Pencil Pencil是一个功能强大的界面原型设计工具,可以设计网页和桌面程序界面,侧重点在于设计,支持自定义控件和导出模板,功能确实很强大. 内置形状集合 从2.0.2开始铅笔默认包含更多形状集 ...
- linux日志logger命令详解
通过logger命令记录日志 logger是一个shell命令接口,可以通过该接口使用Syslog的系统日志模块,还可以从命令行直接向系统日志文件写入一行信息. ------------------- ...
- Kafka connect in practice(3): distributed mode mysql binlog ->kafka->hive
In the previous post Kafka connect in practice(1): standalone, I have introduced about the basics of ...
- 贝叶斯、朴素贝叶斯及调用spark官网 mllib NavieBayes示例
贝叶斯法则 机器学习的任务:在给定训练数据A时,确定假设空间B中的最佳假设. 最佳假设:一种方法是把它定义为在给定数据A以及B中不同假设的先验概率的有关知识下的最可能假设 贝叶斯理论提供了 ...
- 强一致性hash实现java版本及强一致性hash原理
一致性 hash 分布式过程中我们将服务分散到若干的节点上,以此通过集体的力量提升服务的目的.然而,对于一个客户端来说,该由哪个节点服务呢?或者说对某个节点来说他分配到哪些任务呢? 强哈希 考虑到单服 ...
- 从零开始学习python:demo2.5
for 循环语句 1.单个for循环: s1 = 'Python'for s2 in s1: print(s2) ------------------------- Python ------- ...
- Spring Boot学习大全(入门)
Spring Boot学习(入门) 1.了解Spring boot Spring boot的官网(https://spring.io),我们需要的一些jar包,配置文件都可以在下载.添置书签后,我自己 ...
- 移动端常用UI框架
作为一个前端人员来说,总结几款相对来说不错的用于移动端开发的UI框架是非常必要的,以下几种移动端UI框架就能基本满足工作中开发需要,根据项目需求,选用合适的框架搭建项目,更能容易提高开发效率. 一.M ...