【安装】Nginx安装
系统平台:CentOS release 6.5 (Final) 64位。
安装编译工具及库文件
yum -y install make zlib zlib-devel gcc-c++ libtool openssl openssl-devel
首先要安装 PCRE
PCRE 作用是让 Nginx 支持 Rewrite 功能。
路由重写是Web服务器中的一个很重要的基本功能。通过路由重写,可以结构化URL,更具语义化(对SEO有益)。另外,分享出去的URL可能会因程序路由变动而导致URL失效,而路由的重写可以很好的解决这类问题。
适当的使用Rewrite功能,可以更我们带来很多的好处。Nginx中Rewrite的功能是基于perl语言兼容的正则表达式,所以在编译安装nginx之前,需要安装PREC库。Nginx中Rewrite功能实现是基于ngx_http_rewrite_module,所以确保安装了此模块。
1.下载 PCRE 安装包,下载地址: http://downloads.sourceforge.net/project/pcre/pcre/8.35/pcre-8.35.tar.gz
[root@bogon src]# wget http://downloads.sourceforge.net/project/pcre/pcre/8.35/pcre-8.35.tar.gz
2.解压安装包:
[root@bogon src]# tar zxvf pcre-8.35.tar.gz
3.进入安装包目录
[root@bogon src]# cd pcre-8.35
4.编译安装
[root@bogon pcre-8.35]# ./configure

[root@bogon pcre-8.35]# make && make install
5.查看pcre版本
[root@bogon pcre-8.35]# pcre-config --version
安装 Nginx
1、下载 Nginx,下载地址:http://nginx.org/download/nginx-1.6.2.tar.gz
[root@bogon src]# wget http://nginx.org/download/nginx-1.6.2.tar.gz
2、解压安装包
[root@bogon src]# tar zxvf nginx-1.6.2.tar.gz
3、进入安装包目录
[root@bogon src]# cd nginx-1.6.2
4、编译安装
[root@bogon nginx-1.6.2]# ./configure --prefix=/opt/module/nginx-1.6.2 --with-http_stub_status_module --with-http_ssl_module --with-pcre=/opt/module/pcre-8.35(pcre安装目录)

[root@bogon nginx-1.6.2]# make && make install
安装Nginx时报错
./configure: error: the HTTP rewrite module requires the PCRE library.
安装pcre-devel解决问题
yum -y install pcre-devel
错误提示:
./configure: error: the HTTP cache module requires md5 functions

from OpenSSL library.   You can either disable the module by using
--without-http-cache option, or install the OpenSSL library into the system,
or build the OpenSSL library statically from the source with nginx by using
--with-http_ssl_module --with-openssl=<path> options.
解决办法:
yum -y install openssl openssl-devel
总结:
yum -y install pcre-devel openssl openssl-devel
5、查看nginx版本
[root@bogon nginx-1.6.2]# /usr/local/webserver/nginx/sbin/nginx -v
到此,nginx安装完成。
Nginx 配置
创建 Nginx 运行使用的用户 www:
[root@bogon conf]# /usr/sbin/groupadd www

[root@bogon conf]# /usr/sbin/useradd -g www www
配置nginx.conf ,将/usr/local/webserver/nginx/conf/nginx.conf替换为以下内容
[root@bogon conf]# cat /usr/local/webserver/nginx/conf/nginx.conf
#user  nobody;
worker_processes  1;

#error_log  logs/error.log;
#error_log  logs/error.log  notice;
#error_log  logs/error.log  info;
#pid        logs/nginx.pid;
events {
    worker_connections  1024;
}

http {
    include       mime.types;
    default_type  application/octet-stream;

    #log_format  main  '$remote_addr - $remote_user [$time_local] "$request" '

    #                  '$status $body_bytes_sent "$http_referer" '

    #                  '"$http_user_agent" "$http_x_forwarded_for"';

    #access_log  logs/access.log  main;

    sendfile        on;

    #tcp_nopush     on;
    #keepalive_timeout  0;
    keepalive_timeout  65;
    #gzip  on;

    server {

        listen       80;
        server_name  localhost;

        #charset koi8-r;
        #access_log  logs/host.access.log  main;

        location / {
            root   html;
            index  index.html index.htm;
        }

        #error_page  404              /404.html;
        # redirect server error pages to the static page /50x.html

        error_page   500 502 503 504  /50x.html;

        location = /50x.html {
            root   html;
        }
}
检查配置文件ngnix.conf的正确性命令:
[root@bogon conf]# /usr/local/webserver/nginx/sbin/nginx -t
启动 Nginx
Nginx 启动命令如下:
[root@bogon conf]# /usr/local/webserver/nginx/sbin/nginx
如果报错找不到error和access错误日志的路径,则在nginx安装目录下新建一个logs文件夹就可以搞定
访问站点
从浏览器访问我们配置的站点ip:
192.168.0.XXX
Nginx 其他命令
以下包含了 Nginx 常用的几个命令:
/usr/local/webserver/nginx/sbin/nginx -s reload            # 重新载入配置文件

/usr/local/webserver/nginx/sbin/nginx -s reopen            # 重启 Nginx

/usr/local/webserver/nginx/sbin/nginx -s stop              # 停止 Nginx
修改nginx.conf 并重启
1.把nginx.conf修改为:
#user  nobody;

worker_processes  1;

#error_log  logs/error.log;

#error_log  logs/error.log  notice;

#error_log  logs/error.log  info;

#pid        logs/nginx.pid;

pid /usr/local/webserver/nginx/nginx.pid;

events {

    worker_connections  1024;

}

http {

    include       mime.types;

    default_type  application/octet-stream;

    #log_format  main  '$remote_addr - $remote_user [$time_local] "$request" '

    #                  '$status $body_bytes_sent "$http_referer" '

    #                  '"$http_user_agent" "$http_x_forwarded_for"';

    #access_log  logs/access.log  main;

    sendfile        on;

    #tcp_nopush     on;

    #keepalive_timeout  0;

    keepalive_timeout  65;

#gzip  on;

# 配置web集群

    upstream bakend {

#ip_hash;

         server 192.168.0.204:8080 weight=1;

        server 192.168.0.170:8080 weight=1;

    }

    server {

        listen       80;

        server_name  localhost;

        error_page   500 502 503 504  /50x.html;

        location = /50x.html {

            root   html;

        }

location ~ .*\.(gif|jpg|jpeg|png|bmp|swf|js|css)$ {

#proxy_pass http://192.168.0.170:8080;

proxy_pass http://bakend;

proxy_set_header Host $host;

proxy_set_header X-Real-IP $remote_addr;

proxy_set_header X-Forwarded-For $proxy_add_x_forwarded_for;

proxy_redirect off;

}

        # proxy the PHP scripts to Apache listening on 127.0.0.1:80

        #

        location / {

             #proxy_pass   http://192.168.0.170:8080/;

proxy_pass http://bakend/;

         proxy_set_header Host $host;

     proxy_set_header  X-Real-IP        $remote_addr;

             proxy_set_header  X-Forwarded-For  $proxy_add_x_forwarded_for;

     proxy_redirect off;

}

    }

}
2.重启Nginx
/usr/local/webserver/nginx/sbin/nginx -s reopen
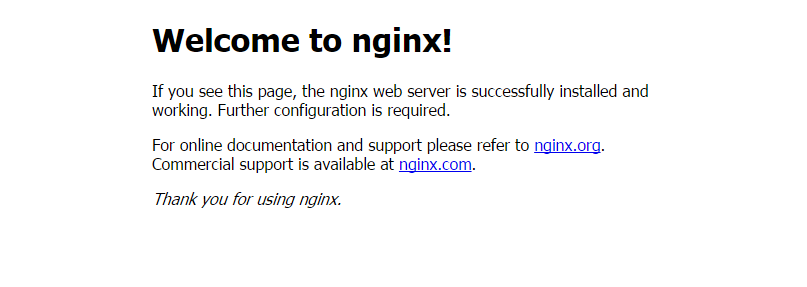
3. 从浏览器访问我们配置的站点:192.168.0.XXX如下图 部署成功
【安装】Nginx安装的更多相关文章
- CentOS安装Nginx安装详解
一.准备工作,安装依赖包,缺一不可!(推荐先用命令查看自己是否已经安装一下软件,确认没有再安装) --------------------------------------------------- ...
- Linux 安装 nginx 安装PCRE库
PCRE(Perl Compatible Regular Expressions)是一个Perl库,包括 perl 兼容的正则表达式库.这些在执行正规表达式模式匹配时用与Perl 5同样的语法和语义是 ...
- Mac下用brew安装nginx
1. nginx nginx [engine x] is an HTTP and reverse proxy server, a mail proxy server, and a generic TC ...
- git和nginx安装
原始地址: https://www.zybuluo.com/freeethy/note/192109 git安装 设置git的username和email (注册gitlab的账号密码) $$ git ...
- CentOS7.0安装Nginx 1.7.9
一.安装准备 首先由于nginx的一些模块依赖一些lib库,所以在安装nginx之前,必须先安装这些lib库,这些依赖库主要有g++.gcc.openssl-devel.pcre-devel和zlib ...
- CentOS 6.5 安装Nginx 1.7.4
一.安装准备 首先由于nginx的一些模块依赖一些lib库,所以在安装nginx之前,必须先安装这些lib库,这些依赖库主要有g++.gcc.openssl-devel.pcre-devel和zlib ...
- centos 安装nginx
centos 安装nginx 安装依赖 更换源 yum install http://mirrors.163.com/centos/6.8/extras/x86_64/Packages/epel-re ...
- (转)Centos7 Nginx安装
场景:工作中使用的suse,因为系统可可查资料太少,且系统中一些功能的确实,导致很多集群中功能无法顺利测试通过,在Centos上面进行测试,能够更快的熟悉项目的架构过程! 1 安装准备 首先由于ngi ...
- CentOS7 安装Nginx+MySQL
首先我们需要安装nginx的yum源 [root@AD ~]# rpm -Uvh http://nginx.org/packages/centos/7/noarch/RPMS/nginx-releas ...
- CentOS7上安装Nginx、PHP、MySQL
一.安装准备 首先由于nginx的一些模块依赖一些lib库,所以在安装nginx之前,必须先安装这些lib库,这些依赖库主要有g++.gcc.openssl-devel.pcre-devel和zlib ...
随机推荐
- python flask的request模块以及在flask编程中遇到的坑
一.首先来讲讲遇到的坑: 1.linux下package的打包引用: """ 路径结构如下: ./project ./bin ./api ""&quo ...
- 【Mac】Docker安装及基础使用
Docker 安装 在 Mac OS X 系统中,首先你要下载安装包安装:Docker Toolbox 安装过程中,可以选择是否安装 Docker Machine,Docker Compose 等,默 ...
- Egret Wing4.0.3 合并资源图片问题
一 发布项目时,选择合并图片资源 选择合图大小 发布后,图片合并.随机了图片名字. 二 随机名的问题 当资源不变更的情况下,多次发布,每次发布后资源的图片随机名是不变的. 现在改变preload组 ...
- NIO之Buffer的clear()、rewind()、flip()方法的区别
Java的NIO中有关Buffer的几种常用方法比如clear,rewind和flip到底有哪些区别.下面给大家这三种方法的源码,方便大家记忆.clear()方法用于写模式,其作用为情况Buffer中 ...
- vector库的用法
C++内置的数组支持容器的机制,但是它不支持容器抽象的语义.要解决此问题我们自己实现这样的类.在标准C++中,用容器向量(vector)实现.容器向量也是一个类模板.标准库vector类型使用需要的头 ...
- spring-boot集成redis
application.properties #redis 配置 # Redis数据库索引(默认为0) spring.redis.database=0 # Redis服务器地址 spring.redi ...
- 170620、springboot编程之页面版Hello World
书接上回,把Hello World 在页面上显示! 1.在pom文件中加入web支持 <dependency> <groupId>org.springframework.boo ...
- Python实现Table To Point代码 分类: Python 2015-07-31 18:45 3人阅读 评论(0) 收藏
</pre><pre name="code" class="python"><span style="font-fami ...
- ClassicLink互通原理
ClassicLink概述_ClassicLink_用户指南_专有网络 VPC-阿里云 https://help.aliyun.com/document_detail/65412.html Class ...
- Python开发【Django】:缓存、信号
缓存 由于Django是动态网站,所有每次请求均会去数据进行相应的操作,当程序访问量大时,耗时必然会更加明显,最简单解决方式是使用:缓存,缓存将一个某个views的返回值保存至内存或者memcache ...