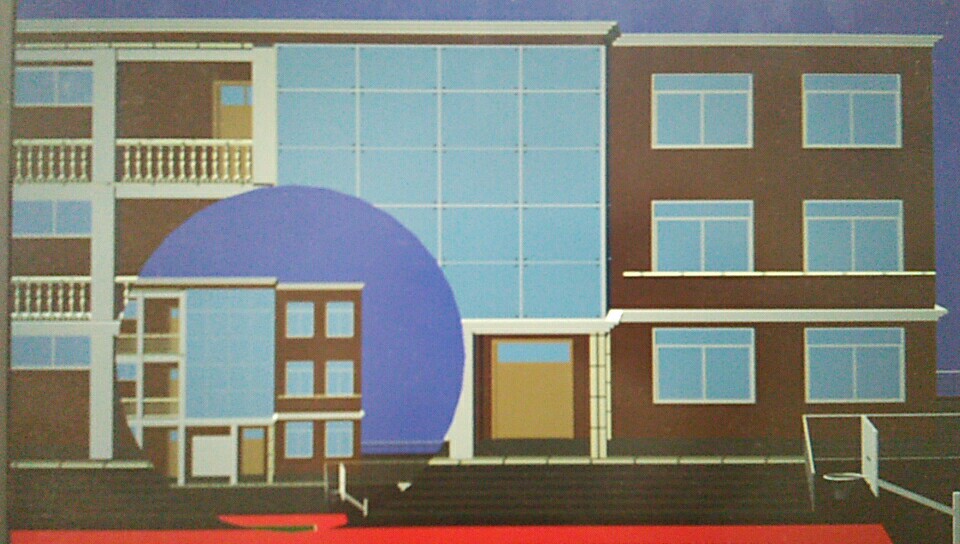
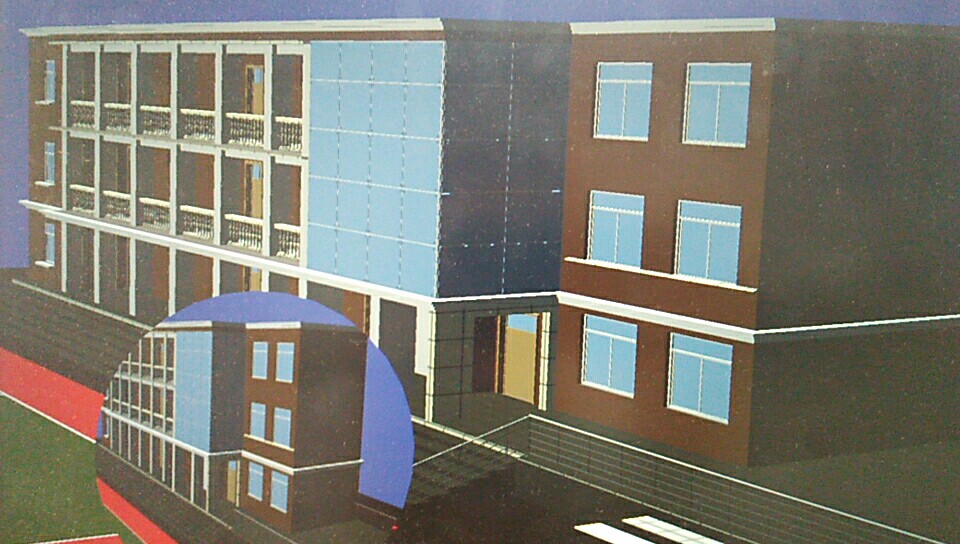
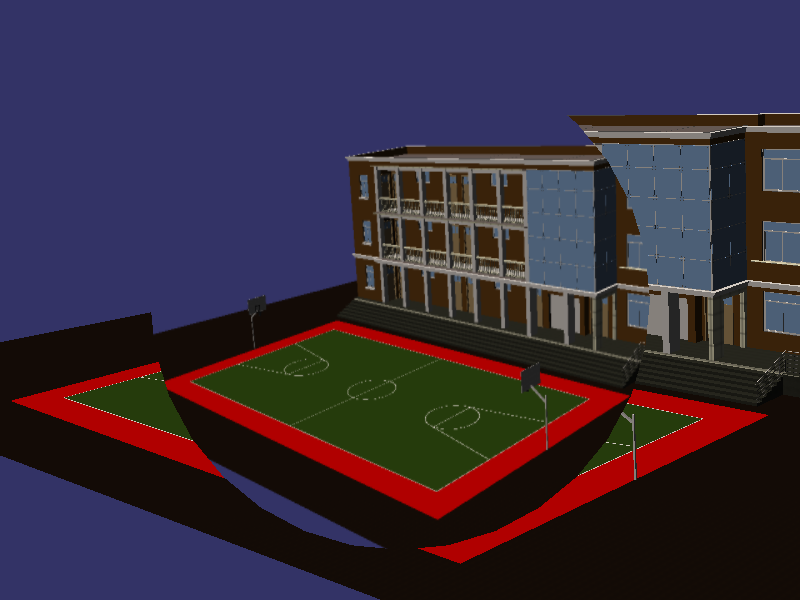
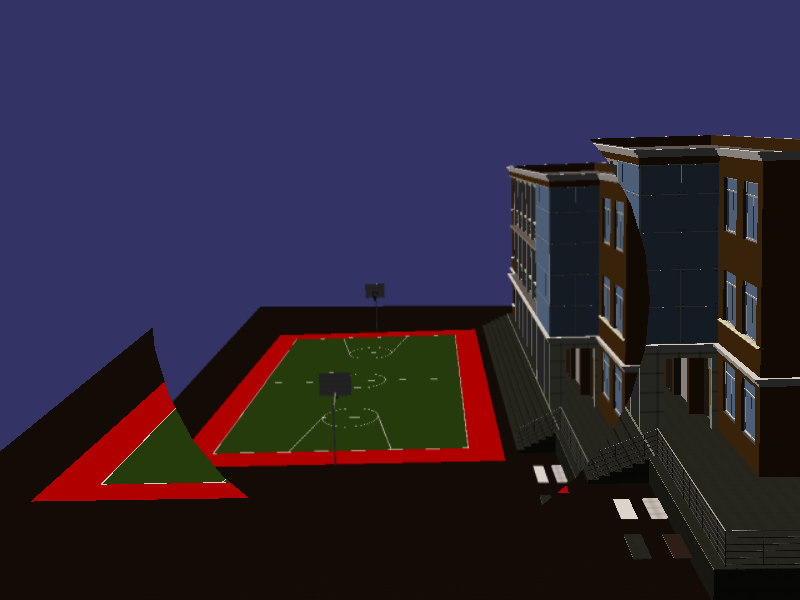
osg RTT 多相机-局部放大镜
#ifdef _WIN32

#include <Windows.h>

#endif // _WIN32

#include<iostream>

#include <osgViewer/Viewer>

#include <osgViewer/ViewerEventHandlers>

#include <osgViewer/CompositeViewer>

#include <osgDB/ReadFile>

#include <osg/Geode>

#include <osg/Node>

#include <osg/Geometry>

#include <osg/GraphicsContext>

#include <osg/ShapeDrawable>

#include <osg/Material>

#include <osg/Image>

#include <osg/Texture2D>

#include <osg/TexEnv>

#include <osg/TexGen>

#include <osg/NodeVisitor>

#include <osg/MatrixTransform>

#include <osg/PositionAttitudeTransform>

#include <osg/AnimationPath>

#include <osg/Matrixd>

#include <osg/PagedLOD>

#include <osg/Camera>

#include <osgText/Text>

#include <osgGA/TrackballManipulator>

#include <osgGA/GUIEventHandler>

#include <osgGA/CameraManipulator>

#include <osgGA/StandardManipulator>

#include <osgGA/OrbitManipulator>

#include <osgGA/TrackballManipulator>

#include <osgUtil/IntersectionVisitor>

#include <osgUtil/LineSegmentIntersector>

osg::Node* createCircle()

{

    //osg::ref_ptr<osg::Geode> geode1 = new osg::Geode;

    //osg::ref_ptr<osg::StateSet> stateSet1 = geode1->getOrCreateStateSet();

    osg::Geode *geode1 = new osg::Geode;

    osg::StateSet *stateSet1 = geode1->getOrCreateStateSet();

    osg::ref_ptr<osg::Image> image1 = osgDB::readImageFile("D:\\参考手册\\OSG\\mzj.jpg");

    if (!image1.valid())

    {

        return geode1;

    }

    osg::ref_ptr<osg::Texture2D> texture2d1 = new osg::Texture2D;

    texture2d1->setImage(, image1);

    stateSet1->setTextureAttributeAndModes(, texture2d1, osg::StateAttribute::ON);

    stateSet1->setMode(GL_LIGHTING, osg::StateAttribute::OFF);

    osg::TessellationHints *hits = new osg::TessellationHints;

    hits->setDetailRatio(0.8f);

    geode1->addDrawable(new osg::ShapeDrawable(new osg::Cylinder(osg::Vec3(400.0, 300.0, 0.0), , 0.1), hits));

    return geode1;

}

osg::Node* createCircle1(osg::Texture2D *texture2dParam)

{

    //osg::ref_ptr<osg::Geode> geode1 = new osg::Geode;

    //osg::ref_ptr<osg::StateSet> stateSet1 = geode1->getOrCreateStateSet();

    osg::Geode *geode1 = new osg::Geode;

    osg::StateSet *stateSet1 = geode1->getOrCreateStateSet();

    stateSet1->setTextureAttributeAndModes(, texture2dParam, osg::StateAttribute::ON);

    stateSet1->setMode(GL_LIGHTING, osg::StateAttribute::OFF);

    osg::TessellationHints *hits = new osg::TessellationHints;

    hits->setDetailRatio(0.8f);

    geode1->addDrawable(new osg::ShapeDrawable(new osg::Cylinder(osg::Vec3(400.0, 300.0, 0.0), , 0.1), hits));

    return geode1;

}

osg::Camera* createBackground(std::string strImg)

{

    osg::ref_ptr<osg::Geode> geode1 = new osg::Geode;

    osg::ref_ptr<osg::Geometry> geometry1 = new osg::Geometry;

    osg::ref_ptr<osg::Camera> camera1 = new osg::Camera;

    camera1->setAllowEventFocus(false);

    camera1->setProjectionMatrixAsOrtho2D(, , , );

    camera1->setViewport(, , , );

    camera1->setReferenceFrame(osg::Transform::ABSOLUTE_RF);

    camera1->setRenderOrder(osg::Camera::PRE_RENDER);

    camera1->setClearMask(GL_DEPTH_BUFFER_BIT | GL_COLOR_BUFFER_BIT);

    //camera1->setClearColor(osg::Vec4());

    camera1->setViewMatrix(osg::Matrix::identity());

    //压入顶点

    osg::ref_ptr<osg::Vec3Array> vertex = new osg::Vec3Array;

    vertex->push_back(osg::Vec3(0.0, 0.0, 0.0));

    vertex->push_back(osg::Vec3(960.0, 0.0, 0.0));

    vertex->push_back(osg::Vec3(960.0, 600.0, 0.0));

    vertex->push_back(osg::Vec3(0.0, 600.0, 0.0));

    geometry1->setVertexArray(vertex);

    //压入法线

    osg::ref_ptr<osg::Vec3Array> norml = new osg::Vec3Array;

    norml->push_back(osg::Vec3(0.0, 0.0, 1.0));

    geometry1->setNormalArray(norml);

    geometry1->setNormalBinding(osg::Geometry::BIND_OVERALL);

    //纹理坐标

    osg::ref_ptr<osg::Vec2Array> coord = new osg::Vec2Array;

    coord->push_back(osg::Vec2(0.0, 0.0));

    coord->push_back(osg::Vec2(1.0, 0.0));

    coord->push_back(osg::Vec2(1.0, 1.0));

    coord->push_back(osg::Vec2(0.0, 1.0));

    geometry1->setTexCoordArray(, coord);

    geometry1->addPrimitiveSet(new osg::DrawArrays(osg::PrimitiveSet::QUADS, , ));

    osg::ref_ptr<osg::Image> img1 = osgDB::readImageFile(strImg);

    if (!img1.valid())

    {

        std::cout << "" << std::endl;

    }

    osg::ref_ptr<osg::Texture2D> texture2d = new osg::Texture2D;

    texture2d->setImage(, img1);

    geometry1->getOrCreateStateSet()->setTextureAttributeAndModes(, texture2d, osg::StateAttribute::ON);

    camera1->addChild(geode1);

    geode1->getOrCreateStateSet()->setMode(GL_LIGHTING, osg::StateAttribute::OFF);

    geode1->addDrawable(geometry1);

    return camera1.release();

}

//创建hud

osg::Camera* createCamera()

{

    osg::ref_ptr<osg::Camera> camera1 = new osg::Camera;

    camera1->setViewMatrix(osg::Matrix::identity());

    camera1->setAllowEventFocus(false);

    camera1->setReferenceFrame(osg::Transform::ABSOLUTE_RF);

    camera1->setViewport(, , , );

    camera1->setProjectionMatrixAsOrtho2D(, , , );

    camera1->setClearMask(GL_DEPTH_BUFFER_BIT);

    camera1->setRenderOrder(osg::Camera::POST_RENDER);

    camera1->addChild(createCircle());

    return camera1.release();

}

osg::Camera* createHUD(osg::Texture2D *texture2d)

{

    osg::ref_ptr<osg::Camera> camera1 = new osg::Camera;

    camera1->setViewMatrix(osg::Matrix::identity());

    camera1->setAllowEventFocus(false);

    camera1->setReferenceFrame(osg::Transform::ABSOLUTE_RF);

    camera1->setViewport(, , , );

    camera1->setProjectionMatrixAsOrtho2D(, , , );

    camera1->setClearMask(GL_DEPTH_BUFFER_BIT);

    camera1->setRenderOrder(osg::Camera::POST_RENDER);

    camera1->addChild(createCircle1(texture2d));

    return camera1.release();

}

//烘焙纹理

void createRTT(osgViewer::Viewer *viewerParam)

{

    osg::ref_ptr<osg::Group> group1 = new osg::Group;

    osg::ref_ptr<osg::Node> node1 = osgDB::readNodeFile("D:\\参考手册\\BIM\\osg\\build20190628.osgb");

    group1->addChild(node1.get());

    if (!viewerParam)

    {

        return;

    }

    unsigned int width, height;

    //获取系统分辨率

    osg::GraphicsContext::WindowingSystemInterface *wsInterface = osg::GraphicsContext::getWindowingSystemInterface();

    if (!wsInterface)

    {

        return;

    }

    wsInterface->getScreenResolution(osg::GraphicsContext::ScreenIdentifier(), width, height);

    osg::ref_ptr<osg::GraphicsContext::Traits> traits1 = new osg::GraphicsContext::Traits;

    //width = 800;

    //height = 600;

    traits1->x = ;

    traits1->y = ;

    traits1->width = width;

    traits1->height = height;

    traits1->windowDecoration = false;

    traits1->doubleBuffer = true;

    traits1->sharedContext = ;

    osg::ref_ptr<osg::GraphicsContext> graphicsContext1 = osg::GraphicsContext::createGraphicsContext(traits1);

    if (!graphicsContext1.valid())

    {

        return;

    }

    //创建主相机

    osg::ref_ptr<osg::Camera> masterCamera = new osg::Camera;

    masterCamera->setGraphicsContext(graphicsContext1);

    masterCamera->setViewport(, , width, height);

    //osg::Camera *masterCamera = createBackground("D:\\参考手册\\images\\104.jpg");

    //masterCamera->setViewport(0, 0, width, height);

    viewerParam->addSlave(masterCamera);

    //烘焙RTT相机

    osg::ref_ptr<osg::Camera> rttCamera = new osg::Camera;

    rttCamera->setRenderOrder(osg::Camera::PRE_RENDER);

    rttCamera->setGraphicsContext(graphicsContext1);

    rttCamera->setViewport(, , width, height);

    rttCamera->addChild(node1);

    viewerParam->addSlave(rttCamera, osg::Matrix::scale(,,),osg::Matrix::identity(),false);

    //替换

    osg::Texture2D *texture2d1 = new osg::Texture2D;

    texture2d1->setInternalFormat(GL_RGBA);

    rttCamera->attach(osg::Camera::COLOR_BUFFER, texture2d1);

    group1->addChild(createHUD(texture2d1));

    viewerParam->setSceneData(group1);

    //viewerParam->setUpViewInWindow(200, 200, 800, 600, 0);

}

int main()

{

    osg::ref_ptr<osgViewer::Viewer> viewer1 = new osgViewer::Viewer;

    osg::ref_ptr<osg::Group> group1 = new osg::Group;

    osg::ref_ptr<osg::Node> node1 = osgDB::readNodeFile("");

    //group1->addChild(node1.get());

    group1->addChild(createCamera());

    createRTT(viewer1);

    //viewer1->setSceneData(group1.get());

    //viewer1->setUpViewInWindow(200, 200, 800, 600, 0);

    return viewer1->run();

}

osg RTT 多相机-局部放大镜的更多相关文章
- magnify.m —— 图像局部放大镜工具函数
magnify.m 函数下载地址:magnify - File Exchange - MATLAB Central: magnify.m 函数在执行时,是一种交互式处理. 简单演示如下: clear, ...
- OSG入坑之路[转]
转载自:https://segmentfault.com/a/1190000010506374?utm_source=tag-newest osg插件原理:https://blog.csdn.net/ ...
- OSG的HUD抬头文字显示
原文:http://blog.csdn.net/tmljs1988/article/details/7562926 可以运行 1. HUD流程图: 完整源代码如下: /*OSG中的HUD, ...
- [osg][原]自定义osgGA漫游器
相机矩阵变化基础:http://blog.csdn.net/popy007/article/details/5120158 osg漫游器原理:http://blog.csdn.net/csxiaosh ...
- [原][osgEarth]在osgearth中添加相机路径动画
在osg中添加相机动画路径请参考:http://www.cnblogs.com/lyggqm/p/8075277.html 这里的代码是在osgearth中添加相机动画路径漫游器: #include ...
- 3D Computer Grapihcs Using OpenGL - 17 添加相机(旋转)
在11节我们说过,MVP矩阵中目前只应用了两个矩阵,World to View 矩阵被省略了,这就导致我们的画面没有办法转换视角. 本节我们将添加这一环节,让相机可以旋转. 为了实现这一目的,我们添加 ...
- 8个超震撼的HTML5和纯CSS3动画源码
HTML5和CSS3之所以强大,不仅因为现在大量的浏览器的支持,更是因为它们已经越来越能满足现代开发的需要.Flash在几年之后肯定会消亡,那么HTML5和CSS3将会替代Flash.今天我们要给大家 ...
- 11个超震撼的HTML5和纯CSS3动画源码
1.jQuery多功能手风琴个人信息菜单面板 这是一款基于jQuery的手风琴个人信息菜单面板,每一个菜单项展开后可以自定义布局,因此可以为每一个菜单项实现多功能.类似这样的多功能菜单还有jQuery ...
- [翻译]:Cinemachine 官方文档(0)
目录 Overview : Installation and Getting Started :安装并开始 User Guide :用户指南 What is Cinemachine? : 什么是Cin ...
随机推荐
- iptables详解(2)表中规则管理(增删改查)
我们定义了四张表:raw表.mangle表.nat表.filter表,不同的表有不同的功能 filter表用来过滤,允许哪些ip.端口访问,禁止哪些ip.端口访问,表中会有很多链 ①禁止ip地址访问我 ...
- VSCode安装程序——java开发
文章:微软为 Java 开发者推出 VSCode 安装程序 文章介绍微软为VSCode提供了开发程序,方便java开发者更好的使用VSCode
- DDD总览
DDD总览 领域驱动设计(DDD)编码实践 目录 写在前面DDD总览实现业务的3种常见方式基于业务的分包领域模型的门面——应用服务业务的载体——聚合根实体 vs 值对象聚合根的家——资源库创生之柱 ...
- diff算法实现
大致流程 var vnode = { tag: 'ul', attrs: { id: 'list' }, children: [{ tag: 'li', attrs: { className: 'it ...
- Django之路——2 Django的安装
Django的安装分为两种方式,一种是命令行安装,另外一种是pycharm安装.在这里只说一种在命令行里面安装的 1.命令行安装 这个自不必多说,直接上干货,如果遇到pip版本过低,安装失败的,请自自 ...
- AfxBeginThread深入解析
看过<深入浅出MFC>书中,j.j.hou提到在创建新的线程时,最好不要直接使用CreateThread,虽然AfxBeginThread也是对CreateThread的封装,但是AfxB ...
- mysql - 引擎与锁的概念( 基础 )
MySQL - 关系型数据库 - innodb : - 支持事务 事务的特征 : - 原子性:事务是最小单位,不可再分,事务执行的过程中,要么同时失败,要么同时成功,如,A跟B转账,一旦有一方出问题 ...
- Greenplum table 之 外部表
转载自: https://www.cnblogs.com/kingle-study/p/10552097.html 一.外部表介绍 Greenplum 在数据加载上有一个明显的优势,就是支持数据的并发 ...
- 51nod 3 * problem
1640题意:一张无向图在最小化最大边后求最大边权和 Slove:sort 最小生成树倒叙最大生成树 #include <iostream> #include <cstdio> ...
- linux查看系统启动时间
1.uptime命令 felix@felix-computer:~$ uptime :: up :, user, load average: 0.89, 0.74, 1.00 felix@felix- ...