CSS之小知识
1、居中
a、文字水平居中
text-align:center;
b、文字垂直居中
/* 如果有n行文字,那么将行高设为容器高度的n分之一 */

height: 35px; line-height: 35px;
c、容器水平居中
width:300px;

margin:0 auto;
d、容器垂直居中
方法1:绝对定位
  <style>

    .big {

      background: red;

      height: 200px;

      width: 200px;

    }

    .small {

      background: blue;

      height: 100px;

      width: 200px;

    }

    .big {

      position: relative;

    }

    .small {

      position: absolute;

      top: calc(50% - 50px);

    }

  </style>

  <div class="big">

    <div class="small"></div>

  </div>
方法2:flex弹性布局
  <style>

    .big {

      background: red;

      height: 200px;

      width: 200px;

    }

    .small {

      background: blue;

      height: 100px;

      width: 200px;

    }

    .big {

      display: flex;

      align-items: center;

    }

  </style>

  <div class="big">

    <div class="small"></div>

  </div>
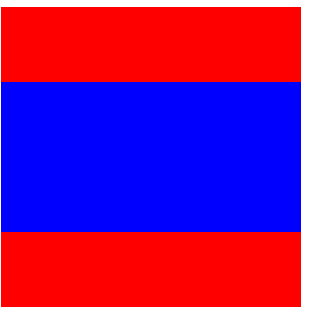
效果:
2、box-shadow使用
box-shadow: h-shadow v-shadow blur spread color inset;
h-shadow 必需。水平阴影的位置。允许负值。
v-shadow 必需。垂直阴影的位置。允许负值。
blur 可选。模糊距离。
spread 可选。阴影的尺寸。
color 可选。阴影的颜色。请参阅 CSS 颜色值。
inset 可选。将外部阴影 (outset) 改为内部阴影,默认外部。
注:可以设置多个值,多个阴影覆盖。boder若设置圆角,阴影相应自动为圆角。
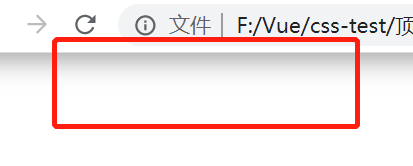
案例1:页面顶部阴影
给body添加阴影
  <style>

    body:before {

      content: "";

      position: fixed;

      top: -10px;

      left: 0;

      width: 100%;

      height: 10px;

      box-shadow: 0px 0px 20px rgba(66,66,66);

      z-index: 100;

      }

  </style>
效果:
案例2:3D按钮
box-shadow给一个垂直5px的阴影,在给一个10px,5px的模糊阴影。点击后移动按钮,同时减小阴影的尺寸即可。
  <style>

    button {

      padding: 10px 20px;

      background: #3bb3e0;

      border: 1px solid #3bb3e0;

      border-radius: 5px;

      cursor: pointer;

      box-shadow: 0px 5px 0px #156785, 0px 10px 5px #999;

    }

    button:active {

      transform: translateY(3px);

      box-shadow: 0px 2px 0px #156785, 0px 5px 5px #999;

    }

  </style>

  <button type="button">Click Me!</button>
效果:

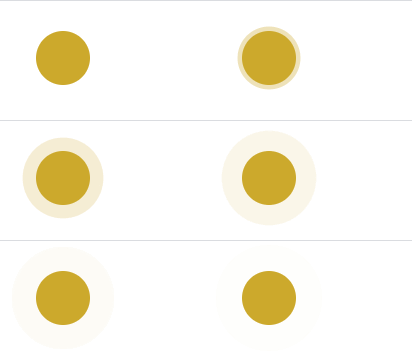
案例3:光环
    .pulse {

      margin: 20px;

      width: 36px;

      height: 36px;

      border-radius: 50%;

      background: #cca92c;

      cursor: pointer;

      box-shadow: 0 0 0 rgba(204,169,44, 0.4);

      animation: pulse 3s infinite;

    }

    @keyframes pulse {

      0% { box-shadow: 0 0 0 0 rgba(204,169,44, 0.4); }

      70% { box-shadow: 0 0 0 18px rgba(204,169,44, 0); }

      100% { box-shadow: 0 0 0 0 rgba(204,169,44, 0); }

    }

  </style>

  <div class="pulse"></div>
效果:
案例4:温度计效果
  <style>

    .thermometer {

      height: 200px;

      width: 12px;

      border-radius: 10px;

      background-color: #e3e1e1;

      cursor: pointer;

      box-shadow: inset 0 -100px 0 red;

      animation: thermometer 3s infinite;

    }

    @keyframes thermometer {

      0% { box-shadow: inset 0 -50px 0 red; }

      100% { box-shadow: inset 0 -150px 0 red; }

    }

  </style>

  <div class="thermometer"></div>
效果:

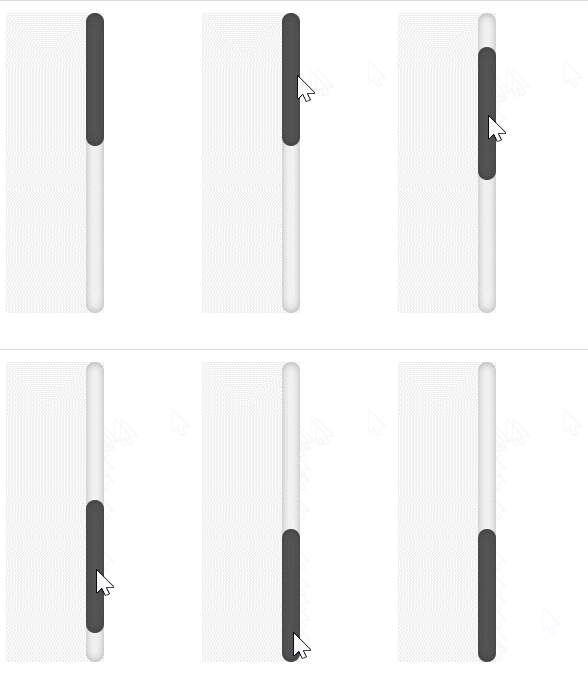
案例5:滚动条样式
  <style>

    ::-webkit-scrollbar-track {

      box-shadow: inset 0 0 6px rgba(0,0,0,0.3);

      border-radius: 10px;

      background-color: #F5F5F5;

    }

    ::-webkit-scrollbar {

      width: 12px;

      background-color: #F5F5F5;

    }

    ::-webkit-scrollbar-thumb {

      border-radius: 10px;

      box-shadow: inset 0 0 6px rgba(0,0,0,.3);

      background-color: #555;

    }

    .scrollbar {

      height: 200px;

      width: 65px;

      background: #F5F5F5;

      overflow-y: scroll;

    }

    .force-overflow {

      min-height: 450px;

    }

  </style>

  <div class="scrollbar">

    <div class="force-overflow"></div>

  </div>
效果:
案例6:复制图形
多个值叠加形成
  <style>

    .box {

      width: 200px;

      height: 200px;

      background: #f0f0f0;

      position: relative;

    }

    .cloud {

      position: absolute;

      top: calc(50% - 25px);

      width: 50px;

      height: 50px;

      background: #fff;

      border-radius: 50%;

      box-shadow: 65px -15px 0 -5px #fff, 25px -25px #fff, 30px 10px #fff, 60px 15px 0 -10px #fff, 85px 5px 0 -5px #fff, 35px -35px #c8c8c8, 66px -27px 0 -5px #c8c8c8, 91px -10px 0 -8px #c8c8c8; }

  </style>

  <div class="box">

    <div class="cloud"></div>

  </div>
效果:

3、图片做列表标志
  <style>

    ul {

      list-style: none;

    }

    ul li {

      background: url('li.png') 30px 30px no-repeat;

      background-position: 0 -8px;

    }

    span {

      margin: 30px;

    }

  </style>

  <ul>

    <li><span>1</span></li>

    <li><span>2</span></li>

    <li><span>3</span></li>

    <li><span>4</span></li>

  </ul>
效果:
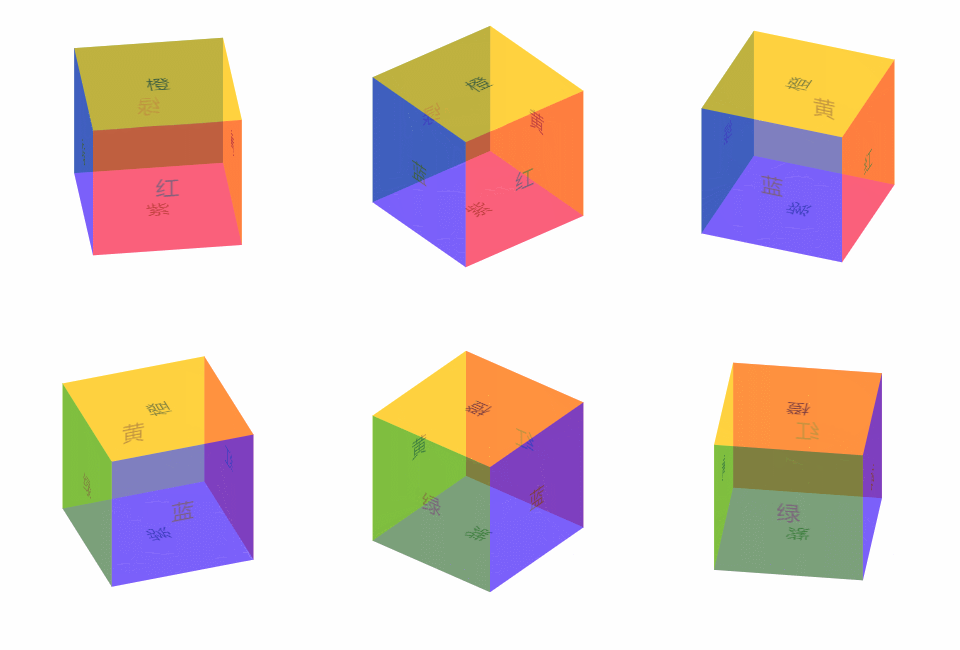
4、3D效果
  <style>

    .box{

      margin: 60px;

      width: 100px;

      height: 100px;

      /* perspective: 800px; */

    }

    .container{

      position: relative;

      transform-style: preserve-3d;

      animation: rY 5s infinite linear;

    }

    .item{

      position: absolute;

      width: 100px;

      height: 100px;

      opacity:0.5;

      text-align: center;

      line-height: 100px;

    }

    .it1{

      background: red;

      transform: translateZ(50px);

    }

    .it2{

      background: yellow;

      transform: translateX(50px) rotateY(90deg);

    }

    .it3{

      background: green;

      transform: translateZ(-50px) rotateY(180deg);

    }

    .it4{

      background: blue;

      transform: translateX(-50px) rotateY(270deg);

    }

    .it5{

      background: orange;

      transform: translateY(-50px) rotateX(90deg);

    }

    .it6{

      background: violet;

      transform: translateY(50px) rotateX(90deg);

    }

    @keyframes rY {

      from {transform: rotateX(-33.5deg) rotateY(0deg)}

      to {transform: rotateX(-33.5deg) rotateY(360deg)}

    }

  </style>

  <div class="box">

    <div class="container">

      <div class="item it1">红</div>

      <div class="item it2">黄</div>

      <div class="item it3">绿</div>

      <div class="item it4">蓝</div>

      <div class="item it5">橙</div>

      <div class="item it6">紫</div>

    </div>

  </div>
效果:
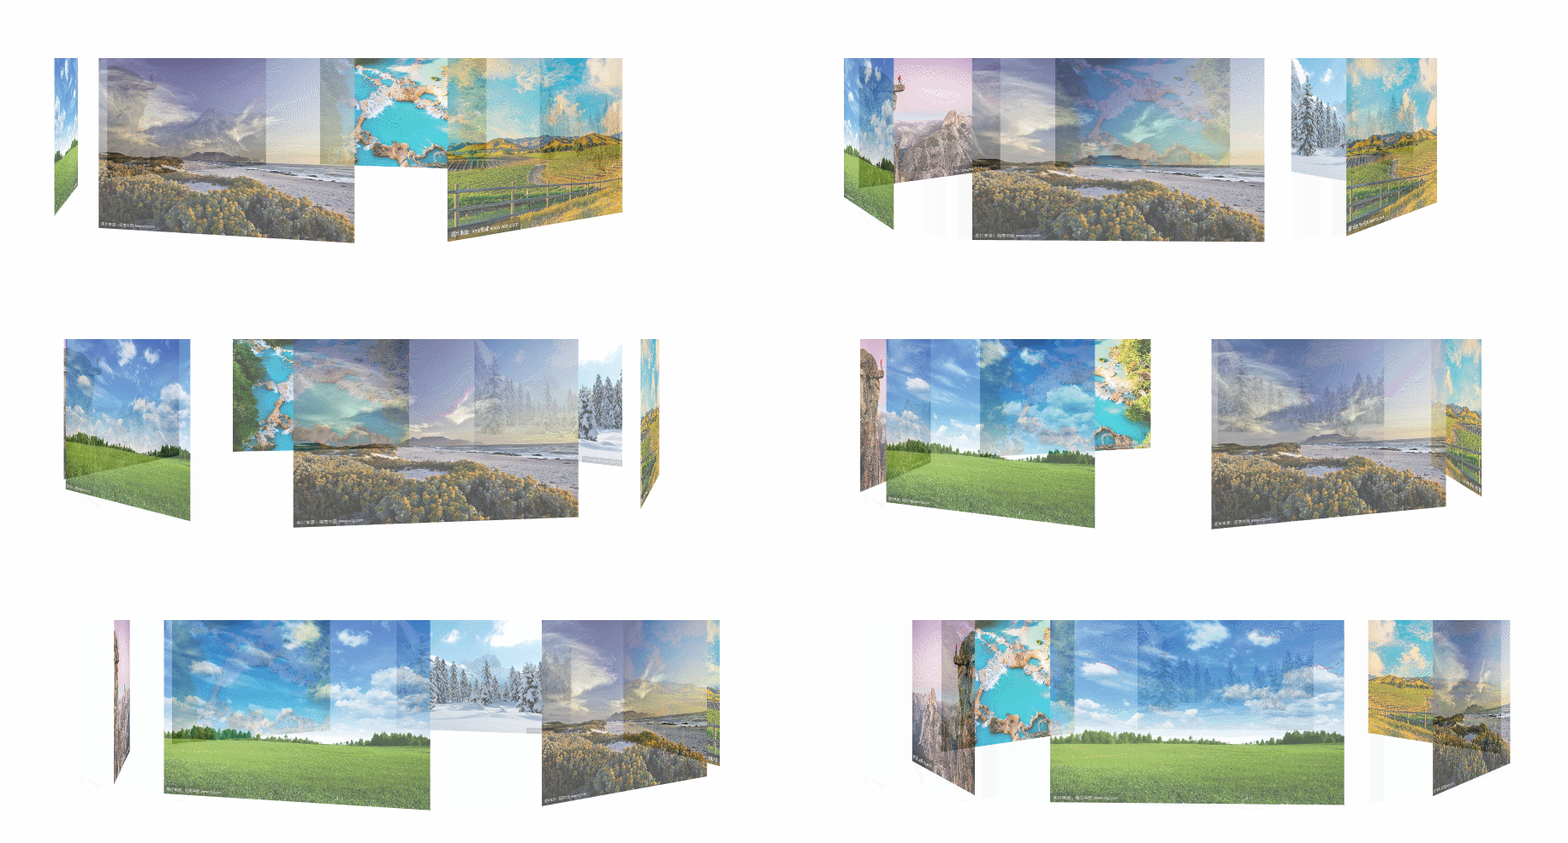
案例2:照片墙
  <style>

    .box{

      margin: 150px;

      perspective: 800px;

    }

    .container{

      position: relative;

      transform-style: preserve-3d;

      animation: rY 20s infinite linear;

      /* transform: rotateX(-30deg) rotateY(0deg); */

    }

    .item{

      position: absolute;

      width: 160px;

      height: 100px;

      opacity:0.7;

    }

    .it1{

      background: url('1.jpg') no-repeat;

      background-size: 100% 100%;

      transform: translateX(80px) translateZ(200px);

    }

    .it2{

      background: url('2.jpg') no-repeat;

      background-size: 100% 100%;

      transform: translateX(240px) translateZ(100px) rotateY(60deg);

    }

    .it3{

      background: url('3.jpg') no-repeat;

      background-size: 100% 100%;

      transform: translateX(240px) translateZ(-100px) rotateY(120deg);

    }

    .it4{

      background: url('4.jpg') no-repeat;

      background-size: 100% 100%;

      transform: translateX(80px) translateZ(-200px) rotateY(180deg);

    }

    .it5{

      background: url('5.jpg') no-repeat;

      background-size: 100% 100%;

      transform: translateX(-80px) translateZ(-100px) rotateY(240deg);

    }

    .it6{

      background: url('6.jpg') no-repeat;

      background-size: 100% 100%;

      transform: translateX(-80px) translateZ(100px) rotateY(300deg);

    }

    @keyframes rY {

      from {transform: rotateY(0deg)}

      to {transform: rotateY(360deg)}

    }

  </style>

  <div class="box">

    <div class="container">

      <div class="item it1"></div>

      <div class="item it2"></div>

      <div class="item it3"></div>

      <div class="item it4"></div>

      <div class="item it5"></div>

      <div class="item it6"></div>

    </div>

  </div>
效果:
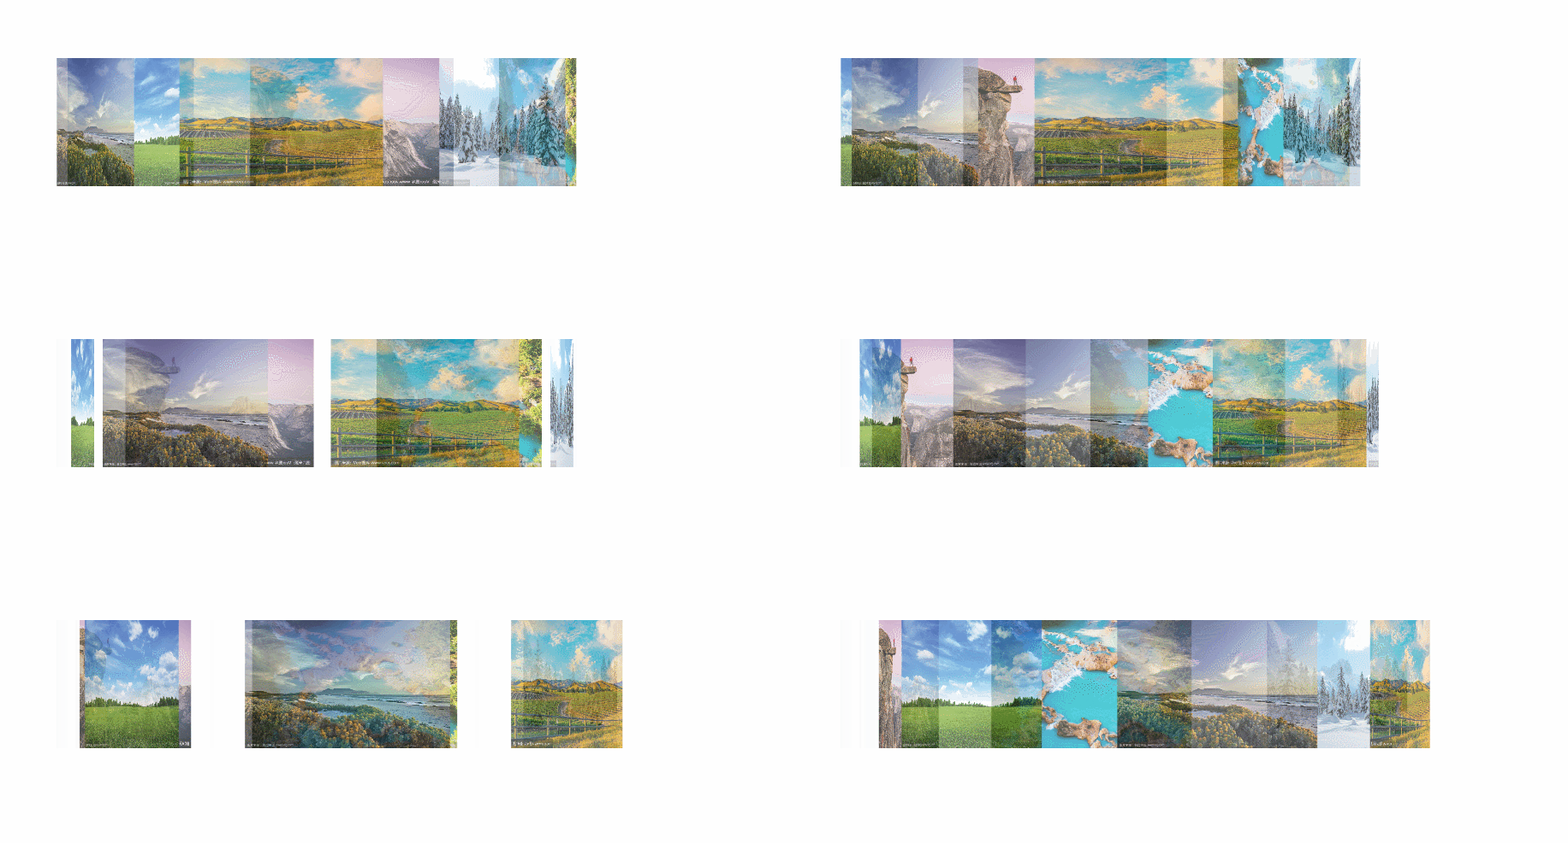
若不加perspective:
5、黑白图片
设置该段代码,图片会变成黑白图片
img.desaturate {

    filter: grayscale(100%);

    -webkit-filter: grayscale(100%);

    -moz-filter: grayscale(100%);

    -ms-filter: grayscale(100%);

    -o-filter: grayscale(100%);

}
6、单行文本溢出显示省略号
  <style>

    .text{

      width: 100px;

      overflow: hidden;

      /* 文本溢出显示省略号 */

      text-overflow:ellipsis;

      /* 文本不会换行 */

      white-space: nowrap;

    }

  </style>

  <div class="text" title="单行文本溢出显示省略号">单行文本溢出显示省略号</div>
效果:

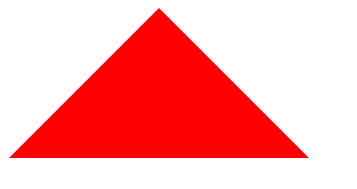
7、三角形
  <style>

    .triangle {

      border-color: transparent transparent red transparent;

      border-style: solid;

      border-width: 0px 100px 100px 100px;

      height: 0px;

      width: 0px;

    }

  </style>

  <div class="triangle"></div>
效果:
8、选择器
a、:not()选择器
选中不在此范围内的元素,例如:div:not(:last-child),选中除最后一个div的所有div元素
b、::selection选择器
选择器匹配元素中被用户选中或处于高亮状态的部分,可以应用于少数的CSS属性:color, background, cursor,和outline
  <style>

    p::selection{

      color: #fff;

      background:red;

    }

  </style>

  <p>选中后字体颜色和背景颜色改变</p>
效果:

9、文字模糊处理
text-shadow: 0 0 2px rgb(236 51 51);
效果:

10、misk-image
设置元素上遮罩层的图像,和background差不多,同样拥有size、repeat、position等属性
mask-image的图片需要满足两个条件:1、png图片;2、背景是透明色的图,或者有透明色。
案例1:两张图片结合
  <style>

    .pic1{

      width: 150px;

      height: 150px;

      background-image: url('pic1.jpg');

      background-repeat: no-repeat;

      background-size: 150px 150px;

    }

    .pic2{

      width: 150px;

      height: 150px;

      background-image: url('pic2.png');

      background-repeat: no-repeat;

      background-size: 150px 150px;

    }

    .mask{

      width: 150px;

      height: 150px;

      background-image: url('pic1.jpg');

      -webkit-mask-image: url('pic2.png');

      -webkit-mask-size: 150px 150px;

      -webkit-mask-repeat: no-repeat;

      -webkit-mask-position: 50% 50%;

    }

  </style>

  <span>图1</span>

  <div class="pic1"></div>

  <span>图2</span>

  <div class="pic2"></div>

  <span>图1+2</span>

  <div class="mask"></div>
效果:

案例2:文本渐变
-webkit-gradient是background的一个属性值
第一组参数type(类型)为 linear
第二组参数是,x1 y1, x2 y2,当成颜色渐变体的两个点的坐标就是。x1,x2,y1,y2的取值范围为0%-100%,当x1,x2,y1,y2取值为极值的时候,x1和x2可以取值left(或0%)或right(或100%),,y1和y2可以取值top(或0%)或bottom(或100%)
from(开始颜色值),to(结束颜色值)是两个渐变颜色值
  <style>

    .text {

      color: red;

      position: relative;

      font-size: 30px;

    }

    .text[data-content]::after {

      content: attr(data-content);

      z-index: 10;

      color: yellow;

      position: absolute;

      top: 0;

      left: 0;

      -webkit-mask-image:-webkit-gradient(linear, 0 0, 0 bottom, from(yellow), to(rgba(0,0,255,0)));

    }

  </style>

  <div class="text" data-content="文本渐变效果">文本渐变效果</div>
效果:

11、background-blend-mode
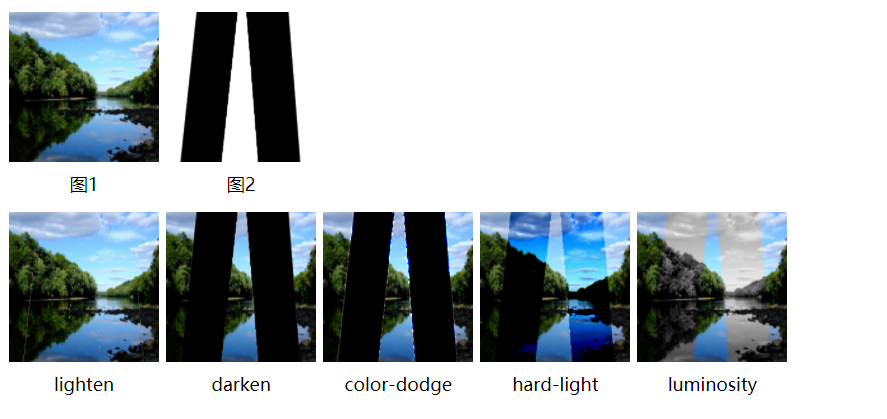
用于单个标签间内背景图与渐变背景间的混合模式,类似ps将多个图层混合得到一个新的效果。
属性值:
normal默认值。设置正常的混合模式
multiply正片叠底模式,用混合颜色来增重基色,产生一种更深的颜色。用黑色正片叠底的结果是黑色,用白色正片叠底的结果是图片没有任何变化。
screen滤色模式,两个像素色的逆向正片叠底。滤色和正片叠底正好相反,使用白色进行虑色会产生白色,使用黑色虑色的结果是图像没有变化。
overlay叠加模式,颜色变深的程度依赖于基色:浅色变的更浅,深色变得更深。
darken变暗模式,选择两个重叠的像素中颜色更深的那个。
lighten变亮模式,选择两个叠加的像素中颜色较轻的那个。
color-dodge颜色减淡模式,颜色减淡减小对比度使基色变亮以反映混合色。
saturation 饱和度模式,当“基色”颜色与“混合色”颜色的饱和度值不同时,才能使用描绘颜色进行着色处理
color 颜色模式,该模式能够使灰色图像的阴影或轮廓透过着色的颜色显示出来,产生某种色彩化的效果。
luminosity 亮度模式,能够使用“混合色”颜色的亮度值进行着色,而保持“基色”颜色的饱和度和色相数值不变。其实就是用“基色”中的“色相”和“饱和度”以及“混合色”的亮度创建“结果色”。此模式创建的效果是与“颜色”模式创建的效果相反
Hard light 强光模式,产生一种强光照射的效果。如果“混合色”颜色“基色”颜色的像素更亮一些,那么“结果色”颜色将更亮;如果“混合色”颜色比“基色”颜色的像素更暗一些,那么“结果色”将更暗。
Difference 差值模式,将从图像中“基色”颜色的亮度值减去“混合色”颜色的亮度值,如果结果为负,则取正值,产生反相效果。由于黑色的亮度值为0,白色的亮度值为255,因此用黑色着色不会产生任何影响,用白色着色则产生被着色的原始像素颜色的反相。
案例1:图标变色
假设我们有这样一张图片,JPG、PNG、GIF 都可以,但是有一个前提要求,就是主色黑色纯色,底色白色(底色如果是透明色,将会填充为对应颜色)
lighten变亮模式与变暗模式产生的效果相反:黑色比任何颜色都要暗,所以黑色会被任何色替换掉。反之,如果素材的底色是黑色,主色是白色。那就应该用变暗(darken)的混合模式
  <style>

    .pic {

      display: inline-block;

      width: 36px;

      height: 36px;

      background-image: url('icon.png');

      background-size: cover;

      line-height: 90px;

      text-align: center;

      margin-right: 10px;

      font-size: 12px;

    }

    .pic1 {

      background-image: url('icon.png'), linear-gradient(#f00, #f00);

      background-blend-mode: lighten;

      background-size: cover;

    }

    .pic2 {

      background-image: url('icon.png'), linear-gradient(#333, #333);

      background-blend-mode: lighten;

      background-size: cover;

    }

    .pic3 {

      background-image: url('icon.png'), linear-gradient(#f00, #00f);

      background-blend-mode: lighten;

      background-size: cover;

    }

    .pic4 {

      display: inline-block;

      width: 36px;

      height: 36px;

      background-image: url('icon1.png');

      background-size: cover;

      line-height: 90px;

      text-align: center;

      margin-right: 10px;

      font-size: 12px;

    }

    .pic41 {

      background-image: url('icon1.png'), linear-gradient(#f00, #f00);

      background-blend-mode: lighten;

      background-size: cover;

    }

  </style>

  <div class="pic">原图</div>

  <div class="pic pic1">红色</div>

  <div class="pic pic2">灰色</div>

  <div class="pic pic3">渐变</div>

  <div class="pic4 pic41">透明</div>
效果:

案例2:多个图片叠加
将两个或者多个图片利用混合模式叠加在一起
  <style>

    .pic1{

      display: inline-block;

      width: 100px;

      height: 100px;

      background-image: url('pic1.jpg');

      background-repeat: no-repeat;

      background-size: 100px 100px;

      line-height: 230px;

      text-align: center;

      font-size: 12px;

    }

    .pic2{

      display: inline-block;

      width: 100px;

      height: 100px;

      background-image: url('pic2.png');

      background-repeat: no-repeat;

      background-size: 100px 100px;

      line-height: 230px;

      text-align: center;

      font-size: 12px;

    }

    .pic{

      display: inline-block;

      width: 100px;

      height: 100px;

      background: url('pic1.jpg'), url('pic2.png');

      background-size: 100px 100px;

      line-height: 230px;

      margin-top: 10px;

      text-align: center;

      font-size: 12px;

    }

    .mask1{

      background-blend-mode: lighten;

    }

    .mask2{

      background-blend-mode: darken;

    }

    .mask3{

      background-blend-mode: color-dodge;

    }

    .mask4{

      background-blend-mode: hard-light;

    }

    .mask5{

      background-blend-mode: luminosity;

    }

  </style>

  <div class="pic1">图1</div>

  <div class="pic2">图2</div>

  <div></div>

  <div class="pic mask1">lighten</div>

  <div class="pic mask2">darken</div>

  <div class="pic mask3">color-dodge</div>

  <div class="pic mask4">hard-light</div>

  <div class="pic mask5">luminosity</div>
效果:
案例3:利用叠加制作hover效果
  <style>

    .pic {

      width: 150px;

      height: 100px;

      margin: 10px;

      float: left;

      background: url('blend.png'),linear-gradient(#f00, #00f);

      background-size: cover, 100% 100%;

      background-position: 0 0, -150px 0;

      background-blend-mode: luminosity;

      background-repeat: no-repeat;

      transition: .5s background-position linear;

    }

    .pic1 {

      background-image: url('blend.png'),linear-gradient(90deg, #ff5722, #03a9f4);

    }

    .pic2 {

      background-image: url('blend.png'),linear-gradient(-180deg, #00bcd4, #fa1a09);

    }

    .pic3 {

      background-image: url('blend.png'),linear-gradient(45deg, #ffc107, #3f51b5, #4caf50, #ff0057, #fae105, #5c00ff);

    }

    .pic:hover {

      background-position: 0 0, 0 0;

    }

  </style>

  <div class="pic"></div>

  <div class="pic pic1"></div>

  <div class="pic pic2"></div>

  <div class="pic pic3"></div>
效果:

CSS之小知识的更多相关文章
- HTML+css零碎小知识
1.设置了float浮动的元素和绝对定位position:absolute的元素会脱离正常的文档流.但是设置absolute的元素不会占据空间,相当于隐形了. 2.相对定位position:rel ...
- css + html 小知识总结
Html+CSS基础之Html 注:本文摘自慕课网http://www.imooc.com HTML+CSS基础课程: 1. HTML是网页内容的载体.内容就是网页制作者放在页面上想要让用户浏览的 ...
- css的小知识4
---恢复内容开始--- 一.单位 1.px就是一个基本单位 像素 2.em也是一个单位 用父级元素的字体大小乘以em前面的数字.如果父级没有就继承上一个父级直到body,如果bod ...
- css的小知识3
1.补充 margin的margin:0 auto:会解决元素的居中,前提是给这个元素设置width 2.css的层叠问题 css有两个性质 1.继承性 2.层叠性 选择器的一种选择能力,谁的权重大 ...
- css的小知识
---恢复内容开始--- 1.当你发现在制作页面时出现滚动条就需要一个去除滚动条的属性 overflow:hidden: overflow-x:hidden:水平超出隐藏 2. ...
- 2018.3.15 css课外小知识
1, 如果手动写动画, 最小的时间间隔是多久 为什么 多数显示器默认频率是60Hz 1s刷新60次 所以理论最小是1/60*1000ms=16.7ms 2. display:inline-bloc ...
- HTML+CSS中的一些小知识
今天分享一些HTML.CSS的小知识,希望能够对大家有所帮助! 1.解决网页乱码的问题:最重要的是要保证各个环节的字符编码一致! (1)编辑器的编辑环境的字符集(默认字符集):Crtl+U 常见的编码 ...
- 12个你未必知道的CSS小知识
虽然CSS并不是一种很复杂的技术,但就算你是一个使用CSS多年的高手,仍然会有很多CSS用法/属性/属性值你从来没使用过,甚至从来没听说过. 1.CSS的color属性并非只能用于文本显示 对于CSS ...
- 谈谈CSS中一些比较"偏门"的小知识
前面我写了:谈谈html中一些比较"偏门"的知识,现在这篇(主要)想谈谈个人所见的CSS一些小知识点,加深印象:同时也希望有需要的人能有收获! 1.常见的浏览器内核: 以IE为代表 ...
- 【前端词典】几个有益的 CSS 小知识
今天偷个懒,不长篇大论,分享几个你可能不知道的 CSS 小知识. 样式的顺序 CSS 代码: HTML 代码: 记得之前这是一道比较火的 CSS 考题,当时好像是有不少的人答错(30% 以上) ...
随机推荐
- 在linux 下如何快速创建环境
首先先在你的主目录下创建一个文件 touch venv python创建环境 python3 -m venv venv 创建虚拟环境 (提示:当你有错找不到的时候可以重新创建一个环境) source ...
- pgsql判断字符串是否为数字
利用正则表达式来对字符串进行匹配 因为工作遇到了一个问题需要对字符串是否可以转换为数值进行判断.今天关于这个问题进行一个分享,流程如下 数字的正则表达式 ^([0-9]+.?[0-9]*|.[0-9] ...
- dp-状压dp
https://www.bilibili.com/video/BV1Z4411x7Kw?from=search&seid=13855865082722302053 状压介绍: 状态表示: 转移 ...
- driver报错
self.driver = webdriver.Chrome(),突然报错,运行不了 解决办法: 第一步:去检查你以安装的驱动版本,用cmd打开命令提示符:然后用命令:chromedriver 第二步 ...
- Canvas布局下使用附加属性使控件岁鼠标移动
定义附加属性 public class MoveBehavior { public static readonly DependencyProperty IsMoveAbleProperty = De ...
- Blog-3
前言 这几周的作业所涉及的知识点有数据的封装和.继承与多态.正则表达式,还有抽象类和接口,另外还有javafx的一些基本知识.题量适中,但是难度对于我来说是比较大的.总的来说就是跟以前的题目差不多,只 ...
- [转]md Typora旧版免费安装包(多平台版本)
typora旧版免费安装包: 链接:https://pan.baidu.com/s/1pIqeO2nTJ9_s16IZj6z3sA?pwd=gut4 提取码:gut4 v1.0以上的版本都要收费了,我 ...
- gRPC 入门(一)
前言 在学习 gRPC 之前,先学习 protobufu 协议,简单的来理解,我们可以使用他来定义 消息 和 服务.然后你只需要实现服务即可,剩下的东西,gRPC 会帮你自动完成. protobufu ...
- MySQL---MGR保姆版
一.环境清理: 三台机器都做: 1.修改主机名 2.修改/etc/hosts文件 3.关闭和禁用防火墙 4.关闭和禁用SELinux 5.生成密钥对 6.传输密钥对 7.验证免密登陆 yum remo ...
- a[i]之和小于N的含义
例题 小白月赛 困难卷积 题目 要求一个暴力算是 \(O(n^2)\) 的东西 同时题目保证 \(\sum a[i] \leq 10^7\) 题解 \(\sum a[i] \leq 10^7\) 的含 ...
