centos7安装tengine强制使用HTTPS访问
操作系统:centos7.2 x64
tengine:Tengine/2.2.0
主机IP: 10.0.0.12
一、安装tengine
1.1 下载源码安装包
1.1.1 源码包pcre-8.40
用于支持正则表达式
            [root@tengine ~]# cd /usr/local/src/

            [root@tengine src]# wget ftp://ftp.csx.cam.ac.uk/pub/software/programming/pcre/pcre-8.40.tar.gz
1.1.2 源码包zlib-1.2.11
用于支持数据压缩
[root@tengine src]# wget http://zlib.net/zlib-1.2.11.tar.gz
1.1.3 源码包openssl-1.0.2
用于数据加密及支持SSL协议
[root@tengine src]# wget https://www.openssl.org/source/openssl-1.0.2k.tar.gz
1.1.4 源码包jemalloc-4.4.0
用于优化内存管理
[root@tengine src]# wget https://github.com/jemalloc/jemalloc/archive/4.4.0.tar.gz
1.1.5 源码包tengine-2.2.0
            [root@tengine src]# wget http://tengine.taobao.org/download/tengine-2.2.0.tar.gz

            [root@tengine src]# ls

            jemalloc-4.4..tar.gz  openssl-1.0.2k.tar.gz  pcre-8.40.tar.gz  tengine-2.2..tar.gz  zlib-1.2..tar.gz
1.2 编译安装依赖包
1.2.1 更新工具包
[root@tengine src]# yum install openssl-devel zlib-devel -y
1.2.2 编译pcre
            [root@tengine src]# tar xf pcre-8.40.tar.gz

            [root@tengine src]# cd pcre-8.40

            [root@tengine pcre-8.40]# ./configure --prefix=/usr/local/pcre

            [root@tengine pcre-8.40]# make && make install
1.2.3 编译openssl
            [root@tengine src]# tar xf openssl-1.0.2k.tar.gz

            [root@tengine src]# cd openssl-1.0.2k

            [root@tengine openssl-1.0.2k]# ./config --prefix=/usr/local/openssl

            [root@tengine openssl-1.0.2k]# make && make install
1.2.4 编译zlib
            [root@tengine src]# tar xf zlib-1.2..tar.gz

            [root@tengine src]# cd zlib-1.2.

            [root@tengine zlib-1.2.]# ./configure --prefix=/usr/local/zlib

            [root@tengine zlib-1.2.]# make && make install
1.2.5 编译jemalloc
            [root@tengine src]# tar xf jemalloc-4.4..tar.gz

            [root@tengine src]# cd jemalloc-4.4.

            [root@tengine jemalloc-4.4.]# ./autogen.sh

            autoconf

            ./autogen.sh: line : autoconf: command not found

            Error  in autoconf

            # 安装autoconf包

            [root@tengine jemalloc-4.4.]# yum install autoconf -y

            [root@tengine jemalloc-4.4.]# ./autogen.sh

            [root@tengine jemalloc-4.4.]# make

            [root@tengine jemalloc-4.4.]# make install

            /usr/bin/install: cannot stat ‘doc/jemalloc.html’: No such file or directory

            make: *** [install_doc_html] Error

            # 这里只是说明文档和html页面没有,可以忽悠这个错误,可以直接touch

            [root@tengine jemalloc-4.4.]# touch doc/jemalloc.html

            [root@tengine jemalloc-4.4.]# make install

            [root@tengine jemalloc-4.4.]# touch doc/jemalloc.

            [root@tengine jemalloc-4.4.]# make install
1.2.8 加载库文件
            [root@tengine tengine-2.2.]# echo '/usr/local/pcre/lib/' > /etc/ld.so.conf.d/pcre.conf

            [root@tengine tengine-2.2.]# echo '/usr/local/zlib/lib/' > /etc/ld.so.conf.d/zlib.conf

            [root@tengine tengine-2.2.]# echo '/usr/local/openssl/lib/' > /etc/ld.so.conf.d/openssl.conf

            [root@tengine tengine-2.2.]# echo '/usr/local/lib/' > /etc/ld.so.conf.d/local.conf

            [root@tengine tengine-2.2.]# ldconfig -v | less

            /usr/local/lib:

                    libjemalloc.so. -> libjemalloc.so.

            /usr/local/openssl/lib:

            /usr/local/pcre/lib:

                    libpcrecpp.so. -> libpcrecpp.so.0.0.

                    libpcreposix.so. -> libpcreposix.so.0.0.

                    libpcre.so. -> libpcre.so.1.2.

            /usr/local/zlib/lib:

                    libz.so. -> libz.so.1.2.

                    ......

                    ......
1.2.7 编译tengine
            [root@tengine src]# tar xf tengine-2.2..tar.gz

            [root@tengine src]# cd tengine-2.2.

            # 创建tengine运行用户

            [root@tengine tengine-2.2.]# groupadd -g  www

            [root@tengine tengine-2.2.]# useradd -u  -g  -s /sbin/nologin -M www

            # 注意,在编译tengine时候,pcre, openssl, zlib必须指向源码目录,而jemalloc不能指向源码目录。切记!

            [root@tengine tengine-2.2.]# ./configure --prefix=/usr/local/tengine --user=www --group=www \

            --with-http_stub_status_module \

            --with-http_ssl_module \

            --with-http_gzip_static_module \

            --with-openssl=/usr/local/src/openssl-1.0.2k \

            --with-pcre=/usr/local/src/pcre-8.40 \

            --with-zlib=/usr/local/src/zlib-1.2. \

            --with-jemalloc

            [root@tengine tengine-2.2.]# make

            [root@tengine tengine-2.2.]# make install

            [root@tengine tengine-2.2.]# cd /usr/local/tengine/

            [root@tengine tengine]# ls

            conf  html  include  logs  modules  sbin

            [root@tengine tengine]# echo 'PATH=$PATH:/usr/local/tengine/sbin/' > /etc/profile.d/tengine.sh

            [root@tengine tengine]# cat !$

            cat /etc/profile.d/tengine.sh

            PATH=$PATH:/usr/local/tengine/sbin/

            [root@tengine tengine]# source /etc/profile.d/tengine.sh

            [root@tengine tengine]# nginx

            [root@tengine tengine]# netstat -ntplu | grep nginx

            tcp               0.0.0.0:              0.0.0.0:*               LISTEN      /nginx: master

            # tengine编译成功!

            # 验证jemalloc是否生效

            [root@tengine tengine]# yum install lsof -y

            [root@tengine tengine]# lsof -n | grep jemalloc

            nginx              root  mem       REG              ,       /usr/local/lib/libjemalloc.so.

            nginx               www  mem       REG              ,       /usr/local/lib/libjemalloc.so.

            # jemalloc 已生效!
1.3 编写服务,实现开机启动
        [root@tengine tengine-2.2.]# vim /usr/lib/systemd/system/tengine.service

        [Unit]

        Description=The nginx HTTP and reverse proxy server

        After=syslog.target network.target remote-fs.target nss-lookup.target

        [Service]

        Type=forking

        PIDFile=/usr/local/tengine/logs/nginx.pid

        ExecStartPre=/usr/local/tengine/sbin/nginx -t

        ExecStart=/usr/local/tengine/sbin/nginx

        ExecReload=/bin/kill -s HUP $MAINPID

        ExecStop=/bin/kill -s QUIT $MAINPID

        PrivateTmp=true

        [Install]

        WantedBy=multi-user.target

        [root@tengine tengine-2.2.]# nginx -s stop

        [root@tengine tengine-2.2.]# systemctl status tengine

        ● tengine.service - The nginx HTTP and reverse proxy server

           Loaded: loaded (/usr/lib/systemd/system/tengine.service; disabled; vendor preset: disabled)

           Active: inactive (dead)

        # 启动服务

        [root@tengine tengine-2.2.]# systemctl start tengine

        [root@tengine tengine-2.2.]# netstat -ntplu | grep nginx

        tcp               0.0.0.0:              0.0.0.0:*               LISTEN      /nginx: master

        # 设置开机启动

        [root@tengine tengine-2.2.]# systemctl enable tengine

        Created symlink from /etc/systemd/system/multi-user.target.wants/tengine.service to /usr/lib/systemd/system/tengine.service.
二、tengine配置SSL并强制使用HTTPS访问
2.1 使用openssl 生成 SSL key 和 CSR
        [root@tengine ~]# mkdir /etc/ssl/private

        [root@tengine ~]# cd /etc/ssl/private/

        [root@tengine private]# openssl req -new -newkey rsa: -sha256 -nodes -out super_com.csr -keyout super_com.key -subj "/C=CN/ST=Beijing/L=Beijing/O=Super Inc./OU=Web Security/CN=super.com"

        # 这里为了实验,我们自行签发不受浏览器信任的SSL证书

        [root@tengine private]# openssl x509 -req -days  -in super_com.csr -signkey super_com.key -out super_com.crt

        Signature ok

        subject=/C=CN/ST=Beijing/L=Beijing/O=Super Inc./OU=Web Security/CN=super.com

        Getting Private key
2.2 为tengine配置SSL协议认证
这里配置建议使用以下两种方式:
(1)通过tengine write配置正则跳转的方式,该方式会占用服务器资源;
(2)通过html meta 跳转的方式,百度采用这种方式;
2.2.1 tengine write方式实现:
[root@tengine ~]# cd /usr/local/tengine/conf/
[root@tengine conf]# vim nginx.conf
...
...
http {
server {
listen ;
server_name www.super.com;
rewrite ^(.*)$ https://$host$1 permanent; # 访问的所有url都跳转为https协议
...
...
}
include vhost/.conf;
}
...
...
[root@tengine conf]# mkdir /usr/local/tengine/conf/vhost
[root@tengine conf]# cd /usr/local/tengine/conf/vhost
[root@tengine conf]# cp -a /etc/ssl/super_com.crt /etc/ssl/private/
[root@tengine conf]# cp -a /etc/ssl/super_com.key /etc/ssl/private/
[root@tengine vhost]# vim ssl.conf server {
listen ssl;
ssl on;
ssl_certificate /etc/ssl/private/super_com.crt;
ssl_certificate_key /etc/ssl/private/super_com.key;
location / {
root /usr/local/tengine/html/ssl;
index index.html;
}
}
# 创建网站根目录和测试页面
[root@tengine vhost]# mkdir /usr/local/tengine/html/ssl
[root@tengine vhost]# cd !$
cd /usr/local/tengine/html/ssl
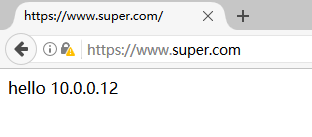
[root@tengine ssl]# echo 'hello 10.0.0.12' > index.html [root@tengine conf]# echo '10.0.0.12 www.super.com' >> /etc/hosts
[root@tengine conf]# ping www.super.com
PING www.super.com (10.0.0.12) () bytes of data.
bytes from www.super.com (10.0.0.12): icmp_seq= ttl= time=0.057 ms
# 重新加载tengine
[root@tengine conf]# nginx -t
nginx: the configuration file /usr/local/tengine/conf/nginx.conf syntax is ok
nginx: configuration file /usr/local/tengine/conf/nginx.conf test is successful
[root@tengine conf]# nginx -s stop # 这里reload不生效可以尝试关闭,在开启
[root@tengine conf]# nginx
[root@tengine conf]# netstat -ntplu | grep nginx
tcp 0.0.0.0: 0.0.0.0:* LISTEN /nginx: master
tcp 0.0.0.0: 0.0.0.0:* LISTEN /nginx: master
[root@tengine conf]# setenforce ; systemctl stop firewalld # 关闭selinux和防火墙
# 编辑本地主机hosts文件。C:\Windows\System32\drivers\etc\hosts
10.0.0.12 www.super.com
浏览器访问:http://www.super.com/
2.2.2 通过html meta 跳转的方式实现:
            [root@tengine conf]# vim nginx.conf

            # 将rewrite注释

            #rewrite ^(.*)$  https://$host$1 permanent;

            [root@tengine conf]# cd /usr/local/tengine/html/

            [root@tengine html]# vim index.html

            <html>

            <meta http-equiv="refresh" content="0;url=https://www.super.com/">

            </html>

centos7安装tengine强制使用HTTPS访问的更多相关文章
- nginx强制使用https访问(http跳转到https)
Nginx 的 Location 从零开始配置 - 市民 - SegmentFault 思否https://segmentfault.com/a/1190000009651161 nginx配置loc ...
- nginx 设置自签名证书以及设置网址http强制转https访问
自签名证书可以在自己的内网环境或者非对外环境使用,保证通信安装 1.生产证书 直接使用脚本生产: 中途会提示书如1次域名和4次密码,把一下文件保存为sh文件,赋予x权限后 直接执行,根据提示输入. # ...
- 解决CentOS7安装Tomcat不能被外部访问的问题
在CentOS7安装了Tomcat,在服务器内部使用火狐浏览器通过localhost:8080是可以访问的,但是不能被外部访问,主要原因是因为防火墙的存在,导致端口不能被访问.CentOS是使用fir ...
- docker下安装nginx并实现https访问
一.启动容器 docker run --detach --name wx-nginx -p 443:443 -p 80:80 -v /home/nginx/data:/usr/share/nginx/ ...
- 安装配置ingress-nginx支持https访问
说明: 1.k8s版本:v1.23: 2.内网测试环境1台master,2台node节点,使用 DaemonSet+HostNetwork+nodeSelector 方式部署 ingress- ...
- centos7安装gitlab 支持带认证https,开启邮件功能 超级简单.
官方安装说明:https://about.gitlab.com/install/#centos-7 自定义yum源 自行搞定 下载gitlab 官方安装: curl -s https://packag ...
- Centos7安装Apache Http服务器无法访问如何解决
1. 安装Apache组件 [root@mycentos shell]# yum install httpd 2. 安装成功后,检测有无httpd进程 [root@mycentos shell]# p ...
- nginx强制使用https访问(多站点多域名配置)
很多配置过https模板的人都知道,配置https 时 ,站在用户的角度http 和https 的区别根本不清楚.有时候敲 http 时会出现 404 错误,而实际上我们是https. 有朋友找我配置 ...
- iOS 9/10强制使用https访问网络,使用了第三方SDK的应用需要配置的信息
2017年01月01日起苹果将全面禁止使用http来访问网络. 网上扒了一些资源,解决方法还是有的,但是都不确定是否可以通过审核,毕竟实践才是检验真理的唯一标准. 后续如果上线成功,再来分享. 如果应 ...
随机推荐
- Visual Studio 2015安装包
点击下载
- BZOJ 4276 [ONTAK2015]Bajtman i Okrągły Robin 费用流+线段树优化建图
Description 有n个强盗,其中第i个强盗会在[a[i],a[i]+1],[a[i]+1,a[i]+2],...,[b[i]-1,b[i]]这么多段长度为1时间中选出一个时间进行抢劫,并计划抢 ...
- Week8 Teamework from Z.XML-Z.XML游戏功能说明
我们小组的游戏终于新鲜出炉了,好开心~ 快来看看有什么功能吧. 游戏目标::=打倒最多的敌人,获得积分,放松心情,获取快乐. 游戏菜单::= 关于+设置+帮助+积分榜+开始游戏吧 (截图还在路上..) ...
- Java 8手动实现一个Collector
我们看一下Stream中的collect的方法. collect(toList())方法由Stream里的值生成一个列表,是一个及早求值的操作. Stream的of方法使用一个初始值生成新的Strea ...
- I/O流任务
一.完成以下链接[https://www.cnblogs.com/zhrb/p/6834084.html]中的任务3.4.5. 3. 字符编码 主要讲解中文乱码问题,FileReader.InputS ...
- 【历史】- Unix时代的开创者Ken Thompson
自图灵奖诞生以来,其获得者一直都是计算机领域的科学家与学者,而在所有这些界的图灵奖中只有唯一的一届有个例外,那就是Ken Thompson与Dennis M. Ritchie,他们都是计算机软件工程师 ...
- 配合JAVA的AJAX使用
概要 Ajax是“Asynchronous JavaScript and XML”的简称,即异步的JavaScript和XML. readyState属性用来返回当前的请求状态,有五个可选值.分别是0 ...
- [BZOJ4212]神牛的养成计划
[BZOJ4212]神牛的养成计划 试题描述 Hzwer 成功培育出神牛细胞,可最终培育出的生物体却让他大失所望...... 后来,他从某同校女神 牛处知道,原来他培育的细胞发生了基因突变,原先决定神 ...
- 算法学习——kruskal重构树
kruskal重构树是一个比较冷门的数据结构. 其实可以看做一种最小生成树的表现形式. 在普通的kruskal中,如果一条边连接了在2个不同集合中的点的话,我们将合并这2个点所在集合. 而在krusk ...
- rematch的基本用法
rematch是对redux的二次封装,简化了redux是使用,极大的提高了开发体验.rematch仅仅是对redux的封装,没有依赖redux-saga,也没有关联react,因此其可以用在其他的视 ...