基于tornado的文件上传demo
这里,web框架是tornado的4.0版本,文件上传组件,是用的bootstrap-fileinput。
这个小demo,是给合作伙伴提供的,模拟APP上摄像头拍照,上传给后台服务进行图像识别用,识别结果OK,则告知客户端不需要继续上传图片了,若结果不ok,则还要继续上传。利用的是每次上传的图片,拍摄的角度或者光线什么的可能不同,丰富后台识别系统识别的判决依据。
还有一点,要注意的是,一般基于http请求操作,都是基于session操作,我们要标识多次图像上传的操作,对应的是同一个业务流,怎么做到呢?就好比用户登录http后台服务器后,通过session保持住一个会话,直到用户退出。在这个应用场景中,可能一个session中存在多个业务流,如何区分?是有办法的,同样利用http session的原理,只是,在我们这个demo里面,我利用时间戳的方式,即每次前端上传图片的时候都带上一个timestamp的字段,这个值在前端通过js生成。当图片识别结果是OK的时候,就将这个timestamp进行刷新,否则就继续保持timestamp的值不变。
web后端服务,采用的是多进程方式,因为python的GIL(全局解析锁)的缘故,无法利用多线程发挥并发优势。故而采用了多进程。多进程要做的事情包括:
1> 接收客户端上传的图像数据,写文件,保存以备后续做学习素材。
2> 处理图像识别的逻辑,处理的结果写入共享数据区。
说到这里,基于tornado的web应用,在接收http请求的时候,这个处理http请求的过程,其实也是一个进程。所以,这个demo就相当于是3个进程之间的协助了。多进程协助,就必须考虑同步和资源共享的问题。
《一》先将web后端的服务代码贴上来,然后给予一些解说,方便读者理解:
 #!/usr/bin/env python

 #-*- coding:utf- -*-

 #__author__ "shihuc"

 import tornado.ioloop

 import tornado.web

 import os

 import json

 import multiprocessing

 import aibusiness

 procPool = multiprocessing.Pool()


 class MainHandler(tornado.web.RequestHandler):

     def get(self):

         self.render("uploadAI.html")

 class UploadHandler(tornado.web.RequestHandler):

     def post(self,*args,**kwargs):

         file_metas=self.request.files['tkai_file']                         #提取表单中‘name’为‘tkai_file’的文件元数据

         timestamp = self.get_argument("sequence")

         xsrf = self.get_argument("_xsrf")


         res = {}

         #注意,只会有一个文件在每次http请求中

         for meta in file_metas:

             filename=meta['filename']

             procPool.apply_async(aibusiness.doWriteImageJob, (filename, meta['body'],))

             p = multiprocessing.Process(target=aibusiness.doRecJob, args=(timestamp, meta['body'],))

             p.start()

             p.join()

         retVal = aibusiness.reportResult(timestamp)

         print "timestamp: %s, xrsf: %s, res: %s, filename: %s\r\n" % (timestamp, xsrf, retVal, filename)

         res['result'] = retVal

         self.write(json.dumps(res))


 settings = {

     'template_path': 'page',          # html文件

     'static_path': 'resource',        # 静态文件(css,js,img)

     'static_url_prefix': '/resource/',# 静态文件前缀

     'cookie_secret': 'shihuc',        # cookie自定义字符串加盐

     'xsrf_cookies': True              # 防止跨站伪造

 }

 def make_app():

     return tornado.web.Application([

         (r"/", MainHandler),(r"/upload", UploadHandler)

     ], default_host='',transforms=None, **settings)

 if __name__ == "__main__":

     app = make_app()

     app.listen()

     tornado.ioloop.IOLoop.current().start()

     procPool.close()
针对上面的代码,我简单的加以解释说明:
a>本demo中,多进程中,接受图像并写入文件的过程,采用的是进程池。注意第13行,我定义全局的变量procPool的时候,multiprocessing.Pool(),没有指定参数,默认会根据当前主机的cpu核数决定启动几个进程。
b>图像识别的处理过程,采用的是来一个请求就启动一个进程的方式。这里的图像识别的处理逻辑,采用的是模拟的过程,用生成随机数的方式替代,相关的逻辑,在aiprocess这个模块中,后面将会附上代码。
c>开41行,这里的settings,给tornado的web应用程序指定基本的配置信息,这里有web应用的页面显示文件的存放路径,以及html文件里面用到的资源文件的存放路径,还有安全防御相关的配置。
- 比如html文件存放路径,这里是page目录;资源文件(css,js,image等)的根目录在resource下面。
- 安全相关的,cookie字符串加密过程中添加了自定义的盐;防止跨站请求伪造(CSRF)的功能开关是否开启,在tornado框架下,csrf被叫作xsrf了,本例中,xsrf开关是开启的。
d>多进程之间的同步,这里,主要需要考虑的是http接收消息的进程与图形识别进程之间的同步,因为识别后的结果要返回给客户端,所以,接收消息的进程必须要等待图形识别进程执行关闭。这里,这个同步,主要利用的是33行的代码join完成的。
e>看26,36,37行的代码,这里要注意,http处理函数post结束后,必须放回json格式的结果给客户端。因为这个是bootstrap-fileinput框架检查结果要求的。
《二》接下来看看,aiprocess模块的内容
 #!/usr/bin/env python

 #-*- coding:utf- -*-

 #__author__ "shihuc"

 import os

 import json

 import random

 import multiprocessing

 #记录同一个业务请求对应的上传的图片数量,key是前端传来的timestamp,value是对应该

 #timestamp值的图片处理结果,一个list。

 timestamp_filecount_map = multiprocessing.Manager().dict()


 procLock = multiprocessing.Lock()

 procEvent = multiprocessing.Event()

 upload_path=os.path.join(os.path.dirname(__file__),'uploadfiles')  #文件的暂存路径

 def doWriteImageJob(filename, imgData):

        """ 1. Add your business logic here, write image data as file!

        """

        #Below do result update

        filepath=os.path.join(upload_path,filename)

        with open(filepath,'wb') as up:                                #有些文件需要已二进制的形式存储,实际中可以更改

             up.write(imgData)

 def doRecJob(timestamp, imgData):

        """ 1. Add your business logic here, for example, image recognization!

            . After image rec process, you must update the timestamp_filecount_map

        to check the next final result in the next step.

        """

        #Here, do recognization, simulate the result by random

        procLock.acquire()

        result = random.randrange(, , )

        #Below do result update

        res = []

        if timestamp_filecount_map.get(str(timestamp)) is None:

           res.append(result)

        else:

           res = timestamp_filecount_map.get(str(timestamp))

           res.append(result)

        timestamp_filecount_map[str(timestamp)] = res

        print timestamp_filecount_map

        procLock.release()

 def reportResult(timestamp):

        """ Add your business logic here, check whether the result is ok or not.

        Here, I will simulate the logic that check the existing result whether it

        is accepted as OK, e.g. the present of image with same result is no less

        %, which is defined to be OK.

        """

        #Here, simulation. check if all the result, if there is % image whose result

        #is no less , then the final is OK.

        procLock.acquire()

        tempCnt =

        try:

            detail_info = timestamp_filecount_map.get(str(timestamp))

            if detail_info is None:

               return "OK"

            else:

               for elem in detail_info:

                  if elem >= :

                      tempCnt +=

               if tempCnt >= len(detail_info) * 0.8:

                  del timestamp_filecount_map[str(timestamp)]

                  return "OK"

               else:

                  return "NOK"

        finally:

            procLock.release()
上述代码,有几点需要解释说明:
1>进程之间的同步问题,用到多进程的Lock,例如代码15行 procLock = multiprocessing.Lock()。每次进程操作的时候,对该代码逻辑进行锁定,因为都在操作共享资源timestamp_filecount_map这个结构,加锁可以保证数据操作的完整性,避免出现脏读现象。
2>进程之间的共享,一定要用多进程模块的Manager生成相应的数据结构。例如代码13行timestamp_filecount_map = multiprocessing.Manager().dict()。否则,假若用一般的字典结构,例如下面: timestamp_filecount_map = {},那么,在进程之间,就无法传递共享的数据,典型的测试结果就是每次在调研reportResult的时候,执行到第59行时,返回的detail_info都是None。
3>上面的代码,处理图像识别的逻辑,是通过生成随机数来模拟的,随机数大于2,表示识别结果是OK的。最终叛变一个业务流是否OK,就是看随机数列表中,不小于2的数的个数是不是不小于随机数总数的80%,是则OK,否则NOK。
《三》看看基于bootstrap-fileinput的前端
 <!doctype html>

 <html>

 <head>

     <meta charset="UTF-8">

     <meta http-equiv="X-UA-Compatible" content="IE=edge,chrome=1">

     <meta name="viewport" content="width=device-width, initial-scale=1.0">

     <title>Python多进程DEMO</title>

     <link href="{{static_url('css/bootstrap.min.css')}}" rel="stylesheet">

     <link rel="stylesheet" type="text/css" href="{{static_url('css/default.css')}}">

     <link href="{{static_url('css/fileinput.css')}}" media="all" rel="stylesheet" type="text/css" />

     <script src="{{static_url('js/jquery-2.1.1.min.js')}}"></script>

     <script src="{{static_url('js/fileinput.js')}}" type="text/javascript"></script>

     <script src="{{static_url('js/bootstrap.min.js')}}" type="text/javascript"></script>

     <script src="{{static_url('js/bootbox.js')}}" type="text/javascript"></script>

 </head>

 <body>

     <div class="htmleaf-container">

         <div class="container kv-main">

            <div class="page-header">

              <h2>Python concurrency demo<small></h2>

            </div>

            <form enctype="multipart/form-data" method="post">

               <div class="form-group">

                   {% module xsrf_form_html() %}

                   <input type="file" name="tkai_file" id="tkai_input" multiple>

               </div>

               <hr>

            </form>

         </div>

     </div>

     <script>

             $(document).ready(function() {

                 if(sessionStorage.image_ai_sequence == null || sessionStorage.image_ai_sequence == undefined){

                     sessionStorage.image_ai_sequence = Date.parse(new Date());

                 }

                 var fileInput= $("#tkai_input").fileinput({

                         uploadUrl: "/upload",

                         uploadAsync: true,

                         maxFileCount: ,

                         allowedFileExtensions : ['jpg','jpeg','png','gif'],//允许的文件类型

                         showUpload: false,                                 //是否显示上传按钮

                         showCaption: true,                                 //是否显示标题

                         showPreview: true,

                         autoReplace: true,

                         dropZoneEnabled: true,

                         uploadExtraData: function() { return {'sequence': sessionStorage.image_ai_sequence, '_xsrf': document.getElementsByName('_xsrf')[0].value}}

                     }).on('filepreajax', function(event, previewId, index) {

                         console.log('previewId:' + previewId + ', index: ' + index + ', seq: ' + sessionStorage.image_ai_sequence);

                     }).on('filepreupload', function(event, data, previewId, index, jqXHR){

                         //console.log('filepreupload');

                     }).on('fileuploaded',function(event, data) {     //单个文件上传成功后的回调

                         //console.log('fileuploaded');

                         var res=data.response;

                         if(res.result == "NOK"){

                             ;                                        //如果后台处理的结果显示为NOK,说明识别效果没有达到预期,要重新传图片

                         }else if (res.result == "OK"){

                             sessionStorage.image_ai_sequence = Date.parse(new Date());       //识别效果达到预期,可以不用再传文件了。

                             bootbox.alert("Result is acceptable!");

                         }

                    }).on('filecustomerror', function(event, params, msg) {

                         //console.log(params)

                         //console.log(msg)

                    }).on('fileclear', function(event,data) {         //删除按钮对应的回调

                         //console.log(data);

                    }).on('filebatchuploadsuccess', function(event,data) { //批量上传文件对应的回调

                         //console.log(data);

                    });

             });

     </script>

 </body>

 </html>
对这段代码,也做一些必要的解释说明
1>第8行处,红色部分static_url这个函数,是tornado的模板解释函数,在这里{{static_url('css/bootstrap.min.css')}},要结合第一部分web后端代码中介绍的settings中的静态资源路径配置信息,本demo中的资源路径前缀是/resource/,所以这个红色部分在模板解析后,全路径就是/resource/css/bootstrap.min.css。上述代码中其他的涉及到static_url的地方,都是如此。资源加载的模板格式都是{{。。。}}这样的,这样用有一个好处,每次加载资源,tornado都会给资源文件添加一个版本号,强制浏览器放弃使用缓存,每次刷新页面,都会重新加载,不会出现因为缓存造成文件内容刷新不及时的问题。
2>第24行代码,这里也是利用了tornado的模板语言,加载了一段代码,生成xsrf相关逻辑的,对应就是添加了一个input元素,已hidden的方式,以name为_xsrf,value为一段tornado生成的字符串,相当于token,是随机的,防止跨站请求伪造用的。提交表单时没有这个值或者这个值和tornado后台的值对不上,都是会拒绝提交的表单的。这里的模板格式是{% 。。。 %}。
3>第33-35行的代码,对应前面说到的标记一个业务流的timestamp标记,当然这个值,可以是后台生成。这里是demo,就前端生成了。这里用到了sessionStorage的存储功能,防止页面刷新导致这个值可能出现的不一致。
4>fileinput插件,多文件上传过程,支持两种文件上传模式,一个是同步的批量上传,一个是异步的一张一张的文件上传。第38行的代码,就是设置为异步的单张文件的上传。这种模式下,后台接收文件的地方,每次http请求到来时,里面只会有一个文件。若是批量上传,则http后台接收文件时,会是一个数组的形式,接收到多个文件。我们的python后台代码,是同时支持单张上传和批量上传的。
5>第46行的代码,利用了fileinput的上传过程支持上传额外数据的能力,即不仅仅上传form表单中的数据,还可以上传用户自定义的数据。这里,通过回调函数的方式设置uploadExtraData,就是为了在每次上传之前,都重新获取一次新数据,防止每次上传的数据都是页面加载时的初始值。
最后,将整个基于tornado的web项目目录结构信息附在这里:
 [root@localhost demo]# ll

 总计

 -rw-r--r--  root root  - : aibusiness.py

 drwxr-xr-x  root root  - : page

 drwxr-xr-x  root root  - : resource

 drwxr-xr-x  root root  - : uploadfiles

 -rw-r--r--  root root  - : web_server.py
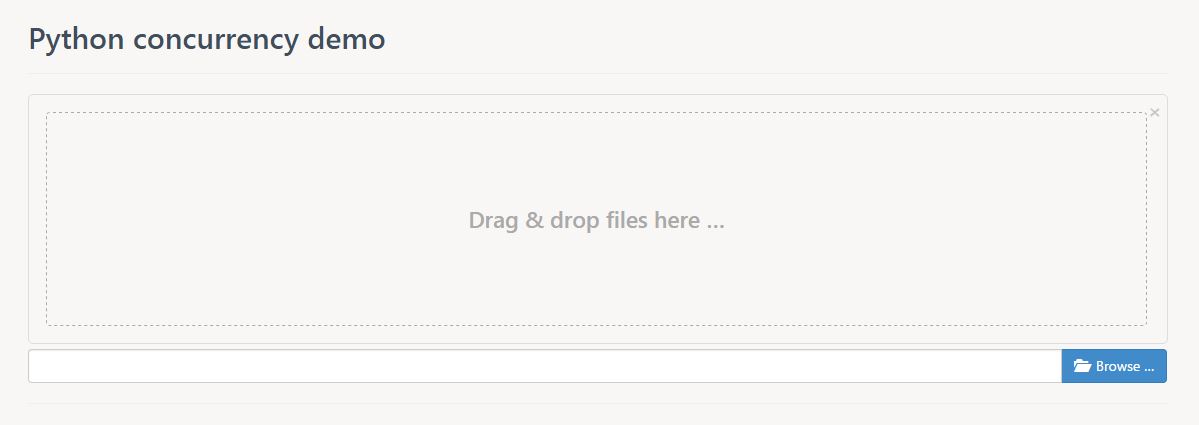
项目启动后,从浏览器访问项目,看到的效果如下图
另外,这个demo的所有源文件,我都上传到了github,地址https://github.com/shihuc/fileupload,有兴趣的,可以去参考。
基于tornado的文件上传demo的更多相关文章
- python 全栈开发,Day75(Django与Ajax,文件上传,ajax发送json数据,基于Ajax的文件上传,SweetAlert插件)
昨日内容回顾 基于对象的跨表查询 正向查询:关联属性在A表中,所以A对象找关联B表数据,正向查询 反向查询:关联属性在A表中,所以B对象找A对象,反向查询 一对多: 按字段:xx book ----- ...
- 第二百七十三节,Tornado框架-文件上传
Tornado框架-文件上传 第一.普通表单上传文件 self.request.files["fafafa"] 获取上传文件信息,参数["上传文件框的name名称&quo ...
- Django与Ajax,文件上传,ajax发送json数据,基于Ajax的文件上传,SweetAlert插件
一.Django与Ajax AJAX准备知识:JSON 什么是 JSON ? JSON 指的是 JavaScript 对象表示法(JavaScript Object Notation) JSON 是轻 ...
- 基于jsp的文件上传和下载
参考: 一.JavaWeb学习总结(五十)--文件上传和下载 此文极好,不过有几点要注意: 1.直接按照作者的代码极有可能listfile.jsp文件中 <%@taglib prefix=&qu ...
- WebSite 文件上传Demo
知识点: 1 <!--上传文件时: 1.必须使用Post方式来提交数据 2.必须设置表单的enctype属性 3.必须在表单中包含文件域.input t ...
- shutil模块和几种文件上传Demo
一.shutil模块 1.介绍 shutil模块是对os中文件操作的补充.--移动 复制 打包 压缩 解压 2.基本使用 1. shutil.copyfileobj(文件1, 文件2, 长度) 将文件 ...
- 基于Ajax的文件上传使用FileInput插件(使用谷歌翻译作者的原文,大致意思是对的,自己把握)
bootstrap-fileinput 说明文档:http://plugins.krajee.com/file-input 有许多人希望学习使用bootstrap-fileinput jQuery插件 ...
- Spring文件上传Demo
package com.smbea.controller; import java.io.File; import java.io.FileOutputStream; import java.io.I ...
- SpringMVC经典系列-12基于SpringMVC的文件上传---【LinusZhu】
注意:此文章是个人原创.希望有转载须要的朋友们标明文章出处,假设各位朋友们认为写的还好,就给个赞哈,你的鼓舞是我创作的最大动力.LinusZhu在此表示十分感谢,当然文章中如有纰漏.请联系linusz ...
随机推荐
- input默认显示当前时间
方法一: // 获取当天的年月日 new Date().getFullYear() + '-' + (new Date().getMonth() + 1) + '-' + new Date().get ...
- [转]HBASE 二级索引
1.二级索引的核心思想是什么?2.二级索引由谁来管理?3.在主表中插入某条数据后,hbase如何将索引列写到索引表中去?4.scan查询的时候,coprocessor钩子的作用是什么?5.在split ...
- Java 容器的使用及数组、List、Set 的相互转换
0. Utils 字符串数组的排序: Set<String> set = new TreeSet<String>(); Collections.addAll(set, args ...
- Linux audit安全审计工具
/********************************************************************** * Linux audit安全审计工具 * 说明: * ...
- 用conda创建python虚拟环境
1.首先在所在系统中安装Anaconda.可以打开命令行输入conda -V检验是否安装以及当前conda的版本. 2.conda常用的命令. 1)conda list 查看安装了哪些包. 2)con ...
- ROC曲线和AUC值
链接:https://www.zhihu.com/question/39840928/answer/146205830来源:知乎 一.混淆矩阵 混淆矩阵如图1分别用”0“和”1“代表负样本和正样本.F ...
- re.compile
详情见 >>> import re >>> s = "adfad asdfasdf asdfas asdfawef asd adsfas " & ...
- Unity 灯光探针用法教程
Unity 灯光探针用详解 本文提供全流程,中文翻译. Chinar 坚持将简单的生活方式,带给世人!(拥有更好的阅读体验 -- 高分辨率用户请根据需求调整网页缩放比例) Chinar -- 心分享. ...
- NYOJ 6:喷水装置(一)(贪心)
6-喷水装置(一) 内存限制:64MB 时间限制:3000ms 特判: No 通过数:68 提交数:111 难度:3 题目描述: 现有一块草坪,长为20米,宽为2米,要在横中心线上放置半径为Ri的喷水 ...
- .Net Core开发环境迁移到Linux
.Net开发环境迁移到Linux上去 .Net Core发布之前,多年来,.Net程序员的开发环境都在Windows上. 三街第一帅的我,虽然上班的8小时一直在windows上撸C#,但是下班时间一般 ...