在Mac OS X Yosemite 10.10.3 中搭建第一个 ASP.NET 5 Web 项目
终于有时间在 Mac 上安装一下 ASP.NET 5,网上有许多教程,但是多数的时间比较早了,版本不是最新,搭着 Build 2015 的春风,我也实践一下 Mac OS X 上的 ASP.NET 5。
经常使用 Windows 8.1,对 Mac 并不太熟悉,也一并把安装中的问题趟一遍。
前几天刚刚更新了 Mac 的操作系统,操作系统版本 Mac OS X Yosemite 10.10.3。
1. 在 Mac OS X 上安装 ASP.NET 5
ASP.NET 5 运行在 DNX 之上,DNX 是 .NET 运行环境 ( .NET Execution Environment ) 的简写,它支持多种平台,当然包括我们今天的 OS X 了,在 OS X 上,使用 Homebrew 可以很容易安装 DNX。
1.1 安装 Hoembrew
什么是 Homebrew? 我们先看看它。
Homebrew 是用来在 Mac OS X 安装 Linux 工具包最简单和灵活的方式。官方网址:http://brew.sh。
打开 Mac OS 的终端,输入 ruby 命令
ruby -e "$(curl -fsSL https://raw.githubusercontent.com/Homebrew/install/master/install)"
就可以了。安装之后可以检查是否安装成功。
brew –v
Homebrew 0.9.5
我现在的版本是 0.9.5
1.2 安装 DNVM
又一个新的缩写词 DNVM,英文的原文是 .NET Version Manager,就是 .NET 版本管理器,包含更新和配置 .NET 运行环境 ( KRE ) 所使用的一系列工具,是 ASP.NET 5 项目的一个子项目。DNVM 的网址:https://github.com/aspnet/dnvm/
一旦成功安装了 Homebrew,就可以使用 brew 命令来安装这个 DNVM。
brew 自己有默认的仓库,使用 tap 可以添加第三方的仓库,我们的 DNVM 就需要设置一下所在的仓库。
在终端窗口中,使用下面的命令来设置这个第三方的仓库。
brew tap aspnet/dnx
如果你想更新一下这个仓库,可以使用下面的命令先删除原来的,再重新安装,实现更新的目的。
brew untap aspnet/dnx

brew tap aspnet/dnx
更新之后,才可以安装我们真正需要的 DNVM。现在,可以安装 .NET 版本管理器了。
在终端中输入下面的命令,安装 DNVM。注意大小写,命令中可是小写的。这将会自动从 https://www.nuget.org/api/v2 安装最新的 DNX 包。
brew install dnvm
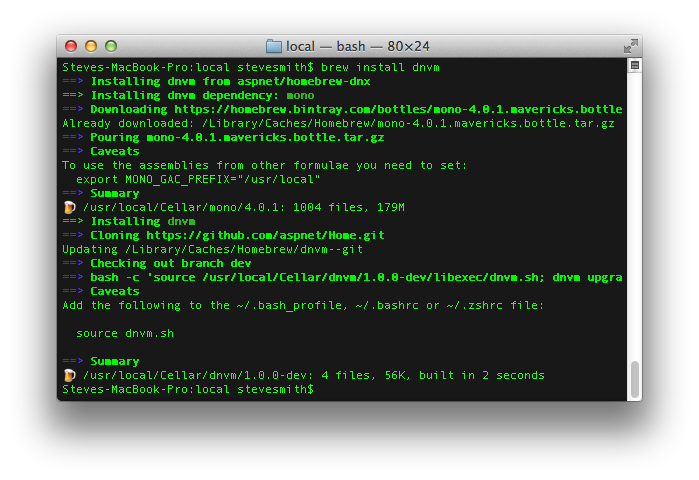
终端中的输出如下所示。
成功安装之后,可以在终端窗口中执行 dnvm 命令来检查一下。
dnvm
应该看到如下的输出。
    ___  _  ___   ____  ___

   / _ \/ |/ / | / /  |/  /

  / // /    /| |/ / /|_/ /

 /____/_/|_/ |___/_/  /_/

.NET Version Manager - Version 1.0.-beta5-

By Microsoft Open Technologies, Inc.

DNVM can be used to download versions of the .NET Execution Environment and manage which version you are using.

You can control the URL of the stable and unstable channel by setting the DNX_FEED and DNX_UNSTABLE_FEED variables.

Current feed settings:

Default Stable: https://www.nuget.org/api/v2

Default Unstable: https://www.myget.org/F/aspnetvnext/api/v2

Current Stable Override: <none>

Current Unstable Override: <none>

Use dnvm [help|-h|-help|--help]  to display help text.
如果你看到的是
-bash: dnvm: command not found
也没有关系,这是因为没有找到 dnvm 这个命令而已,将 dnvm.sh 加入搜索路径就可以,这可以通过下面的命令来实现。
source dnvm.sh
如果需要更新 DNX,那么,可以使用 upgrade 命令。
dnvm upgrade
现在,你的 DNX 就已经成功安装了。使用 dnvm list 可以查看所有的版本。
Active Version              Runtime Arch Location             Alias

------ -------              ------- ---- --------             -----

       1.0.-beta5-    coreclr x64  ~/.dnx/runtimes

  *    1.0.-beta4          mono         ~/.dnx/runtimes      default

       1.0.-beta5-    mono         ~/.dnx/runtimes
可以切换当前使用的 .NET 版本。
localhost:helloClr $ dnvm alias default 1.0.-beta5-

Updating alias 'default' to 'dnx-mono.1.0.0-beta5-11682'
重新显示一下当前的版本。
ocalhost:helloClr $ dnvm list

Active Version              Runtime Arch Location             Alias

------ -------              ------- ---- --------             -----

       1.0.-beta5-    coreclr x64  ~/.dnx/runtimes

  *    1.0.-beta4          mono         ~/.dnx/runtimes

       1.0.-beta5-    mono         ~/.dnx/runtimes      default
1.3 保存路径
当关闭现在的终端窗口之后,重新打开终端窗口就会发现 dnx 不好用了。这是因为我们使用 source 设置的路径只能在当前的终端窗口中才能使用,如果希望能够保存下来,需要修改配置文件了。
查找一下 dnvm.sh 所在的文件夹。
localhost:~ $ mdfind -name dnvm.sh

/usr/local/Cellar/dnvm/1.0.0-dev/libexec/dnvm.sh
2. 创建控制台程序
环境创建之后,我们一般都会创建一个控制台的 Hello, world 程序来爽一把,程序就不用说了,主要是环境。
在桌面上创建了一个测试使用的文件夹 helloClr。在这里面创建下面的两个文件。
使用你喜欢的编辑器写一个 helloworld.cs 程序,其实与 Windows 下当然是一摸一样了。
using System;

public class Program {

public static void Main() {

        Console.WriteLine("Hello from DNX!");

    }

}
不一样的是需要为我们这个简单的项目,创建一个项目文件,文件名必须是 project.json,是 json 格式呀,不要写错了。在与 helloworld.cs 相同的文件夹下,创建这个 project.json 文件。内容如下。
{

  "dependencies": {

  },

  "frameworks": {

    "dnx451": {},

    "dnxcore50": {

      "dependencies": {

        "System.Console": "4.0.0-beta-22605"

        }
      }

   }
}
现在已经一切都准备好了,注意当前目录需要在这个文件夹下,在终端窗口中,输入运行的命令就可以了。
dnx . run
没有问题的话,就应该看到输出的 Hello from DNX! 了。
在 Mac OS X 下面,还可以设置一个环境变量 DNX_TRACE 来看看详细的输出。
export DNX_TRACE=
现在的输出丰富多了。
Information: [DefaultHost]: Project path: /Users/haogj/Desktop/helloClr

Information: [DefaultHost]: Project root: /Users/haogj/Desktop/helloClr

Information: [DefaultHost]: Packages path: /Users/haogj/.dnx/packages

Information: [Breadcrumbs] Breadcrumbs for servicing will not be written because the breadcrumbs folder () does not exist.

Information: [DependencyWalker]: Walking dependency graph for 'helloClr DNX,Version=v4.5.1'.

Information: [WalkContext]: Graph walk stage  took in 9ms

Information: [DependencyWalker]: Graph walk took 17ms.

Information: [WalkContext]: Populate took 7ms

Information: [DependencyWalker]: Resolved dependencies for helloClr in 26ms

Information: [LoaderContainer]: Load name=helloClr

Information: [ProjectLibraryExportProvider]: GetLibraryExport(helloClr, DNX,Version=v4.5.1, Debug, )

Information: [Microsoft.Framework.Runtime.Roslyn.RoslynProjectReferenceProvider]: GetProjectReference(helloClr, DNX,Version=v4.5.1, Debug, )

Information: [ProjectExportProviderHelper]: Resolving references for 'helloClr'

Information: [ProjectExportProviderHelper]: Resolved  references for 'helloClr' in 6ms

Information: [RoslynCompiler]: Compiling 'helloClr'

Information: [LoaderContainer]: Load name=System.Security.Cryptography.Hashing

Information: [LoaderContainer]: Load name=System.Security.Cryptography.Hashing.Algorithms

Information: [RoslynCompiler]: Compiled 'helloClr' in 373ms

Information: [CompilationContext]: Generating resources for helloClr

Information: [CompilationContext]: Generated resources for helloClr in 3ms

Information: [RoslynProjectReference]: Emitting assembly for helloClr

Warning: PDB generation is not supported on this platform

Information: [RoslynProjectReference]: Emitted helloClr in 827ms

Information: [ProjectAssemblyLoader]: Loaded name=helloClr in 1240ms

Hello from DNX!
查看一下当前目录,可以看到我们熟悉的 helloworld.exe 文件,当然了,它必须使用 dnx 才能执行,可以这样直接执行程序。
dnx helloworld.exe
3. 创建网站程序
激动人心的时刻快到了,但是,我们还需要做一些准备工作。
先确认一下你的 .NET 版本。还记得下面的命令吗?检查默认的版本。
dnvm list
Yeoman 是一个创建项目框架的应用,使用它我们可以创建出网站项目的基本框架。
默认的网站需要很多文件组成,包括样式、脚本、配置等等,在 Mac 下面可没有强大的 Visual Studio,这里需要通过 Yeoman 来搭建基本的网站框架。
yeoman 需要通过 npm 来安装,如果你已经安装过 nodejs ,就已经安装过它了,如果没有,就先安装 nodejs 吧。
由于 npm 服务器在国外,国内使用起来问题较多,淘宝提供了一个国内镜像,保障了安装网络环境的稳定,和源地址10分钟同步一次,没有被收录的包会自动切换到npm官方下载,并添加进镜像库。说明链接地址:http://ju.outofmemory.cn/entry/118659
临时使用淘宝 npm 库,可以使用如下命令
npm --registry https://registry.npm.taobao.org info underscore
安装了 npm 之后,就可以使用 install 命令来安装 yeoman 了。
sudo npm install -g yo
安装的输出如下。
/usr/local/bin/yo -> /usr/local/lib/node_modules/yo/lib/cli.js

> yo@1.4. postinstall /usr/local/lib/node_modules/yo

> yodoctor

Yeoman Doctor

Running sanity checks on your system

✔ Global configuration file is valid

✔ NODE_PATH matches the npm root

✔ No .bowerrc file in home directory

✔ No .yo-rc.json file in home directory

Everything looks all right!

yo@1.4. /usr/local/lib/node_modules/yo

├── array-uniq@1.0.

├── figures@1.3.

├── titleize@1.0.

├── user-home@1.1.

├── opn@1.0.

├── humanize-string@1.0. (decamelize@1.0.)

├── sort-on@1.2. (dot-prop@2.0.)

├── yeoman-character@1.0. (supports-color@1.3.)

├── async@0.9.

├── string-length@1.0. (strip-ansi@2.0.)

├── root-check@1.0. (sudo-block@1.2., downgrade-root@1.1.)

├── cross-spawn@0.2. (lru-cache@2.6.)

├── chalk@1.0. (escape-string-regexp@1.0., ansi-styles@2.0., supports-color@1.3., strip-ansi@2.0., has-ansi@1.0.)

├── findup@0.1. (commander@2.1., colors@0.6.)

├── yosay@1.0. (ansi-regex@1.1., ansi-styles@2.0., word-wrap@1.0., strip-ansi@2.0., pad-component@0.0., taketalk@1.0., minimist@1.1.)

├── meow@3.1. (object-assign@2.0., camelcase-keys@1.0., minimist@1.1., indent-string@1.2.)

├── package-json@1.1. (registry-url@3.0.)

├── npm-keyword@1.1. (registry-url@3.0.)

├── update-notifier@0.3. (is-npm@1.0., latest-version@1.0., semver-diff@2.0.)

├── got@2.9. (lowercase-keys@1.0., is-stream@1.0., timed-out@2.0., object-assign@2.0., prepend-http@1.0., nested-error-stacks@1.0., statuses@1.2., infinity-agent@2.0., duplexify@3.3., read-all-stream@2.1.)

├── fullname@1.1. (npmconf@2.1.)

├── yeoman-environment@1.2. (escape-string-regexp@1.0., untildify@2.0., log-symbols@1.0., diff@1.4., text-table@0.2., debug@2.2., mem-fs@1.1., globby@1.2., grouped-queue@0.3.)

├── configstore@0.3. (object-assign@2.0., xdg-basedir@1.0., osenv@0.1., graceful-fs@3.0., uuid@2.0., mkdirp@0.5., js-yaml@3.3.)

├── insight@0.5. (object-assign@2.0., lodash.debounce@3.0., os-name@1.0., tough-cookie@0.12., request@2.55.)

├── lodash@3.8.

├── yeoman-doctor@1.3. (object-values@1.0., log-symbols@1.0., each-async@1.1., twig@0.7.)

└── inquirer@0.8. (ansi-regex@1.1., cli-width@1.0., through@2.3., readline2@0.1., rx@2.5.)
安装 yeoman 之后,还需要安装 aspnet 的模版库。使用下面的命令
sudo npm install -g yo generator-aspnet
输出如下内容。
/usr/local/bin/yo -> /usr/local/lib/node_modules/yo/lib/cli.js

> yo@1.4. postinstall /usr/local/lib/node_modules/yo

> yodoctor

Yeoman Doctor

Running sanity checks on your system

✔ Global configuration file is valid

✔ NODE_PATH matches the npm root

✔ No .bowerrc file in home directory

✔ No .yo-rc.json file in home directory

Everything looks all right!

yo@1.4. /usr/local/lib/node_modules/yo

├── titleize@1.0.

├── array-uniq@1.0.

├── figures@1.3.

├── user-home@1.1.

├── opn@1.0.

├── humanize-string@1.0. (decamelize@1.0.)

├── sort-on@1.2. (dot-prop@2.0.)

├── yeoman-character@1.0. (supports-color@1.3.)

├── async@0.9.

├── string-length@1.0. (strip-ansi@2.0.)

├── cross-spawn@0.2. (lru-cache@2.6.)

├── chalk@1.0. (escape-string-regexp@1.0., ansi-styles@2.0., supports-color@1.3., strip-ansi@2.0., has-ansi@1.0.)

├── root-check@1.0. (sudo-block@1.2., downgrade-root@1.1.)

├── findup@0.1. (commander@2.1., colors@0.6.)

├── yosay@1.0. (ansi-regex@1.1., ansi-styles@2.0., word-wrap@1.0., strip-ansi@2.0., pad-component@0.0., taketalk@1.0., minimist@1.1.)

├── meow@3.1. (object-assign@2.0., camelcase-keys@1.0., minimist@1.1., indent-string@1.2.)

├── npm-keyword@1.1. (registry-url@3.0.)

├── package-json@1.1. (registry-url@3.0.)

├── update-notifier@0.3. (is-npm@1.0., latest-version@1.0., semver-diff@2.0.)

├── got@2.9. (lowercase-keys@1.0., is-stream@1.0., timed-out@2.0., object-assign@2.0., prepend-http@1.0., nested-error-stacks@1.0., statuses@1.2., infinity-agent@2.0., read-all-stream@2.1., duplexify@3.3.)

├── fullname@1.1. (npmconf@2.1.)

├── configstore@0.3. (object-assign@2.0., xdg-basedir@1.0., osenv@0.1., graceful-fs@3.0., uuid@2.0., mkdirp@0.5., js-yaml@3.3.)

├── yeoman-environment@1.2. (untildify@2.0., log-symbols@1.0., escape-string-regexp@1.0., diff@1.4., text-table@0.2., debug@2.2., mem-fs@1.1., globby@1.2., grouped-queue@0.3.)

├── insight@0.5. (object-assign@2.0., lodash.debounce@3.0., os-name@1.0., tough-cookie@0.12., request@2.55.)

├── lodash@3.8.

├── yeoman-doctor@1.3. (object-values@1.0., log-symbols@1.0., each-async@1.1., twig@0.7.)

└── inquirer@0.8. (ansi-regex@1.1., cli-width@1.0., through@2.3., readline2@0.1., rx@2.5.)

generator-aspnet@0.0. /usr/local/lib/node_modules/generator-aspnet

├── uuid@2.0.

├── chalk@1.0. (escape-string-regexp@1.0., ansi-styles@2.0., supports-color@1.3., strip-ansi@2.0., has-ansi@1.0.)

├── yosay@1.0. (string-length@1.0., word-wrap@1.0., strip-ansi@2.0., ansi-regex@1.1., ansi-styles@2.0., pad-component@0.0., taketalk@1.0., minimist@1.1.)

├── chai@1.10. (assertion-error@1.0., deep-eql@0.1.)

└── yeoman-generator@0.19. (read-chunk@1.0., detect-conflict@1.0., dargs@4.0., yeoman-welcome@1.0., xdg-basedir@1.0., user-home@1.1., diff@1.4., text-table@0.2., mime@1.3., async@0.9., istextorbinary@1.0., nopt@3.0., debug@2.2., run-async@0.1., cross-spawn@0.2., mem-fs-editor@1.2., mkdirp@0.5., shelljs@0.4., through2@0.6., cli-table@0.3., pretty-bytes@1.0., dateformat@1.0., underscore.string@3.0., glob@5.0., github-username@1.1., findup-sync@0.2., rimraf@2.3., class-extend@0.1., yeoman-assert@1.0., html-wiring@1.1., yeoman-environment@1.2., sinon@1.14., gruntfile-editor@1.0., lodash@3.8., download@4.1., inquirer@0.8.)
安装好生成器之后,我们终于可以创建一个网站项目了。直接在命令行输入 yo 或者直接输入 yo aspnet 就可以了。有向导的呀。
? 'Allo OpenXLive! What would you like to do? Aspnet

Make sure you are in the directory you want to scaffold into.

This generator can also be run with: yo aspnet

     _-----_

    |       |    .--------------------------.

    |--(o)--|    |      Welcome to the      |

   `---------´   |   marvellous ASP.NET    |

    ( _´U`_ )    |        generator!        |

    /___A___\    '--------------------------'

     |  ~  |

   __'.___.'__

 ´   `  |° ´ Y `

? What type of application do you want to create? Web Application

? What's the name of your ASP.NET application? WebApplication

   create WebApplication/.gitgnore

   create WebApplication/Startup.cs

   create WebApplication/bower.json

   create WebApplication/config.json

   create WebApplication/MessageService.cs

   create WebApplication/project.json

   create WebApplication/package.json

   create WebApplication/gruntfile.js

   create WebApplication/Models/AccountViewModels.cs

   create WebApplication/Models/IdentityModels.cs

   create WebApplication/Models/ManageViewModels.cs

   create WebApplication/Controllers/AccountController.cs

   create WebApplication/Controllers/HomeController.cs

   create WebApplication/Controllers/ManageController.cs

   create WebApplication/Compiler/Preprocess/RazorPreCompilation.cs

   create WebApplication/Migrations/000000000000000_CreateIdentitySchema.cs

   create WebApplication/Migrations/ApplicationDbContextModelSnapshot.cs

   create WebApplication/Properties/AppSettings.cs

   create WebApplication/Views/Account/ConfirmEmail.cshtml

   create WebApplication/Views/Account/ExternalLoginConfirmation.cshtml

   create WebApplication/Views/Account/ExternalLoginFailure.cshtml

   create WebApplication/Views/Account/ForgotPassword.cshtml

   create WebApplication/Views/Account/ForgotPasswordConfirmation.cshtml

   create WebApplication/Views/Account/Login.cshtml

   create WebApplication/Views/Account/Register.cshtml

   create WebApplication/Views/Account/ResetPassword.cshtml

   create WebApplication/Views/Account/ResetPasswordConfirmation.cshtml

   create WebApplication/Views/Account/SendCode.cshtml

   create WebApplication/Views/Account/VerifyCode.cshtml

   create WebApplication/Views/Home/Contact.cshtml

   create WebApplication/Views/Home/About.cshtml

   create WebApplication/Views/Home/Index.cshtml

   create WebApplication/Views/Manage/AddPhoneNumber.cshtml

   create WebApplication/Views/Manage/ChangePassword.cshtml

   create WebApplication/Views/Manage/Index.cshtml

   create WebApplication/Views/Manage/ManageLogins.cshtml

   create WebApplication/Views/Manage/RemoveLogin.cshtml

   create WebApplication/Views/Manage/SetPassword.cshtml

   create WebApplication/Views/Manage/VerifyPhoneNumber.cshtml

   create WebApplication/Views/Shared/Error.cshtml

   create WebApplication/Views/Shared/_Layout.cshtml

   create WebApplication/Views/Shared/_LoginPartial.cshtml

   create WebApplication/Views/Shared/_ValidationScriptsPartial.cshtml

   create WebApplication/Views/_GlobalImport.cshtml

   create WebApplication/Views/_ViewStart.cshtml

   create WebApplication/wwwroot/_references.js

   create WebApplication/wwwroot/css/site.css

   create WebApplication/wwwroot/favicon.ico

   create WebApplication/wwwroot/images/ASP-NET-Banners-.png

   create WebApplication/wwwroot/images/ASP-NET-Banners-.png

   create WebApplication/wwwroot/images/Banner--Azure.png

   create WebApplication/wwwroot/images/Banner--VS.png

   create WebApplication/wwwroot/lib/bootstrap-touch-carousel/css/bootstrap-touch-carousel.css

   create WebApplication/wwwroot/lib/bootstrap-touch-carousel/js/bootstrap-touch-carousel.js

   create WebApplication/wwwroot/lib/bootstrap/css/bootstrap-theme.css

   create WebApplication/wwwroot/lib/bootstrap/css/bootstrap-theme.min.css

   create WebApplication/wwwroot/lib/bootstrap/css/bootstrap.css

   create WebApplication/wwwroot/lib/bootstrap/css/bootstrap.min.css

   create WebApplication/wwwroot/lib/bootstrap/fonts/glyphicons-halflings-regular.eot

   create WebApplication/wwwroot/lib/bootstrap/fonts/glyphicons-halflings-regular.svg

   create WebApplication/wwwroot/lib/bootstrap/fonts/glyphicons-halflings-regular.ttf

   create WebApplication/wwwroot/lib/bootstrap/fonts/glyphicons-halflings-regular.woff

   create WebApplication/wwwroot/lib/bootstrap/js/bootstrap.js

   create WebApplication/wwwroot/lib/bootstrap/js/bootstrap.min.js

   create WebApplication/wwwroot/lib/hammer.js/hammer.js

   create WebApplication/wwwroot/lib/hammer.js/hammer.min.js

   create WebApplication/wwwroot/lib/hammer.js/hammer.min.map

   create WebApplication/wwwroot/lib/jquery-validation-unobtrusive/jquery.validate.unobtrusive.js

   create WebApplication/wwwroot/lib/jquery-validation/jquery.validate.js

   create WebApplication/wwwroot/lib/jquery/jquery-migrate.js

   create WebApplication/wwwroot/lib/jquery/jquery-migrate.min.js

   create WebApplication/wwwroot/lib/jquery/jquery.js

   create WebApplication/wwwroot/lib/jquery/jquery.min.js

   create WebApplication/wwwroot/lib/jquery/jquery.min.map

Your project is now created, you can use the following commands to get going

    dnu restore

    dnu build

    dnx . run for console projects

    dnx . kestrel or dnx . web for web projects

     _-----_

    |       |    .----------------------.

    |--(o)--|    |     Bye from us!     |

   `---------´   |      Chat soon.      |

    ( _´U`_ )    |      Yeoman team     |

    /___A___\    |   http://yeoman.io   |

     |  ~  |     '----------------------'

   __'.___.'__

 ´   `  |° ´ Y `
太麻烦了?看看动画吧。

资料来源:http://blogs.msdn.com/b/webdev/archive/2014/12/17/yeoman-generators-for-asp-net-vnext.aspx
在输出的最后,已经说明我们需要的工作。执行 dnu restore, 但是,报错了。
Restoring packages for /Users/Openxlive/Desktop/helloWeb/WebApplication/project.json

Writing lock file /Users/Openxlive/Desktop/helloWeb/WebApplication/project.lock.json

npm WARN package.json WebApplication@0.0. No description

npm WARN package.json WebApplication@0.0. No repository field.

npm WARN package.json WebApplication@0.0. No README data

grunt@0.4. node_modules/grunt

├── which@1.0.

├── dateformat@1.0.-1.2.

├── eventemitter2@0.4.

├── getobject@0.1.

├── rimraf@2.2.

├── colors@0.6.

├── async@0.1.

├── hooker@0.2.

├── grunt-legacy-util@0.2.

├── exit@0.1.

├── nopt@1.0. (abbrev@1.0.)

├── lodash@0.9.

├── minimatch@0.2. (sigmund@1.0., lru-cache@2.6.)

├── glob@3.1. (inherits@1.0., graceful-fs@1.2.)

├── coffee-script@1.3.

├── underscore.string@2.2.

├── iconv-lite@0.2.

├── findup-sync@0.1. (glob@3.2., lodash@2.4.)

├── grunt-legacy-log@0.1. (underscore.string@2.3., lodash@2.4.)

└── js-yaml@2.0. (esprima@1.0., argparse@0.1.)

grunt-bower-task@0.4. node_modules/grunt-bower-task

├── colors@0.6.

├── async@0.1.

├── wrench@1.4.

├── rimraf@2.0. (graceful-fs@1.1.)

├── lodash@0.10.

└── bower@1.3. (is-root@1.0., junk@1.0., stringify-object@1.0., which@1.0., abbrev@1.0., chmodr@0.1., osenv@0.1., archy@0.0., opn@1.0., rimraf@2.2., bower-logger@0.2., bower-endpoint-parser@0.2., graceful-fs@3.0., lockfile@1.0., lru-cache@2.5., nopt@3.0., retry@0.6., tmp@0.0., q@1.0., request-progress@0.3., shell-quote@1.4., chalk@0.5., semver@2.3., bower-json@0.4., fstream@1.0., p-throttler@0.1., mkdirp@0.5., promptly@0.2., bower-config@0.5., fstream-ignore@1.0., tar-fs@0.5., decompress-zip@0.0., request@2.42., glob@4.0., bower-registry-client@0.2., cardinal@0.4., mout@0.9., inquirer@0.7., insight@0.4., handlebars@2.0., update-notifier@0.2.)

----------

System.ComponentModel.Win32Exception: ApplicationName='bower', CommandLine='install', CurrentDirectory='/Users/Openxlive/Desktop/helloWeb/WebApplication', Native error= Cannot find the specified file

  at System.Diagnostics.Process.Start_noshell (System.Diagnostics.ProcessStartInfo startInfo, System.Diagnostics.Process process) [0x00000] in <filename unknown>:

  at System.Diagnostics.Process.Start_common (System.Diagnostics.ProcessStartInfo startInfo, System.Diagnostics.Process process) [0x00000] in <filename unknown>:

  at System.Diagnostics.Process.Start (System.Diagnostics.ProcessStartInfo startInfo) [0x00000] in <filename unknown>:

  at Microsoft.Framework.PackageManager.ScriptExecutor.Execute (Microsoft.Framework.Runtime.Project project, System.String scriptName, System.Func` getVariable) [0x00000] in <filename unknown>:

  at Microsoft.Framework.PackageManager.RestoreCommand+<RestoreForProject>d__69.MoveNext () [0x00000] in <filename unknown>:

--- End of stack trace from previous location where exception was thrown ---

  at System.Runtime.ExceptionServices.ExceptionDispatchInfo.Throw () [0x00000] in <filename unknown>:

  at System.Runtime.CompilerServices.TaskAwaiter.ThrowForNonSuccess (System.Threading.Tasks.Task task) [0x00000] in <filename unknown>:

  at System.Runtime.CompilerServices.TaskAwaiter.HandleNonSuccessAndDebuggerNotification (System.Threading.Tasks.Task task) [0x00000] in <filename unknown>:

  at System.Runtime.CompilerServices.TaskAwaiter.ValidateEnd (System.Threading.Tasks.Task task) [0x00000] in <filename unknown>:

  at System.Runtime.CompilerServices.TaskAwaiter`[System.Boolean].GetResult () [0x00000] in <filename unknown>:

  at Microsoft.Framework.PackageManager.RestoreCommand+<>c__DisplayClass68_0+<<ExecuteCommand>b__0>d.MoveNext () [0x00000] in <filename unknown>:

--- End of stack trace from previous location where exception was thrown ---

  at System.Runtime.ExceptionServices.ExceptionDispatchInfo.Throw () [0x00000] in <filename unknown>:

  at System.Runtime.CompilerServices.TaskAwaiter.ThrowForNonSuccess (System.Threading.Tasks.Task task) [0x00000] in <filename unknown>:

  at System.Runtime.CompilerServices.TaskAwaiter.HandleNonSuccessAndDebuggerNotification (System.Threading.Tasks.Task task) [0x00000] in <filename unknown>:

  at System.Runtime.CompilerServices.TaskAwaiter.ValidateEnd (System.Threading.Tasks.Task task) [0x00000] in <filename unknown>:

  at System.Runtime.CompilerServices.TaskAwaiter.GetResult () [0x00000] in <filename unknown>:

  at Microsoft.Framework.PackageManager.RestoreCommand+<ExecuteCommand>d__68.MoveNext () [0x00000] in <filename unknown>:

----------

Restore failed

ApplicationName='bower', CommandLine='install', CurrentDirectory='/Users/Openxlive/Desktop/helloWeb/WebApplication', Native error= Cannot find the specified file
看样子是少了一个 bower 组件,重新安装一下吧。
sudo npm install -g bower
输出如下:
/usr/local/bin/bower -> /usr/local/lib/node_modules/bower/bin/bower

bower@1.4. /usr/local/lib/node_modules/bower

├── is-root@1.0.

├── junk@1.0.

├── stringify-object@1.0.

├── user-home@1.1.

├── abbrev@1.0.

├── chmodr@0.1.

├── rimraf@2.3.

├── archy@1.0.

├── opn@1.0.

├── bower-logger@0.2.

├── bower-endpoint-parser@0.2.

├── graceful-fs@3.0.

├── lockfile@1.0.

├── nopt@3.0.

├── lru-cache@2.6.

├── retry@0.6.

├── tmp@0.0.

├── q@1.4.

├── semver@2.3.

├── p-throttler@0.1. (q@0.9.)

├── fstream@1.0. (inherits@2.0.)

├── promptly@0.2. (read@1.0.)

├── which@1.1. (is-absolute@0.1.)

├── tar-fs@1.5. (pump@1.0., tar-stream@1.1.)

├── request-progress@0.3. (throttleit@0.0.)

├── glob@4.5. (inherits@2.0., once@1.3., inflight@1.0., minimatch@2.0.)

├── fstream-ignore@1.0. (inherits@2.0., minimatch@2.0.)

├── chalk@1.0. (ansi-styles@2.0., escape-string-regexp@1.0., supports-color@1.3., strip-ansi@2.0., has-ansi@1.0.)

├── github@0.2. (mime@1.3.)

├── mkdirp@0.5. (minimist@0.0.)

├── cardinal@0.4. (ansicolors@0.2., redeyed@0.4.)

├── mout@0.11.

├── bower-config@0.6. (osenv@0.0., graceful-fs@2.0., optimist@0.6., mout@0.9.)

├── handlebars@2.0. (optimist@0.3., uglify-js@2.3.)

├── decompress-zip@0.1. (mkpath@0.1., touch@0.0., readable-stream@1.1., binary@0.3.)

├── shell-quote@1.4. (array-filter@0.0., array-reduce@0.0., array-map@0.0., jsonify@0.0.)

├── bower-json@0.4. (graceful-fs@2.0., intersect@0.0., deep-extend@0.2.)

├── inquirer@0.8. (figures@1.3., ansi-regex@1.1., mute-stream@0.0., through@2.3., readline2@0.1., chalk@0.5., lodash@2.4., rx@2.5., cli-color@0.3.)

├── request@2.53. (caseless@0.9., json-stringify-safe@5.0., forever-agent@0.5., aws-sign2@0.5., stringstream@0.0., tunnel-agent@0.4., oauth-sign@0.6., isstream@0.1., node-uuid@1.4., qs@2.3., form-data@0.2., combined-stream@0.0., tough-cookie@1.1., bl@0.9., hawk@2.3., mime-types@2.0., http-signature@0.10.)

├── bower-registry-client@0.3. (graceful-fs@2.0., request-replay@0.2., rimraf@2.2., lru-cache@2.3., async@0.2., mkdirp@0.3., request@2.51.)

├── insight@0.5. (object-assign@2.0., async@0.9., lodash.debounce@3.0., tough-cookie@0.12., os-name@1.0.)

├── update-notifier@0.3. (is-npm@1.0., string-length@1.0., semver-diff@2.0., latest-version@1.0.)

└── configstore@0.3. (object-assign@2.0., xdg-basedir@1.0., osenv@0.1., uuid@2.0., js-yaml@3.3.)
把 grunt 也安装一下。
sudo npm install -g grunt-cli
输出。
/usr/local/bin/grunt -> /usr/local/lib/node_modules/grunt-cli/bin/grunt

grunt-cli@0.1. /usr/local/lib/node_modules/grunt-cli

├── resolve@0.3.

├── nopt@1.0. (abbrev@1.0.)

└── findup-sync@0.1. (lodash@2.4., glob@3.2.)
重新 restore ,终于成功了。
Restoring packages for /Users/Openxlive/Desktop/helloWeb/WebApplication/project.json

Writing lock file /Users/Openxlive/Desktop/helloWeb/WebApplication/project.lock.json

npm WARN package.json WebApplication@0.0. No description

npm WARN package.json WebApplication@0.0. No repository field.

npm WARN package.json WebApplication@0.0. No README data

Running "bower:install" (bower) task

>> Installed bower packages

>> Copied packages to /Users/Openxlive/Desktop/helloWeb/WebApplication/wwwroot/lib

Done, without errors.

Restore complete, 12380ms elapsed
运行网站。
dnx . kestrel
Started
打开浏览器,访问地址: http://localhost:5001
居然又报了一个错误。
An unhandled exception occurred while processing the request.

IOException: kqueue() FileSystemWatcher has reached the maximum nunmber of files to watch.

System.IO.KqueueMonitor.Add (System.String path, Boolean postEvents, System.Collections.Generic.List`& fds) [0x00000] in <filename unknown>, line
这是 Mono 的一个已知错误,需要一个设置。
export MONO_MANAGED_WATCHER=false
再次运行,终于可以看到网站了。
在Mac OS X Yosemite 10.10.3 中搭建第一个 ASP.NET 5 Web 项目的更多相关文章
- mac OS X Yosemite (10.10.5) 下 安装vim 7.4笔记
摘要 前言 需求与mac OS X 自带vim版本的冲突 默认Python解释器问题 并非Mac自带python的 homebrew 1. 前言 本文为自己作死折腾的问题记录 2. 需求与mac OS ...
- MAC OS X Yosemite的PyQt4配置记录
MAC OS X Yosemite的PyQt4配置记录 声明: 1)本报告由博客园bitpeach撰写,版权所有,免费转载,请注明出处,并请勿作商业用途. 2)若本文档内有侵权文字或图片等内容,请联系 ...
- Mac OS X Yosemite 10.10 配置 Apache+PHP 教程注意事项
刚更新到了 Mac OS X Yosemite 10.10,发现运行Apache出现了一些问题,修正一下! 教程基于 Mac OS X Mavericks 10.9.X,移步:Mac OS X Mav ...
- Vmare12(虚拟机)安装Mac OS X Yosemite 10.10
需要预备的软件如下: OSX10.10的系统镜像,下载好之后将后缀.cdr改成.iso,下载来源如下: 链接:http://pan.baidu.com/s/1sj4ri5R 密码:y86w un ...
- 苹果 Mac OS X Yosemite 10.10 新功能特性总结 - 扁平化、主打跨设备的无缝连通性
苹果在2014.06.03凌晨的 WWDC 2014 大会上正式发布了最新的 OS X Yosemite 桌面操作系统和 iOS 8 移动系统.虽然整场发布会的重心都在软件上,并没有硬件亮相,但软件上 ...
- VMware 9.0.1安装Mac OS X Mountain Lion 10.8.2
原地址:http://zengwu3915.blog.163.com/blog/static/278348972013117114742496/ 所需软件1.VMware Workstation Bu ...
- VMware9虚拟机安装MAC OS X Mountain Lion 10.8.2详细图文教程
VMware虚拟机安装Mac OS X Mountain Lion 10.8.2所需文件:1.Vmware 9.01版下载:点击进入2.Vmware 9.01版汉化文件:点击进入3.VMware Wo ...
- Mac OS X Yosemite安装盘U盘制作
从App Store下载Mac OS X Yosemite安装程序,下载后的安装文件保存在应用程序(/Applications)文件夹中.请注意,此时一定不要直接启动该程序安装 OS X Yosemi ...
- Mac OS X Yosemite & Arduino安装CH340 USB转串口驱动
新买的Arduino开发板 USB转串口使用了CH340芯片,在Mac OS X Yosemite上正常安装驱动后,在Arduino IDE的端口没发现相应的设备,使用以下方法后就能使用USB转串口调 ...
随机推荐
- 微信快速开发框架(九)-- V3.0发布,代码已更新至Github 新增微店功能
版本内容 1.修正了缺少对Event.View的支持 2.增加了用户UnionID 3.新增微信小店功能 4.多客服功能 5.单元测试 什么是UnionID 我们知道,每个用户针对一个微信公众账号都有 ...
- FPGA与simulink联合实时环路系列—开篇
FPGA与simulink联合实时环路系列—开篇 作为网络上第一个开源此技术,笔者迫不及待地想将此技术分享出来,希望大家多多支持.笔者从2011年接触FPGA以来,从各个方面使用FPGA,无论是控制. ...
- HTML5全局属性和事件详解
属性: HTML5属性能够赋给标签元素含义和语境,下面的全局属性可用于任何 HTML5 元素. 属性 描述 contenteditable 规定是否允许用户编辑内容. contextmenu 规定元素 ...
- android 自定义Style初探---ProgressBar
系统自带的ProgressBar太丑了,所以我决定自定义一个Style. 原来的Style <?xml version="1.0" encoding="utf-8& ...
- 转发 VS 重定向
转发:JSP容器将使用一个内部的方法来调用目标页面,新的页面继续处理同一个请求,而浏览器将不会知道这个过程.以前的request中存放的变量全部失效,并进入一个新的request作用域. 重定向:第一 ...
- WCF错误:由于目标计算机积极拒绝,无法连接
今天学习WCF时用C#重写测试例子时,发生错误:由于目标计算机积极拒绝,无法连接.找了N久,网上也没有找到实际的解决方法.查看netstat -an发现当自承载宿主运行时,没有侦听配置的端口.开始总以 ...
- zookeeper启动后没有相关进程
查看状态报错,报错,百度硕士nc问题,让看.out文件,但是这哥文件是空的,那就看log 016-12-15 14:08:19,355 [myid:] - INFO [main:QuorumPeer$ ...
- Linux 远程复制文件
Linux 远程复制文件 如果想把机器A上面的dir目录下面的所有文件复制到机器B的dir目录下,我们可以使用nc命令来完成 在机器A的dir目录下面执行: tar -czf - * | nc -l ...
- <<< tomcat启动报错StandardServer.await: create[8005]
启动tomcat的时候出现异常 严重: StandardServer.await: create[8005]: java.net.BindException: Address already in u ...
- tnt_esri.dat Arcgis8.1安装license
arcgis8.1授权文件内容,复制个txt重命名为tnt_esri.dat即可.注意替换yourcomputername为你的计算机名 SERVER yourcomputername ESRI_ ...