redux、react-redux、redux-thunk、redux-saga使用及dva对比
一、redux使用
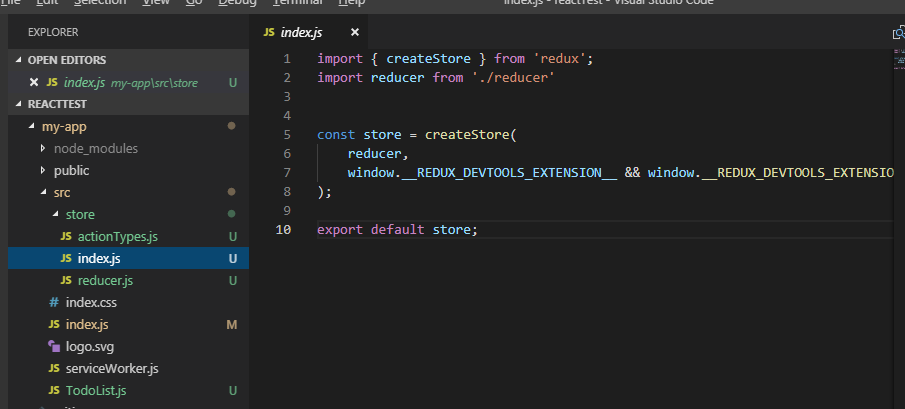
1、src下新建store文件夹,新建index.js作为store的输出文件
2、store文件夹下新建index.js文件
3、新建reducer.js ,actionTypes.js文件
4、组件引入store
import React, { Component } from 'react';

import { Input ,Button,List } from 'antd';

import store from './store';

import {CHANGE_INPUT_VALUE,ADD_TODO_ITEM,DELETE_TODO_ITEM} from  './store/actionTypes'

class TodoList extends Component {

    constructor(props) {

        super(props);

        this.state = store.getState();

        this.handleStoreChange = this.handleStoreChange.bind(this);

        this.handleBtnClick = this.handleBtnClick.bind(this);

        this.handleInputChange = this.handleInputChange.bind(this);

        store.subscribe(this.handleStoreChange)

    }

    handleInputChange(e) {

        const action = {

            type: CHANGE_INPUT_VALUE,

            value: e.target.value

        }

        store.dispatch(action)

    }

    handleBtnClick() {

        const action = {

            type: ADD_TODO_ITEM

        }

        store.dispatch(action)

    }

    render() {

        return (

            <div style={{marginTop:'20px',marginLeft:'15px'}}>

                <div>

                    <Input

                        value={this.state.inputValue}

                        placeholder="input"

                        style={{width:'300px'}}

                        onChange={this.handleInputChange}

                    />

                    <Button onClick={this.handleBtnClick} type="primary">Primary</Button>

                </div>

                <List

                    style={{marginTop:'15px',width:'300px'}}

                    bordered

                    dataSource={this.state.list}

                    renderItem={(item,index) => <List.Item onClick={this.handleItemDelete.bind(this,index)}>{item}</List.Item>}

                    />

            </div>

        )

    }

    handleStoreChange() {

        this.setState(store.getState())

    }

    handleItemDelete(index) {

        const action = {

            type: DELETE_TODO_ITEM,

            index

        }

        store.dispatch(action)

    }

}

export default TodoList;
5、使用redux-devtool
import { createStore } from 'redux';

import reducer from './reducer'

const store = createStore(

    reducer,

    window.__REDUX_DEVTOOLS_EXTENSION__ && window.__REDUX_DEVTOOLS_EXTENSION__()

);

export default store;
6、actionTypes.js代码如下
export const  CHANGE_INPUT_VALUE = 'change_input_value';

export const  ADD_TODO_ITEM = 'add_todo_item';

export const  DELETE_TODO_ITEM = 'delete_todo_item';
7、reducer.js代码如下
import {CHANGE_INPUT_VALUE,ADD_TODO_ITEM,DELETE_TODO_ITEM} from  './actionTypes'

const defaultState = {

    inputValue:'aaa',

    list:['1','2']

}

export default (state = defaultState,action) => {

    if(action.type === CHANGE_INPUT_VALUE) {

        const newState = JSON.parse(JSON.stringify(state));

        newState.inputValue = action.value;

        return newState;

    }

    if(action.type === ADD_TODO_ITEM) {

        const newState = JSON.parse(JSON.stringify(state));

        newState.list.push(newState.inputValue);

        newState.inputValue = '';

        return newState;

    }

    if(action.type === DELETE_TODO_ITEM) {

        const newState = JSON.parse(JSON.stringify(state));

        newState.list.splice(action.index,1);

        return newState;

    }

    return state;

}
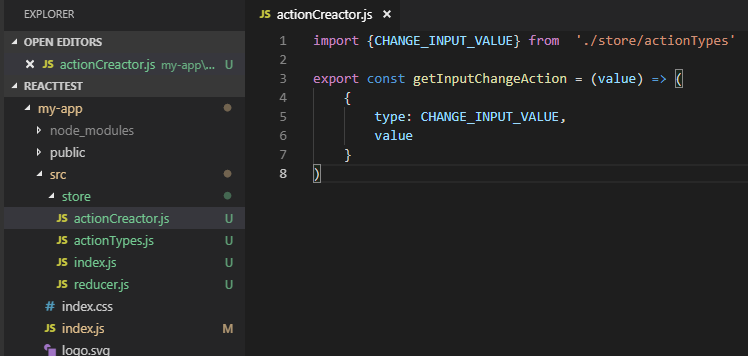
8、优化:使用actionCreactor.js来统一管理action
二、引入react-redux
1.在index.js里引入react-redux及store
import React from 'react';

import ReactDOM from 'react-dom';

import 'antd/dist/antd.css';

import './index.css';

import App from './TodoList';

import * as serviceWorker from './serviceWorker';

import store from './store'

import { Provider } from 'react-redux';

const ProviderApp = (

    <Provider store={store}>

        <App></App>

    </Provider>

)

ReactDOM.render(ProviderApp, document.getElementById('root'));

serviceWorker.unregister();
2.在组件里做connect
import React, { Component } from 'react';

import { Input ,Button,List } from 'antd';

import {CHANGE_INPUT_VALUE,ADD_TODO_ITEM} from  './store/actionTypes'

import {connect} from 'react-redux';

class TodoList extends Component {

    render() {

        const {handleInputChange,handleBtnClick} = this.props

        return (

            <div style={{marginTop:'20px',marginLeft:'15px'}}>

                <div>

                    <Input

                        value={this.props.inputValue}

                        placeholder="input"

                        style={{width:'300px'}}

                        onChange={handleInputChange}

                    />

                    <Button onClick={handleBtnClick} type="primary">Primary</Button>

                </div>

                <List

                    style={{marginTop:'15px',width:'300px'}}

                    bordered

                    dataSource={this.props.list}

                    renderItem={(item,index) => <List.Item>{item}</List.Item>}

                    />

            </div>

        )

    }

}

const mapStateToProps = (state) => {

    return {

        inputValue: state.inputValue,

        list : state.list

    }

}

const mapDispatchToProps = (dispatch) => {

    return {

        handleInputChange(e) {

            const action = {

                type: CHANGE_INPUT_VALUE,

                value: e.target.value

            }

            dispatch(action)

        },

        handleBtnClick() {

            const action = {

                type: ADD_TODO_ITEM

            }

            dispatch(action)

        },

    }

}

export default connect(mapStateToProps,mapDispatchToProps)(TodoList);
三、redux-thunk使用
1.中间件的概念
dispatch一个action之后,到达reducer之前,进行一些额外的操作,就需要用到middleware。你可以利用 Redux middleware 来进行日志记录、创建崩溃报告、调用异步接口或者路由等等。
换言之,中间件都是对store.dispatch()的增强。redux-thunk就是用来异步操作,比如接口请求等。
2.引入redux-thunk
import { applyMiddleware, createStore } from 'redux';

import thunk from 'redux-thunk';

 const store = createStore(

  reducers,

  applyMiddleware(thunk)

);
3.这样就可以再actionCreactor中创建一个带异步函数的方法了
export const getTodoList = () => {

    return () => {

        axios.get('./list').then((res)=>{

            const data = res.data;

            const action  = initListAction(data);

            StorageEvent.dispatch(action);

        })

    }

}
四、redux-saga使用
redux-saga是一个用于管理redux应用异步操作的中间件,redux-saga通过创建sagas将所有异步操作逻辑收集在一个地方集中处理,可以用来代替redux-thunk中间件。
1.在store.js里引入redux-saga
import { createStore, applyMiddleware } from 'redux'

import createSagaMiddleware from 'redux-saga'

import reducer from './reducers'

import mySaga from './sagas'

// create the saga middleware

const sagaMiddleware = createSagaMiddleware()

// mount it on the Store

const store = createStore(

  reducer,

  applyMiddleware(sagaMiddleware)

)

// then run the saga

sagaMiddleware.run(mySaga);

export default store;
2.新建 saga.js
import { call, put, takeEvery, takeLatest } from 'redux-saga/effects'

import Api from '...'

// worker Saga: will be fired on USER_FETCH_REQUESTED actions

function* fetchUser(action) {

   try {

      const user = yield call(Api.fetchUser, action.payload.userId);

      yield put({type: "USER_FETCH_SUCCEEDED", user: user});

   } catch (e) {

      yield put({type: "USER_FETCH_FAILED", message: e.message});

   }

}

function* mySaga() {

  yield takeEvery("USER_FETCH_REQUESTED", fetchUser);

}

export default mySaga;
五、dva对比
dva使用可以参考这个博客:https://www.cnblogs.com/superSmile/p/9972344.html
redux、react-redux、redux-thunk、redux-saga使用及dva对比的更多相关文章
- Redux React & Online Video Tutorials
Redux React & Online Video Tutorials https://scrimba.com/@xgqfrms https://scrimba.com/c/cEwvKNud ...
- 如何优雅地在React项目中使用Redux
前言 或许你当前的项目还没有到应用Redux的程度,但提前了解一下也没有坏处,本文不会安利大家使用Redux 概念 首先我们会用到哪些框架和工具呢? React UI框架 Redux 状态管理工具,与 ...
- 在 React Native 中使用 Redux 架构
前言 Redux 架构是 Flux 架构的一个变形,相对于 Flux,Redux 的复杂性相对较低,而且最为巧妙的是 React 应用可以看成由一个根组件连接着许多大大小小的组件的应用,Redux 也 ...
- React深入 - 手写redux api
简介: 手写实现redux基础api createStore( )和store相关方法 api回顾: createStore(reducer, [preloadedState], enhancer) ...
- 优雅的在React项目中使用Redux
概念 首先我们会用到哪些框架和工具呢? React UI框架 Redux 状态管理工具,与React没有任何关系,其他UI框架也可以使用Redux react-redux React插件,作用:方便在 ...
- RxJS + Redux + React = Amazing!(译一)
今天,我将Youtube上的<RxJS + Redux + React = Amazing!>翻译(+机译)了下来,以供国内的同学学习,英文听力好的同学可以直接看原版视频: https:/ ...
- RxJS + Redux + React = Amazing!(译二)
今天,我将Youtube上的<RxJS + Redux + React = Amazing!>的后半部分翻译(+机译)了下来,以供国内的同学学习,英文听力好的同学可以直接看原版视频: ht ...
- react+redux教程(二)redux的单一状态树完全替代了react的状态机?
上篇react+redux教程,我们讲解了官方计数器的代码实现,react+redux教程(一).我们发现我们没有用到react组件本身的state,而是通过props来导入数据和操作的. 我们知道r ...
- [Redux] React Todo List Example (Toggling a Todo)
/** * A reducer for a single todo * @param state * @param action * @returns {*} */ const todo = ( st ...
随机推荐
- 零元学Expression Blend 4 - Chapter 25 以Text相关功能就能简单做出具有设计感的登入画面
原文:零元学Expression Blend 4 - Chapter 25 以Text相关功能就能简单做出具有设计感的登入画面 本章将交大家如何运用Blend 4 内的Text相关功能做出有设计感的登 ...
- C#最简单的文本加密
#region AES加密 public static byte[] TextEncrypt(string content, string secretKey) { byte[] data = Enc ...
- 关于SetLocaleInfo()
原文:关于SetLocaleInfo() 此函数用于设置系统的一些本地信息, 非常有用. 比如日期格式为'yyyy/mm/dd'时, 稍微不注意,有些程序语句会报错. 以下资料网络收集: 1. Set ...
- JS浏览器滚轮事件实现横向滚动照片展
if(window.attachEvent){ ///*IE8注册事件*/ this.oc.attachEvent('onmousewheel',function(e) { //函数体 }); } e ...
- Microsoft .NET Framework 3.5 SP1安装错误 1603
ghost版安装时由于系统简化引起上述错误,你按下面方法试一下1.点击电脑桌面右下角的“开始”按钮,点击“运行”按钮,在弹出的节目输入框中输入“regedit”.2.在弹出来的“注册表编辑器”界面上, ...
- QT5.6,5.7,5.8的新特征以及展望(Qt5.7首次正式支持Qt3D,以前都是预览版)
https://wiki.qt.io/New_Features_in_Qt_5.6 (跨平台High-DPI,改进WebEngine到45,支持WIN 10,Canvas3D,3D) https:// ...
- Qt Creator调用VS2008生成的DLL注意事项 good
问题:生成的dll文件QT无法静态/隐式调用 分析:调用的lib库可能是msvc编译的,而我用Qt调用,Qt默认编译器是minGW,两种编译器生成的函数名不一样,所以调用的时候你要用哪个函数,编译结果 ...
- LINUX下QT FOR ARM开发环境搭建过程 (使用qt-x11-opensource-src-4.5.2.tar.gz进行编译)
在PC上,我们需要得到两个版本的Qt,分别是:Qt-4.5.2和QtEmbedded-4.5.2-arm.前者包括了Qt Designer等基本工具,用于在PC上对程序的开发调试,使我们能确保程序放到 ...
- Zookeeper详解-Cli(五)
ZooKeeper命令行界面(CLI)用于与ZooKeeper集合进行交互以进行开发.它有助于调试和解决不同的选项. 要执行ZooKeeper CLI操作,首先打开ZooKeeper服务器(“bin/ ...
- Django之forms组件进阶
Django Form表单组件 Form介绍 我们之前在HTML页面中利用form表单向后端提交数据时,都会写一些获取用户输入的标签并且用form标签把它们包起来. 与此同时我们在好多场景下都需要 ...