ubuntu14.04 LEMP(linux+nginx+mysql+php5)构建环境
Install LEMP (Linux, Nginx, MySQL and PHP) Stack on Ubuntu Linux 14.04 LTS
I'm a new Ubuntu Linux user. How do I install the LEMP stack on an Ubuntu Linux 14.04 LTS server using command line options to serve dynamic web apps?
As one of the most popular Linux distribution in the world, Ubuntu has released the latest version on April 17, 2014. The latest version is 14.04 with code name Trusty Tahr. Ubunt 14.04 is a LTS (Long Term Support) version. This means that Ubuntu 14.04 will be supported for the next 5 years from the release date. In this tutorial we will cover Nginx, MySQL and PHP installation on Ubuntu Linux v14.04.
| Tutorial details | |
|---|---|
| Difficulty | Easy (rss) |
| Root privileges | Yes |
| Requirements | Ubuntu |
| Estimated completion time | 15m |
What is new in Ubuntu 14.04 (Trusty Tahr) version?
You may see it on cyberciti.biz or visit the Ubuntu home page at ubuntu.com.
Nginx Installation
Nginx is one of the robust web server in Linux world. Nginx is a free, open source, high performance HTTP server and reverse proxy, as weell as an IMAP/POP3 proxy server. Now, we are going to install Nginx web server.
First, make sure system is upto date:
$ sudo apt-get update


$ sudo apt-get upgrade
#1 - Download and Install Nginx
The easiest way to download and install Nginx is using apt-get command. Here is the command:
$ sudo apt-get install nginx
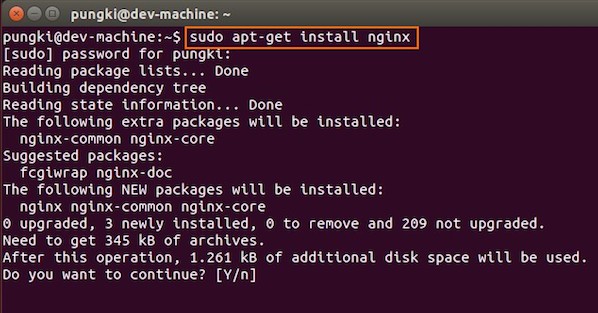
Fig.01: Download and Install Nginx on Ubuntu Linux
Just wait until installation is get done on the system.
#2 - Test Nginx
Once it get done, you can open your browser and type url http://localhost or http://your_ip_address to test it. If everything goes normal, you will see Nginx welcome page:
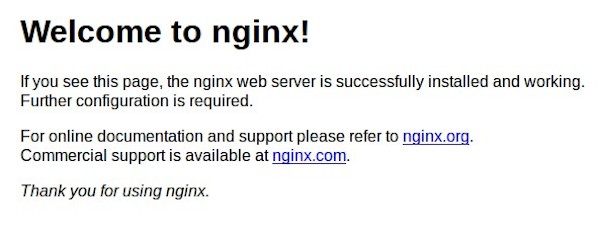
Fig.02: Welcome nginx page on Ubuntu Linux
MySQL Installation On Ubuntu
MySQL is one of the most powerful database management system in Linux world. Next, we are going to install it with PHP support.
#1 - Install MySQL and PHP support
Type the following command:
$ sudo apt-get install mysql-server php5-mysql
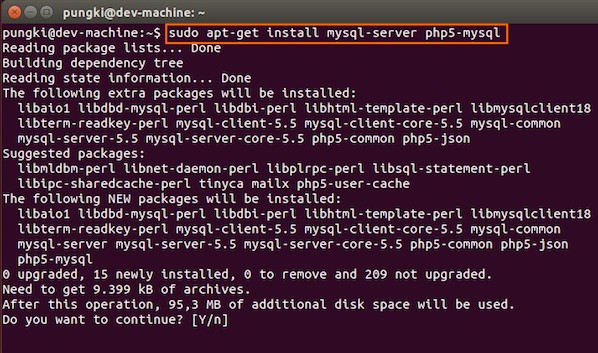
Fig.03: Ubuntu Linux Install MySQL to Manage Site Data with PHP
During the installation, MySQL will ask you to enter MySQL root password, other wise the installation will not continue. Type the password you want, then press OK to continue the installation.
#2 - Test MySQL
Once mysql installation finished, we can test it. Open your console and type the following command:
$ mysql -u root -p
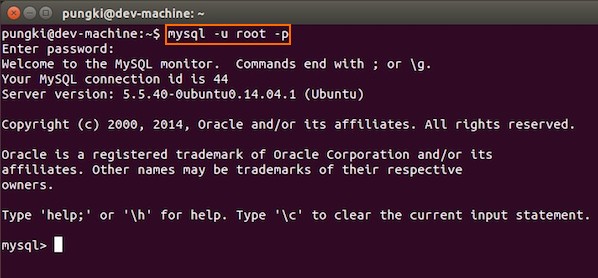
Fig.04: Ubuntu test Mysql installation
If you type your password correctly, the you will see the mysql prompt.
#3 - Securing access to MySQL
If we are going to use MySQL as a production database, we may want to secure it. MySQL provides a shell script to help us securing it. Just type the following command on your console:
$ sudo mysql_secure_installation
Here are the steps to do it.
1. Enter your root password
Enter your current root password to continue to the next step.
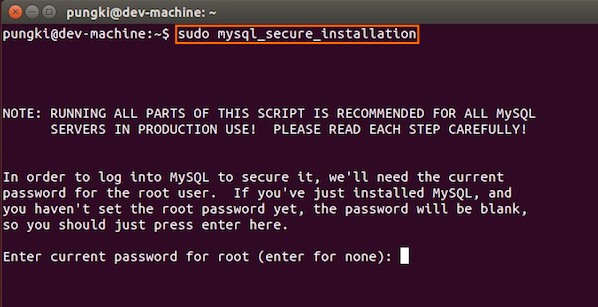
Fig.05: MySQL enter your root db password
2.Change the root password
If you want to change it, press Y. Otherwise, press N.
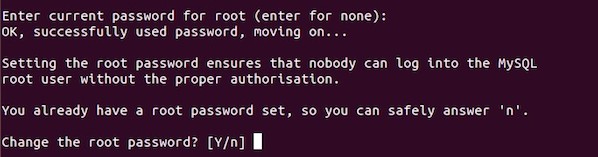
Fig.06: MySQL security
3.Remove anonymous user
It is recommended to remove anonymous user to mitigate risk who can log in into your database.

Fig.07: MySQL security
4.Disallow root login remotely
To make sure that no one remote your database as root from another machines, we need to disallow root login remotely.

Fig.08: MySQL security
5.Remove test database
Sometimes some MySQL installation will create a database named ëtestí for testing purpose. We can remove it if we donít use it.

Fig.09: MySQL security
6.Reload privilege tables
Then we need to reloading the privilege tables to ensure all changes made so far will take effect immediately.
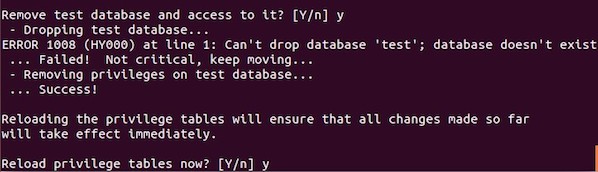
Fig.10: MySQL security
7.Done
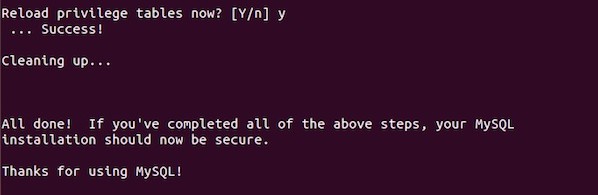
Fig.11: MySQL security
PHP Installation For Server Side Scripting
Since PHP is popular, a lot of websites is built using PHP language. As of January 2013, PHP was installed on more than 240 millions websites. Now we are going to install PHP on Ubuntu 14.04
#1 - Download and install PHP
As usual, we can download and install PHP using apt-get command. Just type the following command on your Ubuntu console or over the ssh based session:
$ sudo apt-get install php5-fpm
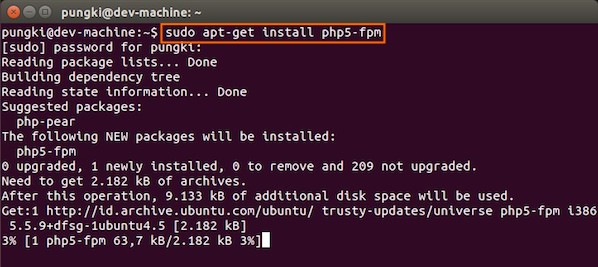
Fig.12: Install PHP for Server Side Processing on Ubuntu
And wait for the installation to complete.
Configure Nginx to work with PHP and MySQL Server on Ubuntu
Now we have all components installed. The next step is we need to configure Nginx with PHP and MySQL. Let's start to configure them.
#1 - Configure PHP5-FPM
PHP5-FPM configuration file is located at /etc/php5/fpm/php.ini. Open it with your text editor
$ sudo vi /etc/php5/fpm/php.ini
Change this parameter, from:
cgi.fix_pathinfo=1
to:
cgi.fix_pathinfo=0
Save and close the file and then restart php5-fpm service, type:
$ sudo service php5-fpm restart
#2 - Configure Nginx
Nginx configuration file is located at /etc/nginx/nginx.conf. But basically, we don't need to touch it. The configuration of nginx website is located in /etc/nginx/sites-available/default file.
Open it, and uncomment lines:
 location ~ \.php$ {

         fastcgi_split_path_info ^(.+\.php)(/.+)$;

 #       # NOTE: You should have "cgi.fix_pathinfo = 0;" in php.ini

 #

 #       # With php5-cgi alone:

 #        fastcgi_pass 127.0.0.1:9000;

 #       # With php5-fpm:

         fastcgi_pass unix:/var/run/php5-fpm.sock;

         fastcgi_index index.php;

         include fastcgi_params;

 }
Then restart the services.
$ sudo service nginx restart
Please make sure, on Ubuntu 14.04, we cannot use fastcgi_pass 127.0.0.1:9000. So make sure that the line is commented. Otherwise, on my machine, I got this error :
$ tail /var/log/nginx/error.log


2014/11/04 16:57:04 [emerg] 3216#0: "fastcgi_pass" directive is not allowed here in /etc/nginx/sites-enabled/default:59


2014/11/04 16:58:21 [emerg] 3256#0: "fastcgi_pass" directive is not allowed here in /etc/nginx/sites-enabled/default:59
On Ubuntu 14.04, I use the following line:
fastcgi_pass unix:/var/run/php5-fpm.sock
When I restart the Nginx and I still got the following error message:
2014/11/04 17:02:05 [emerg] 3295#0: "fastcgi_pass" directive is not allowed here in /etc/nginx/sites-enabled/default:61


2014/11/04 17:04:58 [emerg] 3410#0: "fastcgi_pass" directive is not allowed here in /etc/nginx/sites-enabled/default:61
Please make sure that you already uncomment this line:
location ~ \.php$ {
#3 - Configure MySQL
After the configuration section is done, now we need to test them to make sure that our configuration is working as required. On Ubuntu 14.04 the root document folder is located in /usr/share/nginx/html. So create a file called /usr/share/nginx/html/phpinfo.php with the following code:
- <span style="margin:0px; padding:0px; word-wrap:break-word; color:rgb(0,0,0)"><strong><?</strong></span> <a target="_blank" href="http://www.php.net/phpinfo" style="margin:0px; padding:0px; word-wrap:break-word; color:rgb(128,128,128); text-decoration:none"><span style="margin:0px; padding:0px; word-wrap:break-word; color:rgb(0,0,102)">phpinfo</span></a><span style="margin:0px; padding:0px; word-wrap:break-word; color:rgb(102,204,102)">(</span><span style="margin:0px; padding:0px; word-wrap:break-word; color:rgb(102,204,102)">)</span>; <span style="margin:0px; padding:0px; word-wrap:break-word; color:rgb(0,0,0)"><strong>?></strong></span>
After restarting PHP-FPM and Nginx, open the browser and browse to the php file, we got only a blank screen. No error message on the screen. No error message on PHP-FPM and Nginx log file.
![]()
Then we changed /usr/share/nginx/html/phpinfo.php file code on the root document of Nginx, as follows:
- <span style="margin:0px; padding:0px; word-wrap:break-word; color:rgb(0,0,0)"><strong><?php</strong></span> <a target="_blank" href="http://www.php.net/phpinfo" style="margin:0px; padding:0px; word-wrap:break-word; color:rgb(128,128,128); text-decoration:none"><span style="margin:0px; padding:0px; word-wrap:break-word; color:rgb(0,0,102)">phpinfo</span></a><span style="margin:0px; padding:0px; word-wrap:break-word; color:rgb(102,204,102)">(</span><span style="margin:0px; padding:0px; word-wrap:break-word; color:rgb(102,204,102)">)</span>; <span style="margin:0px; padding:0px; word-wrap:break-word; color:rgb(0,0,0)"><strong>?></strong></span>
And then open the browser again and type url http://your_ip_address/phpinfo.php
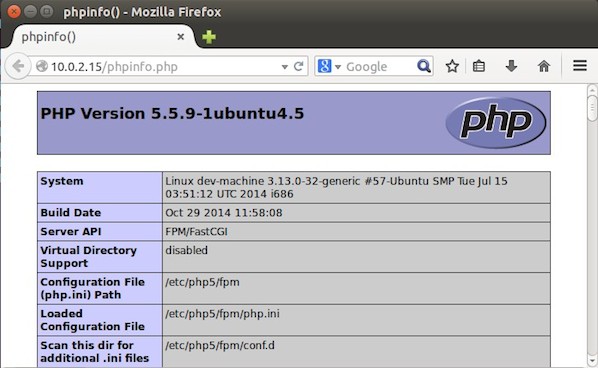
It seem that by default, we can not use short php-tag like this:
- <span style="margin:0px; padding:0px; word-wrap:break-word; color:rgb(0,0,0)"><strong><?</strong></span> ... your code ... <span style="margin:0px; padding:0px; word-wrap:break-word; color:rgb(0,0,0)"><strong>?></strong></span>
To enable short php tag, we need to change the value of short_open_tag parameter on php.ini file:
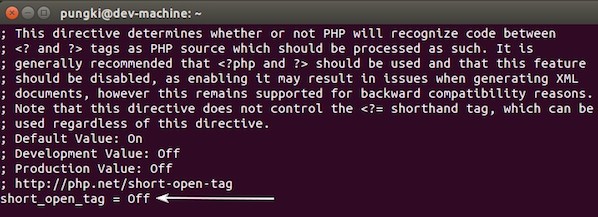
Change the value from Off to On. Then restart your php5-fpm :
sudo service php5-fpm restart
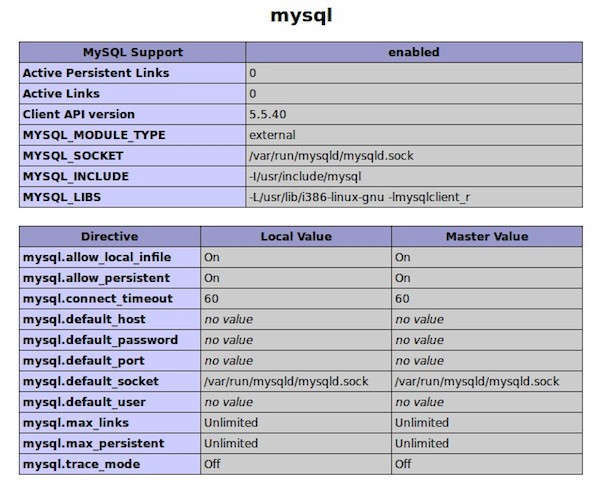
Then try again to test your phpinfo file. Next, we will see if the MySQL support is enabled or not. Scroll down the php configuration screen on your browser, if you see MySQL block there, then MySQL support already enabled.
You are now ready to use Nginx, PHP5 and MySQL on Ubuntu server. I hope this quick article help anyone who wish to install Linux, Nginx, PHP and MySQL on Ubuntu 14.04.
ubuntu14.04 LEMP(linux+nginx+mysql+php5)构建环境的更多相关文章
- LNMP(linux+nginx+mysql+php)服务器环境配置【转载】
本文转载自 园友David_Tang的博客,如有侵权请联系本人及时删除,原文地址: http://www.cnblogs.com/mchina/archive/2012/05/17/2507102.h ...
- LNMP(linux+nginx+mysql+php)服务器环境配置
一.简介 Nginx是俄罗斯人编写的十分轻量级的HTTP服务器,Nginx,它的发音为 “engine X”, 是一个高性能的HTTP和反向代理服务器,同时也是一个IMAP/POP3/SMTP 代理服 ...
- 5.LNMP(Linux + Nginx + MySQL + PHP)环境安装
1.安装Nginx: yum install yum-priorities -y wget http://nginx.org/packages/centos/7/noarch/RPMS/nginx-r ...
- CentOS下安装LNMP(LINUX+NGINX+MYSQL+PHP)环境
一.安装Nginx最新版 首先查看是否有安装源包 yum list nginx (或yum info nginx) 如果没有则 vi /etc/yum.repos.d/nginx.repo #添加如 ...
- linux+nginx+mysql+php
LNMP(linux+nginx+mysql+php)服务器环境配置 一.简介 Nginx是俄罗斯人编写的十分轻量级的HTTP服务器,Nginx,它的发音为 “engine X”, 是一个高性能的 ...
- How To Install Linux & Nginx & MySQL & PHP (LEMP) stack on Raspberry Pi 3,Raspberry Pi 3,LEMP,Nginx,PHP, LEMP (not LNMP)
1. How To Install Linux & Nginx & MySQL & PHP (LEMP) stack on Raspberry Pi 3 R ...
- Linux Debian 7部署LEMP(Linux+Nginx+MySQL+PHP)网站环境
我们在玩VPS搭建网站环境的时候,都经常看到所谓的LAMP.LNMP.LEMP,LAMP, 其中的A代表APECHE WEB驱动环境,LNMP中的N代表NGINX驱动环境,只不过海外的叫法NGINX ...
- 阿里云服务器部署php的laravel项目,在阿里云买ECS 搭建 Linux+Nginx+Mysql+PHP环境的
在阿里云买ECS的时候选择自己习惯的镜像系统,我一般都是使用Linux Ubuntu,所以,以下的配置都是在Ubuntu 14.04稳定支持版的环境中搭建Linux+Nginx+Mysql+PHP环境 ...
- LNMP(Linux+Nginx+Mysql+PHP---源码)环境搭建
LNMP(Linux+Nginx+Mysql+PHP(Perl)) Linux:[root@dep5 mysql]# cat /etc/issueRed Hat Enterprise Linux Se ...
随机推荐
- Salesforce LWC学习(三十) lwc superbadge项目实现
本篇参考:https://trailhead.salesforce.com/content/learn/superbadges/superbadge_lwc_specialist 我们做lwc的学习时 ...
- 《改善python程序的91个建议》读书笔记
推荐 <改善Pthon程序的91个建议>是从基本原则.惯用方法.语法.库.设计模式.内部机制.开发工具和性能优化8个方面深入探讨编写高质量python代码的技巧.禁忌和最佳实践. 读书就如 ...
- Demo分享丨看ModelArts与HiLens是如何让车自己跑起来的
摘要:基于HiLens Kit已经基本开发完成,可部署到HiLens Kit,模型的选择为基于DarkNet53的YOLOv3模型,权重为基于COCO2014训练的数据集,而车道线的检测是基于Open ...
- tail常用命令总结
tail命令作用: tail命令用途是依照要求将指定的文件的最后部分输出到标准设备,通常是终端,通俗讲来,就是把某个档案文件的最后几行显示到终端上,假设该档案有更新,tail会自己主动刷新,确保你看到 ...
- 入门oj 6451: The XOR Largest Pair之二
Description 今天小W用了1s不到的时候完成了这样一个题:在给定的N个整数 A_1,A_2,-,A_N中选出两个进行异或运算,得到的结果最大是多少?正当他志得意满时,L老师亮出了另一个题:给 ...
- 第一章节 BJROBOT ROS 网络配置及移动控制【ROS全开源阿克曼转向智能网联无人驾驶车】
版权声明:该教程版权归北京智能佳科技有限公司所有,未经公司授权禁止引用.发布.转载等,否则将追究其法律责任. 使用前说明:本使用文档说明略微简明,请结合指导视频进行操作会更容易理解!! 第一章节 BJ ...
- 认识PHP8
PHP 团队于2020年11月26日宣布 PHP 8 正式发布!这意味着将不会有 PHP 7.5 版本.PHP8 目前正处于非常活跃的开发阶段,所以在接下来的几个月里,情况可能会发生很大的变化.我也分 ...
- 软件工程与UML代码互改
这个作业属于哪个课程https://edu.cnblogs.com/campus/fzzcxy/2018SE1/ 这个作业的要求在哪里https://edu.cnblogs.com/campus/fz ...
- 浅谈connect,withRouter,history,useState,useEffect
1.connect in umi connect 可以链接不同的组件,从而在这个组件中使用其他组件的参数,常用于获取redux中存取的值. 2.withRouter in umi withRouter ...
- [C#] 老古董的 Microsoft Chart Controls 也可以进行数据预测
我要先声明,这篇文章介绍到的内容虽说不是不能用,但玩乐成分居多,大家看看就好,不要太认真. 1. Microsoft Chart Controls 中的 FinancialFormula 在上一篇文章 ...