App开发流程之图像处理工具类
先罗列一下工具类中提供的方法:
/**

 *  根据原始view和毛玻璃样式,获取模糊视图,并自动作为原view的subview(如果不需要作为子视图,自行调用removeFromSuperview)

 */

+ (UIView *)getBlurEffectViewWithOriginalView:(UIView *)originalView style:(ImageHelperBlurEffectStyle)style;

/**

 *  根据原始图像和毛玻璃样式,获取新图像

 */

+ (UIImage *)getBlurEffectImageWithOriginalImage:(UIImage *)originalImage style:(ImageHelperBlurEffectStyle)style;

/**

 *  根据原始图像,等比缩放系数,得到新图像

 */

+ (UIImage *)getImageWithOriginalImage:(UIImage *)originalImage scale:(CGFloat)scale;

/**

 *  根据原始图像,等比缩放最大尺寸,得到新图像

 */

+ (UIImage *)getImageWithOriginalImage:(UIImage *)originalImage scaleMaxSize:(CGSize)scaleMaxSize;

/**

 *  根据原始图像,等比缩放最大尺寸,得到新尺寸

 */

+ (CGSize)getImageSizeWithOriginalImage:(UIImage *)originalImage scaleMaxSize:(CGSize)scaleMaxSize;

/**

 *  根据原始图像,完全填充尺寸,得到新图像

 */

+ (UIImage *)getImageWithOriginalImage:(UIImage *)originalImage fillSize:(CGSize)fillSize;

/**

 *  根据原始图像,裁剪区域,得到新图像

 */

+ (UIImage *)getImageWithOriginalImage:(UIImage *)originalImage cutFrame:(CGRect)cutFrame;

/**

 *  根据颜色,得到单位尺寸的纯色新图像

 */

+ (UIImage *)getImageWithColor:(UIColor *)color;

/**

 *  根据view,得到快照

 */

+ (UIImage *)getSnapshotWithView:(UIView *)view;

/**

 *  全屏截图,但不包括状态栏

 */

+ (UIImage *)getFullScreenSnapshot;
说明:
1.获取毛玻璃效果(高斯模糊)图像
在iOS8以后,提供了类UIBlurEffect、UIVisualEffectView,可以方便的生成高斯模糊的视图,然后只需要作为目标视图的subview即可看到效果。在iOS7上需要自行实现,不过苹果在WWDC 2013上提供了一个UIImage+ImageEffects的分类,可以生成高斯模糊的图像。将分类加入项目Categories目录后,在ImageHelper中引用。因为UIBlurEffectStyle是在iOS8以后出现的,所以自定义了一个与其对应的枚举类型ImageHelperBlurEffectStyle,以便在iOS7中也可以正常使用。实现代码如下:
+ (UIView *)getBlurEffectViewWithOriginalView:(UIView *)originalView style:(ImageHelperBlurEffectStyle)style

{

    if (DeviceIOSVersionAbove()) {

        UIBlurEffectStyle blurStyle;

        switch (style) {

            case ImageHelperBlurEffectStyleExtraLight: {

                blurStyle = UIBlurEffectStyleExtraLight;

                break;

            }

            case ImageHelperBlurEffectStyleLight: {

                blurStyle = UIBlurEffectStyleLight;

                break;

            }

            case ImageHelperBlurEffectStyleDark: {

                blurStyle = UIBlurEffectStyleDark;

                break;

            }

        }

        UIBlurEffect *effect = [UIBlurEffect effectWithStyle:blurStyle];

        UIVisualEffectView *effectView = [[UIVisualEffectView alloc] initWithEffect:effect];

        effectView.frame = originalView.bounds;

        [originalView addSubview:effectView];

        return effectView;

    } else {

        UIImage *originalImage = [self getSnapshotWithView:originalView];

        UIImage *blurImage = [self getBlurEffectImageWithOriginalImage:originalImage style:style];

        UIImageView *effectView = [[UIImageView alloc] initWithFrame:originalView.bounds];

        [effectView setImage:blurImage];

        [originalView addSubview:effectView];

        return effectView;

    }

}

+ (UIImage *)getBlurEffectImageWithOriginalImage:(UIImage *)originalImage style:(ImageHelperBlurEffectStyle)style

{

    UIImage *newImage;

    switch (style) {

        case ImageHelperBlurEffectStyleExtraLight: {

            newImage = [originalImage applyExtraLightEffect];

            break;

        }

        case ImageHelperBlurEffectStyleLight: {

            newImage = [originalImage applyLightEffect];

            break;

        }

        case ImageHelperBlurEffectStyleDark: {

            newImage = [originalImage applyDarkEffect];

            break;

        }

    }

    return newImage;

}
2.提供了将图像等比例缩放的系列方法,以及裁剪的方法。基本思路就是在当前图像上下文中,指定绘制尺寸(即位图的尺寸),然后将相应图像绘制到指定位置,然后生成最终图像。例如裁剪图像示例代码:
+ (UIImage *)getImageWithOriginalImage:(UIImage *)originalImage cutFrame:(CGRect)cutFrame

{

    CGSize newSize = cutFrame.size;

    UIGraphicsBeginImageContext(newSize);

    [originalImage drawInRect:CGRectMake(-cutFrame.origin.x, -cutFrame.origin.y, cutFrame.size.width, cutFrame.size.height)];

    UIImage *newImage = UIGraphicsGetImageFromCurrentImageContext();

    UIGraphicsEndImageContext();

    return newImage;

}
3.截屏方法
需要用到方法:
UIGraphicsBeginImageContextWithOptions(CGSize size, BOOL opaque, CGFloat scale)。第一个参数仍然是指定图像上下文绘制尺寸;第二个参数指定是否不透明;第三个为等比例缩放系数,如果为0.0,表示与设备主屏幕的系数一致。
CALayer的renderInContext:(CGContextRef)ctx方法,将图层全部渲染到某个上下文中,建议为当前图像上下文。最后得到图像。
+ (UIImage *)getSnapshotWithView:(UIView *)view

{

    UIGraphicsBeginImageContextWithOptions(view.bounds.size, YES, 0.0);

    [view.layer renderInContext:UIGraphicsGetCurrentContext()];

    UIImage *newImage = UIGraphicsGetImageFromCurrentImageContext();

    UIGraphicsEndImageContext();

    return newImage;

}

+ (UIImage *)getFullScreenSnapshot

{

    return [self getSnapshotWithView:[UIApplication sharedApplication].keyWindow];

}
全屏截图时候,不包括状态栏,因为状态栏不在应用的window上,无法直接获取。但是可以通过私有Api拿到系统截屏图像,在此不展开探究。
测试内容
    UIImage *icon = LOADIMAGE(AppIcon);

    UIImage *testImg;

    testImg = [ImageHelper getImageWithOriginalImage:icon scale:];

    LOG(@"%@", testImg);

    testImg = [ImageHelper getImageWithOriginalImage:icon scaleMaxSize:CGSizeMake(, )];

    LOG(@"%@", testImg);

    testImg = [ImageHelper getImageWithOriginalImage:icon fillSize:CGSizeMake(, )];

    LOG(@"%@", testImg);

    testImg = [ImageHelper getImageWithOriginalImage:icon cutFrame:CGRectMake(, , , )];

    LOG(@"%@", testImg);

    testImg = [ImageHelper getImageWithColor:COLOR(, , )];

    LOG(@"%@", testImg);

    testImg = [ImageHelper getSnapshotWithView:self.view];

    LOG(@"%@", testImg);

    testImg = [ImageHelper getFullScreenSnapShot];

    LOG(@"%@", testImg);

    testImg = [ImageHelper getBlurEffectImageWithOriginalImage:testImg style:ImageHelperBlurEffectStyleDark];

    LOG(@"%@", testImg);

    UIView *coverView = [ImageHelper getBlurEffectViewWithOriginalView:[UIApplication sharedApplication].keyWindow style:ImageHelperBlurEffectStyleDark];
-- ::11.995 base[:] <UIImage: 0x7ffaf97e8d00>, {, }

-- ::11.997 base[:] <UIImage: 0x7ffaf97e9610>, {, }

-- ::11.999 base[:] <UIImage: 0x7ffaf950a330>, {, }

-- ::12.001 base[:] <UIImage: 0x7ffaf9463630>, {, }

-- ::12.002 base[:] <UIImage: 0x7ffaf950a330>, {, }

-- ::12.007 base[:] <UIImage: 0x7ffaf96004b0>, {, }

-- ::12.013 base[:] <UIImage: 0x7ffaf950a330>, {, }

-- ::12.040 base[:] <UIImage: 0x7ffaf9506f30>, {, }
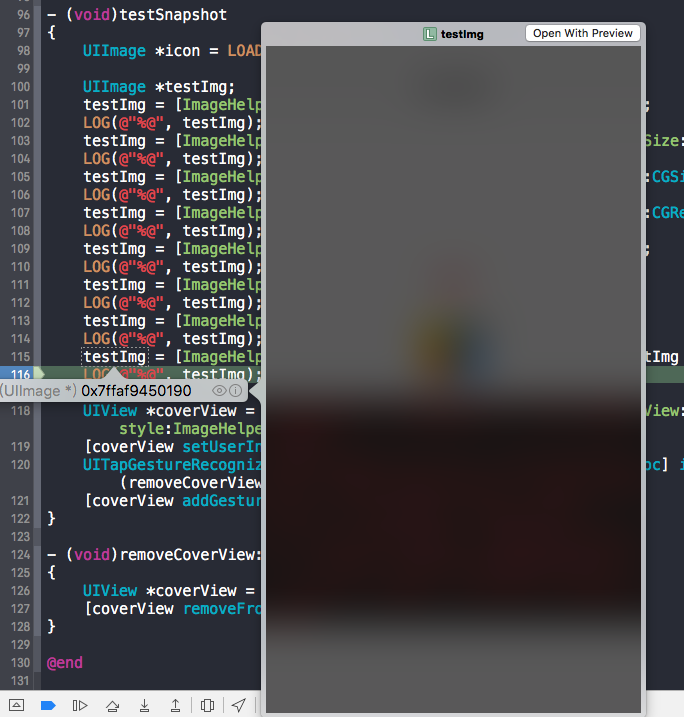
1.可以单步调试代码,查看testImg图像内容:
2.[ImageHelper getSnapshotWithView:self.view];这行代码中的self.view生成快照后,尺寸为{375, 667},但如果在viewDidLoad方法中加入代码:
self.edgesForExtendedLayout = UIRectEdgeNone;
重新输出的尺寸为{375, 603},因为edgesForExtendedLayout属性默认为UIRectEdgeAll,这在处理UI布局时候需要注意。后续记录的UIViewContoller父类也会提到。
base项目已更新:git@github.com:ALongWay/base.git
======================================
2016.09.14更新
1.修改了UIGraphicsBeginImageContext为UIGraphicsBeginImageContextWithOptions方法,设置不透明为NO,scale系数为0.0。即处理后为高质量的图像,包括原图alpha值。截屏方法区别在于没有包括透明度值
2.图像裁剪方法更新:
+ (UIImage *)getImageWithOriginalImage:(UIImage *)originalImage cutFrame:(CGRect)cutFrame

{

    CGImageRef cgimageRef = CGImageCreateWithImageInRect(originalImage.CGImage, cutFrame);

    UIImage *newImage = [UIImage imageWithCGImage:cgimageRef];

    CGImageRelease(cgimageRef);

    return newImage;

}
裁剪区域可以任意设定。之前的方法,当偏移区域加上裁剪区域没有覆盖原图全部区域时候,图像在上下文中绘制会失败。
3.增加了图像合并方法,可以合并任意数量的图像
+ (UIImage *)getImageMergedWithOriginalImageArray:(NSArray<ImageHelperMergeImage *> *)imageArray

{

    if (!imageArray

        || imageArray.count == ) {

        return nil;

    }

    ImageHelperMergeImage *firstMergeImage = [imageArray firstObject];

    //将第一张图作为背景放置

    CGRect firstMergeRect = firstMergeImage.mergeRect;

    firstMergeRect.origin = CGPointZero;

    firstMergeImage.mergeRect = firstMergeRect;

    UIGraphicsBeginImageContextWithOptions(firstMergeImage.mergeRect.size, NO, 0.0);

    for (ImageHelperMergeImage *mergeImage in imageArray) {

        [mergeImage.image drawInRect:mergeImage.mergeRect];

    }

    UIImage *newImage = UIGraphicsGetImageFromCurrentImageContext();

    UIGraphicsEndImageContext();

    return newImage;

}
定义了一个合并图像的对象ImageHelperMergeImage,有一个UIImage属性存储图像,和CGRect属性储存合并的位置。
===================================
2016.09.23更新
之前的全屏截图方法,受限于状态栏无法获取,导致截图无状态栏。
后来,打印了一下UIApplication的全部私有变量和方法,找到一个名为“_statusBar”的私有变量,类型名为UIStatusBar。
猜测为UIView的子类,使用getSnapshotWithView:方法,得到了一个(375,20)的黑条,将方法中代码:
UIGraphicsBeginImageContextWithOptions(view.bounds.size, YES, 0.0);
第二个参数修改为NO,得到了想要的状态栏截图:
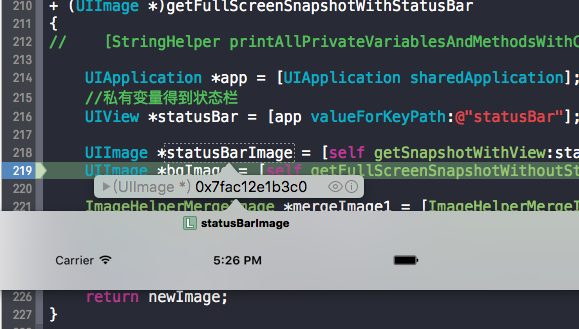
代码如下:
+ (UIImage *)getFullScreenSnapshotWithStatusBar

{

//    [StringHelper printAllPrivateVariablesAndMethodsWithClassName:@"UIApplication"];

    UIApplication *app = [UIApplication sharedApplication];

    //私有变量得到状态栏

    UIView *statusBar = [app valueForKeyPath:@"statusBar"];

    UIImage *statusBarImage = [self getSnapshotWithView:statusBar];

    UIImage *bgImage = [self getFullScreenSnapshotWithoutStatusBar];

    ImageHelperMergeImage *mergeImage1 = [ImageHelperMergeImage getImageHelperMergeImageWithImage:bgImage];

    ImageHelperMergeImage *mergeImage2 = [ImageHelperMergeImage getImageHelperMergeImageWithImage:statusBarImage];

    UIImage *newImage = [self getImageMergedWithOriginalImageArray:@[mergeImage1, mergeImage2]];

    return newImage;

}
base项目已更新:git@github.com:ALongWay/base.git
App开发流程之图像处理工具类的更多相关文章
- App开发流程之加密工具类
科技优家 2016-09-08 18:10 从这篇记录开始,记录的都算是干货了,都是一些编程日常的积累. 我建议先将基础的工具加入项目,后续的开发效率会呈指数增长.如果在专注功能开发过程中,才发现缺少 ...
- 20个可以帮你简化iOS app开发流程的工具
这里推荐20个可以帮你简化iOS app开发流程的工具.很多开发者都使用过这些工具,涉及原型和设计.编程.测试以及最后的营销,基本上涵盖了整个开发过程. 原型和设计 有了一个很好的创意后,你要做的不是 ...
- iOS开发之工具篇-20个可以帮你简化移动app开发流程的工具
如果想进入移动app开发这个领域,你总能从别的开发者或者网上或者书上找到各种各样的方法和工具,对于新手来说,还没有摸清门路就已经陷入迷茫了.这里推荐20个可以帮你简化app开发流程的工具.很多开发者都 ...
- JBPM4入门——4.封装流程管理的工具类(JbpmUtil)
本博文只是简要对JBPM4进行介绍,如需更详细内容请自行google 链接: JBPM入门系列文章: JBPM4入门——1.jbpm简要介绍 JBPM4入门——2.在eclipse中安装绘制jbpm流 ...
- 跨平台app开发(引擎)工具的选择【转】
跨平台app开发(引擎)工具的选择 1.html5执行速度慢,用户体验不好 2.原生应用开发,即ios和安卓分别开发,需要两种技术人员,后期代码维护困难,很难达到统一. 3.xamarin是一款c#的 ...
- app开发流程有哪些
app开发流程是需求方和供求方相互协调的过程,一般分为需求分析.功能设计.功能实现.项目测试.上线等几个步骤,下面我们就来一起看看ytkah团队进行app开发各个流程主要做哪些事情,让您对app开发设 ...
- Android开发之常用必备工具类图片bitmap转成字符串string与String字符串转换为bitmap图片格式
作者:程序员小冰,CSDN博客:http://blog.csdn.net/qq_21376985 QQ986945193 博客园主页:http://www.cnblogs.com/mcxiaobing ...
- 深度讲解智能硬件手机APP开发流程
常州做APP开发公司紫竹云科技分析,智能硬件产品的软件开发,除了APP和后台之外还有一个固件端的开发,由于固件是要运行产品上的,不过此时的硬件也是刚开始进行研发,所以是无法提供硬件来运行固件的.因此在 ...
- javaEE开发之导出excel工具类
web开发中,一个系统的普通需求也包含导出excel,一般採用POI做统计报表导出excel. 导出excel工具类: import java.io.FileOutputStream; import ...
随机推荐
- Netty5 + HTTPS 练习
本次以<Netty权威指南>第十章里面的例子为基础修改而来 HttpsFileServerHandler.java package com.jieli.nettytest.httpsfil ...
- ASP.NET连接Oracle数据库的步骤详解(转)
ASP.NET连接Oracle数据库的步骤详解 本文我们主要介绍了ASP.NET连接Oracle数据库的步骤及每个步骤需要进行的设置,希望能够对您有所帮助. 在用ASP.NET开发应用程序时, ...
- 实战:ASP.NET MVC中把Views下面的视图放到Views文件夹外
园子里写的文章的都是把控制器从传统的项目中的Controllers拿出来单独放,但很少几乎没有把视图从Views拿出去这样的文章,今天来写一个. 其实很简单!一步步解决问题就行了,下面记录如下,供需要 ...
- 通过Foxit和坚果云实现iPad和PC的pdf同步阅读(修改,笔记)
这是解决我之后上班地铁上看书问题的一个关键部分 一个手持电子设备,不大不小 一个方便做笔记的笔 一个方便做笔记的阅读器软件 方便快速地同步(只同步标记最好了) 在查看很多建议以及自己尝试之后,总结了这 ...
- HTML--Table布局
<DOCTYPE html> <html> <head> <meta http-equiv="Content-Type" Content= ...
- Google Code jam Qualification Round 2015 --- Problem A. Standing Ovation
Problem A. Standing Ovation Problem's Link: https://code.google.com/codejam/contest/6224486/dashbo ...
- 脊柱外科病人资料管理系统的界面设计分析(2)--JOA评分记录的实现
在上篇随笔<脊柱外科病人资料管理系统的界面设计分析>中介绍了一些常用的界面设计方面的内容,本篇继续上一篇,介绍脊柱外科病人管理系统的JOA评分记录模块的界面设计以及实现方面的内容. JOA ...
- JS获取屏幕高度
主要使用了document对象关于窗口的一些属性,这些属性的主要功能和用法如下. 要 得到窗口的尺寸,对于不同的浏览器,需要使用不同的属性和方法:若要检测窗口的真实尺寸,在netscape下需要使用w ...
- HTML5实现屏幕手势解锁(转载)
来源:https://github.com/lvming6816077/H5lockhttp://threejs.org/examples/http://www.inf.usi.ch/phd/wett ...
- LGLDatePickerView
这个是封装 系统的PickerView 使用也比较简单, gihub地址:https://github.com/liguoliangiOS/LGLDatePickerView.git 效果图 使用方法 ...