Android开发探秘之一:创建可以点击的Button
感觉到自己有必要学习下手机开发方面的知识,不论是为了以后的工作需求还是目前的公司项目。
当然,任何新东西的开始,必然伴随着第一个HelloWorld,Android学习也不例外。既然才开始,我就不做过多的描述了。
对于Android开发的IDE:ADT来说,打开的第一眼有点迷糊,不过看了网上各种目录结构的介绍,慢慢的就明白了,做这个实例,我们尤其需要关注两个地方,一个是src目录,一个就是res目录下的layout目录。src目录放置的是code-behind源码,而layout目录放置的则是xml前台配置文件。
既然我们要实现的功能是点击按钮,然后EditText中显示“Hello World!”。让我们先打开layout文件,拖放一个Button上去,然后拖放一个EditText上去,最后的xml文件结构如下:
<RelativeLayout xmlns:android="http://schemas.android.com/apk/res/android"

    xmlns:tools="http://schemas.android.com/tools"

    android:layout_width="match_parent"

    android:layout_height="match_parent"

    android:paddingBottom="@dimen/activity_vertical_margin"

    android:paddingLeft="@dimen/activity_horizontal_margin"

    android:paddingRight="@dimen/activity_horizontal_margin"

    android:paddingTop="@dimen/activity_vertical_margin"

    tools:context=".MainActivity" >

    <Button

        android:id="@+id/button1"

        android:layout_width="wrap_content"

        android:layout_height="wrap_content"

        android:clickable="true"

        android:text="Button" />

    <EditText

        android:id="@+id/editText1"

        android:layout_width="wrap_content"

        android:layout_height="wrap_content"

        android:layout_alignBaseline="@+id/button1"

        android:layout_alignBottom="@+id/button1"

        android:layout_toRightOf="@+id/button1"

        android:text="EditText" />

</RelativeLayout>
.csharpcode, .csharpcode pre
{
font-size: small;
color: black;
font-family: consolas, "Courier New", courier, monospace;
background-color: #ffffff;
/*white-space: pre;*/
}
.csharpcode pre { margin: 0em; }
.csharpcode .rem { color: #008000; }
.csharpcode .kwrd { color: #0000ff; }
.csharpcode .str { color: #006080; }
.csharpcode .op { color: #0000c0; }
.csharpcode .preproc { color: #cc6633; }
.csharpcode .asp { background-color: #ffff00; }
.csharpcode .html { color: #800000; }
.csharpcode .attr { color: #ff0000; }
.csharpcode .alt
{
background-color: #f4f4f4;
width: 100%;
margin: 0em;
}
.csharpcode .lnum { color: #606060; }
然后在后台代码文件中,我们需要引入两个命名空间:
import android.widget.Button;

import android.widget.EditText;
.csharpcode, .csharpcode pre
{
font-size: small;
color: black;
font-family: consolas, "Courier New", courier, monospace;
background-color: #ffffff;
/*white-space: pre;*/
}
.csharpcode pre { margin: 0em; }
.csharpcode .rem { color: #008000; }
.csharpcode .kwrd { color: #0000ff; }
.csharpcode .str { color: #006080; }
.csharpcode .op { color: #0000c0; }
.csharpcode .preproc { color: #cc6633; }
.csharpcode .asp { background-color: #ffff00; }
.csharpcode .html { color: #800000; }
.csharpcode .attr { color: #ff0000; }
.csharpcode .alt
{
background-color: #f4f4f4;
width: 100%;
margin: 0em;
}
.csharpcode .lnum { color: #606060; }
全部代码如下:
package com.example.helloworld;

import android.os.Bundle;

import android.app.Activity;

import android.view.Menu;

import android.view.View;

import android.widget.Button;

import android.widget.EditText;

public class MainActivity extends Activity {

    private Button myButton;

    private EditText myText;

    @Override

    protected void onCreate(Bundle savedInstanceState) {

        super.onCreate(savedInstanceState);

        setContentView(R.layout.activity_main);

        myButton = (Button)findViewById(R.id.button1);

        myText = (EditText)findViewById(R.id.editText1);

        myButton.setOnClickListener(new View.OnClickListener() {

            @Override

            public void onClick(View v) {

                // TODO Auto-generated method stub

                myText.setText("Hello World!");

            }

        });

    }

    @Override

    public boolean onCreateOptionsMenu(Menu menu) {

        // Inflate the menu; this adds items to the action bar if it is present.

        getMenuInflater().inflate(R.menu.main, menu);

        return true;

    }

}
然后点击运行按钮,在虚拟机界面中点击按钮,得到的结果如下图:
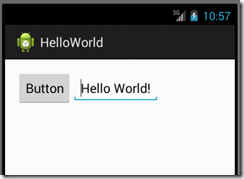
这节就到这里了,下面让我们继续探秘吧。
.csharpcode, .csharpcode pre
{
font-size: small;
color: black;
font-family: consolas, "Courier New", courier, monospace;
background-color: #ffffff;
/*white-space: pre;*/
}
.csharpcode pre { margin: 0em; }
.csharpcode .rem { color: #008000; }
.csharpcode .kwrd { color: #0000ff; }
.csharpcode .str { color: #006080; }
.csharpcode .op { color: #0000c0; }
.csharpcode .preproc { color: #cc6633; }
.csharpcode .asp { background-color: #ffff00; }
.csharpcode .html { color: #800000; }
.csharpcode .attr { color: #ff0000; }
.csharpcode .alt
{
background-color: #f4f4f4;
width: 100%;
margin: 0em;
}
.csharpcode .lnum { color: #606060; }
Android开发探秘之一:创建可以点击的Button的更多相关文章
- Android开发之去掉listview的点击效果,一行代码间接粗暴,解决你的问题。
作者:程序员小冰,CSDN博客:http://blog.csdn.net/qq_21376985 Android开发之去掉listview的点击效果,一行代码间接粗暴,解决你的问题. 当你在用list ...
- Android基础之用Eclipse搭建Android开发环境和创建第一个Android项目(Windows平台)
一.搭建Android开发环境 准备工作:下载Eclipse.JDK.Android SDK.ADT插件 下载地址:Eclipse:http://www.eclipse.org/downloads/ ...
- Android开发-API指南-创建 Content Provider
Creating a Content Provider 英文原文:http://developer.android.com/guide/topics/providers/content-provide ...
- Android开发,Eclipse创建aidl接口时,出错
Android开发中,当我们需要调用远程Service时,我们一般通过远程接口(RMI)来实现的,而Android的RMI需要AIDL(Android Interface Definition Lan ...
- Android开发——Accessibility机制实现模拟点击(微信自动抢红包实现)
1. 何为Accessibility机制 许多Android使用者因为各种情况导致他们要以不同的方式与手机交互.对于那些由于视力.听力或其它身体原因导致不能方便使用Android智能手机的用户,And ...
- Android开发 MMS支持 创建和编辑MMS
Composing and editing MMS在Android Mms 应用里面的具体实现形式,或数据结构是SlideshowModel,它是一个每个节点为SlideModel的 ArrayLis ...
- Android开发探秘之四:利用Intent实现数据传递
在Android开发过程中,很多人都熟悉Intent,这是个用于在多个View之间共享数据的类.本节主要是继承上节,通过点选ListView中的文本,把文本中的URL加载到一个新的页面上,并且打印出来 ...
- Android开发探秘之二:导入存在的项目及其注意事项
网上看到有jsoup写的例子,就下载下来进行了研究,但是发现不会导入,于是就百度一下,发现了方法:也就是依次点击“File”->“Import”->“General”->“Exist ...
- Android开发--Activity的创建
1.Activity概述 Activity是android四大基本组件之一.每一个activity文件对应一个界面,一个程序由多个activity组成. 2.Android工作目录
随机推荐
- iOS开发之UIImage等比缩放
iOS开发之UIImage等比缩放 评论功能真不错 评论开通后,果然有很多人吐槽.谢谢大家的支持和关爱,如果有做的不到的地方,还请海涵.毕竟我一个人的力量是有限的,我会尽自己最大的努力大家准备一些干货 ...
- python sorted
python列表排序 python字典排序 sorted List的元素可以是各种东西,字符串,字典,自己定义的类等. sorted函数用法如下: sorted(data, cmp=None, key ...
- Effective Java 53 Prefer interfaces to reflection
Disadvantage of reflection You lose all the benefits of compile-time type checking, including except ...
- LU分解,Javascript代码
///A 为矩阵,这里写成一维数组,如 [1],[1,2,3,4] function GetLU(a) { var n = a.length;//矩阵的总数据数目 var s = Math.sqrt( ...
- olcal数据库经典SQL语句大全
基于olacle自带的表 第一篇 -----1.列出至少有一个员工的所有部门. oracle 一些经典sql第一篇 --------1.列出至少有一个员工的所有部门.--------- SQL> ...
- 《SQL Server企业级平台管理实践》读书笔记——当我们的备份都已经损坏的时候该怎么办
作为数据库管理员最最痛苦的莫过于,当数据库宕机的时候需要找备份,但在这个时候突然发现备份文件也是坏的,这就意味着数据会丢失,为此可能会丢掉职位,饭碗不保,所以为此,我们一定要保证好备份的完整性,一般发 ...
- 线程本地存储TLS(Thread Local Storage)的原理和实现——分类和原理
原文链接地址:http://www.cppblog.com/Tim/archive/2012/07/04/181018.html 本文为线程本地存储TLS系列之分类和原理. 一.TLS简述和分类 我们 ...
- JFrame小练习1
1.文本域组件 public class TestJTextArea { public static void main(String[] args) { JFrame jf=new JFrame(& ...
- KEIL与ADS1.2共存
出现的问题: 原来电脑已经安装了ADS1.2.现在安装keil5编译一个32位新唐单片机程序时,出现了如下错误: Error: L6411E: No compatible library exists ...
- C++ new(3)
转载自:http://www.builder.com.cn/2008/0104/696370.shtml “new”是C++的一个关键字,同时也是操作符.关于new的话题非常多,因为它确实比较复杂,也 ...