Spring Boot 嵌入式 Tomcat 文件上传、url 映射虚拟路径
1、Java web 应用开发完成后如果是导入外置的 Tomcat 的 webapps 目录的话,那么上传的文件可以直接的放在应用的 web 目录下去就好了,浏览器可以很方便的进行访问。
2、Spring Boot 默认使用嵌入式 Tomcat ,将来打包成可执行 Jar 文件进行部署,显然打成 jar 包后,总不可能再将上传的文件放在 resources 目录下去了。
3、Spring Boot 于是提供了 url 地址匹配本地虚拟路径的功能:
1)上传文件到服务器,服务器将文件保存到了本地,如:E:\wmx\uploadFiles\222.png

2)用户访问应该是服务器地址,如:http://localhost:9393/fileServer/uploadFiles/222.png

3)于是通过配置资源映射,使 url 中的 /uploadFiles/ 映射到本地的 E:\wmx\uploadFiles\ 即可,E:\wmx\uploadFiles 则为虚拟路径。
文件上传
1、Java JDK 1.8 + Spring Boot 2.1.3 新建 web 项目,spring boot 版本不同,可能略有差异。


2、spring boot 的 web 组件中的 org.springframework:spring-web 已经集成了文件上传功能,无需再导入以前的 commons-io、以及 commons-fileupload 了,使用方式和之前的 commons-fileupload 完全一样。
pom.xml
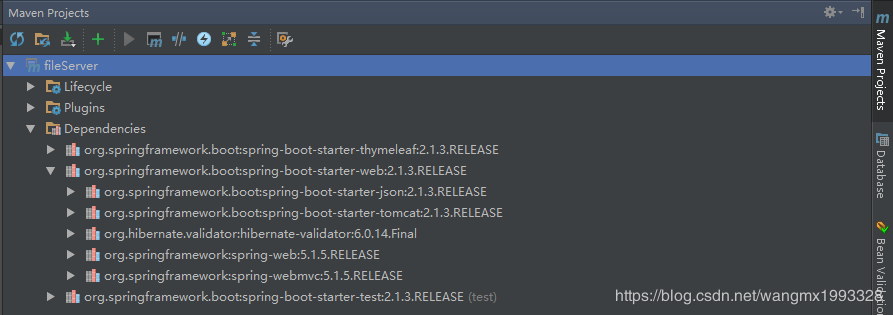
1、pom.xml 内容如下,为了页面写起来方便,使用了 Thymeleaf 模板引擎,java web 应用,自然需要导入 web 组件。
<?xml version="1.0" encoding="UTF-8"?>

<project xmlns="http://maven.apache.org/POM/4.0.0" xmlns:xsi="http://www.w3.org/2001/XMLSchema-instance"

         xsi:schemaLocation="http://maven.apache.org/POM/4.0.0 http://maven.apache.org/xsd/maven-4.0.0.xsd">

    <modelVersion>4.0.0</modelVersion>

    <parent>

        <groupId>org.springframework.boot</groupId>

        <artifactId>spring-boot-starter-parent</artifactId>

        <version>2.1.3.RELEASE</version>

        <relativePath/>

        <!-- lookup parent from repository -->

    </parent>

    <groupId>www.wmx.com</groupId>

    <artifactId>fileServer</artifactId>

    <version>0.0.1-SNAPSHOT</version>

    <name>fileServer</name>

    <description>Demo project for Spring Boot</description>

    <properties>

        <java.version>1.8</java.version>

    </properties>

    <dependencies>

        <!-- thymeleaf 模板引擎-->

        <dependency>

            <groupId>org.springframework.boot</groupId>

            <artifactId>spring-boot-starter-thymeleaf</artifactId>

        </dependency>

        <!-- web 组件-->

        <dependency>

            <groupId>org.springframework.boot</groupId>

            <artifactId>spring-boot-starter-web</artifactId>

        </dependency>

        <!-- spring boot 测试组件-->

        <dependency>

            <groupId>org.springframework.boot</groupId>

            <artifactId>spring-boot-starter-test</artifactId>

            <scope>test</scope>

        </dependency>

    </dependencies>

    <build>

        <plugins>

            <plugin>

                <groupId>org.springframework.boot</groupId>

                <artifactId>spring-boot-maven-plugin</artifactId>

            </plugin>

        </plugins>

    </build>

</project>
application.yml
1、应用全局配置文件内容如下:
#配置服务器

server:

  port: 9393 #服务器端口

  servlet:

    context-path: /fileServer #应用上下文路径

spring:

  servlet:

    multipart: #配置文件上传

      max-file-size: 1000MB #设置上传的单个文件最大值,单位可以是 MB、KB,默认为 1MB

      max-request-size: 1024MB #设置多文件上传时,单次内多个文件的总量的最大值,单位可以是 MB、KB,默认为 10 M

uploadFile:

  location: E:/wmx/uploadFiles #自定义上传文件本地保存路径
2、文件上传官网介绍:Handling Multipart File Uploads,除了配置上面的单个文件最大值已经单次上传总量以外,官网还提供了如下配置:
# MULTIPART (MultipartProperties)

spring.servlet.multipart.enabled=true # Whether to enable support of multipart uploads.

spring.servlet.multipart.file-size-threshold=0B # Threshold after which files are written to disk.

spring.servlet.multipart.location= # Intermediate location of uploaded files.

spring.servlet.multipart.max-file-size=1MB # Max file size.

spring.servlet.multipart.max-request-size=10MB # Max request size.

spring.servlet.multipart.resolve-lazily=false # Whether to resolve the multipart request lazily at the time of file or parameter access.
3、上传文件存放的目录,不应该写死在代码中,所以上面提供了在配置文件中配置 uploadFile.location 属性,将来类中使用 @Value 取值即可。
UploadFileController
1、文件上传后台控制台层代码如下,后期实现 虚拟路径映射本地路径会修改。
import org.springframework.beans.factory.annotation.Value;

import org.springframework.stereotype.Controller;

import org.springframework.web.bind.annotation.PostMapping;

import org.springframework.web.bind.annotation.ResponseBody;

import org.springframework.web.multipart.MultipartFile;

import javax.servlet.http.HttpServletRequest;

import java.io.File;

import java.io.IOException;

/**

 * Created by Administrator on 2019/3/17 0017.

 */

@Controller

public class UploadFileController {

    @Value("${uploadFile.location}")

    private String uploadFileLocation;//上传文件保存的本地目录,使用@Value获取全局配置文件中配置的属性值

    /**

     * 文件上传,因为只是演示,所以使用 @ResponseBody 将结果直接返回给页面

     *

     * @param multipartFile

     * @param request

     * @return

     * @throws IOException

     */

    @PostMapping("uploadFile")

    @ResponseBody

    public String uploadFile(MultipartFile multipartFile, HttpServletRequest request) throws IOException {

        if (multipartFile == null || multipartFile.isEmpty()) {

            return "上传文件为空...";

        }

        //basePath拼接完成后,形如:http://192.168.1.20:8080/fileServer

        String basePath = request.getScheme() + "://" + request.getServerName() + ":" + request.getServerPort() + request.getContextPath();

        System.out.println("basePath=" + basePath);

        String fileName = multipartFile.getOriginalFilename();

        File saveFile = new File(uploadFileLocation, fileName);

        System.out.println("文件保存成功:" + saveFile.getPath());

        multipartFile.transferTo(saveFile);//文件保存

        return saveFile.getPath().toString();

    }

}
index.html
1、前端文件上传 form 表单如下:
<!DOCTYPE html>

<html>

<head lang="en">

    <meta charset="UTF-8">

    <title>文件服务器</title>

</head>

<body>

<form id="uploadForm" method="post" action="http://localhost:9393/fileServer/uploadFile" enctype="multipart/form-data">

    <input type="file" name="multipartFile" style="font-size: 20px"/><br>

    <input type="submit" id="uploadButton" value="上传" style="font-size: 30px">

</form>

</body>

</html>
上传测试
url 映射虚拟路径
1、使用资源映射虚拟路径很简单,使用 WebMvcConfigurer 扩展配置即可,不熟悉的可以参考《Web 项目 tiger 之3 WebMvcConfigurer 实现登录与拦截、过滤静态资源》中的“自定义资源映射”部分。
application.yml
1、首先修改一下 application.yml 文件:
#配置服务器

server:

  port: 9393 #服务器端口

  servlet:

    context-path: /fileServer #应用上下文路径

spring:

  servlet:

    multipart: #配置文件上传

      max-file-size: 1000MB #设置上传的单个文件最大值,单位可以是 MB、KB,默认为 1MB

      max-request-size: 1024MB #设置多文件上传时,单次内多个文件的总量的最大值,单位可以是 MB、KB,默认为 10 M

uploadFile:

  resourceHandler: /uploadFiles/**   #请求 url 中的资源映射

  location: E:/wmx/uploadFiles/ #自定义上传文件本地保存路径
WebMvcConfigurer
1、再扩展 webMvc 配置,设置资源映射:

import org.springframework.beans.factory.annotation.Value;

import org.springframework.context.annotation.Configuration;

import org.springframework.web.servlet.config.annotation.ResourceHandlerRegistry;

import org.springframework.web.servlet.config.annotation.WebMvcConfigurer;

/**

 * WebMvc 扩展配置类,应用一启动,本类就会执行

 * Created by Administrator on 2019/3/17 0017.

 */

@Configuration

public class MyWebMvcConfigurer implements WebMvcConfigurer {

    @Value("${uploadFile.resourceHandler}")

    private String resourceHandler;//请求 url 中的资源映射,不推荐写死在代码中,最好提供可配置,如 /uploadFiles/**

    @Value("${uploadFile.location}")

    private String location;//上传文件保存的本地目录,使用@Value获取全局配置文件中配置的属性值,如 E:/wmx/uploadFiles/

    /**

     * 配置静态资源映射

     *

     * @param registry

     */

    @Override

    public void addResourceHandlers(ResourceHandlerRegistry registry) {

        //就是说 url 中出现 resourceHandler 匹配时,则映射到 location 中去,location 相当于虚拟路径

        //映射本地文件时,开头必须是 file:/// 开头,表示协议

        registry.addResourceHandler(resourceHandler).addResourceLocations("file:///" + location);

    }

}
UploadFileController
1、改写一下控制器。特别提醒一句:实际应用中,文件上传之后,应该往数据库插入记录,如 url 相对路径: uploadFiles/222.png,下面因为只是作为演示,文件上传之后,直接返回了浏览器访问的 url 路径了,并没有保存数据。
import org.springframework.beans.factory.annotation.Value;

import org.springframework.stereotype.Controller;

import org.springframework.web.bind.annotation.PostMapping;

import org.springframework.web.bind.annotation.ResponseBody;

import org.springframework.web.multipart.MultipartFile;

import javax.servlet.http.HttpServletRequest;

import java.io.File;

import java.io.IOException;

/**

 * Created by Administrator on 2019/3/17 0017.

 */

@Controller

public class UploadFileController {

    @Value("${uploadFile.resourceHandler}")

    private String resourceHandler;//请求 url 中的资源映射,不推荐写死在代码中,最好提供可配置,如 /uploadFiles/**

    @Value("${uploadFile.location}")

    private String uploadFileLocation;//上传文件保存的本地目录,使用@Value获取全局配置文件中配置的属性值,如 E:/wmx/uploadFiles/

    /**

     * 文件上传,因为只是演示,所以使用 @ResponseBody 将结果直接返回给页面

     *

     * @param multipartFile

     * @param request

     * @return

     * @throws IOException

     */

    @PostMapping("uploadFile")

    @ResponseBody

    public String uploadFile(MultipartFile multipartFile, HttpServletRequest request) throws IOException {

        if (multipartFile == null || multipartFile.isEmpty()) {

            return "上传文件为空...";

        }

        //basePath拼接完成后,形如:http://192.168.1.20:8080/fileServer

        String basePath = request.getScheme() + "://" + request.getServerName() + ":" + request.getServerPort() + request.getContextPath();

        String fileName = multipartFile.getOriginalFilename();

        String fileServerPath = basePath + resourceHandler.substring(0, resourceHandler.lastIndexOf("/") + 1) + fileName;

        System.out.println("文件访问路径:" + fileServerPath);

        File saveFile = new File(uploadFileLocation, fileName);

        multipartFile.transferTo(saveFile);//文件保存

        System.out.println("文件保存路径:" + saveFile.getPath());

        return "<a href='" + fileServerPath + "'>" + fileServerPath + "</a>";

    }

}
Spring Boot 嵌入式 Tomcat 文件上传、url 映射虚拟路径的更多相关文章
- Spring Boot入门——多文件上传大小超限问题解决
多文件上传中遇到上传文件大小的问题 org.apache.tomcat.util.http.fileupload.FileUploadBase$FileSizeLimitExceededExcepti ...
- spring boot:实现图片文件上传并生成缩略图(spring boot 2.3.1)
一,为什么要给图片生成缩略图? 1, 用户上传的原始图片如果太大,不能直接展示在网站页面上, 因为不但流费server的流量,而且用户打开时非常费时间, 所以要生成缩略图. 2,服务端管理图片要注意的 ...
- Spring Boot + thymeleaf 实现文件上传下载
参考博客:https://juejin.im/post/5a326dcaf265da431048685e 技术选型:spring boot 2.1.1+thymeleaf+maven 码云地址:htt ...
- 对象存储服务MinIO安装部署分布式及Spring Boot项目实现文件上传下载
目录 一.MinIO快速入门 1. MinIO简介 2. CentOS7更换成阿里云镜像 3. 安装 3.1 下载 3.2 运行测试 4. 配置脚本执行文件 4.1 创建配置执行文件 4.2 执行 二 ...
- 利用spring的MultipartFile实现文件上传【原】
利用spring的MultipartFile实现文件上传 主要依赖jar包 spring-web-3.0.6.RELEASE.jar 用到 (org.springframework.web.multi ...
- Spring中MultipartHttpServletRequest实现文件上传
Spring中MultipartHttpServletRequest实现文件上传 转贴自:http://my.oschina.net/nyniuch/blog/185266 实现图片上传 用户必须能 ...
- 关于我使用spring mvc框架做文件上传时遇到的问题
非常感谢作者 原文:https://blog.csdn.net/lingirl/article/details/1714806 昨天尝试着用spring mvc框架做文件上传,犯了挺多不该犯的毛病问题 ...
- Spring MVC-从零开始-文件上传(未完待续)
Spring MVC-从零开始-文件上传(未完待续)
- 解决使用Spring Boot、Multipartfile实现上传提示无法找到文件的问题
前言 SpringBoot使用MultiPartFile接收来自表单的file文件,然后进行服务器的上传是一个项目最基本的需求,我以前的项目都是基于SpringMVC框架搭建的,所以在使用Spring ...
随机推荐
- element表格的滚动条在合计上边
默认滚动条是在下边的,不好看,这里改一下 修改样式.完美解决: .el-table { overflow-x: auto; } .el-table__header-wrapper, .el-table ...
- sqli-libs笔记Page-1(Basic Challenges)
0X00:前言 sqli-libs是一个学习SQL注入的开源平台,共有75中不同类型的注入.源码可到github上搜索sqli-libs找到 0X01:Page-1基础挑战 0X02:每一关的payl ...
- IIS 6.0 cmd iisapp -a C:\WINDOWS\system32\iisapp.vbs不存在
心血来潮看下iis cmd>iisapp -a "噔" 弹出 windows脚本宿主错误:无法找到脚本文件 C:\WINDOWS\system32\iisapp.vbs 晕 ...
- Linux shell case条件判断及位置变量
case语句使用于需要进行多重分支的应用情况 case分支判断结构 语法: case 变量名称 in value1) statement statemen ...
- 浅析Volatile关键字
浅析Volatile关键字 在java中线程并发中,线程之间通信方式分为两种:共享内存和消息传递.共享内存指的是多个线程之间共享内存的属性状态:消息传递指的是线程之间发送信息来通信.在介绍volati ...
- JavaScript/JQuery自执行函数
JavaScript中任何库与框架设计的第一个要点就是解决命名空间与变量污染的问题.jQuery就是利用了JavaScript函数作用域的特性,采用自执行函数包裹了自身的方法来解决这个问题.从jQue ...
- 2-剑指offer: 最小的K个数
题目描述 输入n个整数,找出其中最小的K个数.例如输入4,5,1,6,2,7,3,8这8个数字,则最小的4个数字是1,2,3,4,. 代码: // 这种topN问题比较常见的是使用堆来解决,最小的k个 ...
- vs2008 vc90.pdb 不是创建此预编译头时使用的 pdb 文件,请重新创建预编译头
解决方案: 找到项目中的stdafx.cpp,右键属性,找到C/C++->预编译头, 设置为创建预编译头, 重新生成
- JMeter3.0及JMeter5.1开发WebService接口脚本(soap取样器 & http取样器)
由于5.1没有soap取样器了,所以用3.0演示. WebService接口信息 WebService接口地址:http://www.webxml.com.cn/WebServices/Weather ...
- Python input() 函数
Python3.x 中 input() 函数接受一个标准输入数据,返回为 string 类型. Python2.x 中 input() 相等于 eval(raw_input(prompt)) ,用来获 ...
