ios学习-控制按钮图片的走动和变换
一.项目要求:制作一个界面,通过点击按钮来控制头像(按钮)向上,向下,向左,向右移动,可以左旋转,右旋转,以及放大和缩小。


3.点击main.storyboard,在右下角拖9个Button控件到storyboard的相应位置

四.代码:
ViewController.h文件:
//
//  ViewController.h
//  控制按钮
//
//  Created by yongjianyu on 15/11/25.
//  Copyright (c) 2015年 yongjianyu. All rights reserved.
//

#import <UIKit/UIKit.h>

@interface ViewController : UIViewController
@property (weak, nonatomic) IBOutlet UIButton *btn;

- (IBAction)up:(id)sender;
- (IBAction)down:(id)sender;
- (IBAction)left:(id)sender;
- (IBAction)right:(id)sender;

- (IBAction)leftRotate:(id)sender;
- (IBAction)rightRotate:(id)sender;

- (IBAction)bigger:(id)sender;
- (IBAction)smaller:(id)sender;

@end
ViewController.m文件:
//
//  ViewController.m
//  控制按钮
//
//  Created by yongjianyu on 15/11/25.
//  Copyright (c) 2015年 yongjianyu. All rights reserved.
//

#import "ViewController.h"

@interface ViewController ()

@end

@implementation ViewController

- (void)viewDidLoad {
    [super viewDidLoad];
    // Do any additional setup after loading the view, typically from a nib.
}

- (void)didReceiveMemoryWarning {
    [super didReceiveMemoryWarning];
    // Dispose of any resources that can be recreated.
}

//向上移动按钮
- (IBAction)up:(id)sender {
    //动画(头部)
    [UIView beginAnimations:nil context:nil];
    //设置动画的时间
    [UIView setAnimationDuration:1.0];
    //OC语法规定,不允许直接修改某个对象中结构体属性的成员
    //先取出frame的值,赋值给中间变量
    CGRect tempFrame = _btn.frame;
    //修改y值
    tempFrame.origin.y -= 50;
    //重新给按钮的frame赋值
    _btn.frame = tempFrame;
    //动画(尾部)
    [UIView commitAnimations];
}
//向下移动按钮
- (IBAction)down:(id)sender {
    [UIView beginAnimations:nil context:nil];
    //设置动画持续时间为1.0秒
    [UIView setAnimationDuration:1.0];
    CGRect tempFrame = _btn.frame;
    tempFrame.origin.y += 50;
    _btn.frame = tempFrame;
    [UIView commitAnimations];

}
//向左移动按钮
- (IBAction)left:(id)sender {
    [UIView beginAnimations:nil context:nil];
    [UIView setAnimationDuration:1.0];
    CGRect tempFrame = _btn.frame;
    tempFrame.origin.x -= 50;
    _btn.frame = tempFrame;
    [UIView commitAnimations];

}
//向右移动按钮
- (IBAction)right:(id)sender {
    [UIView beginAnimations:nil context:nil];
    [UIView setAnimationDuration:1.0];
    CGRect tempFrame = _btn.frame;
    tempFrame.origin.x += 50;
    _btn.frame = tempFrame;
    [UIView commitAnimations];

}

//向左旋转按钮
- (IBAction)leftRotate:(id)sender {
    [UIView beginAnimations:nil context:nil];
    [UIView setAnimationDuration:1.0];
    //向左旋转PI/4
    _btn.transform = CGAffineTransformRotate(_btn.transform, - M_PI_4);
    [UIView commitAnimations];
}

//向右旋转按钮
- (IBAction)rightRotate:(id)sender {
    [UIView beginAnimations:nil context:nil];
    [UIView setAnimationDuration:1.0];
    _btn.transform = CGAffineTransformRotate(_btn.transform, + M_PI_4);
    [UIView commitAnimations];
}

//边长放大到原来的1.2倍
- (IBAction)bigger:(id)sender {
    [UIView beginAnimations:nil context:nil];
    [UIView setAnimationDuration:1.0];
    _btn.transform = CGAffineTransformScale(_btn.transform, 1.2, 1.2);
    [UIView commitAnimations];
}

//边长变为原来的0.8
- (IBAction)smaller:(id)sender {
    [UIView beginAnimations:nil context:nil];
    [UIView setAnimationDuration:1.0];
    _btn.transform = CGAffineTransformScale(_btn.transform, 0.8, 0.8);
    [UIView commitAnimations];
}

@end
五.代码重构
ViewController.h文件
#import <UIKit/UIKit.h>

@interface ViewController : UIViewController

- (IBAction)reset:(id)sender;

@property (weak, nonatomic) IBOutlet UIButton *btn;
- (IBAction)run:(id)sender;

- (IBAction)rotate:(id)sender;

- (IBAction)scale:(id)sender;
@end
ViewController.m文件
//
//  ViewController.m
//  Button
//
//  Created by yongjianyu on 15/11/22.
//  Copyright (c) 2015年 yongjianyu. All rights reserved.
//

#import "ViewController.h"
#define KDelta 50

@interface ViewController ()

@end

@implementation ViewController

- (void)viewDidLoad {
    [super viewDidLoad];
    // Do any additional setup after loading the view, typically from a nib.
}

- (void)didReceiveMemoryWarning {
    [super didReceiveMemoryWarning];
    // Dispose of any resources that can be recreated.
}

- (IBAction)run:(id)sender {
    //
    [UIView beginAnimations:nil context:nil];
    //
    [UIView setAnimationDuration:1.0];
    //
//    CGRect tempFrame = _btn.frame;
    CGPoint tempCenter= _btn.center;
    //
    NSInteger tag = [sender tag];
    //
    switch (tag) {
        case 1:
            //
//            tempFrame.origin.y -= KDelta;
            tempCenter.y -= KDelta;
            break;
        case 3:
            //
//            tempFrame.origin.y += KDelta;
            tempCenter.y += KDelta;
            break;
            //
        case 2:
//            tempFrame.origin.x += KDelta;
            tempCenter.x += KDelta;
            break;
            //
        case 4:
//            tempFrame.origin.x -= KDelta;
            tempCenter.x -= KDelta;
            break;

        default:
            break;
    }

    //
//    _btn.frame = tempFrame;
    _btn.center = tempCenter;
    //
    [UIView commitAnimations];

}

- (IBAction)rotate:(id)sender {
    [UIView beginAnimations:nil context:nil];
    [UIView setAnimationDuration:1.0];
    NSInteger tag = [sender tag];
    if (5==tag) {
        _btn.transform = CGAffineTransformRotate(_btn.transform, - M_PI_4);
    }else
          (_btn.transform = CGAffineTransformRotate(_btn.transform,+ M_PI_4));
    [UIView commitAnimations];
}

- (IBAction)scale:(id)sender {
    [UIView beginAnimations:nil context:nil];
    [UIView setAnimationDuration:1.0];
    NSInteger tag = [sender tag];
    if (7==tag) {
     _btn.transform = CGAffineTransformScale(_btn.transform, 1.2, 1.2);
    [UIView commitAnimations];
    }else{
        _btn.transform = CGAffineTransformScale(_btn.transform, 0.8, 0.8);
    }

}

- (IBAction)reset:(id)sender {
    [UIView beginAnimations:nil context:nil];
    [UIView setAnimationDuration:1.0];
    _btn.transform = CGAffineTransformIdentity;
    [UIView commitAnimations];
}
@end
六.用纯代码创建Button,创建UI界面
//
// ViewController.m
// 02-通过代码创建按钮
//
// Created by yongjianyu on 15/11/25.
// Copyright (c) 2015年 yongjianyu. All rights reserved.
//
#import "ViewController.h"
@interface ViewController ()
@end
@implementation ViewController
- (void)viewDidLoad {
[super viewDidLoad];
// Do any additional setup after loading the view, typically from a nib.
//头像
UIButton *btn = [[UIButton alloc]init];
btn.frame = CGRectMake(0, 0, 100, 100);
CGFloat centerX = self.view.frame.size.width * 0.5;
CGFloat centerY = self.view.frame.size.height * 0.25;
btn.center = CGPointMake(centerX, centerY);
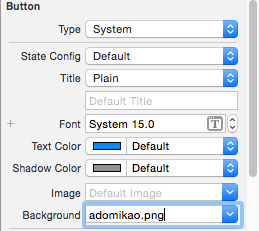
UIImage *nomal = [UIImage imageNamed:@"adomikao.png"];
[btn setBackgroundImage:nomal forState:UIControlStateNormal];
[btn setTitle:@"Adomikao" forState:UIControlStateNormal];
[btn setTitleColor:[UIColor whiteColor] forState:UIControlStateNormal];
UIImage *hightlight = [UIImage imageNamed:@"adomikao1.png"];
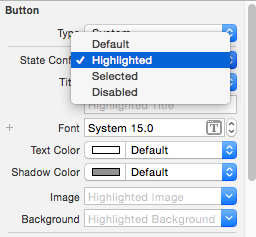
[btn setBackgroundImage:hightlight forState:UIControlStateHighlighted];
[btn setTitle:@"yuyongjian" forState:UIControlStateHighlighted];
[btn setTitleColor:[UIColor redColor] forState:UIControlStateHighlighted];
// [btn addTarget:self action:@selector(btnClick:) forControlEvents:UIControlEventTouchUpInside];
[self.view addSubview:btn];
//向上
UIButton *up = [[UIButton alloc]init];
up.frame = CGRectMake(0, 0, 25, 25);
CGFloat upCenterX = self.view.frame.size.width * 0.25;
CGFloat upCenterY = self.view.frame.size.height * 0.625;
up.center = CGPointMake(upCenterX, upCenterY);
UIImage *upNomal = [UIImage imageNamed:@"up.png"];
[up setBackgroundImage:upNomal forState:UIControlStateNormal];
UIImage *upHightlight = [UIImage imageNamed:@"up1.jpg"];
[up setBackgroundImage:upHightlight forState:UIControlStateHighlighted];
[self.view addSubview:up];
[up addTarget:self action:@selector(upClick:) forControlEvents:UIControlEventTouchUpInside];
//向下
UIButton *down = [[UIButton alloc]init];
down.frame = CGRectMake(0, 0, 25, 25);
CGFloat downCenterX = self.view.frame.size.width * 0.25;
CGFloat downCenterY = self.view.frame .size.height * 0.875;
down.center = CGPointMake(downCenterX, downCenterY);
UIImage *downNormal = [UIImage imageNamed:@"down.png"];
[down setBackgroundImage:downNormal forState:UIControlStateNormal];
UIImage *downheight = [UIImage imageNamed:@"sown1.jpg"];
[down setBackgroundImage:downheight forState:UIControlStateHighlighted];
[self.view addSubview:down];
//向左
UIButton *left = [[UIButton alloc]init];
left.frame = CGRectMake(0, 0, 25, 25);
CGFloat leftCenterX = self.view.frame.size.width * 0.125;
CGFloat leftCenterY = self.view.frame.size.height * 0.75;
left.center = CGPointMake(leftCenterX, leftCenterY);
UIImage *leftNormal = [UIImage imageNamed:@"left.png"];
[left setBackgroundImage:leftNormal forState:UIControlStateNormal];
UIImage *leftHighlight = [UIImage imageNamed:@"left1.jpg"];
[left setBackgroundImage:leftHighlight forState:UIControlStateHighlighted];
[self.view addSubview:left];
//向右
UIButton *right = [[UIButton alloc]init];
right.frame = CGRectMake(0, 0, 25, 25);
CGFloat rightCenterX = self.view.frame.size.width * 0.375;
CGFloat rightcenterY = self.view.frame.size.height * 0.75;
right.center = CGPointMake(rightCenterX, rightcenterY);
UIImage *rightNormal = [UIImage imageNamed:@"right.png"];
[right setBackgroundImage:rightNormal forState:UIControlStateNormal];
UIImage *rightHighlight = [UIImage imageNamed:@"right1.jpg"];
[right setBackgroundImage:rightHighlight forState:UIControlStateHighlighted];
[self.view addSubview:right];
//放大
UIButton *big = [[UIButton alloc]init];
big.frame = CGRectMake(0, 0, 25, 25);
CGFloat bigCenterX = self.view.frame.size.width * 0.625;
CGFloat bigCenterY = self.view.frame.size.height * 0.625;
big.center = CGPointMake(bigCenterX, bigCenterY);
UIImage *bigNormal = [UIImage imageNamed:@"plus.jpg"];
[big setBackgroundImage:bigNormal forState:UIControlStateNormal];
UIImage *bighighlight = [UIImage imageNamed:@"plus1.png"];
[big setBackgroundImage:bighighlight forState:UIControlStateHighlighted];
[self.view addSubview:big];
//缩小
UIButton *small = [[UIButton alloc]init];
small.frame = CGRectMake(0, 0, 25, 25);
CGFloat smallCenterX = self.view.frame.size.width * 0.875;
CGFloat smallCenterY = self.view.frame.size.height * 0.625;
small.center = CGPointMake(smallCenterX, smallCenterY);
UIImage *smallNormal = [UIImage imageNamed:@"minus.png"];
[small setBackgroundImage:smallNormal forState:UIControlStateNormal];
UIImage *smallHighlight = [UIImage imageNamed:@"minus1.png"];
[small setBackgroundImage:smallHighlight forState:UIControlStateHighlighted];
[self.view addSubview:small];
//向左旋转
UIButton *leftRotate = [[UIButton alloc]init];
leftRotate.frame = CGRectMake(0, 0, 25, 25);
CGFloat leftRotateCenterX = self.view.frame.size.width * 0.625;
CGFloat leftRotateCenterY = self.view.frame.size.height * 0.875;
leftRotate.center = CGPointMake(leftRotateCenterX, leftRotateCenterY);
UIImage *leftRotateNormal = [UIImage imageNamed:@"anticlockwise.jpg"];
[leftRotate setBackgroundImage:leftRotateNormal forState:UIControlStateNormal];
UIImage *leftRotateHighlight = [UIImage imageNamed:@"anticlokwise1.png"];
[leftRotate setBackgroundImage:leftRotateHighlight forState:UIControlStateHighlighted];
[self.view addSubview:leftRotate];
//向右旋转
UIButton *rightRotate = [[UIButton alloc]init];
rightRotate.frame = CGRectMake(0, 0, 25, 25);
CGFloat rightRotateCenterX = self.view.frame.size.width * 0.875;
CGFloat rightRotateCenterY = self.view.frame.size.height * 0.875;
rightRotate.center = CGPointMake(rightRotateCenterX, rightRotateCenterY);
UIImage *rightRotateNormal = [UIImage imageNamed:@"clockwise.png"];
[rightRotate setBackgroundImage:rightRotateNormal forState:UIControlStateNormal];
UIImage *rightRotateHighlight = [UIImage imageNamed:@"clockwise1.png"];
[rightRotate setBackgroundImage:rightRotateHighlight forState:UIControlStateHighlighted];
[self.view addSubview:rightRotate];
}
-(void)upClick:(UIButton *)up{
NSLog(@"------up");
CGRect tempFrame = _btn.frame;
tempFrame.origin.y -= 10;
_btn.frame = tempFrame;
}
@end
ios学习-控制按钮图片的走动和变换的更多相关文章
- iOS学习-压缩图片(改变图片的宽高)
压缩图片,图片的大小与我们期望的宽高不一致时,我们可以将其处理为我们想要的宽高. 传入想要修改的图片,以及新的尺寸 -(UIImage*)imageWithImage:(UIImage*)image ...
- ios学习笔记图片+图片解释(c语言 oc语言 ios控件 ios小项目 ios小功能 swift都有而且笔记完整喔)
下面是目录其中ios文件夹包括了大部分ios控件的介绍和演示,swift的时完整版,可以学习完swift(这个看的是swift刚出来一周的视频截图,可能有点赶,但是完整),c语言和oc语言的也可以完整 ...
- 【原】iOS学习之图片拉伸处理(类似qq的气泡)
原理是拉伸里面的内容,将边保护起来 方法1: ①[image resizableImageWithCapInsets:UIEdgeInsetsMake(, , , )]; ②[image resiza ...
- ios 学习 广告图片轮播器
// // ViewController.m // 图片轮播器 // // Created by zjj on 15/5/23. // Copyright (c) 2015年 zjj. All rig ...
- [置顶] iOS学习笔记47——图片异步加载之EGOImageLoading
上次在<iOS学习笔记46——图片异步加载之SDWebImage>中介绍过一个开源的图片异步加载库,今天来介绍另外一个功能类似的EGOImageLoading,看名字知道,之前的一篇学习笔 ...
- iOS学习笔记31-从图册获取图片和视频
一.从图册中获取本地图片和视频 从图册中获取文件,我们使用的是UIImagePickerController,这个类我们在之前的摄像头中使用过,这里是链接:iOS学习笔记27-摄像头,这里我们使用的是 ...
- ios 学习线路(图片)(摘录)
iOS学习路线
- iOS学习——UIView的研究
在iOS开发中,我们知道有一个共同的基类——NSObject,但是对于界面视图而言,UIView是非常重要的一个类,UIView是很多视图控件的基类,因此,对于UIView的学习闲的非常有必要.在iO ...
- iOS学习——核心动画之Layer基础
iOS学习——核心动画之Layer基础 1.CALayer是什么? CALayer我们又称它叫做层.在每个UIView内部都有一个layer这样一个属性,UIView之所以能够显示,就是因为它里面有这 ...
随机推荐
- Learn ZYNQ (9)
创建zybo cluster的spark集群(计算层面): 1.每个节点都是同样的filesystem,mac地址冲突,故: vi ./etc/profile export PATH=/usr/loc ...
- 局域网内利用gitlab,jenkins自动生成gitbook并发布(nginx)
安装了GitBook,内网使用,没法用上gitbook的网页. 用gitbook serve只能展示一本书,而且也不利于长期维护. 于是使用gitlab,jenkins,和nginx配合gitbook ...
- PostGr-SQL 基本概念
http://wenjiesu.iteye.com/blog/801129 [什么是schema?] 究竟什么是schema?这个问题困扰了我很久. 我们只讨论数据库中的schema,而不讨论XML中 ...
- 好看的IDE配色方案让代码看起来不再那么凶猛了
写这篇小文的初衷是,笔者是原教旨主义者,一直坚持用IDE默认的配色方案.另外也觉得网上黑色系的配色方案太过bling bling了.但今天尝试用新的配色方案后,兴奋地发现对代码的好感度大幅提升. 嗯, ...
- EF部分字段更新,自动忽略null字段
某个项目里的update代码是类似这样的 public T Update<T>(T entity) where T : ModelBase { var set = this.Set< ...
- 关于flex中正则表达式上下文匹配的问题
按照课本与网上的说法,斜杠'/'表示匹配上下文,例如ab/cd表示当ab后面有cd时匹配ab 然而如果实际这么写,flex在调用该正则表达式时触发'unrecognized rule' flex源代码 ...
- JavaWeb三大组件——过滤器的运行机制理解
过滤器Filter 文章前言:本文侧重实用和理解. 一.过滤器的概念. lFilter也称之为过滤器,它是Servlet技术中最实用的技术,WEB开发人员通过Filter技术,对web服务器管理的所有 ...
- LeetCode Hamming Distance
原题链接在这里:https://leetcode.com/problems/hamming-distance/ 题目: The Hamming distance between two integer ...
- [原创]-bash: iostat: command not found解决办法
[root@testhost ~]# iostat-bash: iostat: command not found IOSTAT 命令不可用,首先确认sysstat包是否安装,sysstat包中包括i ...
- centos7 搭建GlusterFS
centos7 搭建GlusterFS 转载http://zhaijunming5.blog.51cto.com/10668883/1704535 实验需求:4台机器安装GlusterFS组成一个集群 ...