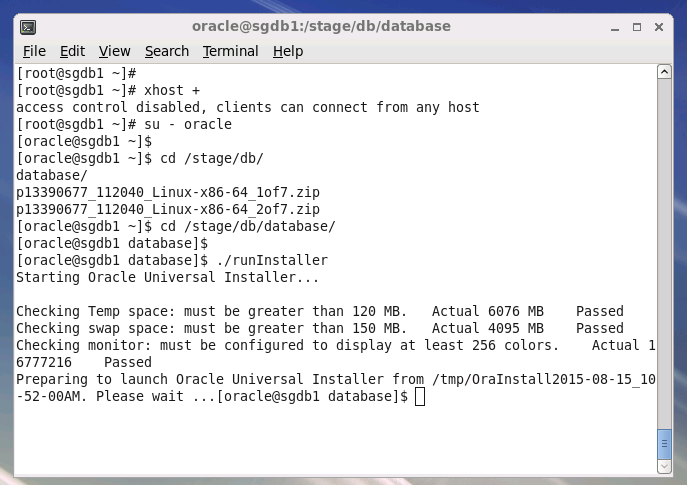
第8步:安装Oracle
- 安装Oracle
| [root@sgdb1~]# xhost+
[root@sgdb1~]# su - oracle
|

.png)
| [oracle @sgdb1~]$ cd database
[oracle @sgdb1~]$ ./runinstaller
|
.png)
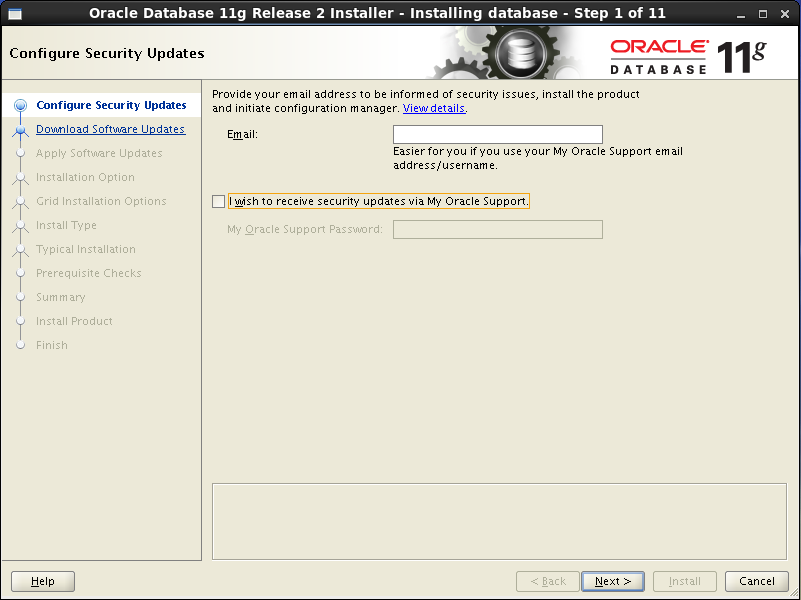
- 取消软件更新
.png)
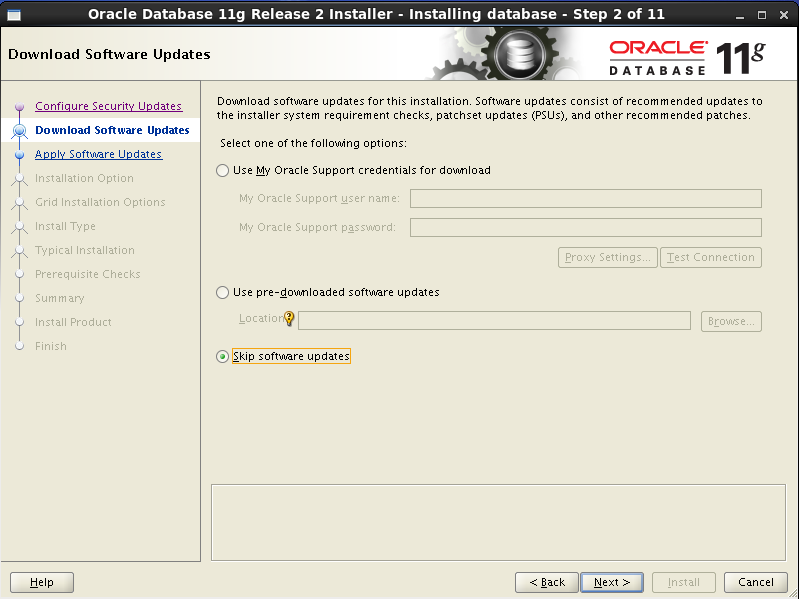
- 跳过软件更新
.png)
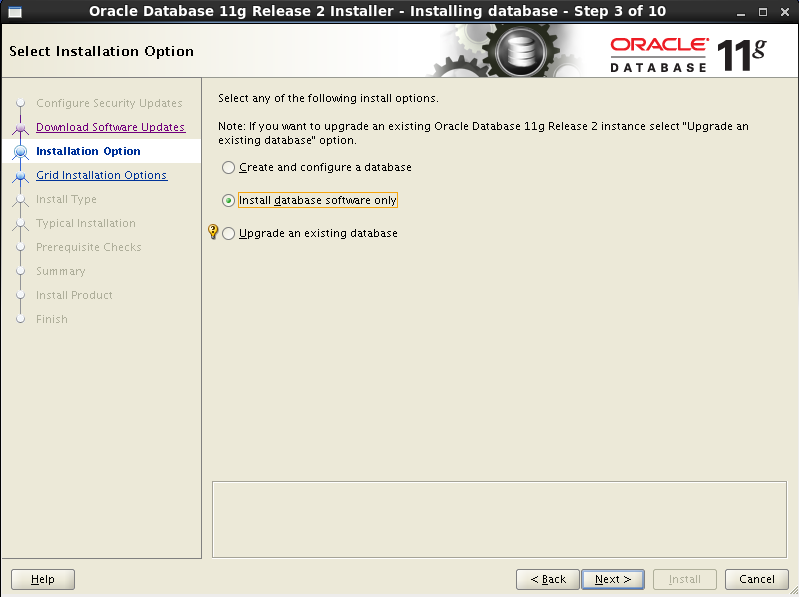
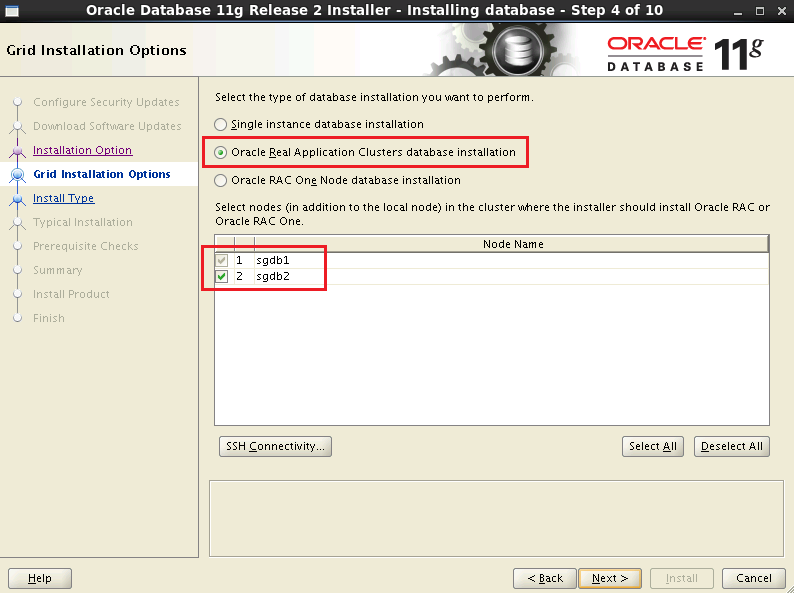
- Oracle安装选项
.png)
- Oracle安装方式
.png)
- Oralce安装语言
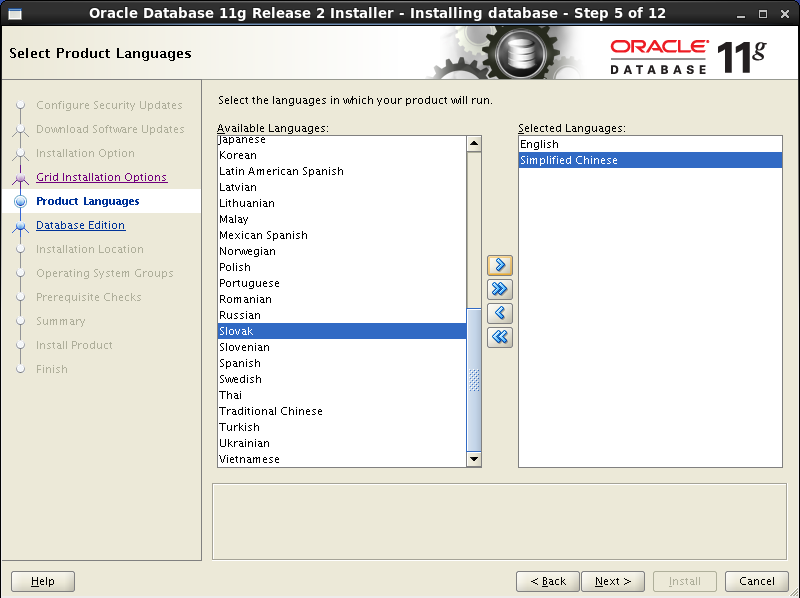
.png)
- 安装版本选择
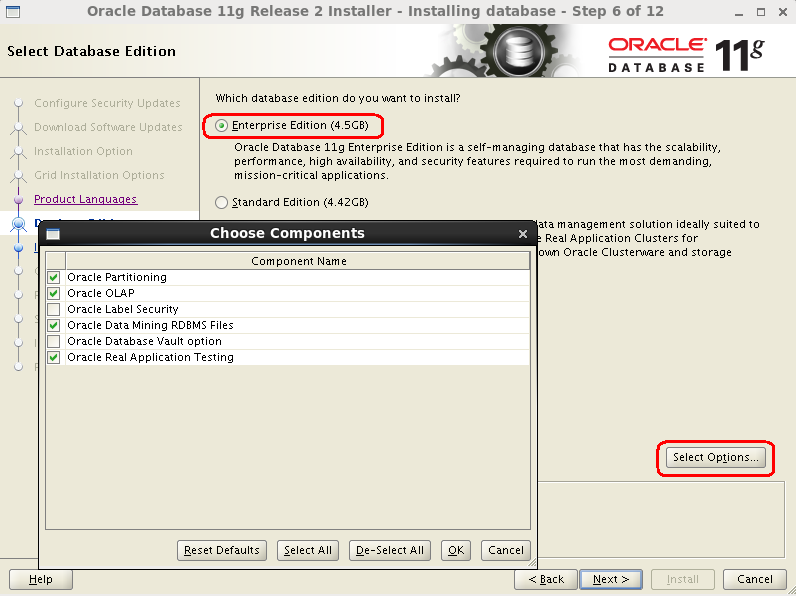
.png)
- 选择安装目录
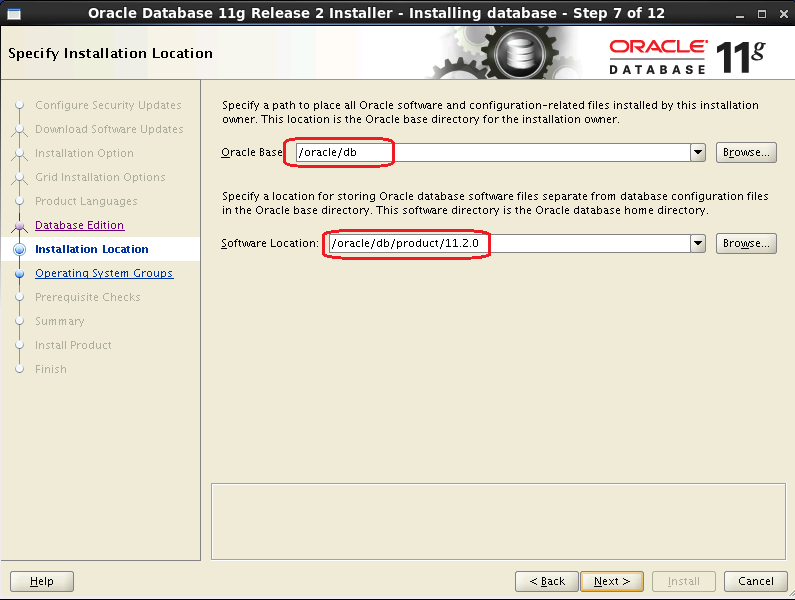
.png)
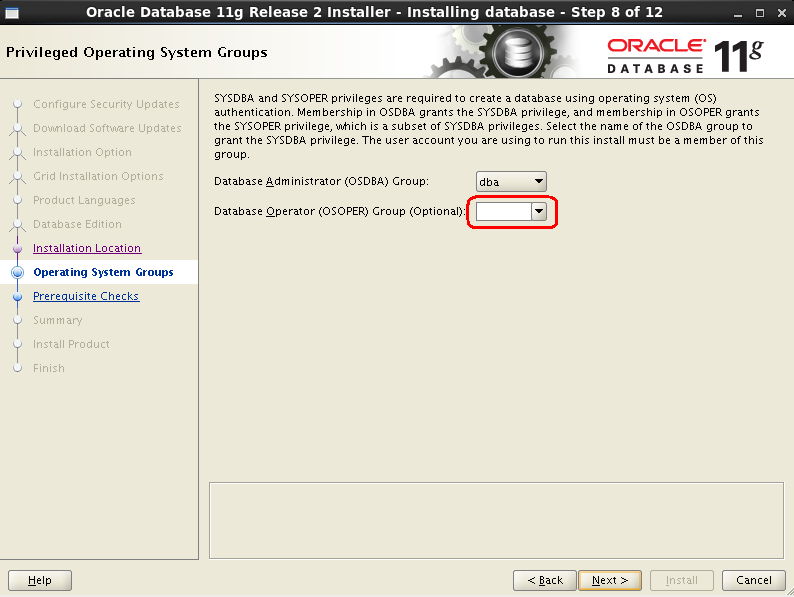
- 选择组
.png)
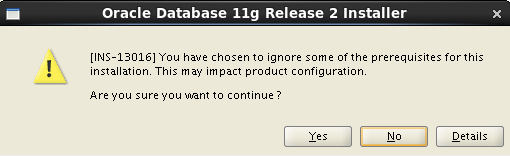
- 执行安装前检查
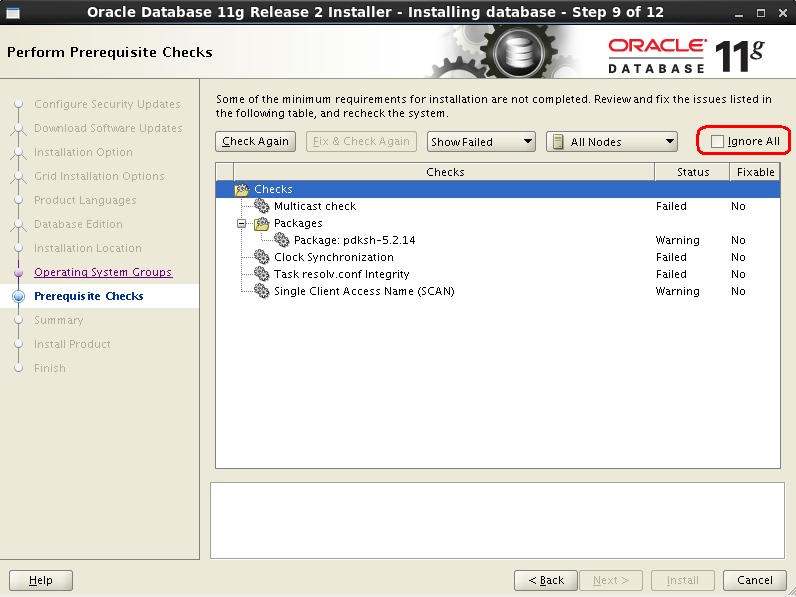
.png)
.png)
- 安装信息统计
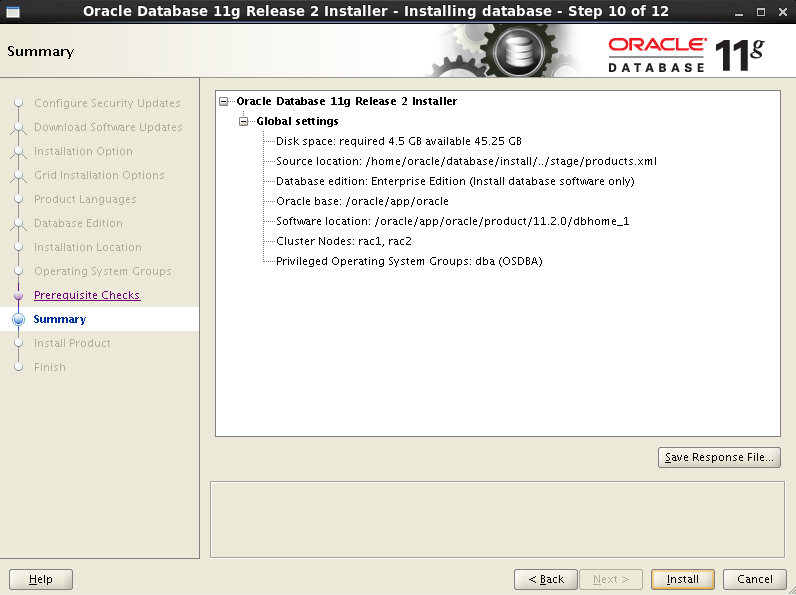
.png)
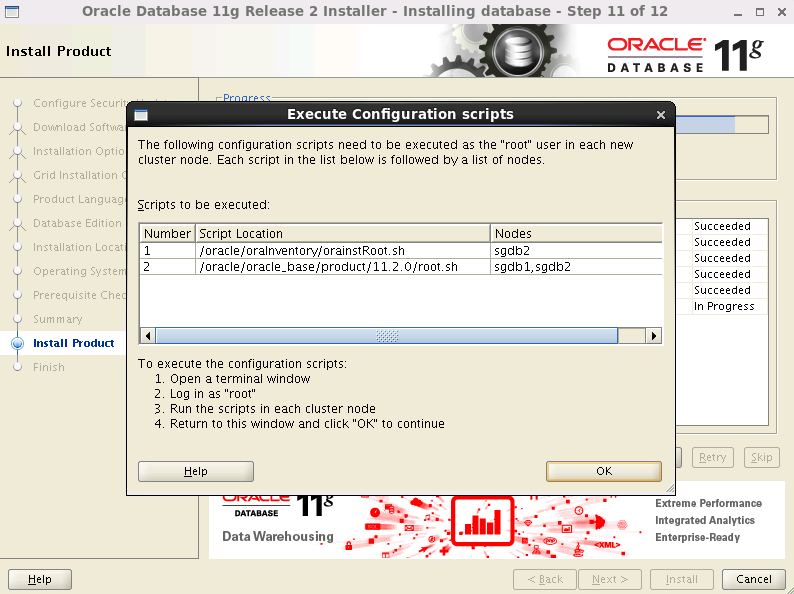
- 安装结束前,需要执行脚本
.png)
| [root@sgdb1 ~]# /oracle/oraInventory/orainstRoot.sh
Changing permissions of /oracle/oraInventory.
Adding read,write permissions for group.
Removing read,write,execute permissions for world.
Changing groupname of /oracle/oraInventory to oinstall.
The execution of the script is complete.
|
| [root@sgdb2 ~]# /oracle/oraInventory/orainstRoot.sh
Changing permissions of /oracle/oraInventory.
Adding read,write permissions for group.
Removing read,write,execute permissions for world.
Changing groupname of /oracle/oraInventory to oinstall.
The execution of the script is complete.
|
| [root@sgdb1 ~]# /oracle/db/product/11.2.0/root.sh
Performing root user operation for Oracle 11g
The following environment variables are set as:
ORACLE_OWNER= oracle
ORACLE_HOME= /oracle/db/product/11.2.0
Enter the full pathname of the local bin directory: [/usr/local/bin]:
The contents of "dbhome" have not changed. No need to overwrite.
The contents of "oraenv" have not changed. No need to overwrite.
The contents of "coraenv" have not changed. No need to overwrite.
Entries will be added to the /etc/oratab file as needed by
Database Configuration Assistant when a database is created
Finished running generic part of root script.
Now product-specific root actions will be performed.
Finished product-specific root actions.
|
| [root@sgdb2 ~]# /oracle/db/product/11.2.0/root.sh
Performing root user operation for Oracle 11g
The following environment variables are set as:
ORACLE_OWNER= oracle
ORACLE_HOME= /oracle/db/product/11.2.0
Enter the full pathname of the local bin directory: [/usr/local/bin]:
The contents of "dbhome" have not changed. No need to overwrite.
The contents of "oraenv" have not changed. No need to overwrite.
The contents of "coraenv" have not changed. No need to overwrite.
Entries will be added to the /etc/oratab file as needed by
Database Configuration Assistant when a database is created
Finished running generic part of root script.
Now product-specific root actions will be performed.
Finished product-specific root actions.
|
.png)
第8步:安装Oracle的更多相关文章
- 在Linux上安装Oracle RAC 12 c(12.1) 虚拟机,一步一步向导
Oracle RAC 12 c(12.1)在Linux上安装虚拟机,一步一步向导 今天我们将看到如何安装 12 c版本1 RAC(真正的应用程序集群)数据库2 Linux 64位的虚拟机 使用VMWa ...
- 一步一步搭建 oracle 11gR2 rac+dg之grid安装(四)【转】
一步一步在RHEL6.5+VMware Workstation 10上搭建 oracle 11gR2 rac + dg 之grid安装 (四) 转自 一步一步搭建 oracle 11gR2 rac+d ...
- 一步一步搭建oracle 11gR2 rac+dg之database安装(五)【转】
一步一步在RHEL6.5+VMware Workstation 10上搭建 oracle 11gR2 rac + dg 之database安装 (五) 转自 一步一步搭建oracle 11gR2 ...
- DBArtist之Oracle入门第3步: 安装配置PL/SQL Developer
操作系统: WINDOWS 7 (64位) 数据库: Oracle 11gR2 (64位) PL/SQL Developer : PL/SQL ...
- DBArtist之Oracle入门第1步: 如何安装Oracle 11g
操作系统: Windows 7 数据库 : Oracle 11gR2 第一步: 下载Oracle安装包 Oracle官网: https://www.oracle.com/index.html ...
- 安装oracle
1.安装vnc yum install tigervnc tigervnc-server 2.vncserver启动 3.安装依赖库 yum install -y compat-libstdc* ...
- CentOS7安装Oracle 11gR2 安装
概述 Oracle 在Linux和window上的安装不太一样,公司又是Linux系统上的Oracle,实在没辙,研究下Linux下Oracle的使用,oracle默认不支持CentOS系统安装,所以 ...
- Linux CentOS下安装Oracle
1 .在安装oracle之前首先安装以下组件包,直接输入下列语句安装. yum install binutils* -y yum install compat-lib* -y yum install ...
- linux下一步一步安装禅道项目管理工具
linux下一步一步安装禅道项目管理工具 因为禅道官网的安装教程实在是太简陋了,所以记录在此. 1.安装apache服务 archlinux下直接 sudo pacman -S apache ubun ...
随机推荐
- ionic 隐藏header-ionic中隐藏头部header
ionic 中隐藏头部header 通过 hide-nav-bar="true" 来实现 <ion-view hide-nav-bar="true"> ...
- 解决grep的结果无法显示文件名的问题
有时候想在代码中执行某个关键词,会用下面的语句: find . -type f -name "*.java" | xargs grep -n "<keyword&g ...
- Drupal启动阶段之三:数据库
Drupal在数据库启动阶段仅仅是简单地包含了database.inc文件,然后再注册类加载器: function _drupal_bootstrap_database() { // Initiali ...
- js 获取select的值 / js动态给select赋值
jQuery获取Select选择的Text和Value:语法解释:1. $("#select_id").change(function(){//code...}); //为Se ...
- struts.xml 文件添加DTD文件
在编辑struts.xml 文件时,“alt + /”无提示信息,需要在myeclipse 中添加消息头中的文件,步骤如下: 1. 选中该段复制 2. Preferences——>XML Cat ...
- xcode9.2 objective-c install (mac 10.12.6)
1. xcode下载: https://download.developer.apple.com/Developer_Tools/Xcode_9.2/Xcode_9.2.xip 2. 点击默认安装即可 ...
- 动态添加easyui 控件
jquery提供了append,appendTo方法,可以动态添加静态的html文本,在easyui中,要动态添加easyui控件要怎么做呢,下面就来介绍动态添加easyui控件. 使用方法:和添加静 ...
- 关于new与=号创建对象的区别
(1)先定义一个名为str的对String类的对象引用变量:String str: (2)[在[栈]中查找有没有存放值为"abc"的地址,如果没有,则开辟一个存放字面值为" ...
- 微信公共服务平台开发(.Net 的实现)4-------语音识别
语音识别这个功能属于高级功能,必须微信实名认证后才能实现,认证费用300元/年,如果你作为开发者可以申请测试帐号,也是可以的.首先建立一个微信消息类,这个类比之前多了一个属性. class wxmes ...
- https://github.com/CocoaPods/CocoaPods/search?q=No+such+file+or+directory报错解决方式
――― MARKDOWN TEMPLATE ――――――――――――――――――――――――――――――――――――――――――――――――――――――――――― ### Command ``` /U ...