沉淀,再出发:Docker的功能浅析
沉淀,再出发:Docker的功能浅析
一、前言
这段时间一直在使用docker,发现docker的技术有很多,从最开始的将自己的程序打包成docker中的镜像,然后上传和下载镜像并使用,再到后来的在集群之中使用docker来运行自己的任务,使用swarm,docker-machine,dockerfile,yaml等技术和工具来完成docker对任务的管理,可以说学习docker有着很大的作用和意义,使用docker的容器,镜像机制,将所有的依赖使用文件来管理,很轻松的进行打包上传和下载,大大的节省了布置环境需要的时间和精力,这种思想非常的棒,可以说是轻量级的虚拟机。
二、Docker功能
我们从一个例子开始,一步步的认识docker。实验环境是使用Linux的Ubuntu16.04真机环境或者虚拟机环境。
2.1、下载和安装docker
这个我们已经探讨过了,大家可以查看我的文章。
2.2、测试是否安装成功
docker --version


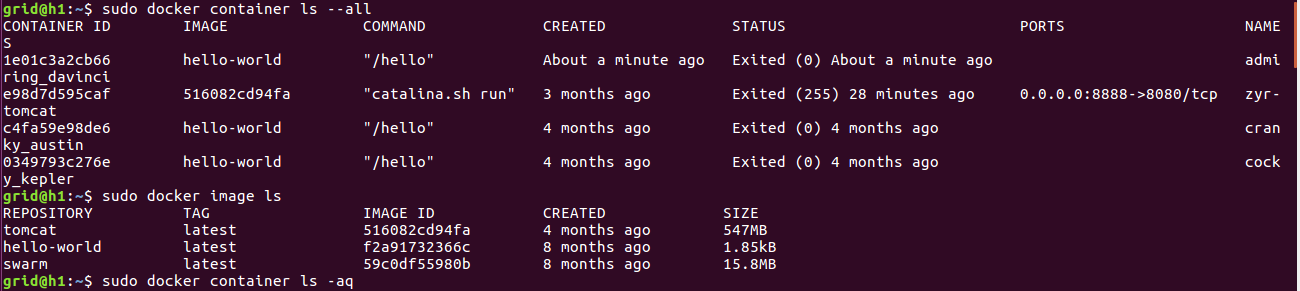
至此可以看到docker已经安装成功了,其他的查看命令如下:
## List Docker CLI commands
docker
docker container --help ## Display Docker version and info
docker --version
docker version
docker info ## Execute Docker image
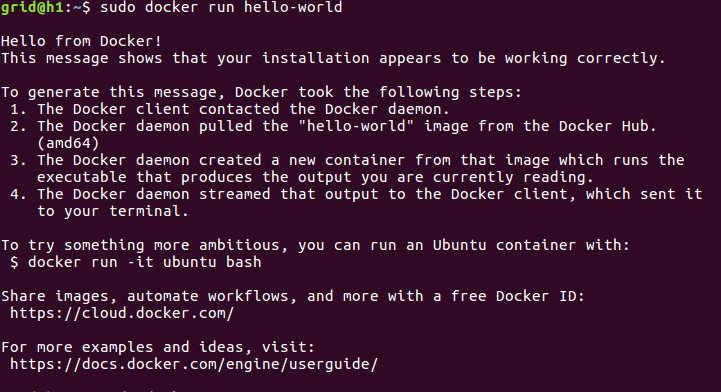
docker run hello-world ## List Docker images
docker image ls ## List Docker containers (running, all, all in quiet mode)
docker container ls
docker container ls --all
docker container ls -aq
2.3、容器的概念和使用(Dockerfile)
我们使用dockerfile文件来定义一个容器运行所需的环境,比如一些包依赖,环境变量配置等等,之后就可以放心的进行自己程序的开发而不需要自己配置了。
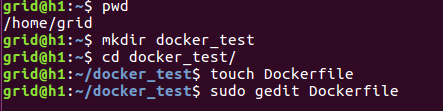
首先我们创建一个新的文件夹,然后在该文件夹中创建一个名为Dockerfile的文件,在文件中作如下操作:
Dockerfile:
# Use an official Python runtime as a parent image

FROM python:2.7-slim

# Set the working directory to /app

WORKDIR /app

# Copy the current directory contents into the container at /app

ADD . /app

# Install any needed packages specified in requirements.txt

RUN pip install --trusted-host pypi.python.org -r requirements.txt

# Make port 80 available to the world outside this container

EXPOSE 80

# Define environment variable

ENV NAME World

# Run app.py when the container launches

CMD ["python", "app.py"]
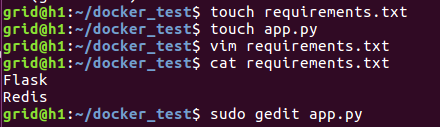
在创建上述文件提到的两个文件:
requirements.txt:
Flask

Redis
app.py:
 from flask import Flask

 from redis import Redis, RedisError

 import os

 import socket

 # Connect to Redis

 redis = Redis(host="redis", db=0, socket_connect_timeout=2, socket_timeout=2)

 app = Flask(__name__)

 @app.route("/")

 def hello():

     try:

         visits = redis.incr("counter")

     except RedisError:

         visits = "<i>cannot connect to Redis, counter disabled</i>"

     html = "<h3>Hello {name}!</h3>" \

            "<b>Hostname:</b> {hostname}<br/>" \

            "<b>Visits:</b> {visits}"

     return html.format(name=os.getenv("NAME", "world"), hostname=socket.gethostname(), visits=visits)

 if __name__ == "__main__":

     app.run(host='0.0.0.0', port=80)
具体过程如下所示:
然后我们运行该Dockerfile文件,使用如下命令,其中friendlyhello 为我们给我们的容器起的名字。之后docker就会自动按照Dockerfile上面的指令一步步的下载我们需要的环境并进行配置。
docker build -t friendlyhello .
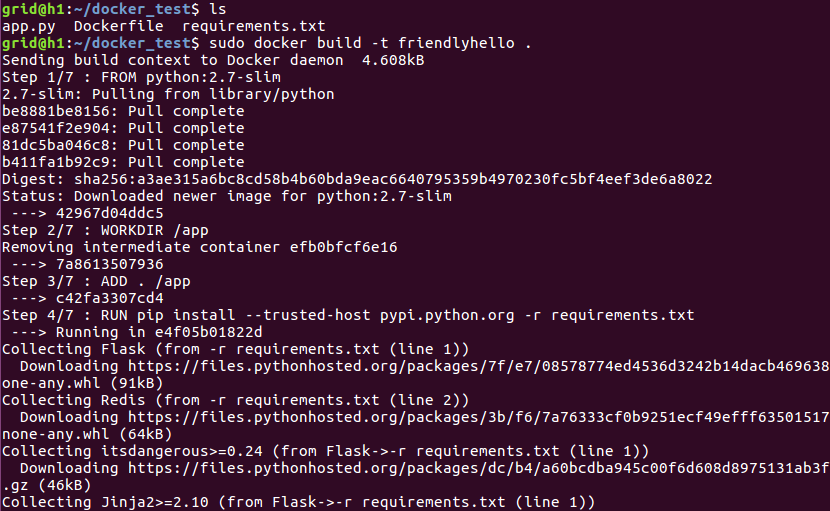

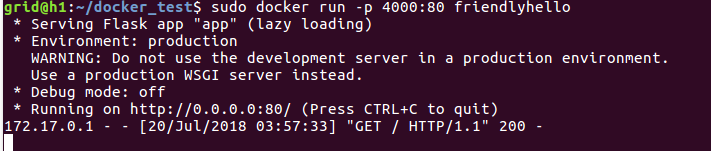
最终配置成功,生成了我们需要的容器,并且我们可以运行这个容器,通过网页或者curl命令来访问可以发现程序已经可以工作了。
docker run -p 4000:80 friendlyhello

同样的我们可以使用如下命令来停止该容器产生的镜像的运行:
docker container stop 容器id
这样我们完成了第一步,之后我们需要将这个镜像存到自己的仓库之中,并且上传到注册中心之中,使用tag命令,我们将该镜像进行标记,注意这里还没有上传,注意后面的“用户名/仓库:标记”我们最好这样做,首先用户名就是我们注册的docker的账户id,仓库和标记这个我们可以自己填写,在自己的注册中心会生成这个东西,也可以使用现有的。
docker tag image的名称 username/repository:tag
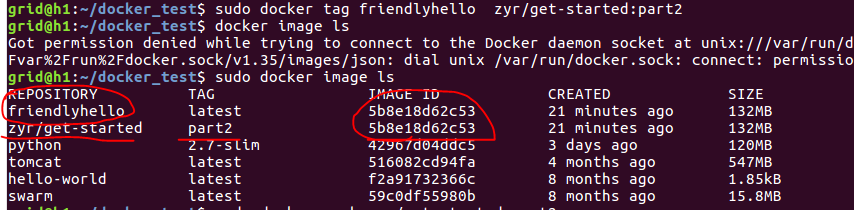
可以看到标记成功,然后我们上传到自己的注册中心之中,在这里如果大家没有注册docker账户的,是不能完成下面操作的,因此需要先注册账户,但是docker在注册的时候需要使用Google的服务,也就是要访问www.google.com这个服务,势必需要外网来操作,如果大家没有外网,那就没办法了,这点也看出来当初Google的离开真是程序员的一大损失呀。不过大家可以通过代理等方式来翻墙,并且只是注册的时候需要外网,之后上传和下载是不需要的,因此,可以借用别人的外网来注册。
下面是我注册并进行上传的内容,非常的方便。
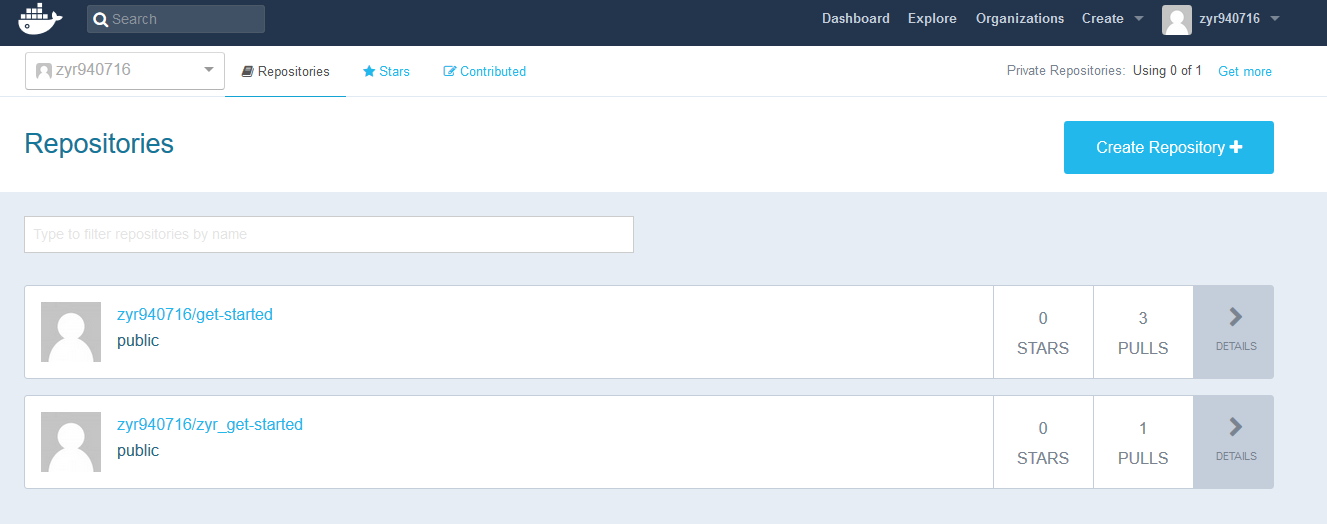
下面我们上传:
docker push username/repository:tag

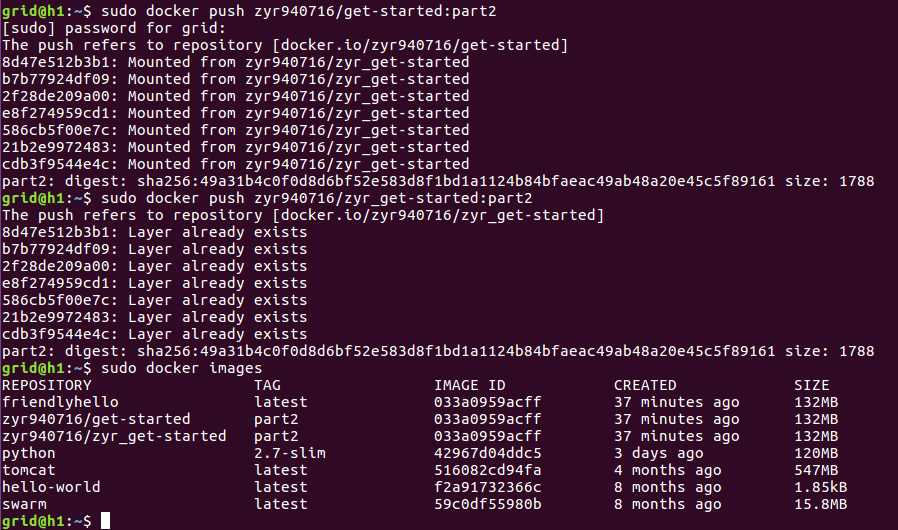
至此,我们已经上传成功了,并且可以在其他的电脑上下载并且使用了,就好像我们开始使用hello-world一样,不需要任何的配置。我们在任何的机器上(安装有docker)使用如下命令就可以自动下载并运行了。
docker run -p 4000:80 username/repository:tag
常用的命令如下:
 docker build -t friendlyhello .  # Create image using this directory's Dockerfile

 docker run -p 4000:80 friendlyhello  # Run "friendlyname" mapping port 4000 to 80

 docker run -d -p 4000:80 friendlyhello         # Same thing, but in detached mode

 docker container ls                                # List all running containers

 docker container ls -a             # List all containers, even those not running

 docker container stop <hash>           # Gracefully stop the specified container

 docker container kill <hash>         # Force shutdown of the specified container

 docker container rm <hash>        # Remove specified container from this machine

 docker container rm $(docker container ls -a -q)         # Remove all containers

 docker image ls -a                             # List all images on this machine

 docker image rm <image id>            # Remove specified image from this machine

 docker image rm $(docker image ls -a -q)   # Remove all images from this machine

 docker login             # Log in this CLI session using your Docker credentials

 docker tag <image> username/repository:tag  # Tag <image> for upload to registry

 docker push username/repository:tag            # Upload tagged image to registry

 docker run username/repository:tag                   # Run image from a registry
2.4、服务的概念和应用
我们首先需要安装Docker Compose,安装方法如下:注意版本号如果已经过期或者不能访问我们进入相应的网站查找能用的版本并进行更改。
sudo curl -L https://github.com/docker/compose/releases/download/1.21.2/docker-compose-$(uname -s)-$(uname -m) -o /usr/local/bin/docker-compose

sudo chmod +x /usr/local/bin/docker-compose
docker-compose --version

Services are really just “containers in production.” A service only runs one image, but it codifies the way that image runs—what ports it should use, how many replicas of the container should run so the service has the capacity it needs, and so on. Scaling a service changes the number of container instances running that piece of software, assigning more computing resources to the service in the process.
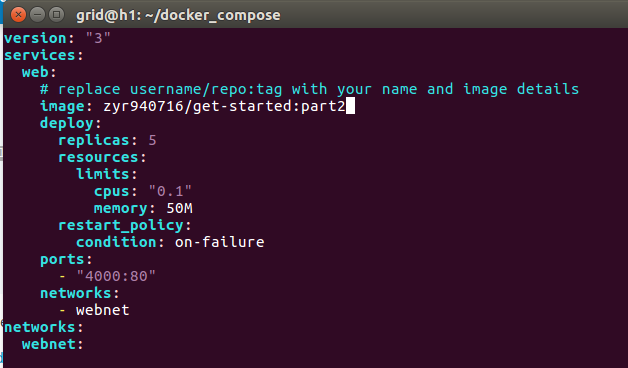
使用docker-compose.yml文件可以很轻松的定义服务:
 version: ""

 services:

   web:

     # replace username/repo:tag with your name and image details

     image: username/repo:tag

     deploy:

       replicas:

       resources:

         limits:

           cpus: "0.1"

           memory: 50M

       restart_policy:

         condition: on-failure

     ports:

       - "4000:80"

     networks:

       - webnet

 networks:

   webnet:
之后运行如下命令来初始化当前节点为管理节点:
docker swarm init
docker stack deploy -c docker-compose.yml getstartedlab(自己定义的程序名称)
然后我们可以查看相应的服务,Look for output for the web service, prepended with your app name. If you named it the same as shown in this example, the name is getstartedlab_web. The service ID is listed as well, along with the number of replicas, image name, and exposed ports.
docker service ls
docker service ps getstartedlab_web

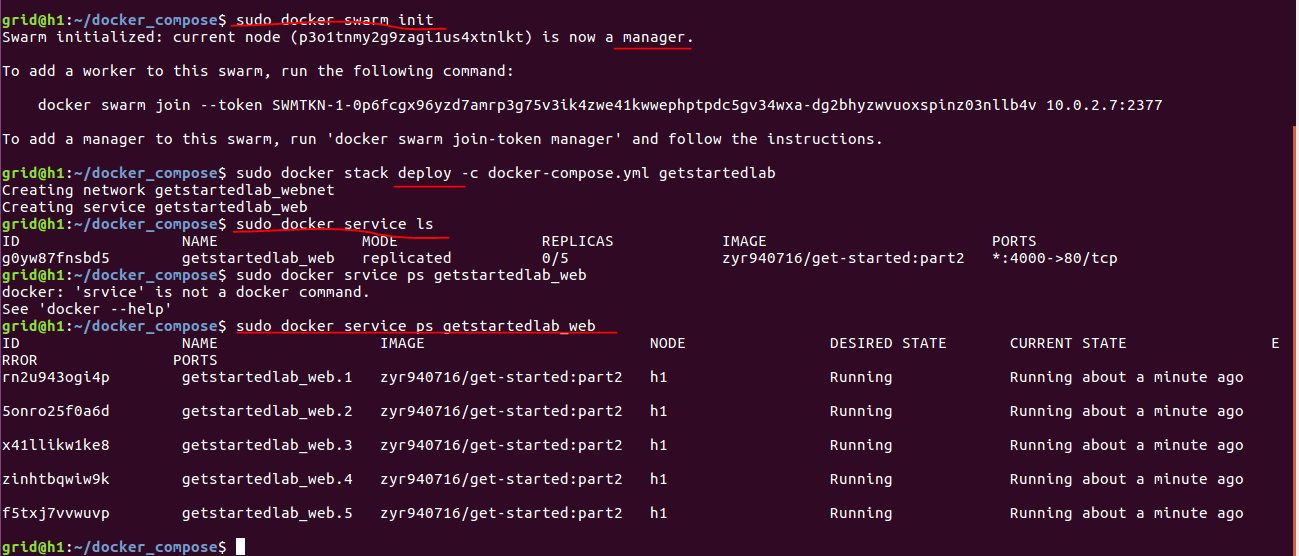

可以看到我们的容器生成的镜像已经可以运行了,并且根据上述的yaml文件,生成了五个镜像,在相应的内存空间之内进行运行,这就是服务的概念。如果我们以后打算对服务的参数进行更改我们可以编辑上述的yaml文件,然后重新运行docker stack deploy ....命令即可。
同理,我们可以移除掉我们创建的stack和swarm:
   #Take the app down with docker stack rm:

    docker stack rm getstartedlab

    #Take down the swarm.

    docker swarm leave --force
 docker stack ls                                            # List stacks or apps

 docker stack deploy -c <composefile> <appname>  # Run the specified Compose file

 docker service ls                 # List running services associated with an app

 docker service ps <service>                  # List tasks associated with an app

 docker inspect <task or container>                   # Inspect task or container

 docker container ls -q                                      # List container IDs

 docker stack rm <appname>                             # Tear down an application

 docker swarm leave --force      # Take down a single node swarm from the manager
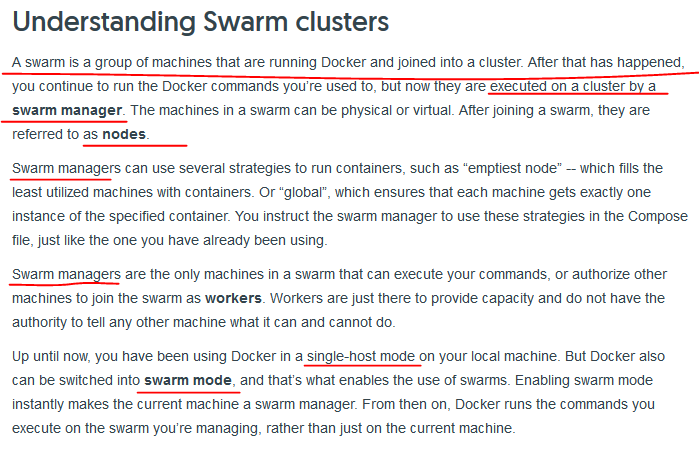
2.5、swarm
从上面的例子我们其实可以看出swarm是干什么用的了,其实就是在多个机器上面进行任务的分配、通信、信息的交互的一个软件,服务的概念也是在这样的集群上面才有意义的,因此,将swarm和服务结合起来就能实现真正意义上的生产环境了。
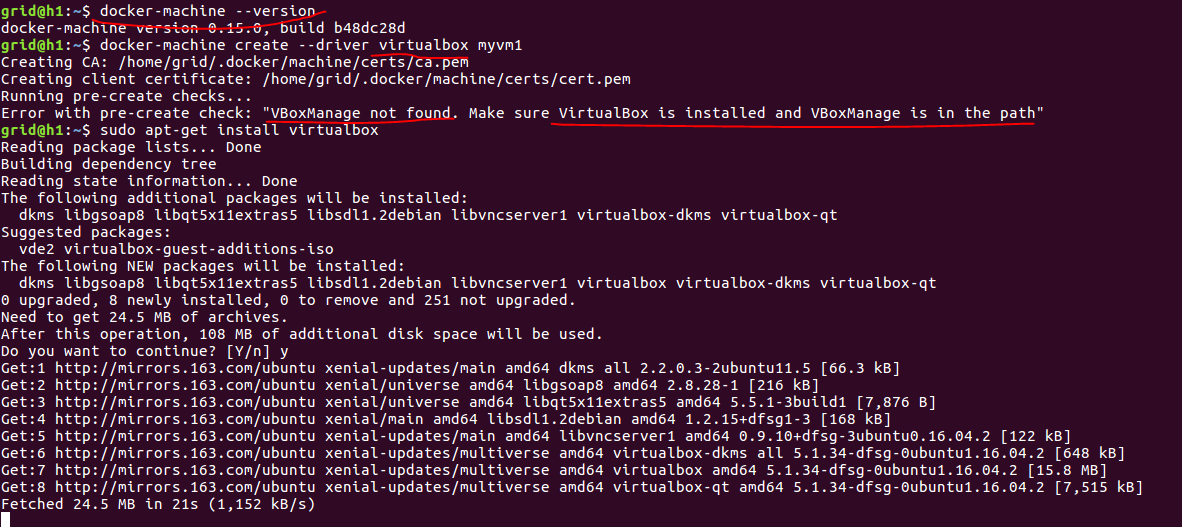
我们需要先安装docker-machine:
  base=https://github.com/docker/machine/releases/download/v0.15.0 &&

  curl -L $base/docker-machine-$(uname -s)-$(uname -m) >/tmp/docker-machine &&

  sudo install /tmp/docker-machine /usr/local/bin/docker-machine

然后使用如下命令创建两个虚拟机,因为我们是使用virtualbox创建的,所以需要先下载virtualbox,之后进行创建:
docker-machine create --driver virtualbox myvm1

docker-machine create --driver virtualbox myvm2
docker-machine ls
docker-machine ssh myvm1 "docker swarm init --advertise-addr <myvm1 ip>"
docker-machine ssh myvm2 "docker swarm join \

--token <token> \

<ip>:2377"
docker-machine ssh myvm1 "docker node ls"
之后的操作,因为时间的原因以后再完成。
 docker-machine create --driver virtualbox myvm1 # Create a VM (Mac, Win7, Linux)

 docker-machine create -d hyperv --hyperv-virtual-switch "myswitch" myvm1 # Win10

 docker-machine env myvm1                # View basic information about your node

 docker-machine ssh myvm1 "docker node ls"         # List the nodes in your swarm

 docker-machine ssh myvm1 "docker node inspect <node ID>"        # Inspect a node

 docker-machine ssh myvm1 "docker swarm join-token -q worker"   # View join token

 docker-machine ssh myvm1   # Open an SSH session with the VM; type "exit" to end

 docker node ls                # View nodes in swarm (while logged on to manager)

 docker-machine ssh myvm2 "docker swarm leave"  # Make the worker leave the swarm

 docker-machine ssh myvm1 "docker swarm leave -f" # Make master leave, kill swarm

 docker-machine ls # list VMs, asterisk shows which VM this shell is talking to

 docker-machine start myvm1            # Start a VM that is currently not running

 docker-machine env myvm1      # show environment variables and command for myvm1

 eval $(docker-machine env myvm1)         # Mac command to connect shell to myvm1

 & "C:\Program Files\Docker\Docker\Resources\bin\docker-machine.exe" env myvm1 | Invoke-Expression   # Windows command to connect shell to myvm1

 docker stack deploy -c <file> <app>  # Deploy an app; command shell must be set to talk to manager (myvm1), uses local Compose file

 docker-machine scp docker-compose.yml myvm1:~ # Copy file to node's home dir (only required if you use ssh to connect to manager and deploy the app)

 docker-machine ssh myvm1 "docker stack deploy -c <file> <app>"   # Deploy an app using ssh (you must have first copied the Compose file to myvm1)

 eval $(docker-machine env -u)     # Disconnect shell from VMs, use native docker

 docker-machine stop $(docker-machine ls -q)               # Stop all running VMs

 docker-machine rm $(docker-machine ls -q) # Delete all VMs and their disk images
三、总结
学习一门技术,就要理解其中的原理,但是最开始的时候还是要先学会使用,上面的命令大家多多练习是非常有用的。docker还有很多的哲理和原理在其中,学无止境,我们一定要谦虚、认真、坚定。
参考文档:https://docs.docker.com/get-started/
沉淀,再出发:Docker的功能浅析的更多相关文章
- 沉淀再出发:在python3中导入自定义的包
沉淀再出发:在python3中导入自定义的包 一.前言 在python中如果要使用自己的定义的包,还是有一些需要注意的事项的,这里简单记录一下. 二.在python3中导入自定义的包 2.1.什么是模 ...
- 沉淀再出发:web服务器和应用服务器之间的区别和联系
沉淀再出发:web服务器和应用服务器之间的区别和联系 一.前言 关于后端,我们一般有三种服务器(当然还有文件服务器等),Web服务器,应用程序服务器和数据库服务器,其中前面两个的概念已经非常模糊了,但 ...
- 沉淀再出发:jetty的架构和本质
沉淀再出发:jetty的架构和本质 一.前言 我们在使用Tomcat的时候,总是会想到jetty,这两者的合理选用是和我们项目的类型和大小息息相关的,Tomcat属于比较重量级的容器,通过很多的容器层 ...
- 沉淀再出发:dubbo的基本原理和应用实例
沉淀再出发:dubbo的基本原理和应用实例 一.前言 阿里开发的dubbo作为服务治理的工具,在分布式开发中有着重要的意义,这里我们主要专注于dubbo的架构,基本原理以及在Windows下面开发出来 ...
- 沉淀再出发:Spring的架构理解
沉淀再出发:Spring的架构理解 一.前言 在Spring之前使用的EJB框架太庞大和重量级了,开发成本很高,由此spring应运而生.关于Spring,学过java的人基本上都会慢慢接触到,并且在 ...
- 沉淀再出发:spring boot的理解
沉淀再出发:spring boot的理解 一.前言 关于spring boot,我们肯定听过了很多遍了,其实最本质的东西就是COC(convention over configuration),将各种 ...
- 沉淀再出发:Bean,JavaBean,POJO,VO,PO,EJB等名词的异同
沉淀再出发:Bean,JavaBean,POJO,VO,PO,EJB等名词的异同 一.前言 想必大家都有这样的困惑,接触的东西越多却越来越混乱了,这个时候就要进行对比和深入的探讨了,抓住每一个概念背后 ...
- 沉淀再出发:IoC和AOP的本质
沉淀再出发:IoC和AOP的本质 一.前言 关于IoC和AOP这两个概念,如果我们没有深入的理解可以说是根本就不理解Spring这个架构的,同样的由Spring演变出来的Spring Boot和Spr ...
- 沉淀再出发:Tomcat的实现原理
沉淀再出发:Tomcat的实现原理 一.前言 在我们接触java之后,相信大家都编写过服务器程序,这个时候就需要用到Tomcat了.Tomcat 服务器是一个开源的轻量级Web应用服务器,在中小型系统 ...
随机推荐
- 使用vue的v-model自定义 checkbox组件
<template id='c'> <input type="checkbox" :checked="checked" v-on:change ...
- linux mint 18.2 install postgresql
https://www.postgresql.org/download/linux/ubuntu/ 1 check Xenial16.04 2 创建文件 /etc/apt/sources.list ...
- 深入分析java web技术内幕目录一览
Web请求过程 如何发起请求:browser,httpclient http解析:chrome ,cache Dns域名解析:域名缓存 cdn:负载,动态加速,回源 Java I/O I/0类库的基本 ...
- WPF DataTemplate與ControlTemplate
一. 前言 什麼是DataTemplate? 什麼是ControlTemplate? 在stackoverflow有句簡短的解釋 "A DataTemplate, therefore ...
- linux 段页式内存管理
http://blog.chinaunix.net/uid-24227137-id-3723898.html 页是信息的物理单位,分页是为了实现离散分配方式,以消减内存的外零头,提高内存的利用率从:或 ...
- JDK1.7新特性(1):Switch和数字
Switch jdk1.7的switch语句增加了对字符串类型的支持.其实现的原理是通过字符串的hash值来比较的,代码示例如下: String name = "KiDe"; // ...
- [转]Android Studio SQLite Database Example
本文转自:http://instinctcoder.com/android-studio-sqlite-database-example/ BY TAN WOON HOW · PUBLISHED AP ...
- spring mongodb增删改查操作
添加数据 School @Id @GeneratedValue private long id; @Indexed(unique = true) private String name; studen ...
- zsh: command not found: gulp
明明安装了gulp,但是为什么执行gulp命令却在控制台输出 zsh: command not found: gulp 可能因为gulp没有被全局安装 在控制台输入 which gulp 如果输出 g ...
- 最新的dubbo和zookeeper整合的问题
最新的dubbo和zookeeper整合的问题 生活本不易,流人遂自安 博主最新在做小项目练手,在进行dubbo和zookeeper整合的时候遇到了一些问题,在这里这些问题做个小总结吧. 首先需要说明 ...