springboot中websoket的使用
知识点:springboot项目中,websoket实时推送技术的介绍与使用
一、双向通信
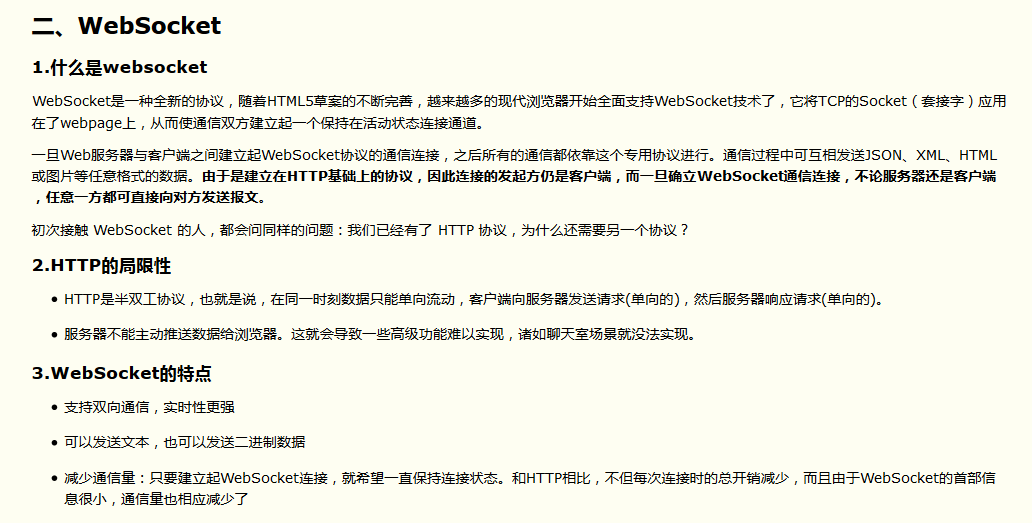
http协议通信只能由客户端发起请求,服务端返回查询结果,如果我们想定时获取服务端的状态变化,相对麻烦一点,Websoket协议之前,可以通过轮询,长轮询,iframe流的方式实现,(可参考https://www.cnblogs.com/fundebug/p/real-time-communication-technologies-of-web.html)我以前在一个项目里,做了一个用户抢登录的功能(一个账户同一时间只能由一个用户登录,如果之后有人登录,那么之前登录的用户就强制退出),用的是很简单的轮询,客户端定时向后台发请求,知道有新用户登录以后,则下线,但是缺点是轮询的间隔过长,会导致用户不能及时接收到更新的数据;轮询的间隔过短,会导致查询请求过多,增加服务器端的负担,所以如果服务器端一旦知道新用户登陆了,主动向客户端发消息,就避免了一些不必要的请求,可以用websoket技术


三:实现代码
1.引入mvn依赖
<dependency>
   <groupId>org.springframework.boot</groupId>
   <artifactId>spring-boot-starter-websocket</artifactId>
</dependency>
2.启用WebSoket支持
@Configuration
public class WebSocketConfig {
    @Bean
    public ServerEndpointExporter serverEndpointExporter(){
        return  new ServerEndpointExporter();
    }
}
3.server端:
@ServerEndpoint("/websocket_server")
@Component
public class WebSocketServer implements InitializingBean {
    //静态变量,用来记录当前大屏数。应该把它设计成线程安全的。
    private static int onlineCount = 0;
    //concurrent包的线程安全Set,用来存放每个客户端对应的MyWebSocket对象。若要实现服务端与单一客户端通信的话,可以使用Map来存放,其中Key可以为用户标识
    public static CopyOnWriteArraySet<WebSocketServer> webSocketSet = new CopyOnWriteArraySet<WebSocketServer>();
    //与某个客户端的连接会话,需要通过它来给客户端发送数据
    private Session session;
    /**
     * 连接建立成功调用的方法
     * @param session  可选的参数。session为与某个客户端的连接会话,需要通过它来给客户端发送数据
     */
    @OnOpen
    public void onOpen(Session session){
        this.session = session;
        webSocketSet.add(this);     //加入set中
        addOnlineCount();           //大屏数加1
        System.out.println("有新连接加入!当前大屏数为" + getOnlineCount());
        String message = "连接建立";
        for(WebSocketServer item : webSocketSet) {
            try {
                item.sendMessage(message);
            } catch (Exception e) {
                e.printStackTrace();
            }
        }
    }
    /**
     * 连接关闭调用的方法
     */
    @OnClose
    public void onClose(){
        webSocketSet.remove(this);  //从set中删除
        subOnlineCount();           //大屏数减1
        //screenFlagMap.remove(this.session.toString());
        System.out.println("有一连接关闭!当前大屏数为" + getOnlineCount());
    }
    /**
     * 收到客户端消息后调用的方法
     * @param message 客户端发送过来的消息
     */
    @OnMessage
    public void onMessage(String message) {
        System.out.println("来自客户端的消息:" + message);
        //群发消息
        for(WebSocketServer item: webSocketSet){
            try {
                if(message.equals("ping")){
                    item.sendMessage("ping");
                }else{
                    item.sendMessage(message);
                }
            } catch (IOException e) {
                e.printStackTrace();
                continue;
            }
        }
    }
    /**
     * 发生错误时调用
     * @param session
     * @param error
     */
    @OnError
    public void onError(Session session, Throwable error){
        System.out.println("发生错误");

    }
    /**
     * 这个方法与上面几个方法不一样。没有用注解,是根据自己需要添加的方法。
     *  实现服务器主动推送
     * @param message
     * @throws IOException
     */
    public void sendMessage(String message) throws IOException {
        /**
         *以下都是实际业务的内容,根据业务进行编写
         **/
        this.session.getBasicRemote().sendText(message);
    }
    public static synchronized int getOnlineCount() {
        return onlineCount;
    }
    public static synchronized void addOnlineCount() {
        WebSocketServer.onlineCount++;
    }
    public static synchronized void subOnlineCount() {
        WebSocketServer.onlineCount--;
    }
    @Override
    public void afterPropertiesSet() throws Exception {
    }
    public  WebSocketServer() {
    }
}
4.消息推送,自己写个Controller,调用webSocketServer.sendMessage()
@Controller
@RequestMapping(value = "/screen")
public class APIController {
    @Autowired
    private WebSocketServer webSocketServer;
    @RequestMapping(value = "/change")
    @ResponseBody
    public String skip(HttpServletRequest request, HttpServletResponse response) throws IOException {
         //向所有客户端发送消息
        String message="该账号已登录,强制下线";
        WebSocketServer ws=new WebSocketServer();
        Iterator< WebSocketServer> iterator = webSocketServer.webSocketSet.iterator();
        while (iterator.hasNext()){
            ws=iterator.next();
            ws.sendMessage(message);
        }
        return "操作成功!";
    }
5.页面发起soket请求
<body>
<div>
     WebSoket测试页
    <div id="showInfo"></div>
</div>
<script>
    debugger
    var websocket = null;
    var lockReconnect = false;  //避免ws重复连接

     var wsUrl="ws://192.168.1.105:5050/websocket_server";
    createWebSocket(wsUrl);
    function createWebSocket(url) {
        try{
            /**判断当前浏览器是否支持WebSocket**/
            if ('WebSocket' in window) {
                websocket = new WebSocket(url);
            }else if ('MozWebSocket' in window){
                websocket = new MozWebSocket(url);
            }else {
                alert('当前浏览器 Not support websocket')
            }
            initEventHandle(url);
        }catch(e){
            reconnect(url);
        }
    }
    function initEventHandle(url) {
        /* 连接发生错误的回调方法 */
        websocket.onerror = function() {
            reconnect(url);
            setMessageInnerHTML("WebSocket连接发生错误");
        };
        /* 连接成功建立的回调方法 */
        websocket.onopen = function() {
            heartCheck.reset().start();       //心跳检测重置
            setMessageInnerHTML("WebSocket连接成功");
        }

        /* 接收到消息的回调方法 */
        websocket.onmessage = function(event) {    //如果获取到消息,心跳检测重置
            heartCheck.reset().start();      //拿到任何消息都说明当前连接是正常的
            setMessageInnerHTML(event.data);
            if(event.data!='ping'){
                if(event.data.indexOf("{")!=-1){
                    console.log("eeeeee"+event.data);
                }
            }
        }
        /* 连接关闭的回调方法 */
        websocket.onclose = function() {
            reconnect(wsUrl);
            setMessageInnerHTML("WebSocket连接关闭");
        }
    }

    /* 监听窗口关闭事件,当窗口关闭时,主动去关闭websocket连接,防止连接还没断开就关闭窗口,server端会抛异常。 */
    window.onbeforeunload = function() {
        closeWebSocket();
    }
    /* 将消息显示在网页上 */
    function setMessageInnerHTML(innerHTML) {
        document.getElementById("showInfo").innerHTML =innerHTML;
        console.log("消息控制台打印:"+innerHTML);
    }
    /* 关闭WebSocket连接 */
    function closeWebSocket() {
        websocket.close();
    }
    /* 发送消息 */
    function send() {
        /* var message = document.getElementById('text').value; */
        var message = '${pageCode}';
        websocket.send(message);
    }

 代码放不下了 ,可以参考源码 https://github.com/shuaishuaihand/websoketdemo.git
springboot中websoket的使用的更多相关文章
- SpringBoot中yaml配置对象
转载请在页首注明作者与出处 一:前言 YAML可以代替传统的xx.properties文件,但是它支持声明map,数组,list,字符串,boolean值,数值,NULL,日期,基本满足开发过程中的所 ...
- 如何在SpringBoot中使用JSP ?但强烈不推荐,果断改Themeleaf吧
做WEB项目,一定都用过JSP这个大牌.Spring MVC里面也可以很方便的将JSP与一个View关联起来,使用还是非常方便的.当你从一个传统的Spring MVC项目转入一个Spring Boot ...
- springboot中swaggerUI的使用
demo地址:demo-swagger-springboot springboot中swaggerUI的使用 1.pom文件中添加swagger依赖 2.从github项目中下载swaggerUI 然 ...
- spring-boot+mybatis开发实战:如何在spring-boot中使用myabtis持久层框架
前言: 本项目基于maven构建,使用mybatis-spring-boot作为spring-boot项目的持久层框架 spring-boot中使用mybatis持久层框架与原spring项目使用方式 ...
- 由浅入深学习springboot中使用redis
很多时候,我们会在springboot中配置redis,但是就那么几个配置就配好了,没办法知道为什么,这里就详细的讲解一下 这里假设已经成功创建了一个springboot项目. redis连接工厂类 ...
- Springboot中使用AOP统一处理Web请求日志
title: Springboot中使用AOP统一处理Web请求日志 date: 2017-04-26 16:30:48 tags: ['Spring Boot','AOP'] categories: ...
- SpringBoot 中常用注解
本篇博文将介绍几种SpringBoot 中常用注解 其中,各注解的作用为: @PathVaribale 获取url中的数据 @RequestParam 获取请求参数的值 @GetMapping 组合注 ...
- SpringBoot中关于Mybatis使用的三个问题
SpringBoot中关于Mybatis使用的三个问题 转载请注明源地址:http://www.cnblogs.com/funnyzpc/p/8495453.html 原本是要讲讲PostgreSQL ...
- 在SpringBoot中配置aop
前言 aop作为spring的一个强大的功能经常被使用,aop的应用场景有很多,但是实际的应用还是需要根据实际的业务来进行实现.这里就以打印日志作为例子,在SpringBoot中配置aop 已经加入我 ...
随机推荐
- 安装php环境xampp
1.下载xampp 安装 2.如果启动时发生端口占用错误, 是443和80端口被占用, 可以改成444,88端口, 在C:\xampp\apache\conf\extra\httpd-ssl.conf ...
- c# Sockect 通信
1.Server using System; using System.Collections.Generic; using System.Text; //添加Socket类 using System ...
- [shell]用shell脚本将本地文件夹与ftp上的文件夹同步
需求说明 最近在AIX上做开发,开发机器在office网段,测试机器在lab网段,不能互相通讯,只能通过特定的ftp来传文件. 每次上传的机器都要做:登录ftp,进入我的目录,上传:下载的机器都要做: ...
- 10.Curator队列
Curator也提供ZK Recipe的分布式队列实现.利用ZK的 PERSISTENTSEQUENTIAL节点,可以保证放入到队列中的项目是按照顺序排队的.如果单一的消费者从队列中取数据,那 ...
- MVC学习之HtmlHelper
1.为什么要使用HtmlHelper? 1.首先HtmlHelper是一个类型,MVC中的ViewPage<TModel>中的一个属性Html属性,这个属性的类型就是HtmlHelper& ...
- Oracle下回滚rollback的使用
oracle中可以设置一个回滚点进行回滚 设置回滚名称 savepoint pointa ; 进行回滚 rollback to pointa; 如果期间有删除的数据就回来了
- 牛客网多校赛第七场A--Minimum Cost Perfect Matching【位运算】【规律】
链接:https://www.nowcoder.com/acm/contest/145/A 来源:牛客网 时间限制:C/C++ 1秒,其他语言2秒 空间限制:C/C++ 262144K,其他语言524 ...
- R中绘制聚类的离散图
R中利用cluster简单的绘制常见聚类离散图 # 引入cluster库(clara.fanny) library(cluster) # 聚类散点图绘制 # 引入factoextra,cluster库 ...
- pandas的replace方法
就是将一个值替换为另一个值,以前我用的是赋值方式,这里应该效率会高. 1.说明: 语法:replace(self, to_replace=None, value=None, inplace=False ...
- EF批量添加,删除,修改的扩展
在EF各版本中,没有相应批量的添加,删除,修改,在用ORM 处理数据时直有个尴尬.在网上,也接到了很多网友的询问这方面的情况,特此今天把这方面的相关扩展分享一下,(这里只做批量删除的例子,添加和修改的 ...
