Android中如何使用JUnit进行单元测试 eclipse
Android中如何使用JUnit进行单元测试
|
<instrumentation android:name="android.test.InstrumentationTestRunner"
android:targetPackage="com.example.junittest" android:label="@string/app_name"
></instrumentation>
|
|
<?xml version="1.0" encoding="utf-8"?>
<manifest xmlns:android="http://schemas.android.com/apk/res/android"
package="com.example.junittest"
android:versionCode="1"
android:versionName="1.0" >
<uses-sdk
android:minSdkVersion="8"
android:targetSdkVersion="18" />
<instrumentation android:name="android.test.InstrumentationTestRunner"
android:targetPackage="com.example.junittest" android:label="@string/app_name"
></instrumentation>
<application
android:allowBackup="true"
android:icon="@drawable/ic_launcher"
android:label="@string/app_name"
android:theme="@style/AppTheme" >
<uses-library android:name="android.test.runner"/>
<activity
android:name="com.example.junittest.MainActivity"
android:label="@string/app_name" >
<intent-filter>
<action android:name="android.intent.action.MAIN" />
<category android:name="android.intent.category.LAUNCHER" />
</intent-filter>
</activity>
</application>
</manifest>
|
|
package com.example.junittest;
public class Calculator {
public int add(int x,int y){
return x+y;
}
public int sub(int x,int y){
return x-y;
}
public int divide(int x,int y){
return x/y;
}
public int multiply(int x,int y){
return x*y;
}
}
|
|
package com.example.test;
import junit.framework.Assert;
import com.example.junittest.Calculator;
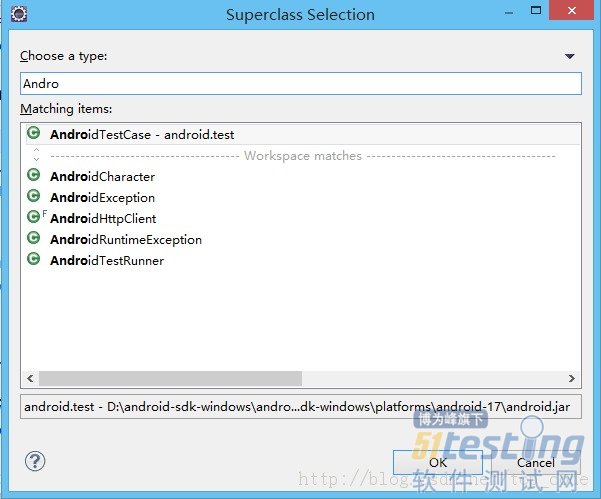
import android.test.AndroidTestCase;
import android.util.Log;
public class CalculatorTester extends AndroidTestCase {
private static final String TAG = CalculatorTester.class.getSimpleName();
private Calculator calculator;
/**
* This method is invoked before any of the test methods in the class.
* Use it to set up the environment for the test (the test fixture. You can use setUp() to instantiate a new Intent with the action ACTION_MAIN. You can then use this intent to start the Activity under test.
*/
@Override
protected void setUp() throws Exception {
Log.e(TAG, "setUp");
calculator = new Calculator();
super.setUp();
}
/**
* 测试Calculator的add(int x, int y)方法
* 把异常抛给测试框架
* @throws Exception
*/
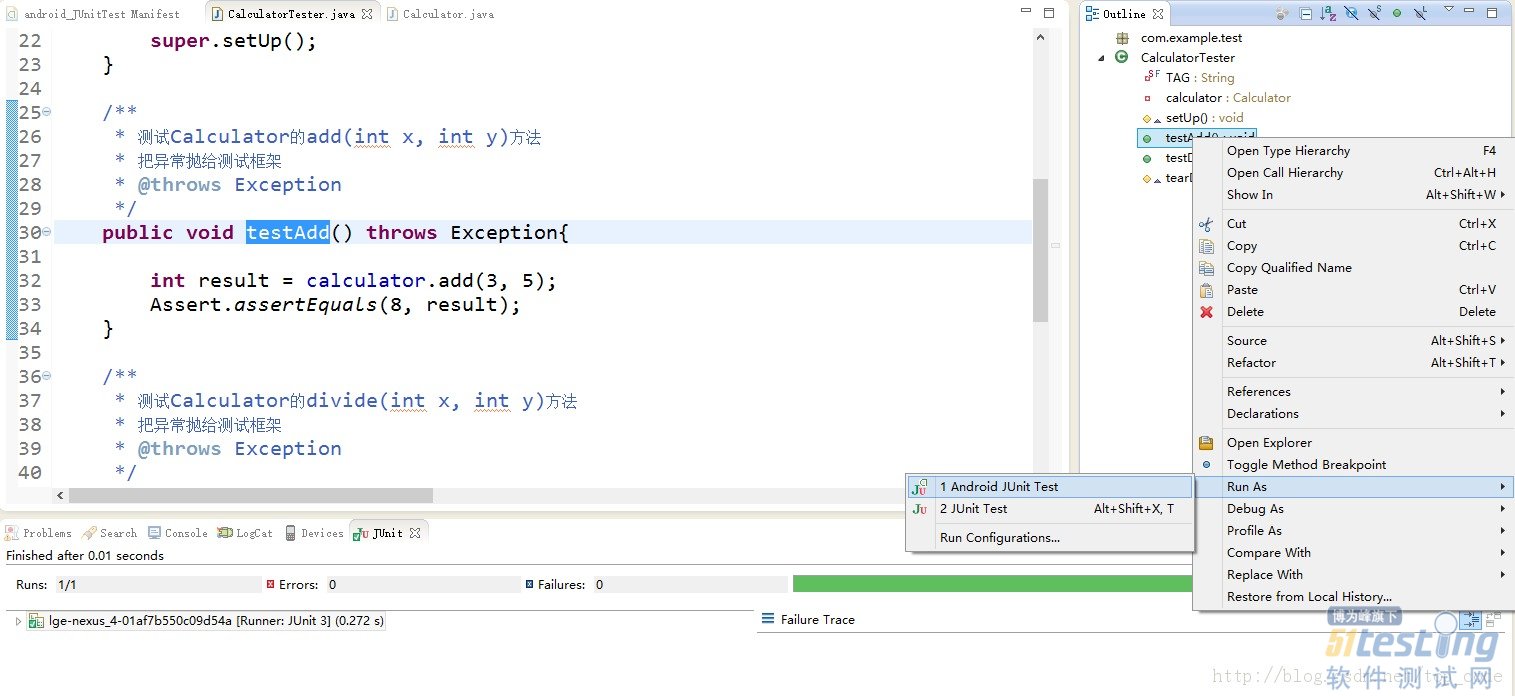
public void testAdd() throws Exception{
int result = calculator.add(3, 5);
Assert.assertEquals(8, result);
}
/**
* 测试Calculator的divide(int x, int y)方法
* 把异常抛给测试框架
* @throws Exception
*/
public void testDivide() throws Exception{
int result = calculator.divide(10, 0);
Assert.assertEquals(10, result);
}
/**
* This method is invoked after all the test methods in the class.
* Use it to do garbage collection and to reset the test fixture.
*/
@Override
protected void tearDown() throws Exception {
Log.e(TAG, "tearDown");
calculator = null;
super.tearDown();
}
}
|

Android中如何使用JUnit进行单元测试 eclipse的更多相关文章
- Android之如何使用JUnit进行单元测试
转的:http://www.blogjava.net/qileilove/archive/2014/05/19/413824.html Android中如何使用JUnit进行单元测试 在我们日常开发a ...
- SpringBoot重点详解--使用Junit进行单元测试
目录 添加依赖与配置 ApplicationContext测试 Environment测试 MockBean测试 Controller测试 情况一 情况二 方法一 方法二 本文将对在Springboo ...
- 在Android中进行单元测试遇到的问题
问题1.Cannot connect to VM socket closed 在使用JUnit进行测试的时候,遇到这个问题.网上的解释是:使用Eclipse对Java代码进行调试,无论是远程JVM还 ...
- 软件工程第二次作业(Android Studio利用Junit进行单元测试)
一.开发工具的安装和运行 1.安装 由于我的电脑之前就安装好了Android Studio,就不再重装了.在这里就给出几条安装过程中需要注意的地方吧: 安装包最好在官网下载已经带有Android SD ...
- Android使用JUnit进行单元测试
前言:为什么要进行单元测试?单元测试能快速是开发者,找到代码中的问题所在,因为是单元测试,所以代码只执行响应的测试单元,执行快解决问题的效率高,同时提高代码的质量. Android中的单元测试可简单分 ...
- Android中使用自身携带的Junit新建一个测试工程
1.新建立一个Android工程 package com.shellway.junit; public class Service { public int divide(int a,int b){ ...
- 如何将Android默认的Camra程序导入到eclipse中
由于工作需要将camera源码导入到Eclipse中,找了很多的方法,现将自己的整理发出来.... 由于开发的要求,需要将Android默认的Camra程序导入到eclipse中,进行修改和再开发. ...
- Android中的单元测试
2015年5月19日 23:10 在Android中,已经内置了Junit所以不需要在导包.只要继承AndroidTestCase类就可以了. 首先需要修改AndroidManifes ...
- Android 开发之开发插件使用:Eclipse 插件 SQLiteManger eclipse中查看数据内容--翻译
最近研究了一段时间Android开发后发现,google自带的ADT工具,缺失一些开发常用的东西,希望可以构建一个类似使用JAVA EE开发体系一样开发的工具包集合,包括前台开发,调试,到后台数据库的 ...
随机推荐
- FMC简介
FMC简介 FMC ( FPGA Mezzanine Card ) 简而言之,是具有特定功能的子卡模块. Developed by a consortium of companies ranging ...
- git仓库迁移的两种解决方案
Git仓库迁移而不丢失log的方法 要求能保留原先的commit记录,应该如何迁移呢? 同时,本地已经clone了原仓库,要配置成新的仓库地址,该如何修改呢? 注意:如果使用了代码审核工具Gerrit ...
- php 二维数组
<?php // 一个二维数组 $cars=array ( array(,), array(,), array(,) ); ?>
- mysql数据库的备份及免密码上传
主要利用了mysqldump和sshpass进行备份和免密上传 以下是代码实现: #!/bin/bash #该脚本放在主服务器运行 #从服务器账号密码ipremotehost="xxxxxx ...
- Getting 'The AWS Access Key Id you provided does not exist in our records' error with Amazon MWS
I upgraded from one version of Amazon MWS (marketplace web service) version https://mws.amazonservic ...
- xargs -i的用法
find ... | 后面跟文件,就需要用到xargs,其中-i加{}就能替代管道符之前的文件(标准输出的内容) 在/tmp下创建6个文件,1.txt,2.txt,3.txt,4.txt,5.txt, ...
- bzoj1069: [SCOI2007]最大土地面积 凸包+旋转卡壳求最大四边形面积
在某块平面土地上有N个点,你可以选择其中的任意四个点,将这片土地围起来,当然,你希望这四个点围成的多边形面积最大. 题解:先求出凸包,O(n)枚举旋转卡壳,O(n)枚举另一个点,求最大四边形面积 /* ...
- iptable filter nat MASQUERADE snat dat
在这里,系统会根据IP数据包中的destination ip address中的IP地址对数据包进行分发.如果destination ip adress是本机地址,数据将会被转交给INPUT链.如果不 ...
- Eclipse CDT 配置C /C ++ 标准库 (UBUNTU 12 )
http://blog.csdn.net/wudiwo/article/details/7682320
- Windows 7 IIS7.5上部署MVC实例
这段时间在用MVC写一个导游网站,在Window7上部署的时候,遇到和处理了一些问题. 现将完整的过程整理出来,供大家参考: 一.部署准备: 1.安装Microsoft .net FrameWork ...