安卓TabLayout+ViewPager实现切页
安卓使用TabLayout+ViewPager+Fragment 实现页面切换,可实现左右滑动切换视图界面和点击切换
可自定义菜单栏是在顶部还是在底部
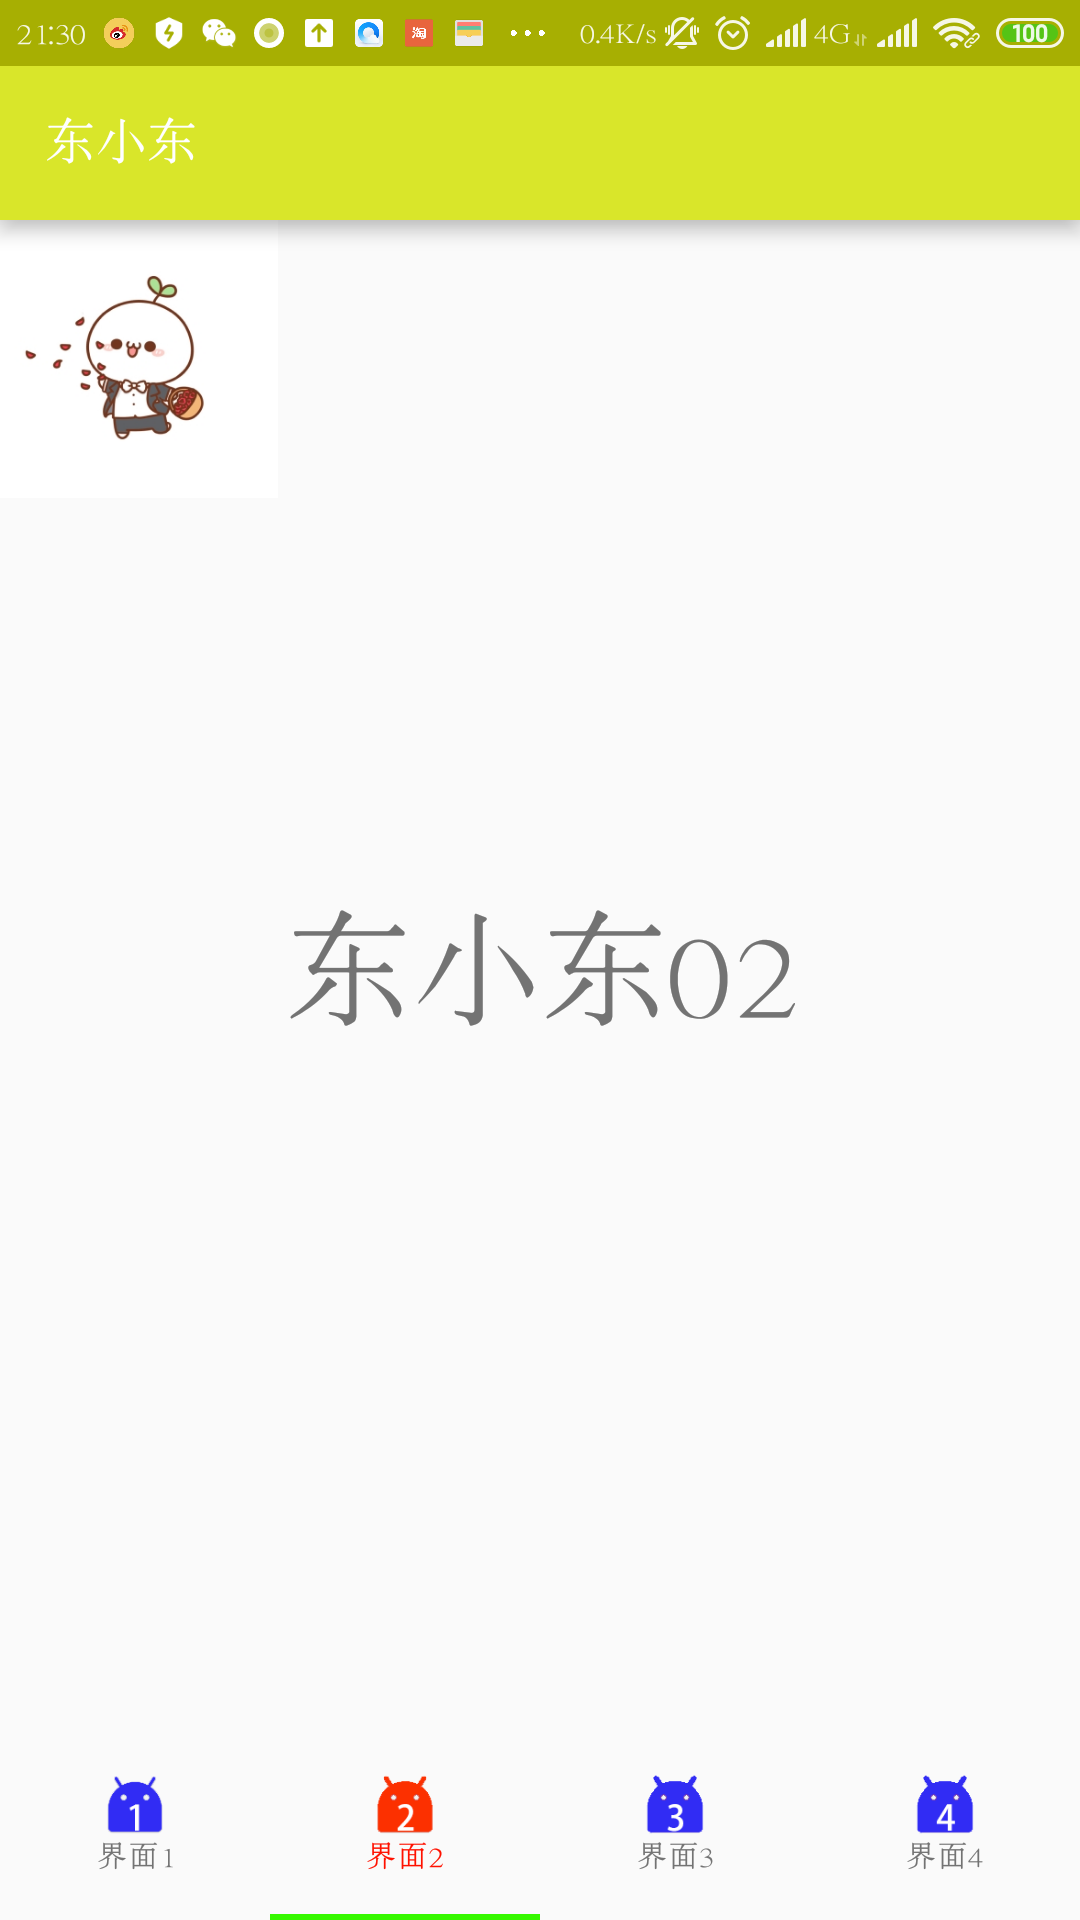
一、实现效果:
二、实现过程:
2.1 一些重要的设置
添加必须依赖:
因为需要使用:import android.support.design.widget.TabLayout;,所以必须添加下列依赖
- compile 'com.android.support:design:23.3.0'
使用Android Studio3时,此步可能出现问题,请参考下面的升级篇
主布局文件编写:
顶部或者底部显示,只要更改ViewPager和TabLayout排列顺序即可
- <?xml version="1.0" encoding="utf-8"?>
- <LinearLayout xmlns:android="http://schemas.android.com/apk/res/android"
- xmlns:tools="http://schemas.android.com/tools"
- android:layout_width="match_parent"
- android:layout_height="match_parent"
- xmlns:app="http://schemas.android.com/apk/res-auto"
- android:paddingBottom="0dp"
- android:paddingLeft="0dp"
- android:paddingRight="0dp"
- android:orientation="vertical"
- android:paddingTop="0dp"
- tools:context="com.example.fafa.MainActivity">
- <android.support.v4.view.ViewPager
- android:id="@+id/viewpager"
- android:layout_width="match_parent"
- android:layout_height="0dp"
- android:layout_weight="1"
- />
- <!--
- app:tabIndicatorColor="" 指示器颜色
- app:tabIndicatorHeight="" 指示器高度,设置为0就是没有指示器
- app:tabTextColor="" Tab文本默认颜色
- app:tabSelectedTextColor="" Tab文本被选中后的颜色
- app:tabTextAppearance="" 为Tab文本设置样式,一般是需要为Tab加图标时使用
- app:tabMode="" 只有两个值:fixed、scrollable
- 其中 fixed用于标题栏少的情况,每个Tab可以平分屏幕宽度
- 其中 scrollable用于标题栏多出屏幕的情况,如果标题栏少的时候用很难看,占不满屏幕
- app:tabGravity="center" 整体居中,不可与上共用
- app:tabBackground="" TabLayout背景,和android:background=""效果一样
- app:tabGravity="" 对齐方式: 居中显示center、fill填满
- -->
- <android.support.design.widget.TabLayout
- android:id="@+id/tabs2"
- android:layout_width="match_parent"
- android:layout_height="wrap_content"
- android:layout_gravity="center"
- app:tabMode="fixed"
- app:tabIndicatorColor="@color/colorLv"
- app:tabTextColor="@android:color/black"
- app:tabSelectedTextColor="@color/colorred"
- />
- </LinearLayout>
2.2 仅字符菜单栏显示实现:
未加入图片显示,实现较为简单

基本逻辑代码:
每个界面使用不同的fragment,进行一 一对应
- import android.support.design.widget.TabLayout;
- public class MainActivity extends AppCompatActivity {
- private ViewPager viewPager;
- private TabLayout tabLayout;
- @Override
- protected void onCreate(Bundle savedInstanceState) {
- super.onCreate(savedInstanceState);
- setContentView(R.layout.activity_main);
- tabLayout = (TabLayout) findViewById(R.id.tabs2);
- viewPager = (ViewPager) findViewById(R.id.viewpager);
- //设置界面文件和文字一一对应
- final Fragment[] fragments = {new Fragment0(), new Fragment1(), new Fragment2()};
- final String[] titles = {"界面1", "界面2", "界面3"};
- //添加tablayout中的竖线,每一项的中间分隔线
- //LinearLayout linearLayout = (LinearLayout) tabLayout.getChildAt(0);
- // linearLayout.setShowDividers(LinearLayout.SHOW_DIVIDER_MIDDLE);
- // linearLayout.setDividerDrawable(ContextCompat.getDrawable(this, R.mipmap.fg));
- //每项只进入一次
- viewPager.setAdapter(new FragmentPagerAdapter(getSupportFragmentManager()) {
- @Override
- public Fragment getItem(int position) {
- return fragments[position];
- }
- @Override
- public int getCount() {
- return fragments.length;
- }
- @Override
- public CharSequence getPageTitle(int position) {
- return titles[position];
- }
- });
- tabLayout.setupWithViewPager(viewPager);
- tabLayout.getTabAt(1).select();//设置第一个为选中
- }
- }
2.3 字符和图片菜单栏实现
图片加汉字菜单栏,菜单栏每项都是一个视图可以自定义设计
菜单栏每项的布局文件设计:
一个图片显示和一个文字显示,定义为垂直布局,其中android:layout_gravity="center"是把控件居中,这里不写,在菜单栏显示时可能会出现错位
- <?xml version="1.0" encoding="utf-8"?>
- <LinearLayout xmlns:android="http://schemas.android.com/apk/res/android"
- android:layout_width="match_parent"
- android:orientation="vertical"
- android:id="@+id/item_view"
- android:layout_height="match_parent">
- <ImageView
- android:layout_width="wrap_content"
- android:src="@mipmap/ic_launcher"
- android:id="@+id/item_img"
- android:layout_gravity="center"
- android:layout_height="wrap_content" />
- <TextView
- android:layout_width="wrap_content"
- android:text="xxxx"
- android:layout_gravity="center"
- android:id="@+id/item_text"
- android:layout_height="wrap_content" />
- </LinearLayout>
主布局文件更改:
在主布局文件的<android.support.design.widget.TabLayout>更改android:layout_height="70dp",表示其菜单栏的高度改变。
定义必要的类变量:
- private ViewPager viewPager;
- private TabLayout tabLayout;
- //设置界面文件和文字一一对应
- private Fragment[] Lfragments = {new Fragment0(), new Fragment1(), new Fragment2(),new Fragment3()};
- private String[] Ltitles = {"界面1", "界面2", "界面3","界面4"};
- //未选中图片
- private int[] Limg = {R.mipmap.an1,R.mipmap.an2,R.mipmap.an3,R.mipmap.an4};
- //选中图片
- private int[] Limgn = {R.mipmap.ann1,R.mipmap.ann2,R.mipmap.ann3,R.mipmap.ann4};
- //配置默认选中第几项
- private int ItemWhat=1;
数据初始化及基本界面加载:
- //只进入一次,初始化
- viewPager.setAdapter(new FragmentPagerAdapter(getSupportFragmentManager()) {
- @Override
- public Fragment getItem(int position) {
- return Lfragments[position];
- }
- @Override
- public int getCount() {
- return Lfragments.length;
- }
- @Override
- public CharSequence getPageTitle(int position) {
- return Ltitles[position];
- }
- });
- //绑定
- tabLayout.setupWithViewPager(viewPager);
- //设置默认选中页,宏定义
- tabLayout.getTabAt(ItemWhat).select();
- viewPager.setOffscreenPageLimit(3); //设置向左和向右都缓存的页面个数
- //初始化菜单栏显示
- for (int i = 0; i < tabLayout.getTabCount(); i++) {
- //寻找到控件
- View view = LayoutInflater.from(MainActivity.this).inflate(R.layout.items, null);
- LinearLayout mTabView = (LinearLayout) view.findViewById(R.id.item_view);
- TextView mTabText = (TextView) view.findViewById(R.id.item_text);
- ImageView mTabIcon = (ImageView) view.findViewById(R.id.item_img);
- mTabText.setText(Ltitles[i]);
- mTabIcon.setImageResource(Limg[i]);
- //设置不可点击
- // mTabView.setClickable(true);
- //更改选中项样式
- if(i==ItemWhat){
- mTabIcon.setImageResource(Limgn[i]);
- mTabText.setTextColor(ContextCompat.getColor(this, R.color.colorRed));
- }
- //设置样式
- tabLayout.getTabAt(i).setCustomView(view);
- }
监听选择事件:
- //是否选中监听
- tabLayout.setOnTabSelectedListener(new TabLayout.OnTabSelectedListener() {
- @Override
- public void onTabSelected(TabLayout.Tab tab) {
- //选中时进入,改变样式
- ItemSelect(tab);
- //onTabselected方法里面调用了viewPager的setCurrentItem 所以要想自定义OnTabSelectedListener,也加上mViewPager.setCurrentItem(tab.getPosition())就可以了
- viewPager.setCurrentItem(tab.getPosition());
- }
- @Override
- public void onTabUnselected(TabLayout.Tab tab) {
- //未选中进入,改变样式
- ItemNoSelect(tab);
- }
- @Override
- public void onTabReselected(TabLayout.Tab tab) {
- //重新选中
- }
- });
选中和非选中,更改其中显示样式:
- //某个项选中,改变其样式
- private void ItemSelect(TabLayout.Tab tab) {
- View customView = tab.getCustomView();
- TextView tabText = (TextView) customView.findViewById(R.id.item_text);
- ImageView tabIcon = (ImageView) customView.findViewById(R.id.item_img);
- tabText.setTextColor(ContextCompat.getColor(this, R.color.colorRed));
- String stitle = tabText.getText().toString();
- for(int i=0;i<Ltitles.length;i++){
- if(Ltitles[i].equals(stitle)){
- //Toast.makeText(MainActivity.this,"xxx+"+i,Toast.LENGTH_SHORT).show();
- tabIcon.setImageResource(Limgn[i]);
- }
- }
- }
- //某个项非选中,改变其样式
- private void ItemNoSelect(TabLayout.Tab tab) {
- View customView = tab.getCustomView();
- TextView tabText = (TextView) customView.findViewById(R.id.item_text);
- ImageView tabIcon = (ImageView) customView.findViewById(R.id.item_img);
- tabText.setTextColor(ContextCompat.getColor(this, R.color.colorBlack));
- String stitle = tabText.getText().toString();
- for(int i=0;i<Ltitles.length;i++){
- if(Ltitles[i].equals(stitle)){
- tabIcon.setImageResource(Limg[i]);
- }
- }
- }
整体代码:
- import android.support.design.widget.TabLayout;
- public class MainActivity extends AppCompatActivity {
- private ViewPager viewPager;
- private TabLayout tabLayout;
- //设置界面文件和文字一一对应
- private Fragment[] Lfragments = {new Fragment0(), new Fragment1(), new Fragment2(),new Fragment3()};
- private String[] Ltitles = {"界面1", "界面2", "界面3","界面4"};
- //未选中图片
- private int[] Limg = {R.mipmap.an1,R.mipmap.an2,R.mipmap.an3,R.mipmap.an4};
- //选中图片
- private int[] Limgn = {R.mipmap.ann1,R.mipmap.ann2,R.mipmap.ann3,R.mipmap.ann4};
- //配置默认选中第几项
- private int ItemWhat=1;
- @Override
- protected void onCreate(Bundle savedInstanceState) {
- super.onCreate(savedInstanceState);
- setContentView(R.layout.activity_main);
- //找控件
- tabLayout = (TabLayout) findViewById(R.id.tabs2);
- viewPager = (ViewPager) findViewById(R.id.viewpager);
- //添加tablayout中的竖线,每一项的中间分隔线
- //LinearLayout linearLayout = (LinearLayout) tabLayout.getChildAt(0);
- // linearLayout.setShowDividers(LinearLayout.SHOW_DIVIDER_MIDDLE);
- // linearLayout.setDividerDrawable(ContextCompat.getDrawable(this, R.mipmap.fg));
- //只进入一次,初始化
- viewPager.setAdapter(new FragmentPagerAdapter(getSupportFragmentManager()) {
- @Override
- public Fragment getItem(int position) {
- return Lfragments[position];
- }
- @Override
- public int getCount() {
- return Lfragments.length;
- }
- @Override
- public CharSequence getPageTitle(int position) {
- return Ltitles[position];
- }
- });
- //绑定
- tabLayout.setupWithViewPager(viewPager);
- //设置默认选中页,宏定义
- tabLayout.getTabAt(ItemWhat).select();
- viewPager.setOffscreenPageLimit(3); //设置向左和向右都缓存的页面个数
- //初始化菜单栏显示
- for (int i = 0; i < tabLayout.getTabCount(); i++) {
- //寻找到控件
- View view = LayoutInflater.from(MainActivity.this).inflate(R.layout.items, null);
- LinearLayout mTabView = (LinearLayout) view.findViewById(R.id.item_view);
- TextView mTabText = (TextView) view.findViewById(R.id.item_text);
- ImageView mTabIcon = (ImageView) view.findViewById(R.id.item_img);
- mTabText.setText(Ltitles[i]);
- mTabIcon.setImageResource(Limg[i]);
- //设置不可点击
- // mTabView.setClickable(true);
- //更改选中项样式
- if(i==ItemWhat){
- mTabIcon.setImageResource(Limgn[i]);
- mTabText.setTextColor(ContextCompat.getColor(this, R.color.colorRed));
- }
- //设置样式
- tabLayout.getTabAt(i).setCustomView(view);
- }
- //是否选中监听
- tabLayout.setOnTabSelectedListener(new TabLayout.OnTabSelectedListener() {
- @Override
- public void onTabSelected(TabLayout.Tab tab) {
- //选中时进入,改变样式
- ItemSelect(tab);
- //onTabselected方法里面调用了viewPager的setCurrentItem 所以要想自定义OnTabSelectedListener,也加上mViewPager.setCurrentItem(tab.getPosition())就可以了
- viewPager.setCurrentItem(tab.getPosition());
- }
- @Override
- public void onTabUnselected(TabLayout.Tab tab) {
- //未选中进入,改变样式
- ItemNoSelect(tab);
- }
- @Override
- public void onTabReselected(TabLayout.Tab tab) {
- //重新选中
- }
- });}
- //某个项选中,改变其样式
- private void ItemSelect(TabLayout.Tab tab) {
- View customView = tab.getCustomView();
- TextView tabText = (TextView) customView.findViewById(R.id.item_text);
- ImageView tabIcon = (ImageView) customView.findViewById(R.id.item_img);
- tabText.setTextColor(ContextCompat.getColor(this, R.color.colorRed));
- String stitle = tabText.getText().toString();
- for(int i=0;i<Ltitles.length;i++){
- if(Ltitles[i].equals(stitle)){
- //Toast.makeText(MainActivity.this,"xxx+"+i,Toast.LENGTH_SHORT).show();
- tabIcon.setImageResource(Limgn[i]);
- }
- }
- }
- //某个项非选中,改变其样式
- private void ItemNoSelect(TabLayout.Tab tab) {
- View customView = tab.getCustomView();
- TextView tabText = (TextView) customView.findViewById(R.id.item_text);
- ImageView tabIcon = (ImageView) customView.findViewById(R.id.item_img);
- tabText.setTextColor(ContextCompat.getColor(this, R.color.colorBlack));
- String stitle = tabText.getText().toString();
- for(int i=0;i<Ltitles.length;i++){
- if(Ltitles[i].equals(stitle)){
- tabIcon.setImageResource(Limg[i]);
- }
- }
- }
- }
升级篇
Android Studio3版本:android-studio-ide-191.5900203-windows
依赖修改
- implementation 'com.android.support:design:28.0.0'
XML修改:
- <!--
- app:tabIndicatorColor="" 指示器颜色
- app:tabIndicatorHeight="" 指示器高度,设置为0就是没有指示器
- app:tabTextColor="" Tab文本默认颜色
- app:tabSelectedTextColor="" Tab文本被选中后的颜色
- app:tabTextAppearance="" 为Tab文本设置样式,一般是需要为Tab加图标时使用
- app:tabMode="" 只有两个值:fixed、scrollable
- 其中 fixed用于标题栏少的情况,每个Tab可以平分屏幕宽度
- 其中 scrollable用于标题栏多出屏幕的情况,如果标题栏少的时候用很难看,占不满屏幕
- app:tabGravity="center" 整体居中,不可与上共用
- app:tabBackground="" TabLayout背景,和android:background=""效果一样
- app:tabGravity="" 对齐方式: 居中显示center、fill填满
- -->
- <com.google.android.material.tabs.TabLayout
- android:id="@+id/tabs2"
- android:layout_width="match_parent"
- android:layout_height="wrap_content"
- android:layout_gravity="center"
- app:tabMode="fixed"
- app:tabIndicatorColor="@color/colorLv"
- app:tabTextColor="@android:color/black"
- app:tabSelectedTextColor="@color/colorred"
- />
- <androidx.viewpager.widget.ViewPager
- android:id="@+id/viewpager"
- android:layout_width="match_parent"
- android:layout_height="0dp"
- android:layout_weight=""
- />
导入修改
- import com.google.android.material.tabs.TabLayout;
- import androidx.viewpager.widget.ViewPager;
安卓TabLayout+ViewPager实现切页的更多相关文章
- TabLayout+ViewPager+Fragment制作页卡
本人很懒,直接上代码了. 布局文件: <?xml version="1.0" encoding="utf-8"?><android.suppo ...
- 安卓官方ViewPager与android.support.design.widget.TabLayout双向交互联动切换 。
该TabLayout的功用,简单的说,就是当用户在该TabLayout的选项卡子item中选择触摸时候,文字和下方的指示器横条滑动指示.android.support.design.widget.Ta ...
- TabLayout + ViewPager
一.实现思路 1.在build.gradle中添加依赖,例如: compile 'com.android.support:support-v4:23.4.0'compile 'com.android. ...
- 介绍三个Android支持库控件:TabLayout+ViewPager+RecyclerView
本文主要介绍如下三个Android支持库控件的配合使用: TabLayout:android.support.design.widget.TabLayout ViewPager:android.sup ...
- [置顶]
xamarin Tablayout+Viewpager+Fragment顶部导航栏
最近几天不忙,所以把项目中的顶部导航栏的实现归集一下.android中使用TabLayout+ViewPager+Fragment制作顶部导航非常常见,代码实现也比较简单.当然我这个导航栏是基于xam ...
- Android开发之漫漫长途 Fragment番外篇——TabLayout+ViewPager+Fragment
该文章是一个系列文章,是本人在Android开发的漫漫长途上的一点感想和记录,我会尽量按照先易后难的顺序进行编写该系列.该系列引用了<Android开发艺术探索>以及<深入理解And ...
- ViewPagerWithRecyclerDemo【RecyclerView+ViewPager实现类似TabLayout+ViewPager效果】
版权声明:本文为HaiyuKing原创文章,转载请注明出处! 前言 使用RecyclerView+ViewPager实现类似TabLayout+ViewPager效果. 效果图 使用步骤 一.项目组织 ...
- 011 Android TabLayout+ViewPager实现顶部滑动效果(多个页面)
1.TabLayout介绍 TabLayout提供了一个水平的布局用来展示Tabs,很多应用都有这样的设计,典型的有网易新闻,简书,知乎等.TabLayout就可以很好的完成这一职责,首先TabLay ...
- 关于tablayout+viewpager+fragment配合使用的一点记录
最近在写项目的时候遇到要求使用tablayout和fragment,遇到了这里记录一下大致思路. tablayout是头部可以左右切换的头部控制栏控件,配合viewpager使用,fragment是碎 ...
随机推荐
- 行盒(line box)垂直方向的属性详解:从font-size、line-height到vertical-align
视觉格式化模型 在一个文档中,每个元素都被表示为0.1或多个矩形的盒子.确定这些盒子的尺寸, 属性 --- 像它的颜色,背景,边框方面 --- 和位置是渲染引擎的目标.① 在CSS中,使用标准盒模型描 ...
- k8s 安装步骤
1 安装Docker 1.1 增加中国区镜像 https://registry.docker-cn.com 2 下载安装k8s的镜像的脚本 https://github.com/AliyunConta ...
- UWP作业(二)A Mobile App
看到给出的十个技术主题,我第一反应就是,对于大部分社交软件来讲,运用到全部这些都并不是什么难题,倒不如谈谈我手机里现有的社交软件中,使用时间最短但(you)是(dian)最(bu)好(hao)奇(yo ...
- P1081 开车旅行(Not Finish)
https://www.luogu.org/problemnew/show/P1081
- centos7.6 ssh远程链接配置
1.firewall增加22端口号 增加方式有两种,直接编辑firewall的public.xml增加 vi /etc/firewalld/zones/public.xml 进入后按i健光标移动到zo ...
- JS prototype chaining(原型链)整理中······
初学原型链整理 构造器(constructor).原型(prototype).实例(instance); 每一个构造器都有一个prototype对象,这个prototype对象有一个指针指向该构造器: ...
- 可遇不可求的Question之MySql4.0前版本不支持union与批量SQL提交
批量SQL提交 参考 21.2.6. Connector/NET Connection String Options Reference . Allow Batch true When true, m ...
- HDU 2516 斐波那契博弈
点这里去看题 n为斐波那契数时,先手败,推断方法见算法讲堂 #include<bits/stdc++.h> using namespace std; int main() { ],i,n, ...
- git的命令行操作
1.初始化本地的git仓库git init,代码存放在这里,git会自动对我们的代码进行管理备份. 2.设置用户信息,设置用户名:git config --global user.name " ...
- js:函数与变量作用域的提升
一.要彻底理解JS的作用域和Hoisting,只要记住以下三点即可: 1.所有申明都会被提升到作用域的最顶上 2.同一个变量申明只进行一次,并且因此其他申明都会被忽略 3 ...