Netty-----初探
今天看gateway 实现的时候看到个哥们基于的netty实现的gateway。so,解析一下Netty。
废话少说,maven pom 引入,down 下jar包。看了下netty的包结构,还是挺明确的,不像spring包那么多。
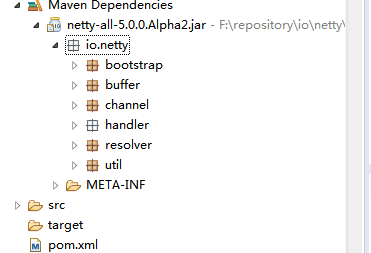
buffer,channel,是包装的JDK 的nio Buffer,Channel等类。
在io.netty.buffer.ByteBuf找到了如下的注释,解释了 limit ,flip等原生JDK api 的含义。
/**
* A random and sequential accessible sequence of zero or more bytes (octets).
* This interface provides an abstract view for one or more primitive byte
* arrays ({@code byte[]}) and {@linkplain ByteBuffer NIO buffers}.
*
* <h3>Creation of a buffer</h3>
*
* It is recommended to create a new buffer using the helper methods in
* {@link Unpooled} rather than calling an individual implementation's
* constructor.
*
* <h3>Random Access Indexing</h3>
*
* Just like an ordinary primitive byte array, {@link ByteBuf} uses
* <a href="http://en.wikipedia.org/wiki/Zero-based_numbering">zero-based indexing</a>.
* It means the index of the first byte is always {@code 0} and the index of the last byte is
* always {@link #capacity() capacity - 1}. For example, to iterate all bytes of a buffer, you
* can do the following, regardless of its internal implementation:
*
* <pre>
* {@link ByteBuf} buffer = ...;
* for (int i = 0; i < buffer.capacity(); i ++) {
* byte b = buffer.getByte(i);
* System.out.println((char) b);
* }
* </pre>
*
* <h3>Sequential Access Indexing</h3>
*
* {@link ByteBuf} provides two pointer variables to support sequential
* read and write operations - {@link #readerIndex() readerIndex} for a read
* operation and {@link #writerIndex() writerIndex} for a write operation
* respectively. The following diagram shows how a buffer is segmented into
* three areas by the two pointers:
*
* <pre>
* +-------------------+------------------+------------------+
* | discardable bytes | readable bytes | writable bytes |
* | | (CONTENT) | |
* +-------------------+------------------+------------------+
* | | | |
* 0 <= readerIndex <= writerIndex <= capacity
* </pre>
*
* <h4>Readable bytes (the actual content)</h4>
*
* This segment is where the actual data is stored. Any operation whose name
* starts with {@code read} or {@code skip} will get or skip the data at the
* current {@link #readerIndex() readerIndex} and increase it by the number of
* read bytes. If the argument of the read operation is also a
* {@link ByteBuf} and no destination index is specified, the specified
* buffer's {@link #writerIndex() writerIndex} is increased together.
* <p>
* If there's not enough content left, {@link IndexOutOfBoundsException} is
* raised. The default value of newly allocated, wrapped or copied buffer's
* {@link #readerIndex() readerIndex} is {@code 0}.
*
* <pre>
* // Iterates the readable bytes of a buffer.
* {@link ByteBuf} buffer = ...;
* while (buffer.readable()) {
* System.out.println(buffer.readByte());
* }
* </pre>
*
* <h4>Writable bytes</h4>
*
* This segment is a undefined space which needs to be filled. Any operation
* whose name ends with {@code write} will write the data at the current
* {@link #writerIndex() writerIndex} and increase it by the number of written
* bytes. If the argument of the write operation is also a {@link ByteBuf},
* and no source index is specified, the specified buffer's
* {@link #readerIndex() readerIndex} is increased together.
* <p>
* If there's not enough writable bytes left, {@link IndexOutOfBoundsException}
* is raised. The default value of newly allocated buffer's
* {@link #writerIndex() writerIndex} is {@code 0}. The default value of
* wrapped or copied buffer's {@link #writerIndex() writerIndex} is the
* {@link #capacity() capacity} of the buffer.
*
* <pre>
* // Fills the writable bytes of a buffer with random integers.
* {@link ByteBuf} buffer = ...;
* while (buffer.maxWritableBytes() >= 4) {
* buffer.writeInt(random.nextInt());
* }
* </pre>
*
* <h4>Discardable bytes</h4>
*
* This segment contains the bytes which were read already by a read operation.
* Initially, the size of this segment is {@code 0}, but its size increases up
* to the {@link #writerIndex() writerIndex} as read operations are executed.
* The read bytes can be discarded by calling {@link #discardReadBytes()} to
* reclaim unused area as depicted by the following diagram:
*
* <pre>
* BEFORE discardReadBytes()
*
* +-------------------+------------------+------------------+
* | discardable bytes | readable bytes | writable bytes |
* +-------------------+------------------+------------------+
* | | | |
* 0 <= readerIndex <= writerIndex <= capacity
*
*
* AFTER discardReadBytes()
*
* +------------------+--------------------------------------+
* | readable bytes | writable bytes (got more space) |
* +------------------+--------------------------------------+
* | | |
* readerIndex (0) <= writerIndex (decreased) <= capacity
* </pre>
*
* Please note that there is no guarantee about the content of writable bytes
* after calling {@link #discardReadBytes()}. The writable bytes will not be
* moved in most cases and could even be filled with completely different data
* depending on the underlying buffer implementation.
*
* <h4>Clearing the buffer indexes</h4>
*
* You can set both {@link #readerIndex() readerIndex} and
* {@link #writerIndex() writerIndex} to {@code 0} by calling {@link #clear()}.
* It does not clear the buffer content (e.g. filling with {@code 0}) but just
* clears the two pointers. Please also note that the semantic of this
* operation is different from {@link ByteBuffer#clear()}.
*
* <pre>
* BEFORE clear()
*
* +-------------------+------------------+------------------+
* | discardable bytes | readable bytes | writable bytes |
* +-------------------+------------------+------------------+
* | | | |
* 0 <= readerIndex <= writerIndex <= capacity
*
*
* AFTER clear()
*
* +---------------------------------------------------------+
* | writable bytes (got more space) |
* +---------------------------------------------------------+
* | |
* 0 = readerIndex = writerIndex <= capacity
* </pre>
*
* <h3>Search operations</h3>
*
* For simple single-byte searches, use {@link #indexOf(int, int, byte)} and {@link #bytesBefore(int, int, byte)}.
* {@link #bytesBefore(byte)} is especially useful when you deal with a {@code NUL}-terminated string.
* For complicated searches, use {@link #forEachByte(int, int, ByteBufProcessor)} with a {@link ByteBufProcessor}
* implementation.
*
* <h3>Mark and reset</h3>
*
* There are two marker indexes in every buffer. One is for storing
* {@link #readerIndex() readerIndex} and the other is for storing
* {@link #writerIndex() writerIndex}. You can always reposition one of the
* two indexes by calling a reset method. It works in a similar fashion to
* the mark and reset methods in {@link InputStream} except that there's no
* {@code readlimit}.
*
* <h3>Derived buffers</h3>
*
* You can create a view of an existing buffer by calling either
* {@link #duplicate()}, {@link #slice()} or {@link #slice(int, int)}.
* A derived buffer will have an independent {@link #readerIndex() readerIndex},
* {@link #writerIndex() writerIndex} and marker indexes, while it shares
* other internal data representation, just like a NIO buffer does.
* <p>
* In case a completely fresh copy of an existing buffer is required, please
* call {@link #copy()} method instead.
*
* <h3>Conversion to existing JDK types</h3>
*
* <h4>Byte array</h4>
*
* If a {@link ByteBuf} is backed by a byte array (i.e. {@code byte[]}),
* you can access it directly via the {@link #array()} method. To determine
* if a buffer is backed by a byte array, {@link #hasArray()} should be used.
*
* <h4>NIO Buffers</h4>
*
* If a {@link ByteBuf} can be converted into an NIO {@link ByteBuffer} which shares its
* content (i.e. view buffer), you can get it via the {@link #nioBuffer()} method. To determine
* if a buffer can be converted into an NIO buffer, use {@link #nioBufferCount()}.
*
* <h4>Strings</h4>
*
* Various {@link #toString(Charset)} methods convert a {@link ByteBuf}
* into a {@link String}. Please note that {@link #toString()} is not a
* conversion method.
*
* <h4>I/O Streams</h4>
*
* Please refer to {@link ByteBufInputStream} and
* {@link ByteBufOutputStream}.
*/
Netty-----初探的更多相关文章
- netty初探(2)
上一篇 netty(1) 一.TCP/IP 流式传输 在上文演示了2进制流式传输引起的TCP拆包问题,这里继续演示文本型的传输问题,文本型的可以有以下几种策略 1.1 以特殊字符表示结尾 HTTP协议 ...
- netty初探(1)
参考目录: 1. user-guide : http://netty.io/wiki/user-guide-for-4.x.html 2. demo: http://netty.io/wiki/ 3. ...
- Netty初探
匠心零度 转载请注明原创出处,谢谢! 说在前面 为什么我们需要学习netty?谈谈自己的看法,由于本人水平有限,如果有那里不对,希望各位大佬积极指出,欢迎在留言区进行评论交流.探讨. 由于移动互联网的 ...
- netty系列之:netty初探
目录 简介 netty介绍 netty的第一个服务器 netty的第一个客户端 运行服务器和客户端 总结 简介 我们常用浏览器来访问web页面得到相关的信息,通常来说使用的都是HTTP或者HTTPS协 ...
- netty中级篇(2)
上一篇 netty入门篇(1) 一.编码解码技术 如何评价一个编解码技术: 是否支持跨语言,或者说支持的语言是否丰富 编码码流大小,影响传输速度 编码和解码的性能,即时间 类库是否精致,API是否方便 ...
- Netty(一):入门篇
匠心零度 转载请注明原创出处,谢谢! 说在前面 上篇文章对Netty进行了初探:Netty初探,主要介绍了下我们为什么需要学习netty.netty介绍等:本篇文章接着上篇文章的内容.本篇为了方便大家 ...
- 图灵,咕泡,鲁班学院--Java高级架构师-互联网企业级实战VIP课程(价值6380)
课程介绍: 讲课内容涉及Java互联网技术工程框架.应用框架. 性能调优 (Tomcat Nginx JVM) 分布式框架(并发编程 Zookeeper N ...
- Netty学习(2):IO模型之NIO初探
NIO 概述 前面说到 BIO 有着创建线程多,阻塞 CPU 等问题,因此为解决 BIO 的问题,NIO 作为同步非阻塞 IO模型,随 JDK1.4 而出生了. 在前面我们反复说过4个概念:同步.异步 ...
- 基于netty框架的Socket传输
一.Netty框架介绍 什么是netty?先看下百度百科的解释: Netty是由JBOSS提供的一个java开源框架.Netty提供异步的.事件驱动的网络应用程序框架和工具,用以快速开 ...
- 响应式Spring Cloud初探
响应式Spring Cloud初探 分类:工程原文链接:The Road to Reactive Spring Cloud作者: JOSH LONG译者: helloworldtang日期:JUNE ...
随机推荐
- OpenCV中的绘图函数
OpenCV可以用来绘制不同的集合图形,包括直线,矩形,圆,椭圆,多边形以及在图片上添加文字.用到的绘图函数包括 cv2.line(),cv2.circle(),cv2.rectangle() ,cv ...
- HBase0.94.2-cdh4.2.0需求评估测试报告1.0之四
第二组:文件存储读过程记录 第一组:一个列,四个分区,随机ID 测试列和分区 测试程序或命令 导入文件大小(Mb) 导入文件个数(个) 是否触发flush事件(布尔) 是否触发compact事件(布尔 ...
- UVa 10118 记忆化搜索 Free Candies
假设在当前状态我们第i堆糖果分别取了cnt[i]个,那么篮子里以及口袋里糖果的个数都是可以确定下来的. 所以就可以使用记忆化搜索. #include <cstdio> #include & ...
- fiddler 抓包数据不会自动下拉解决方法
选中 view 里面的 AutoScroll Session List 即可
- Game on Tree
D - Game on Tree Time limit : 2sec / Memory limit : 256MB Score : 1100 points Problem Statement Ther ...
- springboot集成shiro——登陆记住我
在shiro配置类中增加两个方法: com.resthour.config.shrio.ShiroConfiguration /** * cookie管理对象 * @return */ @Bean p ...
- PHPSTORM+Thinkphp3.2模板标签替换Thinkphp5.1公式
FORMAT: purpose: find: replace 替换<php>标签 <php>(.*)</php> {php}$1{/php} 替换<if &g ...
- Codeforces 899B Months and Years
题目大意 给定 $n$($1\le n\le 24$)个正整数 $a_1,\dots, a_n$ 判断 $a_1$ 到 $a_n$ 是否可能为连续 $n$ 个月份的天数. 解法 由于 $n\le 24 ...
- iOS-ASIHTTPRequest缓存机制
第三方网络请求库 * 我们在对网络请求的时候,可以使用系统为我们提供的NSURLRequest和NSURLConnection,它基本能实现我们的基本功能. * 但是有时我们使用第三方封装的库,可以轻 ...
- Begin to study Deep Learning
今天是儿童节,我开始了人生的新的阶段.借助这个节日我想在今年静下心来,简单执着的进行学习,不掺杂任何利益. 早上起来的比较晚,洗了床单吃了早午饭,背着书包就来到了公司.软件园里面很多游客,但是背着电脑 ...