IOS开发学习笔记042-UITableView总结2
一、自定义非等高的cell
如常见的微博界面,有的微博只有文字,有的有文字和图片。这些微博的高度不固定需要重新计算。
这里简单说一下几种方法。前面的步骤和设置等高的cell一样。现在来说说不一样的地方。
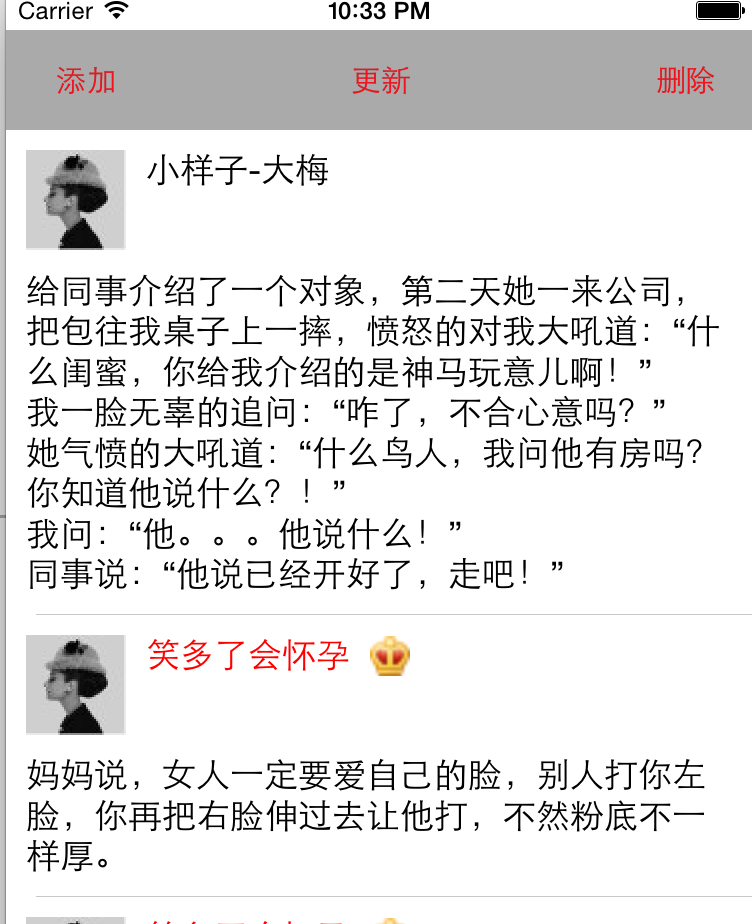
效果如下:
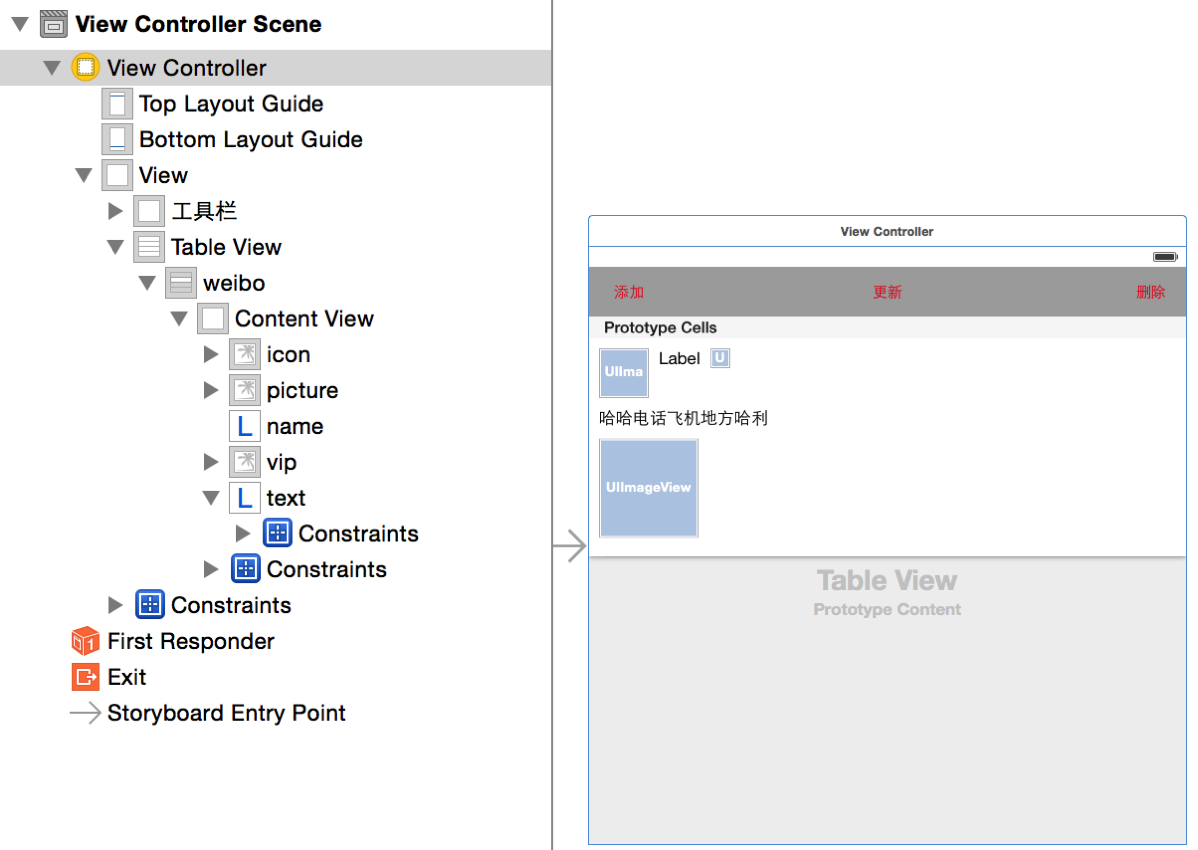
1、在storyboard\xib里实现如下界面
使用自动布局添加约束,在xib里创建和在storyboard非常类似。
2、计算cell高度
2.1、在模型类中给每个cell添加一个高度属性
// cell高度
@property (assign, nonatomic) CGFloat cellHeight;
2.2、设置UILable的宽度
//UILable的宽度,必须进行设置,不然计算时就出问题
- (void)awakeFromNib
{
// 设置label每一行文字的最大宽度
// 为了保证计算出来的数值跟真正显示出来的效果一致
self.contentLable.preferredMaxLayoutWidth = [[UIScreenmainScreen] bounds].size.width -20;
}
2.3、在cell的封装类计算cell高度cellHeight
这里需要注意的地方就是强制布局,因为在设置过数据后,每一个控件虽然都有数据了,但是数据并没有立即显示到tableView中,所以高度值是不准确的,主要是因为UILable的高度没计算出来。这里调用方法layoutIfNeeded 强制进行布局,也就是强制tableView进行更新数据,然后里面的UILable的高度就会有系统计算出来,高度值就是正确的高度值了。
// 强制布局
[self layoutIfNeeded];
// 计算高度
if (self.pictureImage.hidden)
{
weibo.cellHeight = CGRectGetMaxY(self.contentLable.frame) + 10;
}
else
{
weibo.cellHeight = CGRectGetMaxY(self.pictureImage.frame) + 10;
}
2.4、实现两个代理方法
关键是 estimatedHeightForRowAtIndexPath 的实现,实现了这个,上边的强制布局才会有效。
/**
* // 设置cell高度
*/
- (CGFloat)tableView:(UITableView *)tableView heightForRowAtIndexPath:(NSIndexPath *)indexPath
{
SLQWeibo *weibo = self.weibos[indexPath.row];
return weibo.cellHeight;
}
/**
* 返回每一行的估计高度
* 只要返回了估计高度,那么就会先调用tableView:cellForRowAtIndexPath:方法创建cell,再调 用tableView:heightForRowAtIndexPath:方法获取cell的真实高度
*/
- (CGFloat)tableView:(UITableView *)tableView estimatedHeightForRowAtIndexPath:(NSIndexPath *)indexPath
{
return200; // 不要设置的太小
}
3、UITableView的添加、删除和更新
UITableView的数据进行修改时要手动对UITableView进行刷新。
3.1、添加一个工具栏以及三个按钮,并拖线实现单击事件
- (IBAction)addBtn:(id)sender;
- (IBAction)updateBtn:(id)sender;
- (IBAction)deleteBtn:(id)sender;
3.2、添加一行或者多行
对cell的修改,直接修改模型数据就行,UITableView的数据源会自动获取数据并显示到cell中。
// 添加按钮
- (IBAction)addBtn:(id)sender
{
// 添加到模型
SLQWeibo *weibo = [[SLQWeibo alloc] init];
weibo.name = @"天高皇帝远";
weibo.vip = NO;
weibo.text = @"上联:做 I T 风风雨雨又一年;\n下联:卖电脑辛辛苦苦每一天 ;\n横批:从小不学好,长大卖电脑!";
weibo.icon = [NSStringstringWithFormat:@"01%d.png",arc4random_uniform(9)];
// 添加到数组
[self.weibosinsertObject:weibo atIndex:0]; // 添加到数组
// 刷新表格
//[self.tableView reloadData];
// 带有的的动画的删除方式,不过需要指定参数
[self.tableViewinsertRowsAtIndexPaths:@[[NSIndexPathindexPathForItem:0inSection:0]]withRowAnimation:UITableViewRowAnimationRight];
}
3.3、更新某一行cell的数据
// 更新按钮
- (IBAction)updateBtn:(id)sender
{
SLQWeibo *cell = self.weibos[2];
cell.text = @"一天和同学出去吃饭,买单的时候想跟服务员开下玩笑。\n“哎呀,今天没带钱出来啊。”\n“你可以刷卡。”\n“可是我也没带卡出来的啊。”\n“那你可以刷碗!”";
// 刷新表格
[self.tableViewreloadData];
// 带有的的动画的删除方式,需要指定参数
//[self.tableView reloadRowsAtIndexPaths:@[[NSIndexPath indexPathForItem:2 inSection:0]] withRowAnimation:UITableViewRowAnimationFade];
}
3.4、删除一行或者多行
// 删除按钮
- (IBAction)deleteBtn:(id)sender
{
// 删除第2、3行cell
[self.weibosremoveObjectAtIndex:2];// 从数组中移除
[self.weibosremoveObjectAtIndex:2];// 从数组中移除
// 刷新表格
//[self.tableView reloadData];
// 带有的的动画的删除方式,需要指定参数
[self.tableViewdeleteRowsAtIndexPaths:@[[NSIndexPathindexPathForItem:2inSection:0],
[NSIndexPath indexPathForItem:3 inSection:0]
] withRowAnimation:UITableViewRowAnimationLeft];
}
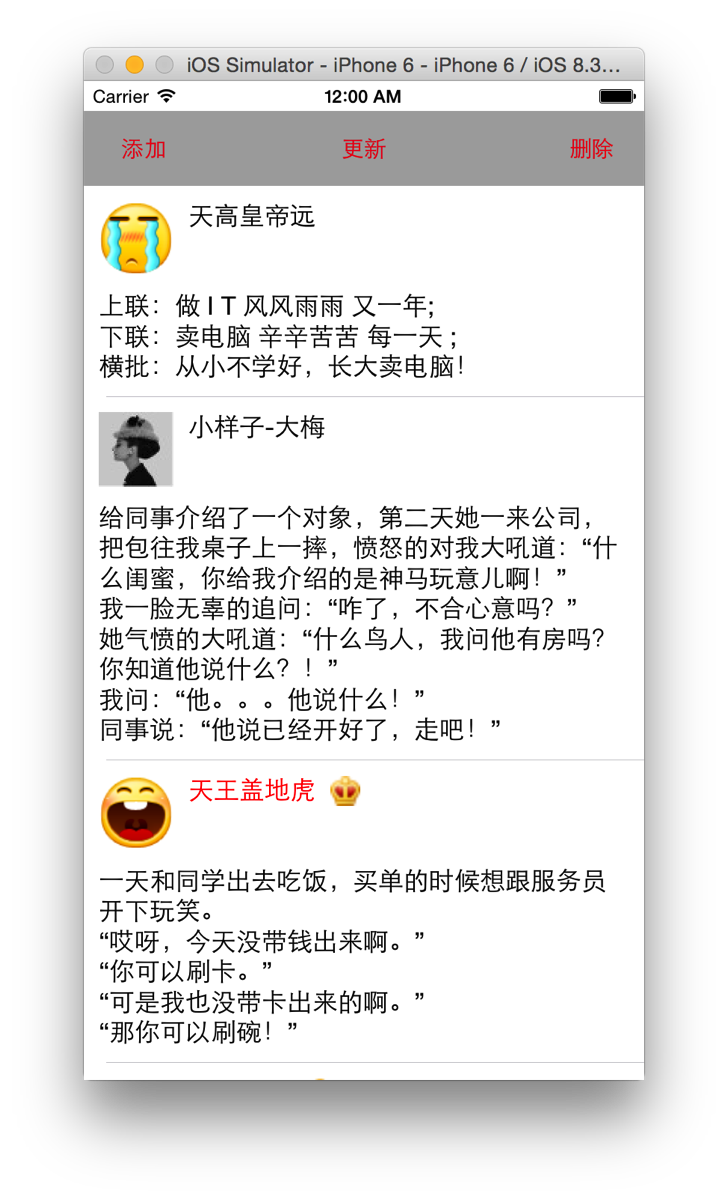
结果如下:
3.5、总结
数据刷新的原则
1、通过修改模型数据,来修改tableView的展示
2、先修改模型数据
3、再调用数据刷新方法
4、不要直接修改cell上面子控件的属性
4、UITableView 编辑模式
进入编辑模式需要设置一个属性editing。
4.1、进入编辑模式
添加一个按钮,响应点击事件,改变UITableView的状态。默认是进入删除模式,还有一个添加模式。

// 编辑按钮
- (IBAction)editBtn:(id)sender
{
// 获取状态,并取反
[self.tableViewsetEditing:!self.tableView.isEditinganimated:YES];
}
进入添加模式需要实现代理方法:
/**
* 这个方法决定了编辑模式时,每一行的编辑类型:insert(+按钮)、delete(-按钮)
*/
- (UITableViewCellEditingStyle)tableView:(UITableView *)tableView editingStyleForRowAtIndexPath:(NSIndexPath *)indexPath
{
returnUITableViewCellEditingStyleInsert;
}
4.2、左划删除cell
实现一个代理方法对左划进行响应。
/**
* 实现这个方法即可实现左划删除数据,并且可以响应添加和删除操作
*/
- (void)tableView:(UITableView *)tableView commitEditingStyle:(UITableViewCellEditingStyle)editingStyle forRowAtIndexPath:(NSIndexPath *)indexPath
{
// 左划删除
if (editingStyle == UITableViewCellEditingStyleDelete) // 删除模式
{
[self.weibos removeObjectAtIndex:indexPath.row];// 从数组中移除
// 刷新表格
//[self.tableView reloadData];
// 带有的的动画的删除方式,需要指定参数
[tableView deleteRowsAtIndexPaths:@[indexPath]withRowAnimation:UITableViewRowAnimationLeft];
}
elseif(editingStyle == UITableViewCellEditingStyleInsert) // 添加模式
{
NSLog(@"UITableViewCellEditingStyleInsert--");
}
}
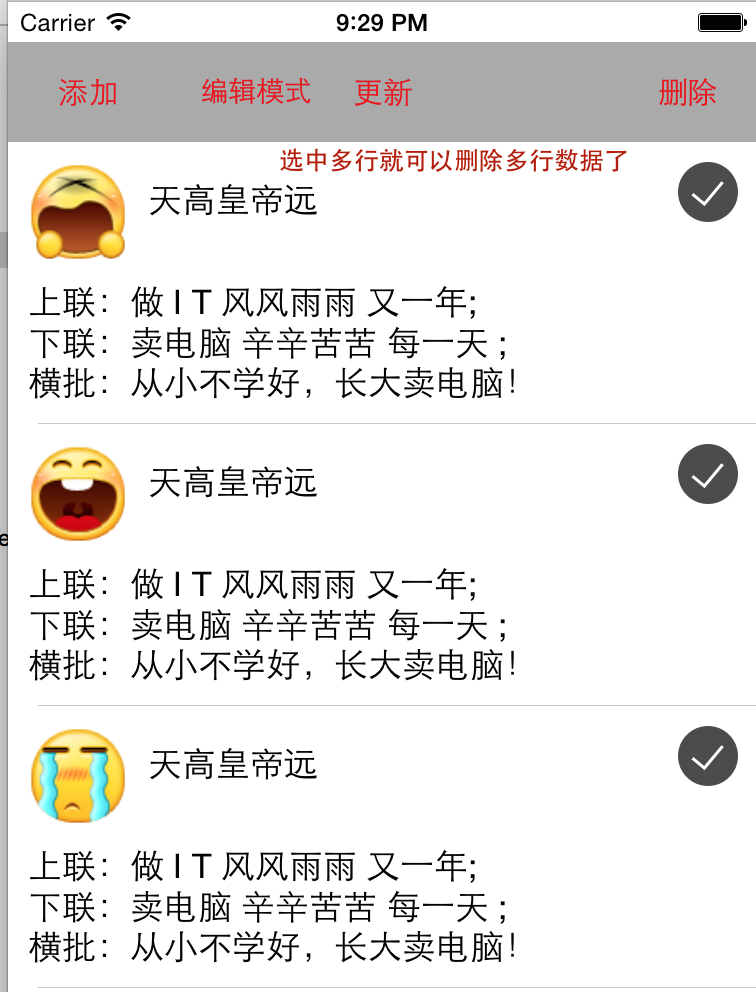
4.3、批量删除方法1
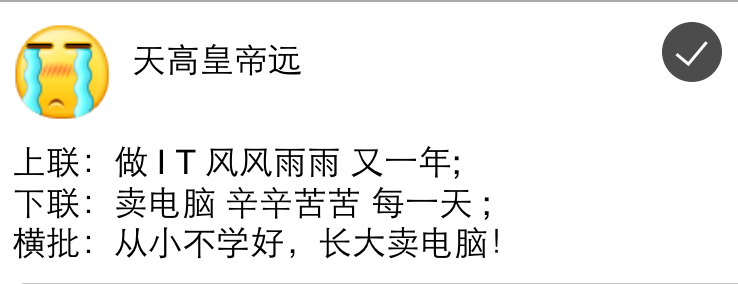
给xib添加一个图片控件,显示选中状态,用于表示多选的状态,选中后如下面所示状态
然后给模型添加一个属性,用于表示cell的选中状态
/*是否选中*/
@property (assign, nonatomic,getter=isChecked) BOOL checked;
接着在封装cell类中得setter方法中对状态进行判断
// setter 方法
- (void)setWeibo:(SLQWeibo *)weibo
{
_weibo = weibo;
// 是否是选中状态
self.checkImage.hidden = !weibo.isChecked;
self.nameLable.text = weibo.name;
self.iconImage.image = [UIImage imageNamed:weibo.icon];
if (weibo.isVip)
{
self.vipImage.hidden = NO;
self.vipImage.image = [UIImage imageNamed:@"vip"];
self.nameLable.textColor = [UIColor redColor];
}
else
{
self.nameLable.textColor = [UIColor blackColor];
self.vipImage.hidden = YES;
}
self.contentLable.text = weibo.text;
if(weibo.picture)
{
self.pictureImage.hidden = NO;
self.pictureImage.image = [UIImage imageNamed:weibo.picture];
}
else
{
self.pictureImage.hidden = YES;
}
// 计算cell高度v
// 强制布局
[selflayoutIfNeeded];
// 计算高度
if (self.pictureImage.hidden)
{
weibo.cellHeight = CGRectGetMaxY(self.contentLable.frame) + 10;
}
else
{
weibo.cellHeight = CGRectGetMaxY(self.pictureImage.frame) + 10;
}
}
接着响应选中cell方法: didSelectRowAtIndexPath
/**
* cell 选中会调用这个方法
*/
- (void)tableView:(UITableView *)tableView didSelectRowAtIndexPath:(NSIndexPath *)indexPath
{
[tableView deselectRowAtIndexPath:indexPath animated:YES]; // 取消选中后cell北京变灰的状态
//取出模型数据进行修改
SLQWeibo *weibo = self.weibos[indexPath.row]; // 取出选中的cell模型数据
weibo.checked = !weibo.isChecked; // 显示或者隐藏选中图标
[tableView reloadData]; // 刷新表格
}
最后响应删除按钮
// 删除按钮
- (IBAction)deleteBtn:(id)sender
{
// 删除多行数据
NSMutableArray *deleteArray = [NSMutableArray array];
for (SLQWeibo *weibo in self.weibos)
{
if (weibo.isChecked)
{
[deleteArray addObject:weibo]; // 将选中的cell添加到待删除数组
}
}
// 删除所有选中数据
[self.weibos removeObjectsInArray:deleteArray];
// 更新表格
[self.tableView reloadData];
}
4.4、批量删除方法2
这里使用一个待删除数组记录选中的cell,然后点击删除按钮后删除选中所有选中cell.
首先,增加一个数组属性并初始化
// 待删除数组
@property (strong, nonatomic) NSMutableArray *deleteWeibo;
- (void)viewDidLoad {
[superviewDidLoad];
_deleteWeibo = [NSMutableArray array]; // 初始化数组
}
其次,在选中cell后进行判断 didSelectRowAtIndexPath
/**
* cell 选中会调用这个方法
*/
- (void)tableView:(UITableView *)tableView didSelectRowAtIndexPath:(NSIndexPath *)indexPath
{
[tableView deselectRowAtIndexPath:indexPath animated:YES]; // 取消选中后cell北京变灰的状态
//取出模型数据进行修改
SLQWeibo *weibo = self.weibos[indexPath.row]; // 取出选中的cell模型数据
if ([self.deleteWeibo containsObject:weibo]) // 如果包含在数组中则从数组中移除
{
[self.deleteWeibo removeObject:weibo];
}
else
{
[self.deleteWeibo addObject:weibo]; // 否则就添加到数组
}
[tableView reloadData]; // 刷新表格
}
再次,在刷新表格时在 cellForRowAtIndexPath 方法中判断cell状态后再显示
- (UITableViewCell *) tableView:(UITableView *)tableView cellForRowAtIndexPath:(NSIndexPath *)indexPath
{
// 获取cell对象
SLQWeiboCell *cell = [SLQWeiboCell cellWithTableView:tableView ];
cell.weibo = self.weibos[indexPath.row];
// 判断选中状态
cell.checkImage.hidden = ![self.deleteWeibo containsObject:cell.weibo];
return cell;
}
最后,实现删除方法
// 删除按钮
- (IBAction)deleteBtn:(id)sender
{
[self.weibos removeObjectsInArray:self.deleteWeibo];
// 更新表格
[self.tableView reloadData];
// 清空删除数组
[self.deleteWeibo removeAllObjects];
}
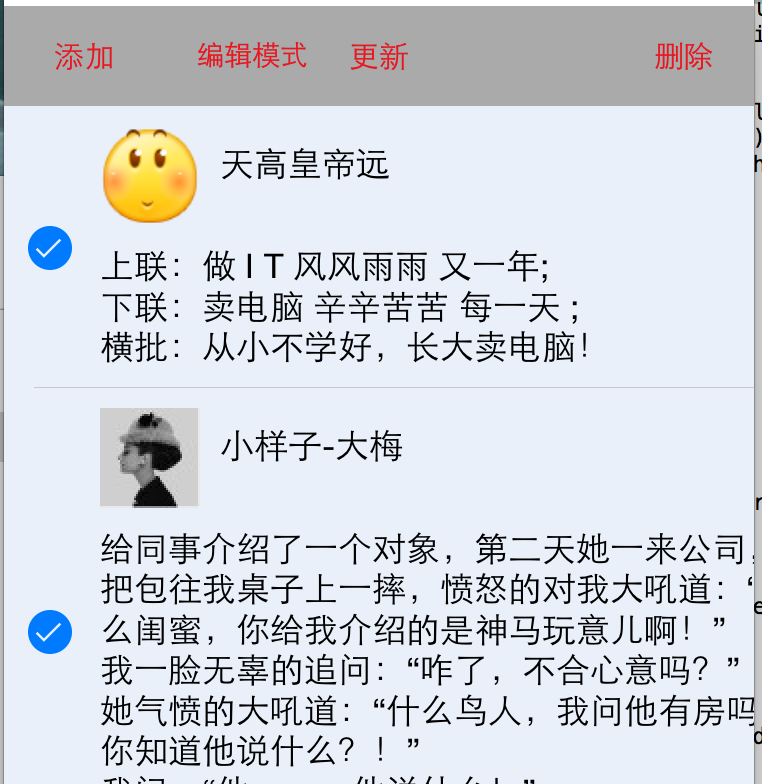
4.5、批量删除方法3:UITableView自带的方法
UITableView 自带的批量删除操作,操作方式需要设置一个属性。
首先,在加载tableView时设置属性,这样就可以在进入编辑模式时支持多选操作。
- (void)viewDidLoad {
[superviewDidLoad];
// 允许在编辑模式下多选
self.tableView.allowsMultipleSelectionDuringEditing = YES;
}
其次,就在就是在点击删除按钮后进行操作,因为选中的cell有tableView自己保存,直接获取就好了。
// 删除按钮
- (IBAction)deleteBtn:(id)sender
{
NSArray *selected = [self.tableView indexPathsForSelectedRows];
NSMutableArray *delete = [NSMutableArrayarray];
for (NSIndexPath * obj in selected)
{
[delete addObject:self.weibos[obj.row]];
}
// 删除选中项
[self.weibosremoveObjectsInArray:delete];
// 更新表格
[self.tableViewreloadData];
}
最后,其他的代码如下,大部分和上一个设置一样。
/**
* cell 选中会调用这个方法
*/
- (void)tableView:(UITableView *)tableView didSelectRowAtIndexPath:(NSIndexPath *)indexPath
{
}
- (NSInteger)tableView:(UITableView *)tableView numberOfRowsInSection:(NSInteger)section
{
returnself.weibos.count;
}
- (UITableViewCell *) tableView:(UITableView *)tableView cellForRowAtIndexPath:(NSIndexPath *)indexPath
{
// 获取cell对象
SLQWeiboCell *cell = [SLQWeiboCell cellWithTableView:tableView ];
cell.weibo = self.weibos[indexPath.row];
return cell;
}

5、tableView其他属性
tableFooterView / tableHeaderView
头部和尾部显示控件,默认都是水平垂直居中,并填充
// 给tableView 添加头部显示的View
SLQPageScroll *pageView = [SLQPageScroll pageScroll];
pageView.imageNames = @[@"ad_01",@"ad_02",@"ad_03",@"ad_04"];
self.tableView.tableHeaderView = pageView;
// 尾部添加控件
SLQLoadData *loadData = [SLQLoadData loadData];
// 指定控制器为代理对象
loadData.delegate = self;
self.tableView.tableFooterView = loadData;
6、自定义cell上的按钮

这是IOS8.0新增的一个代理方法
// 自定义按钮样式
- (NSArray *)tableView:(UITableView *)tableView editActionsForRowAtIndexPath:(NSIndexPath *)indexPath
{
// 创建按钮样式
UITableViewRowAction *action1 = [UITableViewRowActionrowActionWithStyle:UITableViewRowActionStyleDefaulttitle:@"增加"handler:^(UITableViewRowAction *action, NSIndexPath *indexPath) {
// 处理按钮按下事件
}];
action1.backgroundColor = [UIColor blueColor];
UITableViewRowAction *action2 = [UITableViewRowActionrowActionWithStyle:UITableViewRowActionStyleDefaulttitle:@"删除"handler:^(UITableViewRowAction *action, NSIndexPath *indexPath) {
// 删除模型数据
[self.contacts removeObjectAtIndex:indexPath.row];
// 刷新表格
[self.tableView reloadData];
}];
UITableViewRowAction *action3 = [UITableViewRowActionrowActionWithStyle:UITableViewRowActionStyleDefaulttitle:@"haha"handler:^(UITableViewRowAction *action, NSIndexPath *indexPath) {
}];
return @[action1,action2,action3];
}
IOS开发学习笔记042-UITableView总结2的更多相关文章
- iOS开发学习笔记:基础篇
iOS开发需要一台Mac电脑.Xcode以及iOS SDK.因为苹果设备都具有自己封闭的环境,所以iOS程序的开发必须在Mac设备上完成(当然,黑苹果应该也是可以的,但就需要花很多的精力去折腾基础环境 ...
- ios开发学习笔记(1)
objective-c基础总结 第一二章 1.application:didiFinishLauchingWithOptions:程序启动后立即执行 2.启动界面代码格式:self.window = ...
- iOS开发学习笔记
1 常用的第三方工具 1.1 iPhone Simulator 测试程序需要模拟器iPhone Simulator 1.2 设计界面需要Interface Builder,Interface Buil ...
- ios开发学习笔记(这里一定有你想要的东西,全部免费)
1,Search Bar 怎样去掉背景的颜色(storyboard里只能设置background颜色,可是发现clear Color无法使用). 其实在代码里还是可以设置的,那就是删除背景view [ ...
- IOS开发学习笔记026-UITableView的使用
UITableView的简单使用过程 简单介绍 两种样式 UITableViewStylePlain UITableViewStyleGrouped 数据显示需要设置数据源,数据源是符合遵守协议 &l ...
- IOS开发学习笔记017-第一个IOS应用
第一个IOS应用程序,就从最简单的开始吧. 1.先了解一下开发环境,Xcode的相关组成 2.还有模拟器 3.运行与停止按钮 4.新建一个工程 5.看看main函数里都有啥 6.现在来添加一个控件 1 ...
- (ios开发学习笔记一)ios项目文件结构
转自:http://www.cnblogs.com/macroxu-1982/archive/2012/07/31/2616389.html 下面是单个窗体项目例子,我们从这个项目开始,说明ios项目 ...
- IOS开发学习笔记043-QQ聊天界面实现
QQ聊天界面实现 效果如下: 实现过程: 1.首先实现基本界面 头像使用 UIImageView : 文字消息使用 UIButton 标签使用 UILable :水平居中 所有元素在一个cell中,在 ...
- IOS开发学习笔记041-UITableView总结1
一.UITableView的常用属性 1.分割线 // 分割线 self.tableView.separatorColor = [UIColorredColor]; // 隐藏分割线 self.tab ...
随机推荐
- 【Shell脚本学习24】Shell输入输出重定向:Shell Here Document,/dev/null文件
Unix 命令默认从标准输入设备(stdin)获取输入,将结果输出到标准输出设备(stdout)显示.一般情况下,标准输入设备就是键盘,标准输出设备就是终端,即显示器. 输出重定向 命令的输出不仅可以 ...
- SQLserver2005描述对数据的调用
SQL Server2005 采用了下面的4部分结构 服务器名称.数据库名称.架构名称.数据对象名称
- newsyslog.conf详解
newsyslog.conf 指出了哪个日志文件要被管理,要保留多少和它们什么时候被创建.日志文件可以在它们达到一定大小或者在特定的日期被重新整理.# configuration file for n ...
- 测试MS题
购物车测试点: 1.界面测试 界面布局.排版是否合理:文字是否显示清晰:不同卖家的商品是否区分明显. 2.功能测试 未登录时: 将商品加入购物车,页面跳转到登录页面,登录成功后购物车数 ...
- PHP代码规范的一些总结
世界第一语言在手,辅以前人的最佳实践,天下又算什么. 1.代码是写给小白用的 注释,注释,注释,重要的事情说三遍.我们做的虽然不是拿去卖源码的商业产品,不需要把注释写的多么优美.但也不要太过吝啬,到头 ...
- Mac下对PhpStorm主题的添加
大家都知道,作为一个PHPer,PhpStorm是圈内评价较高的一款IDE. 所以,为了有一个更加个性化的coding界面,我们有很多的主题可以使用. phpStorm自带了好几个主题,你可以通过以下 ...
- HDU 2476 String painter 刷字符串(区间DP)
题意: 给出两个串s1和s2,每次可以将s1中的一个整个区间刷成同个字母,问最少刷几次才能让s1变成s2? 思路: 假设最坏情况,两串没任何一个位置是相同的,那么全都得刷,相当于将一个空白串刷成s2. ...
- oracle 11g r2卸载
1. 进入计算机管理>>服务里,停止所有oracle的服务 2. 开始菜单>>程序>>Oracle>>Oracle安装产品>>Univers ...
- 分布式版本控制系统git
最近看到这篇文章,简洁易懂,特摘抄至https://www.cnblogs.com/bgwhite/p/9403233.html 供大家提供参考. git可以说是世界上最先进的版本控制系统,大多语句的 ...
- N-gram的原理、用途和研究
N-gram的原理.用途和研究 N-gram的基本原理 转自:http://blog.sciencenet.cn/blog-713101-797384.html N-gram是计算机语言学和概率论范畴 ...