SSM实战——秒杀系统之Service层接口设计与实现、Spring托管、声明式事务
一:Service层接口设计
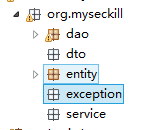
准备工作:新建三个包:service包、exception包、dto包,分别用来存放业务接口、自定义异常类、dto类。
1:定义接口
package org.myseckill.service;

import java.util.List;

import org.myseckill.dto.Exposer;

import org.myseckill.dto.SeckillExecution;

import org.myseckill.entity.Seckill;

import org.myseckill.exception.RepeatKillException;

import org.myseckill.exception.SeckillClosedException;

import org.myseckill.exception.SeckillException;

public interface SeckillService {

    //查询所有

    List<Seckill> getSeckillList();

    //根据ID查询

    Seckill getById(long seckillId);

    //暴露秒杀网页地址

    Exposer exportSeckillUrl(long seckillId);

    //md5用于与内部md5做比较,防止用于篡改url进行秒杀

    SeckillExecution executeSeckill(long seckillId,long userPhone,String md5) throws SeckillException,RepeatKillException,SeckillClosedException;

}
2:定义接口中用到的相关dto:
package org.myseckill.dto;

//封装暴露信息

public class Exposer {

    //是否开启秒杀

    private boolean exposed;

    private String md5;

    private long seckillId;

    private long now;

    private long start;

    private long end;

    public Exposer(boolean exposed, String md5, long seckillId) {

        super();

        this.exposed = exposed;

        this.md5 = md5;

        this.seckillId = seckillId;

    }

    public Exposer(long now, long start, long end) {

        super();

        this.now = now;

        this.start = start;

        this.end = end;

    }

    public Exposer(boolean exposed, long seckillId) {

        super();

        this.exposed = exposed;

        this.seckillId = seckillId;

    }

    public boolean isExposed() {

        return exposed;

    }

    public void setExposed(boolean exposed) {

        this.exposed = exposed;

    }

    public String getMd5() {

        return md5;

    }

    public void setMd5(String md5) {

        this.md5 = md5;

    }

    public long getSeckillId() {

        return seckillId;

    }

    public void setSeckillId(long seckillId) {

        this.seckillId = seckillId;

    }

    public long getNow() {

        return now;

    }

    public void setNow(long now) {

        this.now = now;

    }

    public long getStart() {

        return start;

    }

    public void setStart(long start) {

        this.start = start;

    }

    public long getEnd() {

        return end;

    }

    public void setEnd(long end) {

        this.end = end;

    }

}
package org.myseckill.dto;

import org.myseckill.entity.SuccessKilled;

//封装秒杀后信息

public class SeckillExecution {

    private long seckillId;

    private int state;

    private String stateInfo;

    private SuccessKilled successKilled;

    public long getSeckillId() {

        return seckillId;

    }

    public void setSeckillId(long seckillId) {

        this.seckillId = seckillId;

    }

    public int getState() {

        return state;

    }

    public void setState(int state) {

        this.state = state;

    }

    public String getStateInfo() {

        return stateInfo;

    }

    public void setStateInfo(String stateInfo) {

        this.stateInfo = stateInfo;

    }

    public SuccessKilled getSuccessKilled() {

        return successKilled;

    }

    public void setSuccessKilled(SuccessKilled successKilled) {

        this.successKilled = successKilled;

    }

    //秒杀成功的构造函数

    public SeckillExecution(long seckillId, int state, String stateInfo,

            SuccessKilled successKilled) {

        super();

        this.seckillId = seckillId;

        this.state = state;

        this.stateInfo = stateInfo;

        this.successKilled = successKilled;

    }

    //秒杀失败的构造函数

    public SeckillExecution(long seckillId, int state, String stateInfo) {

        super();

        this.seckillId = seckillId;

        this.state = state;

        this.stateInfo = stateInfo;

    }

}
3:定义接口中用到的自定义异常
package org.myseckill.exception;

//秒杀相关通用异常

public class SeckillException extends RuntimeException {

    public SeckillException() {

        super();

        // TODO Auto-generated constructor stub

    }

    public SeckillException(String message, Throwable cause) {

        super(message, cause);

        // TODO Auto-generated constructor stub

    }

    public SeckillException(String message) {

        super(message);

        // TODO Auto-generated constructor stub

    }

    public SeckillException(Throwable cause) {

        super(cause);

        // TODO Auto-generated constructor stub

    }

}
package org.myseckill.exception;

//重复秒杀异常

public class RepeatKillException extends SeckillException {

    public RepeatKillException(String message, Throwable cause) {

        super(message, cause);

    }

    public RepeatKillException(String message) {

        super(message);

    }

    public RepeatKillException(Throwable cause) {

        super(cause);

    }

}
package org.myseckill.exception;

//秒杀已关闭异常

public class SeckillClosedException extends SeckillException {

    public SeckillClosedException() {

        super();

    }

    public SeckillClosedException(String message, Throwable cause) {

        super(message, cause);

    }

    public SeckillClosedException(String message) {

        super(message);

    }

    public SeckillClosedException(Throwable cause) {

        super(cause);

    }

}
二:Service层接口实现
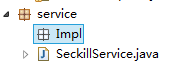
1:在Service包下,新建一个Impl包,用于存放接口的实现类。
2:定义接口实现类SeckillServiceImpl
package org.myseckill.service.Impl;

import java.util.Date;

import java.util.List;

import org.myseckill.dao.SeckillDao;

import org.myseckill.dao.SuccessKilledDao;

import org.myseckill.dto.Exposer;

import org.myseckill.dto.SeckillExecution;

import org.myseckill.entity.Seckill;

import org.myseckill.entity.SuccessKilled;

import org.myseckill.exception.RepeatKillException;

import org.myseckill.exception.SeckillClosedException;

import org.myseckill.exception.SeckillException;

import org.myseckill.service.SeckillService;

import org.myseckill.enums.SeckillStateEnum;

import org.myseckill.exception.RepeatKillException;

import org.myseckill.exception.SeckillClosedException;

import org.slf4j.Logger;

import org.slf4j.LoggerFactory;

import org.springframework.util.DigestUtils;

public class SeckillServiceImpl implements SeckillService {

    //使用slf4j日志

    private Logger logger=LoggerFactory.getLogger(this.getClass());

    private SeckillDao seckillDao;

    private SuccessKilledDao successKilledDao;

    //用于加密的混淆字符串,随机串

   private final String slat="asfdfadsf45qa@$E#iudkgj15=sdf=daf5";

    //本例只用了4跳记录,实际项目中可以再定义一个selectall的SQL语句查询所有

    public List<Seckill> getSeckillList() {

        return seckillDao.queryAll(0, 4);

    }

    @Override

    public Seckill getById(long seckillId) {

        return seckillDao.queryById(seckillId);

    }

    @Override

    public Exposer exportSeckillUrl(long seckillId) {

        Seckill seckill=seckillDao.queryById(seckillId);

        if(seckill==null){//没有这个产品的秒杀记录,不进行暴露

            return new Exposer(false, seckillId);

        }

        Date now=new Date();

        Date start=seckill.getStartTime();

        Date end=seckill.getEndTime();

        //若时间非法,不秒杀

        if(now.getTime()<start.getTime() || now.getTime()>end.getTime()){

            return new Exposer(false, seckillId, now.getTime(), start.getTime(), end.getTime());

        }

        //否则,进行秒杀网址暴露

        String md5=getMD5(seckillId);

        return new Exposer(true, md5, seckillId);

    }

    //用md5加密

    private String getMD5(long seckillId){

        String base=seckillId+"/"+slat;

        String md5=DigestUtils.md5DigestAsHex(base.getBytes());

        return md5;

    }

    @Override

    public SeckillExecution executeSeckill(long seckillId, long userPhone, String md5)

            throws SeckillException, RepeatKillException, SeckillException {

        if(md5==null||!md5.equals(getMD5(seckillId))){

            throw new SeckillException("seckill data rewrite");

        }

        //执行秒杀逻辑:减库存+记录购买行为

        try {

            //记录购买行为

            int insertCount = successKilledDao.insertSuccessKilled(seckillId, userPhone);

            if(insertCount <= 0 ){

                //重复秒杀

                throw new RepeatKillException("seckill repeated");

            }else{

                //减库存,热点商品竞争(高并发点)

                int updateCount = seckillDao.reduceNumber(seckillId, new Date());

                if(updateCount<=0){

                    //没有更新到记录,秒杀结束,rollback

                    throw new SeckillClosedException("seckill is closed");

                }else{

                    //秒杀成功,commit

                    SuccessKilled successKilled = successKilledDao.queryByIdWithSeckill(seckillId, userPhone);

                    return new SeckillExecution(seckillId,SeckillStateEnum.SUCCESS,successKilled);

                }

            }

        } catch(SeckillClosedException e1){

            throw e1;

        } catch(RepeatKillException e2){

            throw e2;

        }catch (Exception e) {

            logger.error(e.getMessage(),e);

            //所有异常转化为运行期异常

            throw new SeckillException("seckill inner error:"+e.getMessage());

        }

    }

}
3:把状态与状态信息常量,封装成枚举常量
在org.myseckill包下新建enums包,包中新建一个枚举类SeckillStateEnum:
package org.myseckill.enums;

//在实际开发中,全局常用的常量们用枚举常量存储

public enum SeckillStateEnum {

    //定义一系列枚举常量

    SUCCESS(1,"秒杀成功"),

    END(0,"秒杀结束"),

    REPEAT_KILL(-1,"重复秒杀"),

    INNER_ERROR(-2,"系统异常"),

    DATA_REWRITE(-3,"数据篡改");

    private int state;

    private String stateInfo;

    SeckillStateEnum(int state, String stateInfo) {

        this.state = state;

        this.stateInfo = stateInfo;

    }

    public int getState() {

        return state;

    }

    public void setState(int state) {

        this.state = state;

    }

    public String getStateInfo() {

        return stateInfo;

    }

    public void setStateInfo(String stateInfo) {

        this.stateInfo = stateInfo;

    }

    public static SeckillStateEnum stateOf(int index) {

        //迭代枚举常量,返回state值等于index的常量

        for (SeckillStateEnum stateEnum : values()) {

            if (stateEnum.getState() == index) {

                return stateEnum;

            }

        }

        return null;

    }

}
4:修改SeckillExecution类的构造函数:
//秒杀成功的构造函数

    public SeckillExecution(long seckillId, SeckillStateEnum success,SuccessKilled successKilled) {

        super();

        this.seckillId = seckillId;

        this.state = success.getState();

        this.stateInfo = success.getStateInfo();

        this.successKilled = successKilled;

    }

    //秒杀失败的构造函数

    public SeckillExecution(long seckillId, SeckillStateEnum success) {

        super();

        this.seckillId = seckillId;

        this.state = success.getState();

        this.stateInfo = success.getStateInfo();

    }
三:Spring托管Service层的类
SpringIOC中,注入主要分为两种场景:
1:第三方类库提供的类,如:datasource等。使用XML中ref来注入;
2:自己定义的类,则在代码中,使用注解来注入;
1:在resource.spring包下,新建一个spring-service.xml,用于负责托管service层bean以及进行事务管理。

2:托管bean:
如果 Web 应用程序采用了经典的三层分层结构的话,最好在持久层、业务层和控制层分别采用上述注解对分层中的类进行注释。
@Service用于标注业务层组件
@Controller用于标注控制层组件(如struts中的action)
@Repository用于标注数据访问组件,即DAO组件
@Component泛指组件,当组件不好归类的时候,我们可以使用这个注解进行标注。
component-scan标签默认情况下自动扫描指定路径下的包(含所有子包),将带有@Component、@Repository、@Service、@Controller标签的类自动注册到spring容器。
托管bean分两步:
首先在配置文件开启包扫描:
<?xml version="1.0" encoding="UTF-8"?>

<beans xmlns="http://www.springframework.org/schema/beans"

    xmlns:xsi="http://www.w3.org/2001/XMLSchema-instance"

    xmlns:context="http://www.springframework.org/schema/context"

    xsi:schemaLocation="http://www.springframework.org/schema/beans

http://www.springframework.org/schema/beans/spring-beans.xsd">

   <!-- 包扫描,找到包下使用注解来依赖注入的属性,进行托管 -->

   <context:component-scan base-package="org.myseckill.service"/>

</beans>
然后,在bean类加注解:为类加组件注解,类中需要注入属性的加注入注解:
@Service

public class SeckillServiceImpl implements SeckillService {

    @Autowired

    private SeckillDao seckillDao;

    @Autowired

    private SuccessKilledDao successKilledDao;

        ......

}
3:声明式事务管理
事务管理主要有两种:
1:XML配置,使用tx:advice标签配置aop进行事务管理。好处是一次配置处处生效(可以自己配置切入点),坏处是,阅读代码时不知道哪个方法是被事务管理的,需要频繁查阅xml。
2:@Transactional注解:使用该注解注释的方法,表示把该方法交给spring进行事务管理。推荐使用这个方法,一是简便,二是在阅读代码时清晰地看到该方法被事务托管。
事务托管:
首先,在xml中配置事务管理器,并开启事务注解:
<?xml version="1.0" encoding="UTF-8"?>

<beans xmlns="http://www.springframework.org/schema/beans"

    xmlns:xsi="http://www.w3.org/2001/XMLSchema-instance"

    xmlns:context="http://www.springframework.org/schema/context"

    xmlns:tx="http://www.springframework.org/schema/tx"

    xsi:schemaLocation="http://www.springframework.org/schema/beans http://www.springframework.org/schema/beans/spring-beans.xsd

        http://www.springframework.org/schema/context http://www.springframework.org/schema/context/spring-context-4.1.xsd

        http://www.springframework.org/schema/tx http://www.springframework.org/schema/tx/spring-tx-4.1.xsd">

    <!-- 扫描service包下所有的类型 -->

    <context:component-scan base-package="org.myseckill.service"></context:component-scan>

    <!-- 配置事务管理器 -->

    <bean id="transactionManager" class="org.springframework.jdbc.datasource.DataSourceTransactionManager">

        <!-- 注入数据库连接池 -->

        <property name="dataSource" ref="dataSource"/>

    </bean>

    <!-- 配置基于注解的声明式事务

        默认使用注解来管理事务行为-->

    <tx:annotation-driven transaction-manager="transactionManager"/>

</beans>
然后,在bean中,需要事务托管的方法前面,加@Transactional注解:
 @Transactional
 public SeckillExecution executeSeckill(long seckillId, long userPhone, String md5)

            throws SeckillException, RepeatKillExeception, SeckillException{}
SSM实战——秒杀系统之Service层接口设计与实现、Spring托管、声明式事务的更多相关文章
- SSM实战——秒杀系统之DAO层实体定义、接口设计、mybatis映射文件编写、整合Spring与Mybatis
一:DAO实体编码 1:首先,在src目录下,新建org.myseckill.entity包,用于存放实体类: 2:实体类设计 根据前面创建的数据库表以及映射关系,创建实体类. 表一:秒杀商品表 对应 ...
- SSM实战——秒杀系统之Web层Restful url设计、SpringMVC整合、页面设计
一:Spring整合SpringMVC 1:编写web.xml,配置DispatcherServlet <web-app xmlns="http://java.sun.com/xml/ ...
- SSM实战——秒杀系统前言
项目来源:慕课网http://www.imooc.com/u/2145618/courses?sort=publish 项目开发流程:整合SSM框架——项目需求分析与实现——解决高并发优化 所用技术: ...
- SSM实战——秒杀系统之创建项目、管理依赖、设计数据库
注:本项目使用Myeclipse开发. 一:项目创建 1:使用Myeclipse创建一个web project,命名为MySeckill,并转换为Maven项目. 2:创建项目文件目录如下: 上面四个 ...
- SSM实战——秒杀系统之高并发优化
一:高并发点 高并发出现在秒杀详情页,主要可能出现高并发问题的地方有:秒杀地址暴露.执行秒杀操作. 二:静态资源访问(页面)优化——CDN CDN,内容分发网络.我们把静态的资源(html/css/j ...
- Spring Boot 揭秘与实战(二) 数据存储篇 - 声明式事务管理
文章目录 1. 声明式事务 2. Spring Boot默认集成事务 3. 实战演练4. 源代码 3.1. 实体对象 3.2. DAO 相关 3.3. Service 相关 3.4. 测试,测试 本文 ...
- Java高并发秒杀API之Service层
Java高并发秒杀API之Service层 第1章 秒杀业务接口设计与实现 1.1service层开发之前的说明 开始Service层的编码之前,我们首先需要进行Dao层编码之后的思考:在Dao层我们 ...
- 零基础学习java------39---------json格式交互,Restful(不懂),静态资源映射,SSM整合(ssm整合思想,application.xml文件详解(声明式事务管理),)
一. json格式交互(知道) 1 . 回顾ajax基本语法 $.ajax({ url:"", // 请求的后台路径 data:{"":"" ...
- 02 整合IDEA+Maven+SSM框架的高并发的商品秒杀项目之Service层
作者:nnngu 项目源代码:https://github.com/nnngu/nguSeckill 首先在编写Service层代码前,我们应该首先要知道这一层到底是干什么的. Service层主要负 ...
随机推荐
- 实用ExtJS教程100例-010:ExtJS Form异步加载和提交数据
ExtJS Form 为我们提供了两个方法:load 和 submit,分别用来加载和提交数据,这两个方法都是异步的. 系列ExtJS教程持续更新中,点击查看>>最新ExtJS教程目录 F ...
- SVG 文字居中整理
一.基于SVG文档的文字居中 text-anchor: middle; //水平方向居中 dominant-baseline: middle; //垂直居中 1.使用内联样式配置居中 <svg ...
- 【转】各种 NoSQL 的比较
转自 : http://linux.cn/article-2177-1.html 来源:Linux中国 原文:http://linux.cn/article-2177-1.html 即使关系 ...
- Chapter 4 -- Throwables
TODO: rewrite with more examples Guava's Throwables utility can frequently simplify dealing with exc ...
- input type=file 选择图片并且实现预览效果的实例
为大家带来一篇input type=file 选择图片并且实现预览效果的实例. 通过<input />标签,给它指定type类型为file,可提供文件上传: accept:可选择上传类型, ...
- 【UOJ Easy Round #1】
数论/Trie/并查集 猜数 这题我是这样分析的…… $a*b=g*l=n=k^2 \ and \ (g|a,g|b) \Rightarrow (g*a')*(g*b' )=g*l=k^2 \\ \R ...
- C#自带类库实现邮件发送
1.首先引入命名空间using System.Net.Mail; 2.将发送的邮件的功能封装成一个类,该类中包含了发送邮件的基本功能:收件人(多人),抄送(多人),发送人,主题,邮件正文,附件等,封装 ...
- 置顶菜单demo
一朋友需要置顶菜单的功能,给了个网站,让弄下来.看了下,就把样式及效果拔了下来.去掉了复杂的东西,只保留了其基本实现.有需要的朋友可以拿去用用. <style> #navigation{ ...
- OpenCV教程(47) sift特征和surf特征
在前面三篇教程中的几种角检测方法,比如harris角检测,都是旋转无关的,即使我们转动图像,依然能检测出角的位置,但是图像缩放后,harris角检测可能会失效,比如下面的图像,图像放大之前可 ...
- 聊一聊Spring中的线程安全性
Spring作为一个IOC/DI容器,帮助我们管理了许许多多的“bean”.但其实,Spring并没有保证这些对象的线程安全,需要由开发者自己编写解决线程安全问题的代码. Spring对每个bean提 ...