《基于Nginx的中间件架构》学习笔记---4.nginx编译参数详细介绍
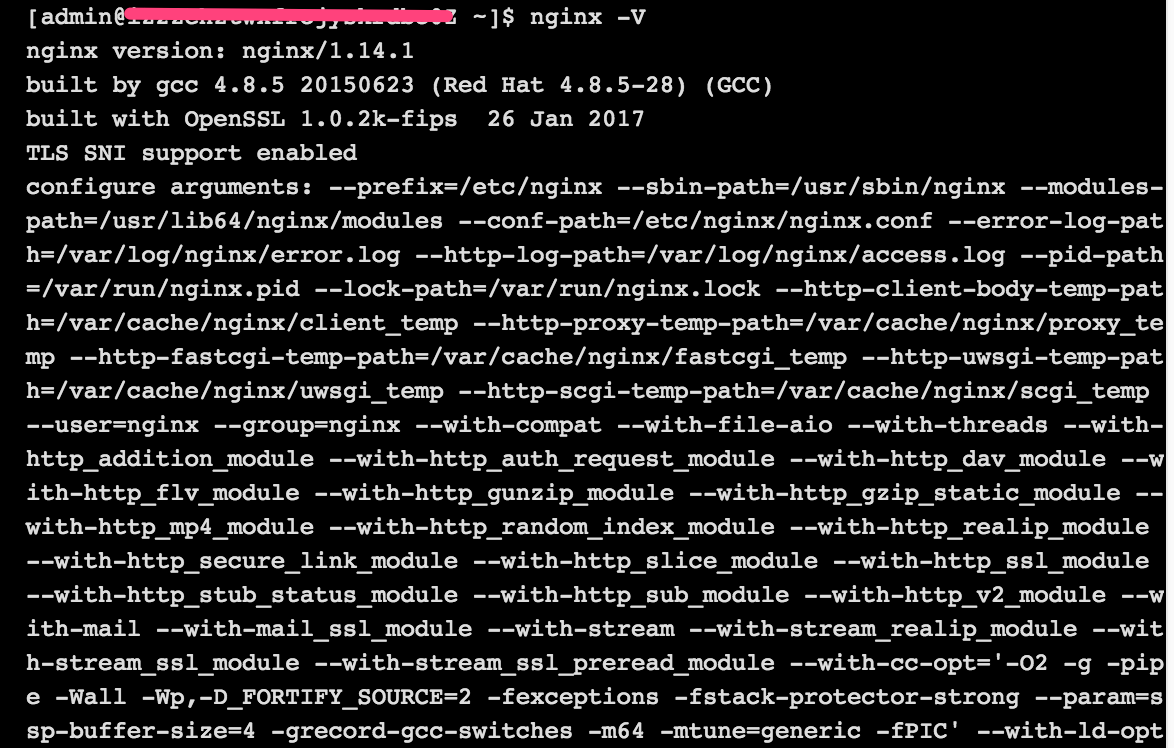
通过nginx -V查看编译时参数:
在nginx安装目录下,通过./configure --help,查看对应版本ngnix编译时支持的所有参数:
Nginx编译参数详细介绍:

--help 显示本提示信息

--prefix=PATH 设定安装目录

--sbin-path=PATH 设定程序文件目录

--conf-path=PATH 设定配置文件(nginx.conf)目录

--error-log-path=PATH 设定错误日志目录

--pid-path=PATH 设定pid文件(nginx.pid)目录

--lock-path=PATH 设定lock文件(nginx.lock)目录

--user=USER 设定程序运行的用户环境(www)

--group=GROUP 设定程序运行的组环境(www)

--build=NAME  设定程序编译名称

--builddir=DIR 设定程序编译目录

--with-rtsig_module 允许rtsig模块

--with-select_module 允许select模块(一种轮询模式,不推荐用在高载环境)

--without-select_module 不使用select模块

--with-poll_module 允许poll模块(一种轮询模式,不推荐用在高载环境)

--without-poll_module 不使用poll模块

--with-threads  允许支持的线程池线程数

--with-http_ssl_module 允许ngx_http_ssl_module模块(Apache对应:mod_ssl)

--with-http_realip_module 允许ngx_http_realip_module模块(mod_rpaf)

--with-http_addition_module 允许ngx_http_addition_module模块(mod_layout)

--with-http_xslt_module 允许ngx_http_xslt_module模块

--with-http_sub_module 允许ngx_http_sub_module模块

--with-http_dav_module 允许ngx_http_dav_module模块(mod_dav)

--with-http_flv_module 允许ngx_http_flv_module模块(mod_flvx)

--with-http_gzip_static_module 允许ngx_http_gzip_static_module模块(mod_dflate)

--with-http_random_index_module 允许ngx_http_random_index_module模块(mod_autoindex)

--with-http_stub_status_module 允许ngx_http_stub_status_module模块(mod_status)

--without-http_charset_module 不使用ngx_http_charset_module模块

--without-http_gzip_module 不使用ngx_http_gzip_module模块

--without-http_ssi_module 不使用ngx_http_ssi_module模块

--without-http_userid_module 不使用ngx_http_userid_module模块

--without-http_access_module 不使用ngx_http_access_module模块

--without-http_auth_basic_module 不使用ngx_http_auth_basic_module模块

--without-http_autoindex_module 不使用ngx_http_autoindex_module模块

--without-http_geo_module 不使用ngx_http_geo_module模块

--without-http_map_module 不使用ngx_http_map_module模块

--without-http_referer_module 不使用ngx_http_referer_module模块

--without-http_rewrite_module 不使用ngx_http_rewrite_module模块

--without-http_proxy_module 不使用ngx_http_proxy_module模块

--without-http_fastcgi_module 不使用ngx_http_fastcgi_module模块

--without-http_memcached_module 不使用ngx_http_memcached_module模块

--without-http_limit_zone_module 不使用ngx_http_limit_zone_module模块

--without-http_empty_gif_module 不使用ngx_http_empty_gif_module模块

--without-http_browser_module 不使用ngx_http_browser_module模块

--without-http_upstream_ip_hash_module 不使用ngx_http_upstream_ip_hash_module模块

--with-http_perl_module 允许ngx_http_perl_module模块

--with-perl_modules_path=PATH 设置perl模块路径

--with-perl=PATH 设置perl库文件路径

--http-log-path=PATH 设置access log文件路径

--http-client-body-temp-path=PATH 设置客户端请求临时文件路径

--http-proxy-temp-path=PATH 设置http proxy临时文件路径

--http-fastcgi-temp-path=PATH 设置http fastcgi临时文件路径

--without-http 不使用HTTP server功能

--with-mail 允许POP3/IMAP4/SMTP代理模块

--with-mail_ssl_module 允许ngx_mail_ssl_module模块

--without-mail_pop3_module 不允许ngx_mail_pop3_module模块

--without-mail_imap_module 不允许ngx_mail_imap_module模块

--without-mail_smtp_module 不允许ngx_mail_smtp_module模块

--with-google_perftools_module 允许ngx_google_perftools_module模块(调试用)

--with-cpp_test_module 允许ngx_cpp_test_module模块

--add-module=PATH 允许使用外部模块,以及路径

--with-cc=PATH 设置C编译器路径

--with-cpp=PATH 设置C预处理路径

--with-cc-opt=OPTIONS 设置C编译器参数

--with-ld-opt=OPTIONS 设置连接文件参数

--with-cpu-opt=CPU 为指定CPU优化,可选参数有:

          pentium, pentiumpro, pentium3, pentium4,

          athlon, opteron, sparc32, sparc64, ppc64

--without-pcre 不使用pcre库文件

--with-pcre=DIR 设定PCRE库路径

--with-pcre-opt=OPTIONS 设置PCRE运行参数

--with-md5=DIR 设定md5库文件路径

--with-md5-opt=OPTIONS 设置md5运行参数

--with-md5-asm 使用md5源文件编译

--with-sha1=DIR 设定sha1库文件路径

--with-sha1-opt=OPTIONS 设置sha1运行参数

--with-sha1-asm 使用sha1源文件编译

--with-zlib=DIR 设定zlib库文件路径

--with-zlib-opt=OPTIONS 设置zlib运行参数

--with-zlib-asm=CPU 使zlib对特定的CPU进行优化,可选参数:

          pentium, pentiumpro

--with-openssl=DIR 设定OpenSSL库文件路径

--with-openssl-opt=OPTIONS 设置OpenSSL运行参数

--with-debug 允许调试日志
补充:centos下如何查看yum安装的软件路径:
1、rpm -qa | grep 软件包名
2、rpm -ql 第一步的结果
例如:

《基于Nginx的中间件架构》学习笔记---4.nginx编译参数详细介绍的更多相关文章
- 基于Netty的RPC架构学习笔记(十二):借助spring实现业务分离、聊天室小项目、netty3和4、5的不同、业务线程池以及消息串行化
文章目录 借助spring实现业务分离(
- 基于Netty的RPC架构学习笔记(十一):粘包、分包分析,如何避免socket攻击
文章目录 问题 消息如何在管道中流转 源码解析 AbstractNioSelector.java AbstractNioWorker.java NioWorker.java DefaultChanne ...
- 基于Netty的RPC架构学习笔记(十):自定义数据包协议
文章目录 数据包简介 粘包.分包现象 数据包格式 举个
- 基于Netty的RPC架构学习笔记(九):自定义序列化协议
文章目录 为什么需要自定义序列化协议
- 基于Netty的RPC架构学习笔记(八):protocol buff学习使用
文章目录 简介 准备 protobuf配置文件 生成java代码 举个
- 基于Netty的RPC架构学习笔记(七):netty学习之心跳
文章目录 idleStateHandler netty3
- 基于Netty的RPC架构学习笔记(六):netty5案例学习
文章目录 netty5服务端入门案例 netty5客户端入门案例 单客户端多连接程序 知识普及 线程池原理图 对象池原理图 对象组原理图 结论 理论结合实际 开干开干 总结 netty5服务端入门案例 ...
- 基于Netty的RPC架构学习笔记(五):netty线程模型源码分析(二)
文章目录 小技巧(如何看开源框架的源码) 源码解析 阅读源码技巧 打印查看 通过打断点调试 查看调用栈 小技巧(如何看开源框架的源码) 一断点 二打印 三看调用栈 四搜索 源码解析 //设置nioso ...
- 基于Netty的RPC架构学习笔记(四):netty线程模型源码分析(一)
文章目录 如何提高NIO的工作效率 举个
- 基于Netty的RPC架构学习笔记(三):netty客户端
文章目录 举个
随机推荐
- Centos6与Centos7防火墙设置与端口开放的方法
Centos升级到7之后,内置的防火墙已经从iptables变成了firewalld.所以,端口的开启还是要从两种情况来说明的,即iptables和firewalld.更多关于CentOs防火墙的最新 ...
- English-旅游英语及情景对话
1.旅游英语:预订机票情景对话及常用句型 目前,越来越多的人都选择以飞机为出行方式.但是如何用一口流利的英语订机票呢?这里我们替你总结了一些情景对话,还有一些常用的句型.大家都来学一学吧~A:Good ...
- 关于cordova 状态栏设置
https://blog.csdn.net/u011127019/article/details/58104056
- 在postgresqlz中查看与删除索引
查看索引 select * from pg_indexes where tablename='tbname'; 或者 select * from pg_statio_all_inde ...
- TypeScript语言学习笔记(1)
基本类型 // 布尔型(Boolean) let isDone: boolean = false; // 数值型(Number) let decimal: number = 6; let hex: n ...
- C#调用C++
c++ extern "C" __declspec(dllexport) char* WINAPI base64_decode( char *data,char base[]) { ...
- splunk + docker-compose 实现自定义 index
splunk是一款非常优秀的运维管理平台.Splunk 是机器数据的引擎.使用 Splunk 可收集.索引和利用所有应用程序.服务器和设备生成的快速移动型计算机数据 . 使用 Splunking 处理 ...
- Chrome 不能访问tensorboard解决
Chrome 不能访问tensorboard解决 Run: Cmd Result: C:\Users\think>tensorboard --logdir=C:\Users\think\sour ...
- 利用lipo编译合并iPhone模拟器和真机通用的静态类
利用lipo编译合并iPhone模拟器和真机通用的静态类 如何编译静态类库,而且现在网上也有很多的教程,现在问题时我们编译好了的静态类库会时两个版本的.a文件,分别用于模拟器和iPhone真迹,因此M ...
- maven 创建war类型项目
1. 创建maven project时选择packaging为war 2. 在webapp文件夹下新建META-INF和WEB-INF/web.xml 3. 在pom.xml中添加web项目需要的ja ...