13_CXF和Spring整合发布服务
【服务端】
第一步:建立一个Web项目
第二步:填充CXF jar包
第三步:创建接口及服务类
【工程截图(对比之前的WebService_CXF_Server00)】
【applicationContext.xml】
<?xml version="1.0" encoding="UTF-8"?>

<beans xmlns="http://www.springframework.org/schema/beans"

    xmlns:xsi="http://www.w3.org/2001/XMLSchema-instance" xmlns:jaxws="http://cxf.apache.org/jaxws"

    xmlns:jaxrs="http://cxf.apache.org/jaxrs" xmlns:cxf="http://cxf.apache.org/core"

    xsi:schemaLocation="http://www.springframework.org/schema/beans

                            http://www.springframework.org/schema/beans/spring-beans.xsd

                            http://cxf.apache.org/jaxrs http://cxf.apache.org/schemas/jaxrs.xsd

                            http://cxf.apache.org/jaxws http://cxf.apache.org/schemas/jaxws.xsd

                            http://cxf.apache.org/core http://cxf.apache.org/schemas/core.xsd">

<!-- service -->

<bean id="weatherInterface" class="com.Higgin.ws.service.WeatherInterfaceImpl"></bean>

<!--

    发布服务

    使用jaxws:server和jaxws:endpoint可以发布服务

    WebService地址=Tomcat地址值+CXF Servlet的路径+ /weather

-->

<jaxws:server address="/weather" serviceClass="com.Higgin.ws.service.WeatherInterface">

    <jaxws:serviceBean>

        <ref bean="weatherInterface"/>

    </jaxws:serviceBean>

</jaxws:server>

</beans>
【web.xml】
<?xml version="1.0" encoding="UTF-8"?>

<web-app xmlns:xsi="http://www.w3.org/2001/XMLSchema-instance" xmlns="http://java.sun.com/xml/ns/javaee" xsi:schemaLocation="http://java.sun.com/xml/ns/javaee http://java.sun.com/xml/ns/javaee/web-app_3_0.xsd" id="WebApp_ID" version="3.0">

  <display-name>WebService_CXF_Spring_Server00</display-name>

  <welcome-file-list>

    <welcome-file>index.jsp</welcome-file>

  </welcome-file-list>

  <!-- 加载Spring容器 -->

  <context-param>

    <param-name>contextConfigLocation</param-name>

    <param-value>/WEB-INF/classes/applicationContext.xml</param-value>

  </context-param>

  <listener>

    <listener-class>org.springframework.web.context.ContextLoaderListener</listener-class>

  </listener>

  <!-- CXF的Servlet -->

  <servlet>

    <servlet-name>cxf</servlet-name>

    <servlet-class>org.apache.cxf.transport.servlet.CXFServlet</servlet-class>

    <load-on-startup>1</load-on-startup>

  </servlet>

  <!-- 本系统的WebService路径必须以/ws/开头 -->

  <servlet-mapping>

    <servlet-name>cxf</servlet-name>

    <url-pattern>/ws/*</url-pattern>

  </servlet-mapping>

</web-app>
【启动Web容器】
访问 http://localhost:8080/WebService_CXF_Spring_Server00/ws

接着访问 http://localhost:8080/WebService_CXF_Spring_Server00/ws/weather?wsdl

可见WebService服务端启动正常。
【测试注意】
因为Spring和CXF整合将WebService通过TomCat发布,WebService和应用程序共用一个端口是8080。
测试WebService和应用程序(JSP)是否可以共存(都可以访问)
正式上线使用80端口。
【客户端】
【生成客户端代码】
首先,使用利用WebService的wsdl2java工具生成客户端代码:

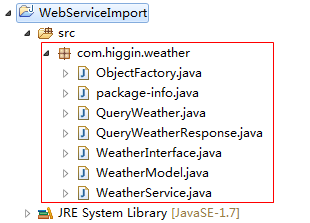
【客户端工程截图】

【applicationContext.java】
<?xml version="1.0" encoding="UTF-8"?>

<beans xmlns="http://www.springframework.org/schema/beans"

    xmlns:xsi="http://www.w3.org/2001/XMLSchema-instance" xmlns:jaxws="http://cxf.apache.org/jaxws"

    xmlns:jaxrs="http://cxf.apache.org/jaxrs" xmlns:cxf="http://cxf.apache.org/core"

    xsi:schemaLocation="http://www.springframework.org/schema/beans

                            http://www.springframework.org/schema/beans/spring-beans.xsd

                            http://cxf.apache.org/jaxrs http://cxf.apache.org/schemas/jaxrs.xsd

                            http://cxf.apache.org/jaxws http://cxf.apache.org/schemas/jaxws.xsd

                            http://cxf.apache.org/core http://cxf.apache.org/schemas/core.xsd">

    <!--

        使用<jaxws:clietn>调用服务端

        jaxws:client内部使用JaxWsProxyFactoryBean方式

        serviceClass:指定portType地址(需要使用wsdl2java工具生成)

    -->

    <jaxws:client id="weatherClient" address="http://localhost:8080/WebService_CXF_Spring_Server00/ws/weather?wsdl"

        serviceClass="com.higgin.weather.WeatherInterface">

    </jaxws:client>

</beans>
【ClientTest.java】
package com.higgin.ws.cxf;

import java.text.SimpleDateFormat;

import java.util.Date;

import java.util.List;

import org.junit.Before;

import org.junit.Test;

import org.springframework.context.ApplicationContext;

import org.springframework.context.support.ClassPathXmlApplicationContext;

import com.higgin.weather.WeatherInterface;

import com.higgin.weather.WeatherModel;

public class ClientTest {

    private ApplicationContext applicationContext;

    @Before

    public void before(){

        applicationContext=new ClassPathXmlApplicationContext("applicationContext.xml");

    }

    @Test

    public void testCxfSpringClient(){

        //从Spring容器中取出portType

        WeatherInterface weatherInterface=(WeatherInterface) applicationContext.getBean("weatherClient");

        //调用portType方法

        List<WeatherModel> list=weatherInterface.queryWeather("杭州");

        for(WeatherModel weatherModel:list){

            System.out.println(weatherModel.getDetail());

            Date date=weatherModel.getDate().toGregorianCalendar().getTime();

            System.out.println(new SimpleDateFormat("yyyy-MM-dd").format(date));

            System.out.println(weatherModel.getTemperatureMax());

            System.out.println(weatherModel.getTemperatureMin());

        }

    }

}
【运行结果】

【总结:使用jaxws实现SOAP1.1、SOAP1.2】
方式一:
CXF编程实现:
1.使用jaxwsServerFactoryBean发布WebService服务端。
需要设置:
jaxwsServerFactoryBean.setAddress("WebService地址");
jaxwsServerFactoryBean.setServiceClass("porType类路径"); //由程序员编写的
jaxwsServerFactoryBean.setServiceBean("portType类对象");
jaxwsServerFactoryBean.create(); //发布一个服务
2.使用jaxwsProxyFactory实现客户端调用WebService服务
jaxwsServerFactoryBean.setAddress("WebService的wsdl地址");
jaxwsServerFactoryBean.setServiceClass("portType路径"); //portType是wsdl2java工具生成
jaxwsServerFactoryBean.setCreate(); //创建portType对象
方法二:
CXF和Spring整合开发服务端和客户端。
1.使用<jaxws:Server>发布WebService服务端
在<jaxws:Server>设置Address、serviceClass、serviceBean
2.使用<jaxws:Client>调用WebService服务
在<jaxws:Server>设置Address、serviceClass
13_CXF和Spring整合发布服务的更多相关文章
- (七)CXF之与spring整合发布web服务
一.需求分析 用spring发布服务 二.案例 2.1 引入maven依赖 <dependencies> <!-- 添加Spring支持 --> <dependency& ...
- WebService学习之旅(三)JAX-WS与Spring整合发布WebService
Spring本身就提供了对JAX-WS的支持,有兴趣的读者可以研究下Spring的Spring-WS项目,项目地址: http://docs.spring.io/spring-ws/sites/1.5 ...
- webservice的cxf和spring整合发布
1.新建一个web项目 2.导入cxf相应的jar包,并部署到项目中 3.服务接口 package com.xiaostudy; /** * @desc 服务器接口 * @author xiaostu ...
- Spring整合CXF之发布WebService服务
今天我们来讲下如何用Spring来整合CXF,来发布WebService服务: 给下官方文档地址:http://cxf.apache.org/docs/writing-a-service-with-s ...
- Spring整合CXF,发布RSETful 风格WebService(转)
Spring整合CXF,发布RSETful 风格WebService 这篇文章是承接之前CXF整合Spring的这个项目示例的延伸,所以有很大一部分都是一样的.关于发布CXF WebServer和Sp ...
- Spring整合CXF,发布RSETful 风格WebService
原文地址:http://www.cnblogs.com/hoojo/archive/2012/07/23/2605219.html 这篇文章是承接之前CXF整合Spring的这个项目示例的延伸,所以有 ...
- spring与axis2整合发布webservice
最近在研究整合spring框架和axis2发布webservice服务,由于本人也才学java不久,为了便于以后的查看,在这里记录下发布过程. 所需的工具包,spring.jar和axis2链接地址为 ...
- 应用Spring MVC发布restful服务是怎样的一种体验
摘要:“约定优于配置”这是一个相当棒的经验,SOAP服务性能差.基于配置.紧耦合,restful服务性能好.基于约定.松耦合,现在我就把使用Spring MVC发布restful服务的 ...
- So easy Webservice 8.spring整合CXF 发布WS
1.添加jar包(cxf的jar包中包含了spring的jar包),添加spring配置文件 2.web.xml中配置CXFServlet,过滤WS服务的地址 <!-- 配置CXFServlet ...
随机推荐
- Chart控件的多种使用方法
花了近一周时间专门研究.net 3.5平台提供的Chart控件的使用方法,感觉该控件的功能很强大,做出的图表效果也很美观,使用方法也并不复杂.如今先讲下Chart控件的部署及一些基本使用方法. 一.安 ...
- 7 种流行 PHP IDE 的比较
编写关于 PHP 的系列文章让我更加深刻地了解了 PHP 开发人员的世界.我和许多 PHP 程序员交谈过,最令我惊奇的是只有很少的人使用 IDE.大多数程序员使用文本编辑器,比如 Microsoft® ...
- android127 zhihuibeijing 屏幕适配
## 屏幕适配 ## 加载不同分辨率的图片是根据手机的像素来加载不同分辨率文件夹下的图片. > 先在主流屏幕来发: *(分辨率和手机屏幕大小无关), 遵循原则: 不用AbsoluteLayout ...
- html页面docutype前面出现字符会导致IE678 margin:0 auto;失效
html页面<!DOCTYPE html>前面出现字符会导致IE678 margin:0 auto;失效
- 详解C中volatile关键字
volatile提醒编译器它后面所定义的变量随时都有可能改变,因此编译后的程序每次需要存储或读取这个变量的时候,都会直接从变量地址中读取数据.如果没有volatile关键字,则编译器可能优化读取和存储 ...
- Preparing for Different Databases
Preparing for Different Databases In the previous chapter, we created a PostRepository that returns ...
- 【转】Git代码提交最佳实践
GIT Commit Good Practice The following document is based on experience doing code development, bug ...
- Objective-C /iphone开发基础:协议(protocol)
protocol协议时为了补充Objective-C 只能单继承的缺陷而增加的一个新功能.Objective-C重所有的方法都是虚方法,所以在oc重也就没有关键字 virtual一说,有了协议可以补充 ...
- Android 自学之日期DatePicker、时间TimePicker选择器
日期(DatePicker).时间(TimePicker)是两个比较易用的控件,他们都是从帧布局FrameLayout派生而出的:他们在FrameLayout的基础上提供了一些方法来获取当前用户所选择 ...
- 使用CompletionService结合ExecutorService批处理任务
CompletionService用于提交一组Callable任务,其take方法返回已完成的一个Callable任务对应的Future对象. 如果你向Executor提交了一个批处理任务,并且希望在 ...