Android 个人手机通讯录开发
Android 个人手机通讯录开发
数据存储:SQLite 数据库
开发工具:Android Studio
Phone Module 简介
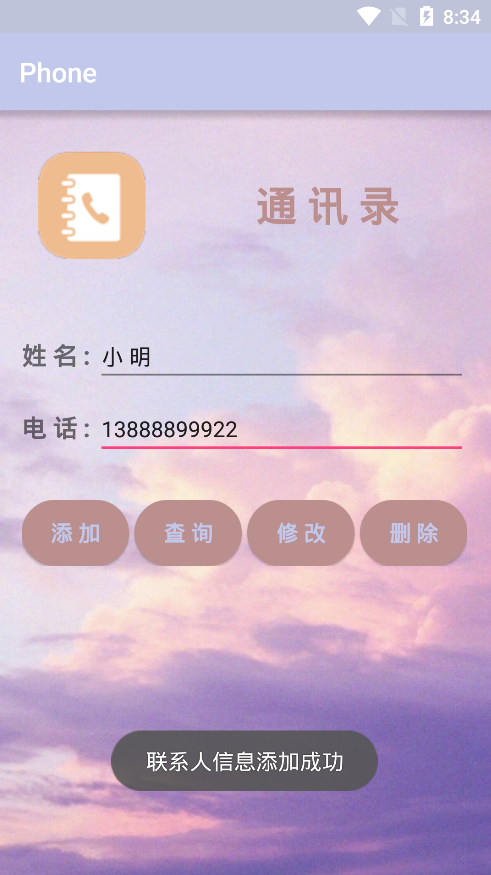
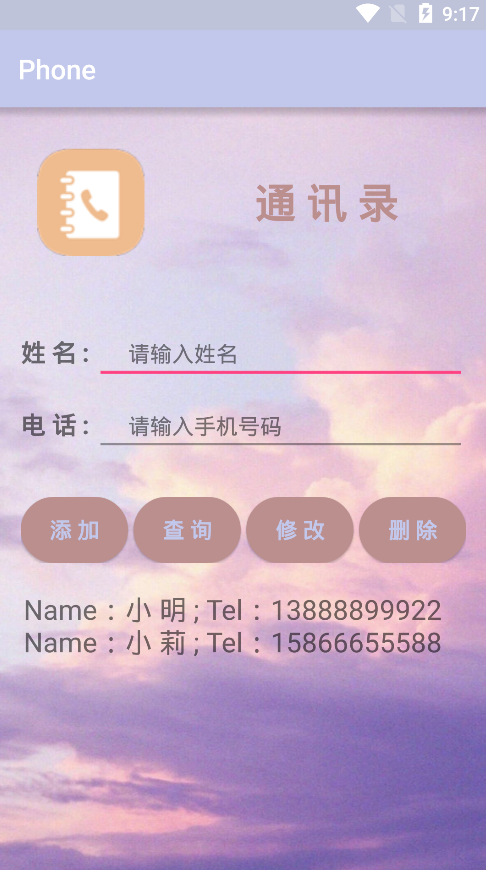
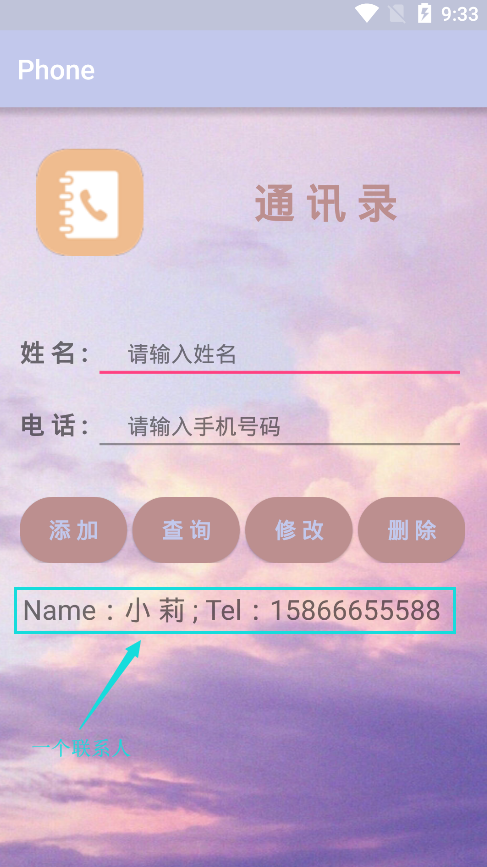
界面展示

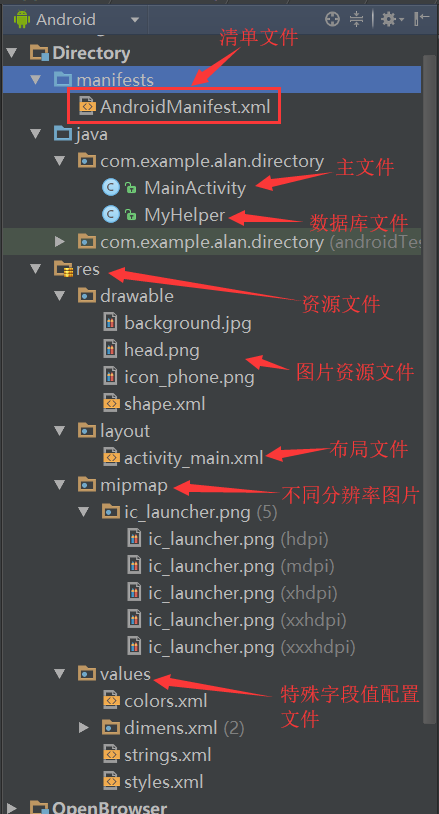
文件结构简单分析
个人手机通讯录代码实现
清单文件 (AndroidManifest.xml)
<?xml version="1.0" encoding="utf-8"?>

<manifest xmlns:android="http://schemas.android.com/apk/res/android"

    package="com.example.alan.directory" >

    <application

        android:allowBackup="true"

        android:icon="@drawable/icon_phone"

        android:label="@string/app_name"

        android:supportsRtl="true"

        android:theme="@style/AppTheme" >

        <activity android:name=".MainActivity" >

            <intent-filter>

                <action android:name="android.intent.action.MAIN" />

                <category android:name="android.intent.category.LAUNCHER" />

            </intent-filter>

        </activity>

    </application>

</manifest>
MainActivity.java (主文件)
/**

 * Created by Alan J on 13/2/2019.

 */

package com.example.alan.directory;

import android.database.Cursor;

import android.database.sqlite.SQLiteDatabase;

import android.support.v7.app.AppCompatActivity;

import android.os.Bundle;

import android.text.method.ScrollingMovementMethod;

import android.view.View;

import android.widget.Button;

import android.widget.EditText;

import android.widget.TextView;

import android.widget.Toast;

public class MainActivity extends AppCompatActivity implements View.OnClickListener{

    MyHelper myHelper;

    private EditText etName;

    private EditText etPhone;

    private TextView tvShow;

    private Button btnAdd;

    private Button btnQuery;

    private Button btnUpdate;

    private Button btnDelete;

    @Override

    protected void onCreate(Bundle savedInstanceState) {

        super.onCreate(savedInstanceState);

        setContentView(R.layout.activity_main);

        myHelper = new MyHelper(this);

        init(); //初始化控件

    }

    private void init(){

        etName = (EditText)findViewById(R.id.et_name);

        etPhone = (EditText)findViewById(R.id.et_phone);

        tvShow = (TextView)findViewById(R.id.tv_show);

        btnAdd = (Button)findViewById(R.id.btn_add);

        btnQuery = (Button)findViewById(R.id.btn_query);

        btnUpdate = (Button)findViewById(R.id.btn_update);

        btnDelete = (Button)findViewById(R.id.btn_delete);

        btnAdd.setOnClickListener(this);          //Button控件设置监听

        btnQuery.setOnClickListener(this);

        btnUpdate.setOnClickListener(this);

        btnDelete.setOnClickListener(this);

        tvShow.setMovementMethod(ScrollingMovementMethod.getInstance());  //设置文本滚动

    }

    @Override

    public void onClick(View v){

        String name;

        String phone;

        SQLiteDatabase db;

        switch (v.getId()){

            case R.id.btn_add:       //添加联系人

                name = etName.getText().toString().trim();

                phone = etPhone.getText().toString().trim();

                db = myHelper.getWritableDatabase();

                if (name.equals("") || phone.equals("")){    //联系人信息不能为空

                    Toast.makeText(this,"联系人信息添加失败",Toast.LENGTH_SHORT).show();

                }

                else {

                    db.execSQL("insert into person (name,phone) values(?,?)", new Object[]{name, phone});

                    Toast.makeText(this,"联系人信息添加成功",Toast.LENGTH_SHORT).show();

                }

                db.close();

                break;

            case R.id.btn_query:    //查询联系人

                db = myHelper.getReadableDatabase();

                Cursor cursor = db.rawQuery("select name,phone from person",null);

                if (cursor.getCount() == 0){

                    tvShow.setText("");

                    Toast.makeText(this,"空目录",Toast.LENGTH_SHORT).show();

                }else {

                    cursor.moveToFirst();

                    tvShow.setText("Name:" + cursor.getString(0) + " ; Tel:" + cursor.getString(1));

                    while (cursor.moveToNext()){

                        tvShow.append("\n" + "Name:" + cursor.getString(0) + " ; Tel:" + cursor.getString(1));

                    }

                }

                cursor.close();

                db.close();

                break;

            case R.id.btn_update:    //修改联系人

                db = myHelper.getWritableDatabase();

                name = etName.getText().toString().trim();

                phone = etPhone.getText().toString().trim();

                if (name.equals("") || phone.equals("")){    //联系人信息不能为空

                    Toast.makeText(this,"联系人信息修改失败",Toast.LENGTH_SHORT).show();

                }

                else {

                    db.execSQL("update person set name=?,phone=? where name=?", new Object[]{name, phone, name});

                    Toast.makeText(this,"联系人信息修改成功",Toast.LENGTH_SHORT).show();

                }

                db.close();

                break;

            case R.id.btn_delete:   //删除联系人

                db = myHelper.getWritableDatabase();

                name = etName.getText().toString().trim();

                phone = etPhone.getText().toString().trim();

                if (name.equals("") || phone.equals("")){    //联系人信息不能为空

                    Toast.makeText(this,"联系人信息删除失败",Toast.LENGTH_SHORT).show();

                }

                else {

                    db.execSQL("delete from person where name=? and phone=?", new Object[]{name, phone});

                    Toast.makeText(this,"联系人信息删除成功",Toast.LENGTH_SHORT).show();

                }

                db.close();

                break;

        }

    }

}
MyHelper.java (数据库文件)
/**

 * Created by Alan J on 13/2/2019.

 */

package com.example.alan.directory;

import android.content.Context;

import android.database.sqlite.SQLiteDatabase;

import android.database.sqlite.SQLiteOpenHelper;

public class MyHelper extends SQLiteOpenHelper{

    public MyHelper(Context context){

        super(context, "alan.db", null ,2);

    }

    @Override

    public void onCreate(SQLiteDatabase db){

        db.execSQL("create table person(id integer primary key autoincrement,name varchar(20),phone varchar(20) unique)");

    }

    public void onUpgrade(SQLiteDatabase db, int oldVersion, int newVersion){

    }

}
activity_main.xml (XML Layout 布局文件)
<?xml version="1.0" encoding="utf-8"?>

<RelativeLayout xmlns:android="http://schemas.android.com/apk/res/android"

    xmlns:tools="http://schemas.android.com/tools"

    android:layout_width="match_parent"

    android:layout_height="match_parent"

    android:background="@drawable/background"

    tools:context=".MainActivity">

    <LinearLayout

        android:layout_width="match_parent"

        android:layout_height="wrap_content"

        android:id="@+id/lineOne">

        <ImageView

            android:layout_width="wrap_content"

            android:layout_height="wrap_content"

            android:background="@drawable/head"

            android:layout_margin="30dp"/>

        <TextView

            android:layout_width="wrap_content"

            android:layout_height="wrap_content"

            android:text="通 讯 录"

            android:textSize="30dp"

            android:textStyle="bold"

            android:textColor="#BC8F8F"

            android:layout_gravity="center"

            android:layout_marginLeft="50dp"

            />

    </LinearLayout>

    <LinearLayout

        android:id="@+id/lineTwo"

        android:layout_width="match_parent"

        android:layout_height="wrap_content"

        android:layout_below="@+id/lineOne"

        android:layout_marginTop="20dp"

        android:layout_marginLeft="18dp"

        android:layout_marginRight="18dp">

        <TextView

            android:layout_width="wrap_content"

            android:layout_height="wrap_content"

            android:text="姓 名 : "

            android:textSize="18dp"

            android:textStyle="bold"/>

        <EditText

            android:id="@+id/et_name"

            android:layout_width="match_parent"

            android:layout_height="wrap_content"

            android:hint="     请输入姓名"

            android:textSize="16dp"

            android:maxLength="14"/>

    </LinearLayout>

    <LinearLayout

        android:id="@+id/lineTree"

        android:layout_width="match_parent"

        android:layout_height="wrap_content"

        android:layout_below="@+id/lineTwo"

        android:layout_marginTop="10dp"

        android:layout_marginLeft="18dp"

        android:layout_marginRight="18dp">

        <TextView

            android:layout_width="wrap_content"

            android:layout_height="wrap_content"

            android:text="电 话 : "

            android:textSize="18dp"

            android:textStyle="bold"/>

        <EditText

            android:id="@+id/et_phone"

            android:layout_width="match_parent"

            android:layout_height="wrap_content"

            android:hint="     请输入手机号码"

            android:textSize="16dp"

            android:maxLength="11"/>

    </LinearLayout>

    <LinearLayout

        android:layout_width="match_parent"

        android:layout_height="wrap_content"

        android:id="@+id/lineFour"

        android:layout_below="@+id/lineTree"

        android:layout_marginTop="30dp"

        android:layout_marginLeft="18dp"

        android:layout_marginRight="18dp"

        android:orientation="horizontal">

        <Button

            android:id="@+id/btn_add"

            android:layout_width="wrap_content"

            android:layout_height="wrap_content"

            android:background="@drawable/shape"

            android:layout_weight="1"

            android:text=" 添 加 "

            android:textSize="16dp"

            android:textColor="#c2c8ec"

            android:textStyle="bold"/>

        <Button

            android:id="@+id/btn_query"

            android:layout_width="wrap_content"

            android:layout_height="wrap_content"

            android:background="@drawable/shape"

            android:layout_weight="1"

            android:layout_marginLeft="4dp"

            android:text=" 查 询 "

            android:textSize="16dp"

            android:textColor="#c2c8ec"

            android:textStyle="bold"/>

        <Button

            android:id="@+id/btn_update"

            android:layout_width="wrap_content"

            android:layout_height="wrap_content"

            android:background="@drawable/shape"

            android:layout_weight="1"

            android:layout_marginLeft="4dp"

            android:text=" 修 改 "

            android:textSize="16dp"

            android:textColor="#c2c8ec"

            android:textStyle="bold"/>

        <Button

            android:id="@+id/btn_delete"

            android:layout_width="wrap_content"

            android:layout_height="wrap_content"

            android:background="@drawable/shape"

            android:layout_weight="1"

            android:layout_marginLeft="4dp"

            android:text=" 删 除 "

            android:textSize="16dp"

            android:textColor="#c2c8ec"

            android:textStyle="bold"/>

    </LinearLayout>

    <TextView

        android:id="@+id/tv_show"

        android:layout_width="match_parent"

        android:layout_height="180dp"

        android:scrollbars="vertical"

        android:layout_below="@+id/lineFour"

        android:layout_marginTop="20dp"

        android:layout_marginLeft="20dp"

        android:layout_marginRight="18dp"

        android:textSize="20dp"/>

</RelativeLayout>
shape.xml (Button 按钮设置)
<?xml version="1.0" encoding="utf-8" ?>

<shape xmlns:android="http://schemas.android.com/apk/res/android"

    android:shape="rectangle">

    <!--设置背景色-->

    <solid android:color="#BC8F8F" />

    <!--设置圆角-->

    <corners android:radius="105dip" />

    <!--设置边框线的宽度和颜色-->

    <stroke android:width="0dp" android:color="#B0C4DE" />

</shape>
Android 个人通讯录功能测试
添加
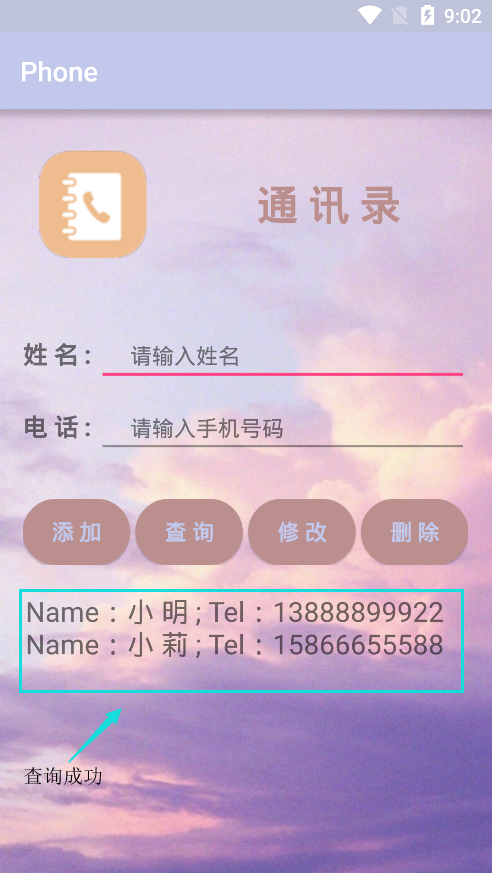
分别添加联系人:姓名:小 明 电话:13888899922
姓名:小 莉 电话:15866655588
添加联系人功能验证:姓名:小 明 电话:13888899922
添加联系人功能验证:姓名:小 莉 电话:15866655588


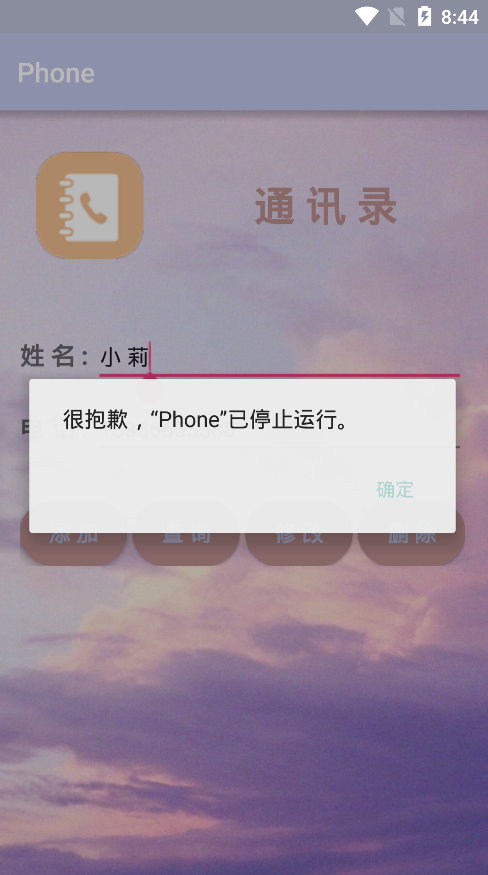
测试中的一些问题:1. 联系人电话号码不能重复添加,程序会终止退出,因为联系人的电话号码是唯一的(一个人可以有多个手机号,而一个手机号只能一个人使用 {该功能程序已经实现} )。
2. 电话号码长度限制为11位。
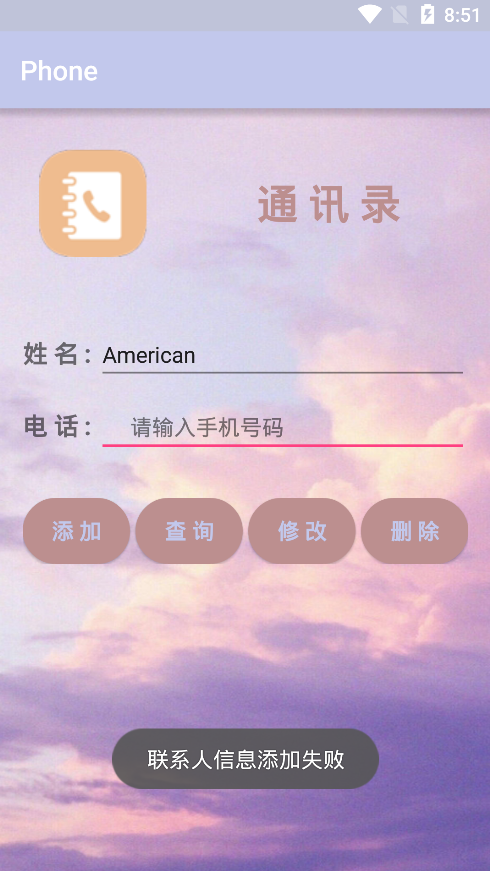
3. 联系人信息为空不能成功添加。
再次添加联系人:姓名:小 莉 电话:15866655588

上述功能问题限制的重点代码如下:
//联系人电话号码唯一性

@Override

public void onCreate(SQLiteDatabase db){

        db.execSQL("create table person(id integer primary key autoincrement,name varchar(20),phone varchar(20) unique)");

}

//电话号码长度限制

<EditText

   android:id="@+id/et_phone"

   android:layout_width="match_parent"

   android:layout_height="wrap_content"

   android:hint="     请输入手机号码"

   android:textSize="16dp"

   android:maxLength="11"/>

//联系人信息为空时的限制

        case R.id.btn_add:       //添加联系人

                name = etName.getText().toString().trim();

                phone = etPhone.getText().toString().trim();

                db = myHelper.getWritableDatabase();

                if (name.equals("") || phone.equals("")){    //联系人信息不能为空

                    Toast.makeText(this,"联系人信息添加失败",Toast.LENGTH_SHORT).show();

                }

                else {

                    db.execSQL("insert into person (name,phone) values(?,?)", new Object[]{name, phone});

                    Toast.makeText(this,"联系人信息添加成功",Toast.LENGTH_SHORT).show();

                }

                db.close();

                break;
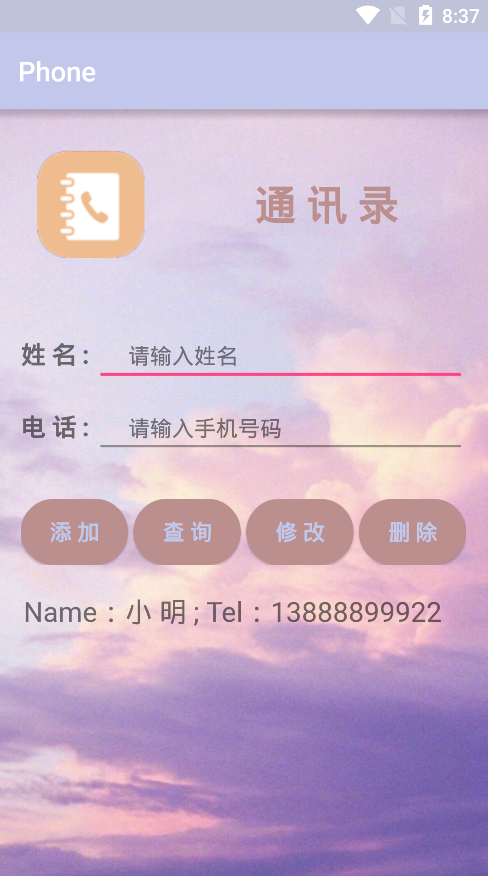
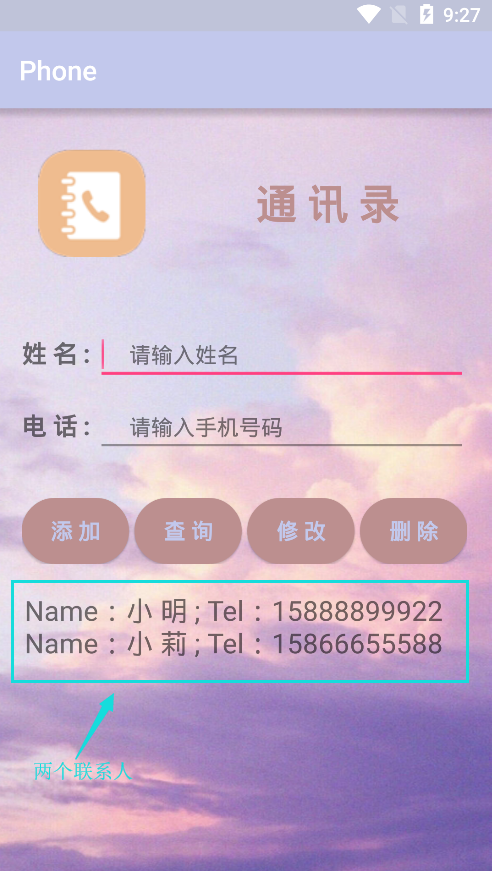
查询
查询通讯录联系人功能验证:
联系人查询重点代码:
//查询联系人

      case R.id.btn_query:

                db = myHelper.getReadableDatabase();

                Cursor cursor = db.rawQuery("select name,phone from person",null);

                if (cursor.getCount() == 0){

                    tvShow.setText("");

                    Toast.makeText(this,"空目录",Toast.LENGTH_SHORT).show();

                }else {

                    cursor.moveToFirst();

                    tvShow.setText("Name:" + cursor.getString(0) + " ; Tel:" + cursor.getString(1));

                    while (cursor.moveToNext()){

                        tvShow.append("\n" + "Name:" + cursor.getString(0) + " ; Tel:" + cursor.getString(1));

                    }

                }

                cursor.close();

                db.close();

                break;
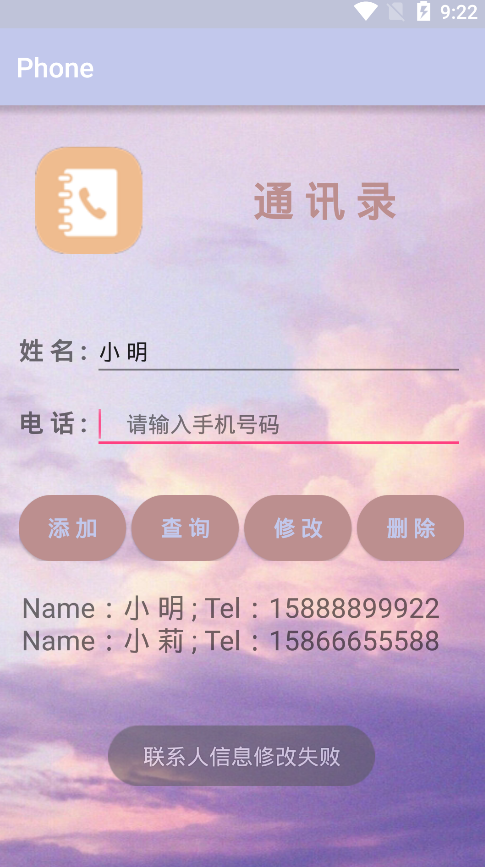
修改
修改联系人功能验证:姓名:小 明 电话:13888899922 ===》》》 姓名:小 明 电话:15888899922
注意小问题:必须输入联系人姓名和电话号码,才可以成功进行修改,在数据库中修改一句name字段值进行匹配

联系人修改重点代码:
//修改联系人

      case R.id.btn_update:

                db = myHelper.getWritableDatabase();

                name = etName.getText().toString().trim();

                phone = etPhone.getText().toString().trim();

                if (name.equals("") || phone.equals("")){    //联系人信息不能为空

                    Toast.makeText(this,"联系人信息修改失败",Toast.LENGTH_SHORT).show();

                }

                else {

                    db.execSQL("update person set name=?,phone=? where name=?", new Object[]{name, phone, name});

                    Toast.makeText(this,"联系人信息修改成功",Toast.LENGTH_SHORT).show();

                }

                db.close();

                break;
测试中的一些问题:联系人为空时不能进行修改
上述功能问题限制的重点代码如下:
         if (name.equals("") || phone.equals("")){    //联系人信息不能为空

                    Toast.makeText(this,"联系人信息修改失败",Toast.LENGTH_SHORT).show();

                }

                else {

                    db.execSQL("update person set name=?,phone=? where name=?", new Object[]{name, phone, name});

                    Toast.makeText(this,"联系人信息修改成功",Toast.LENGTH_SHORT).show();

                }
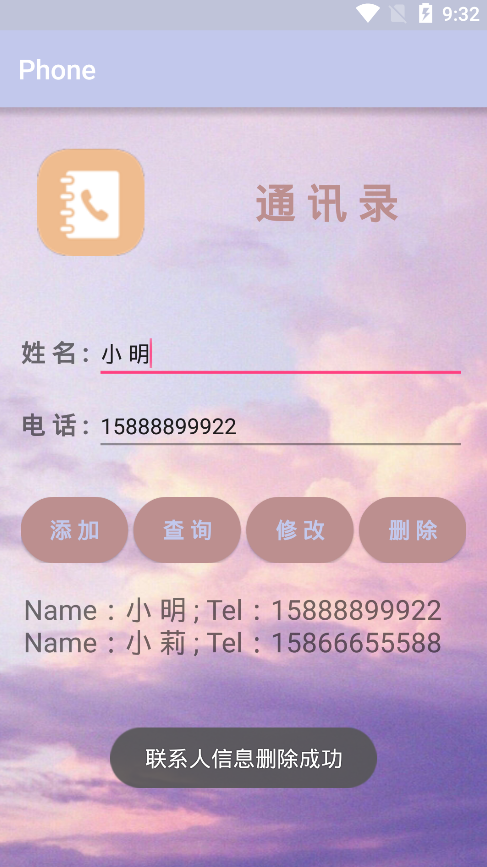
删除
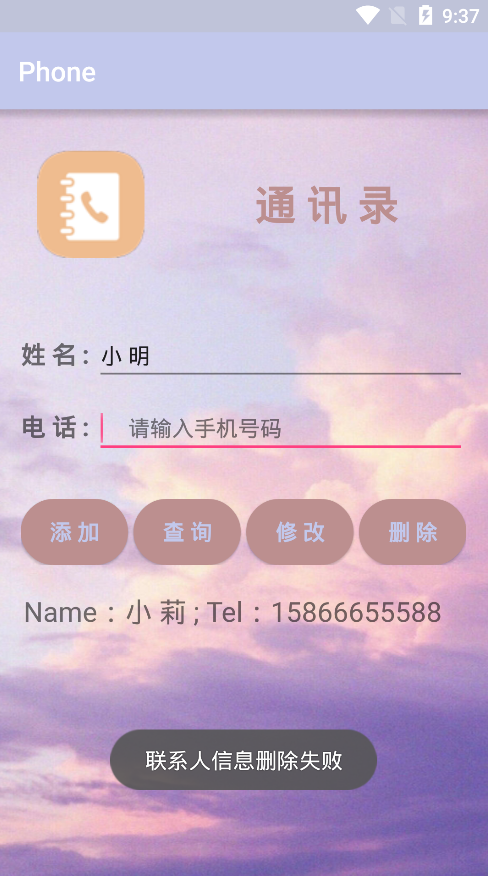
删除联系人功能验证:姓名:小 明 电话:15888899922
联系人删除重点代码:
//删除联系人

       case R.id.btn_delete:

                db = myHelper.getWritableDatabase();

                name = etName.getText().toString().trim();

                phone = etPhone.getText().toString().trim();

                if (name.equals("") || phone.equals("")){    //联系人信息不能为空

                    Toast.makeText(this,"联系人信息删除失败",Toast.LENGTH_SHORT).show();

                }

                else {

                    db.execSQL("delete from person where name=? and phone=?", new Object[]{name, phone});

                    Toast.makeText(this,"联系人信息删除成功",Toast.LENGTH_SHORT).show();

                }

                db.close();

                break;
测试中的一些问题:联系人为空时不能进行删除
上述功能问题限制的重点代码如下:
         if (name.equals("") || phone.equals("")){    //联系人信息不能为空

                    Toast.makeText(this,"联系人信息删除失败",Toast.LENGTH_SHORT).show();

                }

                else {

                    db.execSQL("delete from person where name=? and phone=?", new Object[]{name, phone});

                    Toast.makeText(this,"联系人信息删除成功",Toast.LENGTH_SHORT).show();

                }
Android 个人手机通讯录开发的更多相关文章
- Android安卓手机游戏开发
成都传智播客Java培训,免费学Android安卓手机游戏开发,安卓android开发课程包括Android安卓应用开发和Android安卓游戏开发两个方向,可是偏向游戏开发. 依据"199 ...
- opencv 手写选择题阅卷 (四)Android端 手机应用开发
opencv 手写选择题阅卷 (四)Android 手机应用开发 在PC端把代码调通以后开始开发Android 手机应用,因为主要功能代码为C++代码,所以需要通过NDK编译,JAVA通过JNI方式调 ...
- Android向手机通讯录中的所有的联系人(包括SIM卡),向手机通讯录中插入联系人
package com.example.myapi.phonepersion; import java.util.ArrayList; import java.util.List; import an ...
- Android——Cocosd2d-x手机游戏开发学习思路
手机APP应用如雨后春笋般冒了出来,而在众多的APP应用中,游戏占据了半壁江山.它丰富着人们的业余生活,增进了人们之间的沟通交流.也有许多开发的朋友对游戏开发情有独钟,他们不止是享受着有很多的人们去下 ...
- Android程序设计-简单手机通讯录
在微信中,手机QQ中你会发现软件读取手机通讯录这个功能,这个功能使得软件更好的与手机联系人绑定,从而达到分享,拨打电话,读取用户信息等操作.下面我们将通过一个demo实现这个功能 首先我们看一下效果图 ...
- 【Android Demo】简单手机通讯录
Android 系统给我们提供了访问通讯录的接口,通过接口获取通讯录信息.Adapter 与 View 的连接主要依靠 getView 这个方法返回我们需要的自定义 view. ListView 是 ...
- 【Android】1.0 第1章 C#之Android手机App开发
分类:C#.Android.VS2015:创建日期:2016-01-20 目前Android在全世界市场上大约有75%的占有率,国人Android手机的持有比例更甚,甚至达到90%以上.因此搞计算机的 ...
- Android之手机向导以及设置中心模块的开发
当我们使用的新的软件的时候,我们首先需要教用户如何使用我们的软件,当用户学习完使用教程,下次再登录的时候,我们应该直接跳到我们的功能界面,下面我来展示一下我学习视频做的效果图:手机防盗这个功能模块就是 ...
- c语言开发手机通讯录
// // main.c // 手机通讯录 // // Created by Kevin-Dfg on 16/4/19. // Copyright © 2016年 Kevin-Dfg. All ...
随机推荐
- Python中’__main__’模块的作用
Python不同于C/C++,程序执行并不需要主程序,如main(),而是文件自上而下的执行.但很多Python程序中都有 if __name__ == '__main__': statements ...
- 接口调用(发送http请求)
// 向对应的url地址发送http请求, 并获取响应的json字符串 public String getHttpResponse(String url) { // result用 ...
- kvm常见故障及解决
一.启动虚拟机Connection reset by peer # virsh start vmhost1error: Failed to start domain vmhost1error: Una ...
- 玩转SSH--Hibernate(三)---手动修改数据库,前台查询信息不同步更新问题解决方法
在用hibernate时遇到一个挺纠结的问题,就是我在手动修改数据库的信息后,前台页面查询到的信息还是之前的结果,一开始以为是缓存的问题,经过多次修改和在网上查询资料,最终发现可能是hibernate ...
- textarea去掉右下角拖拽
/*去掉textarea右下角三角符号*/ resize : none;
- WIN10怎么安装SQL server2000数据库
怎样在win10下安装sql2000数据库 1.安装之前先确认自己的Windows10是64位的还是32位的 2.替换对应的系统文件SQLUNIRL.dll 此时你可能会遇到,没有权限替换文件或重命名 ...
- 判断qq号码 规律
$qqs = array('2343232', "4323254","22222","5123123","23412341234& ...
- ESXI的安装和部署
1. 实验拓扑图: 2. 实验要求 (1) 新建一台exsi主机,安装exsi5.5系统. 步骤: 1)新建虚拟机,导入光盘. 2)安装esxi系统 (2)在exsi主机中,配置IP地址为1 ...
- wukong.go
package wukong import ( _ "github.com/boltdb/bolt" _ "github.com/cznic/kv&quo ...
- bzoj 2822 [AHOI2012]树屋阶梯 卡特兰数
因为规定n层的阶梯只能用n块木板 那么就需要考虑,多出来的一块木板往哪里放 考虑往直角处放置新的木板 不管怎样,只有多的木板一直扩展到斜边表面,才会是合法的新状态,发现,这样之后,整个n层阶梯就被分成 ...