vim插件安装总结
vim插件安装总结
插件对于vim来说是一个杀手级别的神器助手,能自动补全,语法高亮,文件搜索等等,有效地提升了编程效率。下面就个人的一些安装和使用进行一个总结。
自动管理vim插件的vundle(原理及总体介绍).
Vundle is short for Vim bundle and is a Vim plug manager, also a Vim plug.
Vundle allows you to :
- keep track of and configure your plugins right in the .vimrc
- install configured plugins
- update configured plugins
- search by name all plugins available Vim scripts
- cleam unused plugins up
- run the above actions in a single keypress in the interactive mode
bundle分为三类,比较常用就是第二种:
- 在Github vim-scripts 用户下的repos,只需要写出repos名称
- 在Github其他用户下的repos, 需要写出”用户名/repos名”
- 不在Github上的插件,需要写出git全路径
bundle的官方说明文档如下,它教你如何配置对应的安装插件位置:
- " plugin on GitHub repo
- " Plugin 'tpope/vim-fugitive'
- " Git plugin not hosted on GitHub
- " Plugin 'git://git.wincent.com/command-t.git'
- " git repos on your local machine (i.e. when working on your own plugin)
- " Plugin 'file:///home/gmarik/path/to/plugin'
vundle安装方法
vundle在github上都有详细的安装过程,可以直接点击链接进行对照安装,我将自己的安装步骤记录下来。
- forest@forest-E351:~$ cd ~ //来到home目录下
- forest@forest-E351:~$ git clone https://github.com/VundleVim/Vundle.vim.git ~/.vim/bundle/Vundle.vim
github上提议将vundle的配置写入.vimrc中,而我是单独写入.vimrc.bundles中,并在.vimrc中填写命令转入到.vimrc.bundles里面。流程如下:
- forest@forest-E351:~$ vim .vimrc //在.vimrc中填入下面命令
- if filereadable(expand("~/.vimrc.bundles")) //此命令作用转入:.vimrc.bundles文件
- source ~/.vimrc.bundles
- endif
在.vimrc.bundles文件的内容见下附录
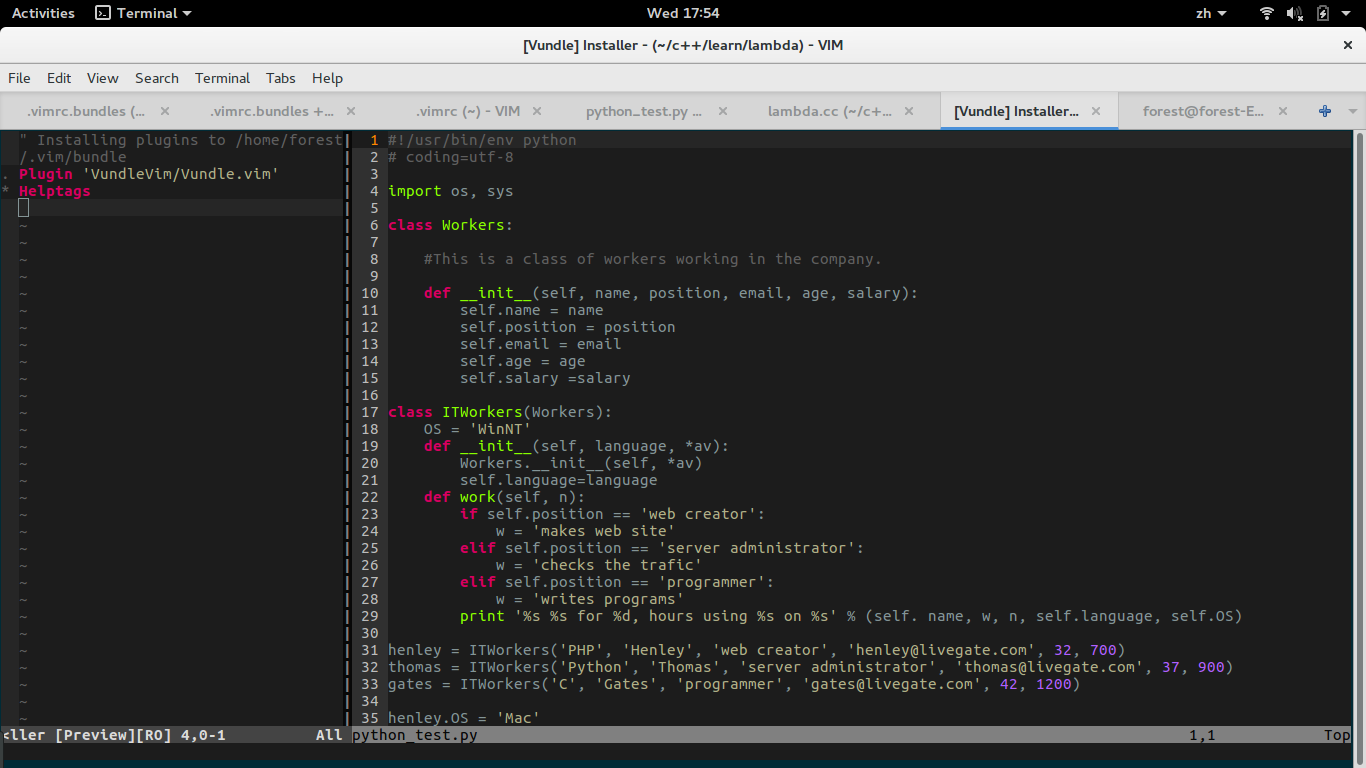
vundle安装好之后,可以在vim打开的文本中键入命令:PluginInstall
或在命令行下键入:vim +PluginInstall +qall
(Launch vim and run :PluginInstall
To install from command line: vim +PluginInstall +qall)
在第一种方法中执行会出现如下图片结果:
安装/卸载/更新插件:
安装/卸载/更新插件:
国内BundleInstall一些软件需要FQ,故需要在/home/forest/.vim/bundle/Vundle.vim/autoload/vundle/installer.sh
找到 git clone此句话,前面添加proxychains进行FQ,如下所示
- let cmd = 'proxychains git clone --recursive '.vundle#installer#shellesc(a:bundle.uri).' '.vundle#installer#shellesc(a:bundle.path())
去掉某些自己用不到的插件: 编辑.vimrc.bundles,注释掉插件对应Bundle行即可(加一个双引号),保存退出即可
"Bundle 'fholgado/minibufexpl.vim’
如果想从物理上清除(删除插件文件),注释保存后再次进入vim
命令行模式,执行:
:BundleClean
如果要安装新插件,在vimrc中加入bundle,然后执行
:BundleInstall
更新插件
:BundleUpdate (更新之后,可能需要重新编译一下YCM)
vim对python的支持
ubuntu16.04+默认安装的vim都是支持Python3,但是很多的插件需要Python2。
当然你也可以自检自己的vim支持哪一种Python,在shell中输入以下命令,若出现-python则表示不支持Python2,+python则表示支持;-python3表示不支持Python3,+python3则表示支持。
- vim --version|grep python
想让vim支持py2,可以通过以下命令:
- sudo apt-get install vim-nox-py2 //安装vim-nox-py2
- sudo update-alternatives --config vim //通过vim的版本切换来选择支持python
vim配合神器ctags
ctags以前是和vim绑定在一起的,在vim6.0以后单独出来,它能帮助编程者有效定位各个函数定义,宏定义,变量定义。安装命令如下:
- sudo apt-get install ctags
vim有效插件之YouCompleteMe
- 安装前提条件:
- sudo apt-get install build-essential cmake
- sudo apt-get install python-dev python3-dev
本人使用bundle进行vim插件安装,故在.vim.bundles内部添加如下命令:
Bundle ‘Valloric/YouCompleteMe’
- 我想选择c/c++,go,js,故编译命令如下:
- cd ~/.vim/bundle/YouCompleteMe
- ./install.py --clang-completer --gocode-completer --tern-completer
想调用c++语法补全,必须在.vimrc中引入如下语句:
- let g:ycm_global_ycm_extra_conf = '~/.vim/bundle/YouCompleteMe/third_party/ycmd/cpp/ycm/.ycm_extra_conf.py'
比较正规的写法还是在.vimrc.bundles内的YouCompleteMe模块中写入。以上语句是2017.6.1最新版本youcompleteme的路径,配置的时候可以使用find命令来查找.ycm_extra_conf.pywen文件
- forest@forest-E351:~$ cd .vim/bundle/YouCompleteMe/
- forest@forest-E351:~/.vim/bundle/YouCompleteMe$ find . -name .ycm_extra_conf.py //要注意添加前面带点号,隐藏文件直接搜不到
- ./third_party/ycmd/cpp/ycm/.ycm_extra_conf.py
- YouCompleteMe自我配置
- nnoremap <leader>jd :YcmCompleter GoToDefinitionElseDeclaration<CR> " 跳转到定义处
- YCM采用了vim的jumplist,往前跳<C-o>,往后跳<C-i>
- YouCompleteMe官方文档
vim插件之NERDTree
在.vim.bunldes文件中添加:
- Bundle 'scrooloose/nerdtree'
- map <leader>n :NERDTreeToggle<CR>
- 使用方法:
<c-w>+hjkl来分屏移动
通过hjkl来移动光标
o打开关闭文件或目录,如果想打开文件,必须光标移动到文件名
t在标签页中打开
s和i可以纵向或水平分割窗口打开文件
p到上层目录
P到根目录
K到同目录第一个节点
J到同目录最后一个节点
本人vim配置中的快捷键小结
- "F3 paste模式转换 #.vimrc中
- "<leader>jd 跳转至定义 #.vimrc.bundles中YouCompleteMe
- "map <leader>n :NERDTreeToggle<CR> #.vimrc.bundles中NERDTree
vimrc的代码
- ":echo "Hello, world!" 注释:"开头表示注释
- "=========================一般设置=======================================
- set nocompatible "vim比vi支持更多的功能,如showcmd,避免冲突和副作用,最好关闭兼容
- set encoding=utf-8 "使用utf-8编码
- set number "显示行号
- set showcmd "显示输入命令
- set clipboard=unnamed,unnamedplus "可以从vim复制到剪贴版中
- set mouse=a "可以在buffer的任何地方使用鼠标
- set cursorline "显示当前行
- set hlsearch "显示高亮搜索
- "set incsearch
- set history=100 "默认指令记录是20
- set ruler "显示行号和列号(默认打开)
- set pastetoggle=<F3> "F3快捷键于paste模式与否之间转化,防止自动缩进
- "set helplang=cn "设置为中文帮助文档,需下载并配置之后才生效
- "============================个人快捷键=================================
- "F3 paste模式转换
- "<leader>jd 跳转至定义 \jd
- "=======================================================================
- "============================vundle=====================================
- if filereadable(expand("~/.vimrc.bundles"))
- source ~/.vimrc.bundles
- endif
- "let g:ycm_global_ycm_extra_conf = '~/.vim/bundle/YouCompleteMe/third_party/ycmd/cpp/ycm/.ycm_extra_conf.py'
- "===========================文本格式排版================================o
- set tabstop=4 "设置tab长度为4
- set shiftwidth=4 "设置自动对齐的缩进级别
- "set cindent "自动缩进,以c语言风格,例如从if进入下一行,会自动缩进shiftwidth大小
- "set smartindent "改进版的cindent,自动识别以#开头的注释,不进行换行
- set autoindent "autoindent配合下面一条命令根据不同语言类型进行不同的缩进操作,更加智能
- filetype plugin indent on
- "set nowrap
- "===========================选择solarized的模式==========================
- syntax enable
- syntax on
- "solarzed的深色模式
- "set background=dark
- "solarized的浅色模式
- "set background=light
- "colorscheme solarized "开启背景颜色模式
- "===========================选择molokai的模式============================
- "let g:rehash256 = 1
- let g:molokai_original = 1 "相较于上一个模式,个人比较喜欢此种模式
- highlight NonText guibg=#060606
- highlight Folded guibg=#0A0A0A guifg=#9090D0
- "set t_Co=256
- "set background=dark
- colorscheme molokai
vimrc.bundles的代码
- filetype off
- " set the runtime path to include Vundle and initialize
- set rtp+=~/.vim/bundle/Vundle.vim
- "defult /home/forest/.vim/bundle (~/.vim/bundle)
- call vundle#begin()
- " alternatively, pass a path where Vundle should install plugins
- "call vundle#begin('~/some/path/here')
- "let Vundle manage Vundle,required
- Plugin 'VundleVim/Vundle.vim'
- " plugin on GitHub repo
- " Plugin 'tpope/vim-fugitive'
- " Git plugin not hosted on GitHub
- " Plugin 'git://git.wincent.com/command-t.git'
- " git repos on your local machine (i.e. when working on your own plugin)
- " Plugin 'file:///home/gmarik/path/to/plugin'
- "===================================plugins=============================
- "Bundle 'junegunn/vim-easy-align'
- Bundle 'Valloric/YouCompleteMe'
- let g:ycm_global_ycm_extra_conf = '~/.vim/bundle/YouCompleteMe/third_party/ycmd/cpp/ycm/.ycm_extra_conf.py'
- "let g:ycm_key_list_select_completion = ['<Down>']
- "最新版本<c-n>=<down> <c-p>=<up>
- nnoremap <leader>y :let g:ycm_auto_trigger=0<CR> "turn off YCM
- nnoremap <leader>Y :let g:ycm_auto_trigger=1<CR> "turn on YCM
- nnoremap <leader>jd :YcmCompleter GoToDefinitionElseDeclaration<CR> " 跳转到定义处
- "在注释输入中也能补全,该补全是根据你以前的输入进行补全
- let g:ycm_complete_in_comments = 1
- "在字符串输入中也能补全
- let g:ycm_complete_in_strings = 1
- "注释和字符串中的文字也会被收入补全
- let g:ycm_collect_identifiers_from_comments_and_strings = 0
- nnoremap <leader>p :let g:ycm_autoclose_preview_window_after_completion = 1 "turn off Preview
- nnoremap <leader>P :let g:ycm_autoclose_preview_window_after_completion = 0 "turn on Preview
- Bundle 'scrooloose/nerdtree'
- map <leader>n :NERDTreeToggle<CR>
- "Bundle "davidhalter/jedi"
- "Bundle "scrooloose/syntastic"
- "=======================================================================
- call vundle#end() " required
- filetype plugin indent on " required
- " To ignore plugin indent changes, instead use:
- "filetype plugin on
- "
- " Brief help
- " :PluginList - lists configured plugins
- " :PluginInstall - installs plugins; append `!` to update or just
- " :PluginSearch foo - searches for foo; append `!` to refresh local cache
- "
- " see :h vundle for more details or wiki for FAQ
- " NOTE: comments after Bundle command are not allowed..
- " :PluginClean - confirms removal of unused plugins; append `!` to
- " auto-approve removal
- "
- " see :h vundle for more details or wiki for FAQ
- " Put your non-Plugin stuff after this line
vim插件安装总结的更多相关文章
- vim 插件安装
一.pathogen简介 通常情况下安装vim插件,通常是将所有的插件和相关的doc文件都安装在中一文件夹中,如将插件全部安装在/usr/share/vim/vim73/plugin/目录下,将帮助文 ...
- Eclipse vim插件安装使用
在eclipse移动关闭位置感觉非常不爽,经常要用到方向键和鼠标,导致经常要移来移去.果断受不了了,去网上搜了下发现eclipse有许多vim插件可以使用.有一个大家都比较推荐的是 vrapper ...
- 打造linux下的source insight——vim插件安装使用总结
source insight是windows下的优秀编辑器,适合阅读管理代码,主要有以下功能: 查找函数,变量或者宏的定义. 查找函数,变量或者宏的引用位置. 查找函数被调用的位置 查找某个符号在工程 ...
- 【原创】vim插件安装简介
一.安装vundle(vim插件管理软件): git clone https://github.com/VundleVim/Vundle.vim 拷贝目录到 ~/.vim/bundle/Vundle. ...
- Linux c++ vim环境搭建系列(4)——vim插件安装配置使用
4. 插件 主要是c++相关的. ~/.vimrc文件在GitHub上有:https://github.com/whuwzp/vim_config 以下内容参考: https://github.com ...
- Vrapper-Eclipse的vim插件安装方法
Vrapper是一款Eclipse的插件,使在Eclipse下编辑文档时可以像使用Vim一样. 它有两种安装方法,在线安装和安装包安装: 在线安装: 打开Eclipse,Help->Instal ...
- MarkDown的vim插件安装
作用:可以使markdown语法高亮.1.安装.使用pathogen插件管理. cd ~/.vim/bundle git clone https://github.com/plasticb ...
- Vim插件安装
一.常用的插件 sudo apt-get install vim vim-scripts vim-docsudo apt-get install ctagssudo apt-get install v ...
- ubuntu vim 插件安装
参考:http://blog.sina.com.cn/s/blog_00f0230d0100y7ih.html 不过由于时间久远,有些已经失效,以上是我的修改过程 参考:https://github. ...
随机推荐
- ESP8266重点知识
每一个mcu对应一个库文件,所以每次上传烧写arduino都需要对应的库文件,修改起来很麻烦,不如记录下来每次的库文件,或者每次都自动生成.这样效果最佳.而且我想应该是比较稳定的, 现在比较朦胧一个问 ...
- vs Code 运行一个本地WEB服务器
VS Code作为前端开发工具,值得推荐,用上之后,爱不释手 当我们建立一个全静态的前端项目时,如果需要将整个项目运行起来也非常简单,两步即可: 1.安装npm install -g live-ser ...
- 解决跨站脚本注入,跨站伪造用户请求,sql注入等http安全漏洞
跨站脚本就是在url上带上恶意的js关键字然后脚本注入了,跨站伪造用户请求就是没有经过登陆,用超链接或者直接url上敲地址进入系统,类似于sql注入这些都是安全漏洞. sql注入 1.参数化查询预处理 ...
- linkin大话面向对象--初始化块
java使用构造器来对单个对象进行初始化操作,使用构造器先完成整个java对象的状态初始化,然后将java对象返回给程序,从而让整个java对象的信息更加完整.与构造器作用非常类似的是初始化块,它也可 ...
- LINUX读写文件区别
body, table{font-family: 微软雅黑; font-size: 10pt} table{border-collapse: collapse; border: solid gray; ...
- [C#][Newtonsoft.Json] Newtonsoft.Json 序列化时的一些其它用法
Newtonsoft.Json 序列化时的一些其它用法 在进行序列化时我们一般会选择使用匿名类型 new { },或者添加一个新类(包含想输出的所有字段).但不可避免的会出现以下情形:如属性值隐藏(敏 ...
- ServiceStack.OrmLite T4模板使用记录
前言 最近研究了下ServiceStack.OrmLite,文档中也提到了使用T4模板对数据库中已经有了表进行实体的映射,这里也顺便记录下使用的步骤和情况. 开始使用 引用T4模板 首先我们创建一个工 ...
- es随想一
一.安全问题 前段时间网上看到的,大量的MongoDB服务器和ElasticSearch服务器被黑客攻击,留下勒索信息. ElasticSearch的2种客户端连接方式,transport方式默认的9 ...
- HDU [P1704] Rank
传递闭包裸题 但是本题的Floyd一定要优化,不然会T cpp #include <iostream> #include <cstdio> #include <cstri ...
- CodeChef Little Elephant and Mouses [DP]
https://www.codechef.com/problems/LEMOUSE 题意: 有一个n *m的网格.有一头大象,初始时在(1,1),要移动到(n,m),每次只能向右或者向下走.有些格子中 ...