自动红眼移除算法 附c++完整代码
说起红眼算法,这个话题非常古老了。
百度百科上的描述:
“红眼”一般是指在人物摄影时,当闪光灯照射到人眼的时候,瞳孔放大而产生的视网膜泛红现象。
由于红眼现象的程度是根据拍摄对象色素的深浅决定的,如果拍摄对象的眼睛颜色较深,红眼现象便不会特别明显。
“红眼”也指传染性结膜炎。
近些年好像没有看到摄影会出现这样的情况,毕竟科技发展迅速。
记得最早看到红眼移除算法是在ACDSee 这个看图软件的编辑功能区。
当然,当时ACDSee 也没有能力做到自动去红眼,也需要进行手工操作。
红眼移除不难,其实就是把眼睛区域的颜色修正一下。
但是难就难在修复之后,不要显得太过突兀,或者破坏眼睛周围的颜色 。
这就有点难办了。
当然其实最简单的思路,就是转色域空间处理后再转回RGB。
记得在2015年的时候,
曾经一度想要寻找红眼移除过度自然的算法思路,
当时仅仅是好奇,想要学习之。
直到2016年,在一个Delphi 图像控件的源码里看到了一个红颜移除算法函数。
把代码转写成C之后验证了一下,效果不错,过度很自然。
貌似好像有点暴露年龄了,
俺也曾经是Delphi程序员来的,无比怀念Delphi7。
贴上红眼算法的Delphi源码:
procedure _IERemoveRedEyes(bitmap: TIEBitmap; fSelx1, fSely1, fSelx2, fSely2: integer; fOnProgress: TIEProgressEvent; Sender: TObject);

var

  row, col: integer;

  nrv, bluf, redq, powr, powb, powg: double;

  per1: double;

  px: PRGB;

begin

  fSelX2 := imin(fSelX2, bitmap.Width);  dec(fSelX2);

  fSelY2 := imin(fSelY2, bitmap.Height); dec(fSelY2);

  per1 :=  / (fSelY2 - fSelY1 + 0.5);

  for row := fSelY1 to fSelY2 do

  begin

    px := bitmap.Scanline[row];

    for col := fSelX1 to fSelX2 do

    begin

      nrv := px^.g + px^.b;

      if nrv <  then

        nrv := ;

      if px^.g >  then

        bluf := px^.b / px^.g

      else

        bluf := px^.b;

      bluf := dMax(0.5, dMin(1.5, Sqrt(bluf)));

      redq := (px^.r / nrv) * bluf;

      if redq > 0.7 then

      begin

        powr := 1.775 - (redq * 0.75 + 0.25);

        if powr <  then

          powr := ;

        powr := powr * powr;

        powb :=  - ( - powr) / ;

        powg :=  - ( - powr) / ;

        with px^ do

        begin

          r := Round(powr * r);

          b := Round(powb * b);

          g := Round(powg * g);

        end;

      end;

      inc(px);

    end;

    if assigned(fOnProgress) then

      fOnProgress(Sender, trunc(per1 * (row - fSelY1 + )));

      Application.ProcessMessages;

  end;

end;
非常非常简单的代码。
但是思路很巧妙。
不多说,各位看官自己品味一下。
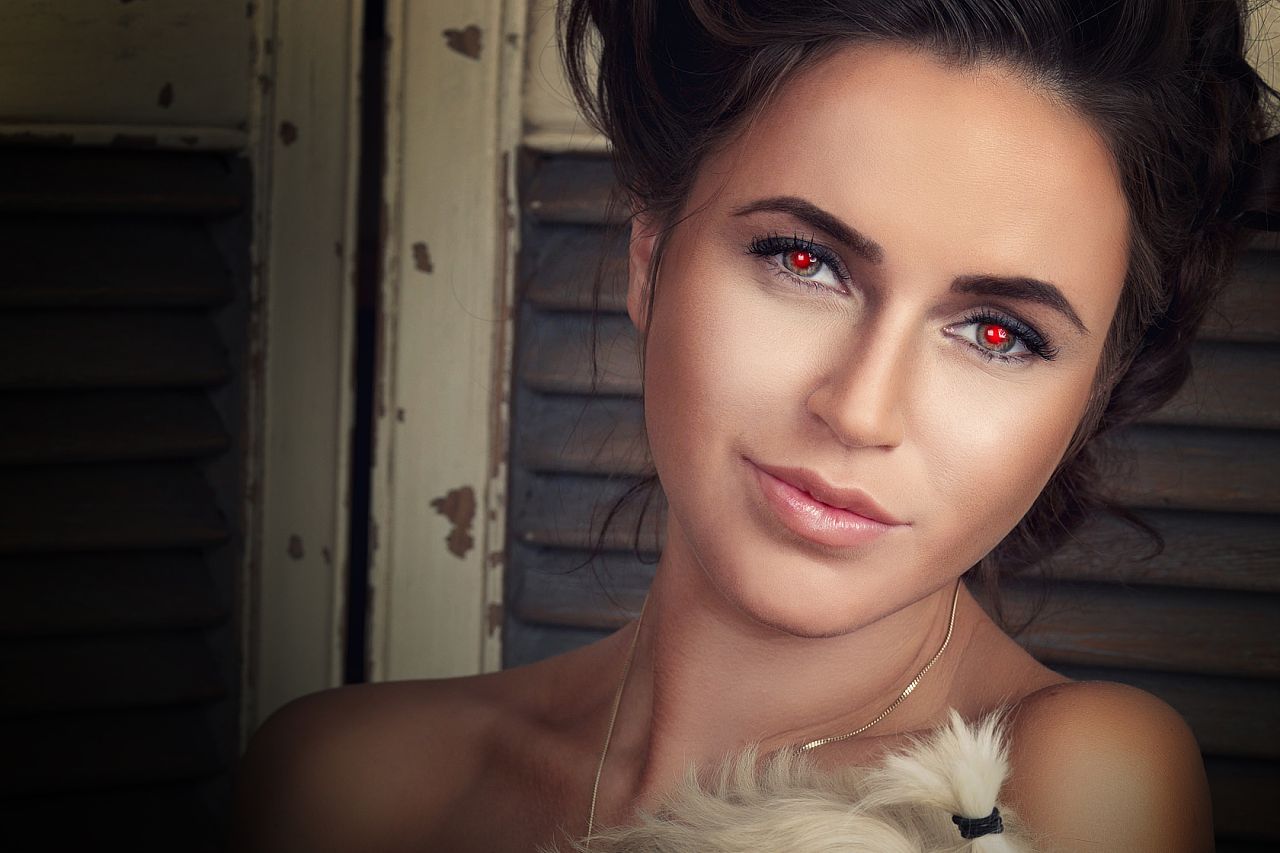
先上个效果图:

说明下本文背景前提:
人脸识别暂时采用MTCNN,示例不考虑判断是否存在红眼。
人脸检测部分,详情见博文《MTCNN人脸检测 附完整C++代码》
算法步骤:
检测人脸,对齐得到人脸五个特征点。
算出两眼球之间的距离,
估算眼球的大概大小,
(示例代码采用 两眼球之间的距离的九分之一)
计算相应的半径,
按圆形修复眼球颜色即可。
完整示例代码献上:
#include "mtcnn.h"

#include "browse.h"

#define USE_SHELL_OPEN

#ifndef  nullptr

#define nullptr 0

#endif

#if defined(_MSC_VER)

#define _CRT_SECURE_NO_WARNINGS

#include <windows.h>

#else

#include <unistd.h>

#endif

#define STB_IMAGE_STATIC

#define STB_IMAGE_IMPLEMENTATION

#include "stb_image.h"

//ref:https://github.com/nothings/stb/blob/master/stb_image.h

#define TJE_IMPLEMENTATION

#include "tiny_jpeg.h"

//ref:https://github.com/serge-rgb/TinyJPEG/blob/master/tiny_jpeg.h

#include <stdint.h>

#include "timing.h"

char saveFile[];

unsigned char *loadImage(const char *filename, int *Width, int *Height, int *Channels) {

    return stbi_load(filename, Width, Height, Channels, );

}

void saveImage(const char *filename, int Width, int Height, int Channels, unsigned char *Output) {

    memcpy(saveFile + strlen(saveFile), filename, strlen(filename));

    *(saveFile + strlen(saveFile) + ) = ;

    //保存为jpg

    if (!tje_encode_to_file(saveFile, Width, Height, Channels, true, Output)) {

        fprintf(stderr, "save JPEG fail.\n");

        return;

    }

#ifdef USE_SHELL_OPEN

    browse(saveFile);

#endif

}

void splitpath(const char *path, char *drv, char *dir, char *name, char *ext) {

    const char *end;

    const char *p;

    const char *s;

    if (path[] && path[] == ':') {

        if (drv) {

            *drv++ = *path++;

            *drv++ = *path++;

            *drv = '\0';

        }

    }

    else if (drv)

        *drv = '\0';

    for (end = path; *end && *end != ':';)

        end++;

    for (p = end; p > path && *--p != '\\' && *p != '/';)

        if (*p == '.') {

            end = p;

            break;

        }

    if (ext)

        for (s = end; (*ext = *s++);)

            ext++;

    for (p = end; p > path;)

        if (*--p == '\\' || *p == '/') {

            p++;

            break;

        }

    if (name) {

        for (s = p; s < end;)

            *name++ = *s++;

        *name = '\0';

    }

    if (dir) {

        for (s = path; s < p;)

            *dir++ = *s++;

        *dir = '\0';

    }

}

void getCurrentFilePath(const char *filePath, char *saveFile) {

    char drive[_MAX_DRIVE];

    char dir[_MAX_DIR];

    char fname[_MAX_FNAME];

    char ext[_MAX_EXT];

    splitpath(filePath, drive, dir, fname, ext);

    size_t n = strlen(filePath);

    memcpy(saveFile, filePath, n);

    char *cur_saveFile = saveFile + (n - strlen(ext));

    cur_saveFile[] = '_';

    cur_saveFile[] = ;

}

void drawPoint(unsigned char *bits, int width, int depth, int x, int y, const uint8_t *color) {

    for (int i = ; i < min(depth, ); ++i) {

        bits[(y * width + x) * depth + i] = color[i];

    }

}

void drawLine(unsigned char *bits, int width, int depth, int startX, int startY, int endX, int endY,

    const uint8_t *col) {

    if (endX == startX) {

        if (startY > endY) {

            int a = startY;

            startY = endY;

            endY = a;

        }

        for (int y = startY; y <= endY; y++) {

            drawPoint(bits, width, depth, startX, y, col);

        }

    }

    else {

        float m = 1.0f * (endY - startY) / (endX - startX);

        int y = ;

        if (startX > endX) {

            int a = startX;

            startX = endX;

            endX = a;

        }

        for (int x = startX; x <= endX; x++) {

            y = (int)(m * (x - startX) + startY);

            drawPoint(bits, width, depth, x, y, col);

        }

    }

}

void drawRectangle(unsigned char *bits, int width, int depth, int x1, int y1, int x2, int y2, const uint8_t *col) {

    drawLine(bits, width, depth, x1, y1, x2, y1, col);

    drawLine(bits, width, depth, x2, y1, x2, y2, col);

    drawLine(bits, width, depth, x2, y2, x1, y2, col);

    drawLine(bits, width, depth, x1, y2, x1, y1, col);

}

#ifndef MAX

#define MAX(a, b) (((a) > (b)) ? (a): (b))

#endif

#ifndef MIN

#define MIN(a, b) (((a) > (b)) ? (b): (a))

#endif

unsigned char ClampToByte(int Value) {

    return ((Value | ((signed int) ( - Value) >> )) & ~((signed int) Value >> ));

}

int Clamp(int Value, int Min, int Max) {

    if (Value < Min)

        return Min;

    else if (Value > Max)

        return Max;

    else

        return Value;

}

void RemoveRedEyes(unsigned char *input, unsigned char *output, int width, int height, int depth, int CenterX, int CenterY,

              int Radius) {

    if (depth < ) return;

    if ((input == nullptr) || (output == nullptr)) return;

    if ((width <= ) || (height <= )) return;

    int Left = Clamp(CenterX - Radius, , width);

    int Top = Clamp(CenterY - Radius, , height);

    int Right = Clamp(CenterX + Radius, , width);

    int Bottom = Clamp(CenterY + Radius, , height);

    int PowRadius = Radius * Radius;

    for (int Y = Top; Y < Bottom; Y++) {

        unsigned char *in_scanline = input + Y * width * depth + Left * depth;

        unsigned char *out_scanline = output + Y * width * depth + Left * depth;

        int OffsetY = Y - CenterY;

        for (int X = Left; X < Right; X++) {

            int OffsetX = X - CenterX;

            int dis = OffsetX * OffsetX + OffsetY * OffsetY;

            if (dis <= PowRadius) {

                float bluf = ;

                int Red = in_scanline[];

                int Green = in_scanline[];

                int Blue = in_scanline[];

                int nrv = Blue + Green;

                if (nrv < ) nrv = ;

                if (Green > )

                    bluf = (float) Blue / Green;

                else

                    bluf = (float) Blue;

                bluf = MAX(0.5f, MIN(1.5f, sqrt(bluf)));

                float redq = (float) Red / nrv * bluf;

                if (redq > 0.7f) {

                    float powr = 1.775f - (redq * 0.75f +

                                           0.25f);

                    if (powr < ) powr = ;

                    powr = powr * powr;

                    float powb = 0.5f + powr * 0.5f;

                    float powg = 0.75f + powr * 0.25f;

                    out_scanline[] = ClampToByte(powr * Red + 0.5f);

                    out_scanline[] = ClampToByte(powg * Green + 0.5f);

                    out_scanline[] = ClampToByte(powb * Blue + 0.5f);

                }

            }

            in_scanline += depth;

            out_scanline += depth;

        }

    }

}

int main(int argc, char **argv) {

    printf("mtcnn face detection\n");

    printf("blog:http://cpuimage.cnblogs.com/\n");

    if (argc < ) {

        printf("usage: %s  model_path image_file \n ", argv[]);

        printf("eg: %s  ../models ../sample.jpg \n ", argv[]);

        printf("press any key to exit. \n");

        getchar();

        return ;

    }

    const char *model_path = argv[];

    char *szfile = argv[];

    getCurrentFilePath(szfile, saveFile);

    int Width = ;

    int Height = ;

    int Channels = ;

    unsigned char *inputImage = loadImage(szfile, &Width, &Height, &Channels);

    if (inputImage == nullptr || Channels != ) return -;

    ncnn::Mat ncnn_img = ncnn::Mat::from_pixels(inputImage, ncnn::Mat::PIXEL_RGB, Width, Height);

    std::vector<Bbox> finalBbox;

    MTCNN mtcnn(model_path);

    double startTime = now();

    mtcnn.detect(ncnn_img, finalBbox);

    double nDetectTime = calcElapsed(startTime, now());

    printf("time: %d ms.\n ", (int)(nDetectTime * ));

    int num_box = finalBbox.size();

    printf("face num: %u \n", num_box);

    bool draw_face_feat = false;

    for (int i = ; i < num_box; i++) {

        if (draw_face_feat) {

            const uint8_t red[] = {, , };

            drawRectangle(inputImage, Width, Channels, finalBbox[i].x1, finalBbox[i].y1,

                          finalBbox[i].x2,

                          finalBbox[i].y2, red);

            const uint8_t blue[] = {, , };

            for (int num = ; num < ; num++) {

                drawPoint(inputImage, Width, Channels, (int) (finalBbox[i].ppoint[num] + 0.5f),

                          (int) (finalBbox[i].ppoint[num + ] + 0.5f), blue);

            }

        }

        int left_eye_x = (int) (finalBbox[i].ppoint[] + 0.5f);

        int left_eye_y = (int) (finalBbox[i].ppoint[] + 0.5f);

        int right_eye_x = (int) (finalBbox[i].ppoint[] + 0.5f);

        int right_eye_y = (int) (finalBbox[i].ppoint[] + 0.5f);

        int dis_eye = (int) sqrtf((right_eye_x - left_eye_x) * (right_eye_x - left_eye_x) +

                                  (right_eye_y - left_eye_y) * (right_eye_y - left_eye_y));

        int radius = MAX(, dis_eye / );

        RemoveRedEyes(inputImage, inputImage, Width, Height, Channels, left_eye_x, left_eye_y, radius);

        RemoveRedEyes(inputImage, inputImage, Width, Height, Channels, right_eye_x, right_eye_y, radius);

    }

    saveImage("_done.jpg", Width, Height, Channels, inputImage);

    free(inputImage);

    printf("press any key to exit. \n");

    getchar();

    return ;

}
算法见 RemoveRedEyes ,这个技巧可以用于类似的图片颜色处理。
要看人脸检测的结果,把draw_face_feat 改为 true 即可。
项目地址:
https://github.com/cpuimage/MTCNN
参数也很简单,
mtcnn 模型文件路径 图片路径
例如: mtcnn ../models ../sample.jpg
用cmake即可进行编译示例代码,详情见CMakeLists.txt。
若有其他相关问题或者需求也可以邮件联系俺探讨。
邮箱地址是:
gaozhihan@vip.qq.com
自动红眼移除算法 附c++完整代码的更多相关文章
- 人脸姿态校正算法 附完整C++示例代码
在一些特殊情况下,经常需要依据图像中的人脸,对图片进行倾斜矫正. 例如拍照角度幅度过大之类的情况,而进行人工矫正确实很叫人头大. 那是不是可以有一种算法,可以根据人脸的信息对图片进行角度的修复呢? 答 ...
- 深入一致性哈希(Consistent Hashing)算法原理,并附100行代码实现
转自:https://my.oschina.net/yaohonv/blog/1610096 本文为实现分布式任务调度系统中用到的一些关键技术点分享——Consistent Hashing算法原理和J ...
- 基于傅里叶变换的音频重采样算法 (附完整c代码)
前面有提到音频采样算法: WebRTC 音频采样算法 附完整C++示例代码 简洁明了的插值音频重采样算法例子 (附完整C代码) 近段时间有不少朋友给我写过邮件,说了一些他们使用的情况和问题. 坦白讲, ...
- 图片文档倾斜矫正算法 附完整c代码
2年前在学习图像算法的时候看到一个文档倾斜矫正的算法. 也就是说能将一些文档图像进行旋转矫正, 当然这个算法一般用于一些文档扫描软件做后处理 或者用于ocr 文字识别做前处理. 相关的关键词: 抗倾斜 ...
- 音频降噪算法 附完整C代码
降噪是音频图像算法中的必不可少的. 目的肯定是让图片或语音 更加自然平滑,简而言之,美化. 图像算法和音频算法 都有其共通点. 图像是偏向 空间 处理,例如图片中的某个区域. 图像很多时候是以二维数据 ...
- mser 最大稳定极值区域(文字区域定位)算法 附完整C代码
mser 的全称:Maximally Stable Extremal Regions 第一次听说这个算法时,是来自当时部门的一个同事, 提及到他的项目用它来做文字区域的定位,对这个算法做了一些优化. ...
- 磨皮美颜算法 附完整C代码
前言 2017年底时候写了这篇<集 降噪 美颜 虚化 增强 为一体的极速图像润色算法 附Demo程序> 这也算是学习过程中比较有成就感的一个算法. 自2015年做算法开始到今天,还有个把月 ...
- 实现文字自动横移--- jquery尺寸相关函数
效果图: 一实现文字自动横移 <style type="text/css"> #demo {overflow:scroll;width:740px; } #indemo ...
- UWP开发:自动生成迷宫&自动寻路算法(3)
+ , + ];//0<=x<=12 0<=y<=24 private static Random Rd = new Random(); 首先声明mazeMap存储数据,声明了 ...
随机推荐
- 8.非关系型数据库(Nosql)之mongodb的应用场景
测试脚本: Mysql测试脚本: [php] view plaincopyprint? 1. <?php 2. header("Content-Type:text/html; ...
- 深入浅出Java Dom4j读取XML
在以前自己使用的xml较少,只是了解其很强大,现在可算是在DRP中,真正的开始使用它了,以前只是简单的理解xml,xml即可扩展标记语言,简单的使用,具体是什么?怎么用?还是一直让自己期待的. 首先来 ...
- 9、Libgdx的输入处理
(官网:www.libgdx.cn) 不同的平台有着不同的输入方式.桌面用户可以通过键盘和鼠标与应用进行交互,基于浏览器的游戏也是这样.在Android中,鼠标被触摸屏所替代,通常没有实体键盘.And ...
- C++ Primer 有感(类)
1.在类内部,声明成员函数时必需 的,而定义成员函数则是可选的.在类内部定义的函数默认为inline. 2.const成员函数不能改变其所操作的对象的数据成员.const必须同时出现在声明和定义中,若 ...
- R12 - Error 'Unable to process your transaction. The operating unit is either invalid or it cannot b
In this Document Symptoms Cause Solution Still Have Questions? References APPLIES TO: Orac ...
- (NO.00002)iOS游戏精灵战争雏形(三)
在Sprite中新建Sprites文件夹,在其中添加Player.cc文件,确保其类型为Sprite. 将其Root节点的CCSprite的精灵帧设置为Image/sprite-2.png,然后打开物 ...
- map.js的编写(js编写一个对象的方式)
// 定义map function Map() { this.container = {}; } // 将key-value放入map中 Map.prototype.put = function(ke ...
- nginx 编译增加新的模块
原已经安装好的nginx,现在需要添加一个未被编译安装的模块: nginx -V 可以查看原来编译时都带了哪些参数 原来的参数:--prefix=/app/nginx 添加的参数: --with-ht ...
- Android开源项目——设置图文居中的按钮 IconButton
本文介绍一下一个小众的开源项目--IconButton. 本文原创,转载请注明出处: http://blog.csdn.net/maosidiaoxian/article/details/435602 ...
- Android官方技术文档翻译——迁移 Gradle 项目到1.0.0 版本
本文译自Android官方技术文档<Migrating Gradle Projects to version 1.0.0>,原文地址:http://tools.android.com/te ...