【读书笔记《Android游戏编程之从零开始》】4.Android 游戏开发常用的系统控件(EditText、CheckBox、Radiobutton)
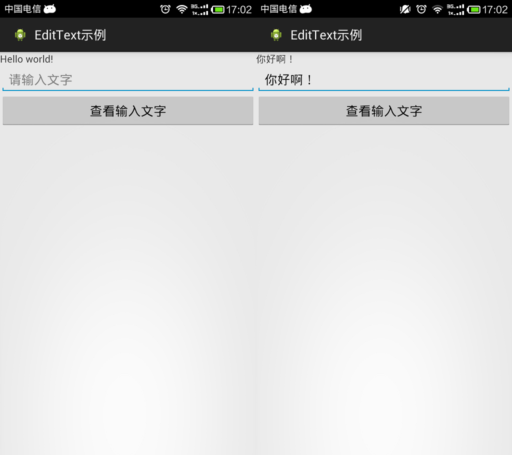
3.4 EditText
EditText类官方文档地址:http://developer.android.com/reference/android/widget/EditText.html
EditText继承TextView,所以EditText具有TextView的属性特点,下面主要介绍一些EditText的特有的输入法的属性特点
android:layout_gravity="center_vertical":设置控件显示的位置:默认top,这里居中显示,还有bottom
android:hin:Text为空时显示的文字提示信息,可通过textColorHint设置提示信息的颜色。
android:singleLine:设置单行输入,一旦设置为true,则文字不会自动换行。
android:gray="top" :多行中指针在第一行第一位置et.setSelection(et.length());:调整光标到最后一行
android:autoText :自动拼写帮助。这里单独设置是没有效果的,可能需要其他输入法辅助才行
android:capitalize :设置英文字母大写类型。设置如下值:sentences仅第一个字母大写;words每一个单词首字母大小,用空格区分单词;characters每一个英文字母都大写。
android:digits :设置允许输入哪些字符。如“1234567890.+-*/%\n()”
android:singleLine :是否单行或者多行,回车是离开文本框还是文本框增加新行android:numeric :如果被设置,该TextView接收数字输入。有如下值设置:integer正整数、signed带符号整数、decimal带小数点浮点数。
android:inputType:设置文本的类型
android:password :密码,以小点”.”显示文本
android:phoneNumber :设置为电话号码的输入方式。
android:editable :设置是否可编辑。仍然可以获取光标,但是无法输入。
android:autoLink=”all” :设置文本超链接样式当点击网址时,跳向该网址
android:textColor = "#ff8c00":字体颜色
android:textStyle="bold":字体,bold, italic, bolditalic
android:textAlign="center":EditText没有这个属性,但TextView有
android:textColorHighlight="#cccccc":被选中文字的底色,默认为蓝色
android:textColorHint="#ffff00":设置提示信息文字的颜色,默认为灰色
android:textScaleX="1.5":控制字与字之间的间距
android:typeface="monospace":字型,normal, sans, serif, monospace
android:background="@null":空间背景,这里没有,指透明
android:layout_weight="1":权重在控制控件显示的大小时蛮有用的。
android:textAppearance="?android:attr/textAppearanceLargeInverse":文字外观,这里引用的是系统自带的一个外观,?表示系统是否有这种外观,否则使用默认的外观。
<?xml version="1.0" encoding="utf-8"?>

<LinearLayout xmlns:android="http://schemas.android.com/apk/res/android"

    android:layout_width="match_parent"

    android:layout_height="match_parent"

    android:orientation="vertical" >

    <TextView

        android:id="@+id/tv"

        android:layout_width="match_parent"

        android:layout_height="wrap_content"

        android:text="@string/hello_world" />

    <EditText

        android:id="@+id/et"

        android:layout_width="match_parent"

        android:layout_height="wrap_content"

        android:hint="@string/txt_hint" />

    <Button

        android:id="@+id/btn"

        android:layout_width="match_parent"

        android:layout_height="wrap_content"

        android:text="@string/btn_GetEditTextStr" />

</LinearLayout>
public class MainActivity extends Activity {

    private EditText et; // 创建一个文本编辑器对象

    private Button btn;

    private TextView tv;

    @Override

    protected void onCreate(Bundle savedInstanceState) {

        // TODO Auto-generated method stub

        super.onCreate(savedInstanceState);

        setContentView(R.layout.activity_main);

        et = (EditText) findViewById(R.id.et);

        btn = (Button) findViewById(R.id.btn);

        tv = (TextView) findViewById(R.id.tv);

        btn.setOnClickListener(new OnClickListener() {

            @Override

            public void onClick(View v) {

                // TODO Auto-generated method stub

                // 获取EditText中的文本内容

                String str = et.getText().toString();

                // 让TextView将获取到的EditText内容str显示出来

                tv.setText(str);

            }

        });

    }

}
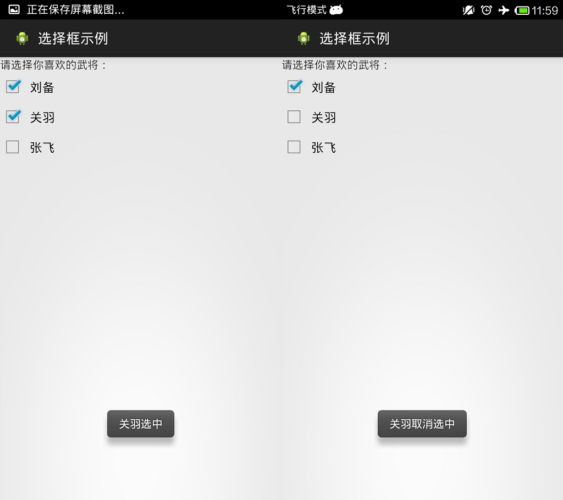
3.5 CheckBox
CheckBox类官方文档地址:http://developer.android.com/reference/android/widget/CheckBox.html
<?xml version="1.0" encoding="utf-8"?>

<LinearLayout xmlns:android="http://schemas.android.com/apk/res/android"

    android:layout_width="match_parent"

    android:layout_height="match_parent"

    android:orientation="vertical" >

    <TextView

        android:layout_width="match_parent"

        android:layout_height="wrap_content"

        android:text="@string/hello_world" />

    <CheckBox

        android:id="@+id/cb1"

        android:layout_width="match_parent"

        android:layout_height="wrap_content"

        android:button="@drawable/checkboxstyle"

        android:text="@string/checkbox1" />

    <CheckBox

        android:id="@+id/cb2"

        android:layout_width="match_parent"

        android:layout_height="wrap_content"

        android:button="@drawable/checkboxstyle"

        android:text="@string/checkbox2" />

    <CheckBox

        android:id="@+id/cb3"

        android:layout_width="match_parent"

        android:layout_height="wrap_content"

        android:button="@drawable/checkboxstyle"

        android:text="@string/checkbox3" />

</LinearLayout>
import android.app.Activity;

import android.os.Bundle;

import android.widget.CheckBox;

import android.widget.CompoundButton;

import android.widget.CompoundButton.OnCheckedChangeListener;

import android.widget.Toast;

public class MainActivity extends Activity implements OnCheckedChangeListener {

    private CheckBox cb1, cb2, cb3;

    @Override

    protected void onCreate(Bundle savedInstanceState) {

        // TODO Auto-generated method stub

        super.onCreate(savedInstanceState);

        setContentView(R.layout.activity_main);

        // 实例化3个CheckBox

        cb1 = (CheckBox) findViewById(R.id.cb1);

        cb2 = (CheckBox) findViewById(R.id.cb2);

        cb3 = (CheckBox) findViewById(R.id.cb3);

        cb1.setOnCheckedChangeListener(this);

        cb2.setOnCheckedChangeListener(this);

        cb3.setOnCheckedChangeListener(this);

    }

    // 重写监听器的抽象函数

    /*

     * onCheckedChanged(CompoundButton buttonView, boolean isChecked)

     * 第一个参数确定哪一个CheckBox状态发生改变 第二个参数确定改变的CheckBox的具体状态值,true为勾选,false为未勾选。

     */

    @Override

    public void onCheckedChanged(CompoundButton buttonView, boolean isChecked) {

        // buttonView 选中状态发生改变的那个按钮

        // isChecked 表示按钮新的状态(true/false)

        if (cb1 == buttonView || cb2 == buttonView || cb3 == buttonView) {

            if (isChecked) {

                // 显示一个提示消息

                toastDisplay(buttonView.getText() + "选中");

            } else {

                toastDisplay(buttonView.getText() + "取消选中");

            }

        }

    }

    private void toastDisplay(String str) {

        /*

         * Toast.makeText(Context context, CharSequence text,int duration);

         * 第一个参数是上下文对象 第二个参数是显示的文本内容

         * 第三个参数是显示提示消息的持续时间;其值有2个参数LENGTH_SHORT(短暂持续)和LENGTH_LONG(略长持续):

         * 最后,使用Toast对象调用show()方法即可

         */

        Toast.makeText(this, str, Toast.LENGTH_SHORT).show();

    }

}
CheckBox样式修改:

在res/drawable中添加checkbox自定义样式的xml文件。
<?xml version="1.0" encoding="utf-8"?>

<selector xmlns:android="http://schemas.android.com/apk/res/android">

<!-- 选中状态样式 -->

    <item android:drawable="@drawable/checkbox_checked" android:state_checked="true"></item>

    <!-- 未选中状态样式 -->

    <item android:drawable="@drawable/checkbox_normol" android:state_checked="false"></item>

</selector>
然后在布局文件中引用就可以了。
<CheckBox

        android:id="@+id/cb1"

        android:layout_width="match_parent"

        android:layout_height="wrap_content"

        android:button="@drawable/checkboxstyle"

        android:text="@string/checkbox1" />
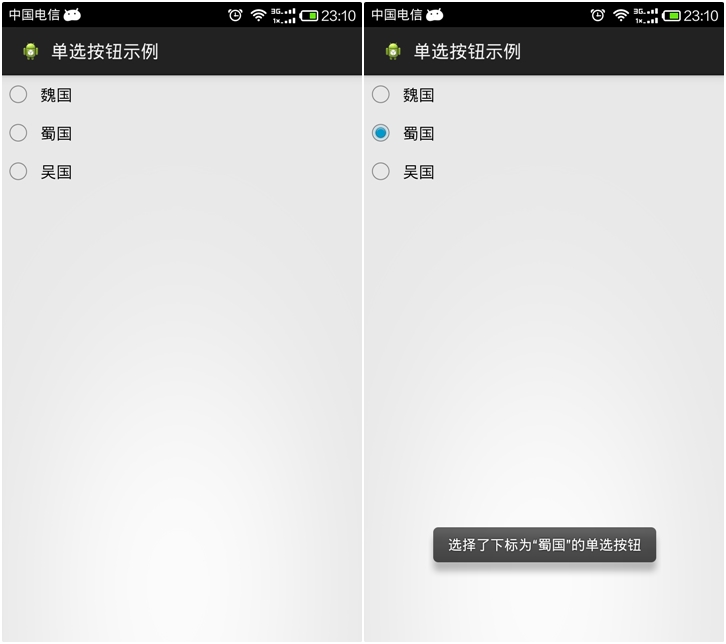
3.6 Radiobutton
Radiobutton类官方文档地址:http://developer.android.com/reference/android/widget/RadioButton.html
RadioButton与CheckBox监听步骤类似,但RadioButton监听需要注意三点:
1.RadioButton与CheckBox使用的监听器不同。
2.RadioButton绑定监听的时候,不是每个RadioButton都去绑定,因为所有的RadioButton都被放在了RadioGroup单选组中,所以只需要将RadioGroup绑定上监听器即可。
3.重写监听器函数onCheckedChanged(RadioGroup group, int checkedId),这个函数的第一个参数是单选组,注意第二个参数,这里的checkedId不是RadioGroup单选组中的每个RadioButton的下标,而是发生状态改变的RadioButton的内存ID。所以在进行判断哪个RadioButton发生状态改变的时候,可以利用RadioButton.getID来与checkedId进行对比
<?xml version="1.0" encoding="utf-8"?>

<LinearLayout xmlns:android="http://schemas.android.com/apk/res/android"

    android:layout_width="match_parent"

    android:layout_height="match_parent"

    android:orientation="vertical" >

    <RadioGroup

        android:id="@+id/radGrp"

        android:layout_width="wrap_content"

        android:layout_height="wrap_content" >

        <RadioButton

            android:id="@+id/rb1"

            android:layout_width="match_parent"

            android:layout_height="wrap_content"

            android:text="@string/rb1" />

        <RadioButton

            android:id="@+id/rb2"

            android:layout_width="match_parent"

            android:layout_height="wrap_content"

            android:text="@string/rb2" />

        <RadioButton

            android:id="@+id/rb3"

            android:layout_width="match_parent"

            android:layout_height="wrap_content"

            android:text="@string/rb3" />

    </RadioGroup>

</LinearLayout>
import android.app.Activity;

import android.os.Bundle;

import android.widget.RadioButton;

import android.widget.RadioGroup;

import android.widget.RadioGroup.OnCheckedChangeListener;

import android.widget.Toast;

public class MainActivity extends Activity implements OnCheckedChangeListener {

    private RadioButton rb1, rb2, rb3;

    private RadioGroup rg;

    @Override

    protected void onCreate(Bundle savedInstanceState) {

        super.onCreate(savedInstanceState);

        setContentView(R.layout.activity_main);

        rb1 = (RadioButton) findViewById(R.id.rb1);

        rb2 = (RadioButton) findViewById(R.id.rb2);

        rb3 = (RadioButton) findViewById(R.id.rb3);

        rg = (RadioGroup) findViewById(R.id.radGrp);

        rg.setOnCheckedChangeListener(this);// 将单选组绑定监听器

    }

    // 重写监听器函数

    /*

     * onCheckedChanged(RadioGroup group, int checkedId) 第一个参数是单选组

     * 第二个参数这里的checkedId发生改变的RadioButton的内存ID。

     * 在进行判断哪个RadioButton发生状态改变的时候,可以利用RadioButton.getID来与checkedId进行对比

     */

    @Override

    public void onCheckedChanged(RadioGroup group, int checkedId) {

        if (group == rg)

        {

            String rbName = null;

            if (checkedId == rb1.getId()) {

                rbName = rb1.getText().toString();

            } else if (checkedId == rb2.getId()) {

                rbName = rb2.getText().toString();

            } else if (checkedId == rb3.getId()) {

                rbName = rb3.getText().toString();

            }

            Toast.makeText(this, "选择了下标为“" + rbName + "”的单选按钮",

                    Toast.LENGTH_SHORT).show();

        }

    }

}
【读书笔记《Android游戏编程之从零开始》】4.Android 游戏开发常用的系统控件(EditText、CheckBox、Radiobutton)的更多相关文章
- 【读书笔记《Android游戏编程之从零开始》】6.Android 游戏开发常用的系统控件(TabHost、ListView)
3.9 TabSpec与TabHost TabHost类官方文档地址:http://developer.android.com/reference/android/widget/TabHost.htm ...
- 【读书笔记《Android游戏编程之从零开始》】5.Android 游戏开发常用的系统控件(ProgressBar、Seekbar)
3.7 ProgressBar ProgressBar类官方文档地址:http://developer.android.com/reference/android/widget/ProgressBar ...
- 【读书笔记《Android游戏编程之从零开始》】3.Android 游戏开发常用的系统控件(Button、Layout、ImageButton)
3.1 Button Button这控件不用多说,就是一个按钮,主要是点击后进行相应事件的响应. 给组件添加ID属性:定义格式为 android:id="@+id/name",这里 ...
- 【读书笔记《Android游戏编程之从零开始》】8.Android 游戏开发常用的系统控件(系统控件常见问题)
Android 中常用的计量单位Android有时候需要一些计量单位,比如在布局Layout文件中可能需要指定具体单位等.常用的计量单位有:px.dip(dp).sp,以及一些不常用的pt.in.mm ...
- 【读书笔记《Android游戏编程之从零开始》】7.Android 游戏开发常用的系统控件(Dialog)
在Android应用开发中,Dialog(对话框)创建简单且易于管理因而经常用到,对话框默认样式类似创建样式的Activity.首先介绍android.app.AlertDialog下的Builder ...
- Windows游戏编程之从零开始d
Windows游戏编程之从零开始d I'm back~~恩,几个月不见,大家还好吗? 这段时间真的好多童鞋在博客里留言说或者发邮件说浅墨你回来继续更新博客吧. woxiangnifrr童鞋说每天都在来 ...
- Java并发编程的艺术读书笔记(2)-并发编程模型
title: Java并发编程的艺术读书笔记(2)-并发编程模型 date: 2017-05-05 23:37:20 tags: ['多线程','并发'] categories: 读书笔记 --- 1 ...
- Java并发编程的艺术读书笔记(1)-并发编程的挑战
title: Java并发编程的艺术读书笔记(1)-并发编程的挑战 date: 2017-05-03 23:28:45 tags: ['多线程','并发'] categories: 读书笔记 --- ...
- 《Essential C++》读书笔记 之 C++编程基础
<Essential C++>读书笔记 之 C++编程基础 2014-07-03 1.1 如何撰写C++程序 头文件 命名空间 1.2 对象的定义与初始化 1.3 撰写表达式 运算符的优先 ...
随机推荐
- 论httpclient上传带参数【commons-httpclient和apache httpclient区别】
需要做一个httpclient上传,然后啪啪啪网上找资料 1.首先以前系统中用到的了commons-httpclient上传,找了资料后一顿乱改,然后测试 PostMethod filePost = ...
- .NET Core添加项目之间的依赖关系
- Android 手机卫士17--缓存清理
清理单个应用缓存 通过反射调用方法 需要权限:android.permission.DELETE_CACHE_FILES. 以上权限为系统权限,手机卫士应用为用户应用,不能拿到此权限 换思路: 调用系 ...
- C++ 面向对象的三个特点--多态性(一)
C++的多态性定义 所谓多态性就是不同对象收到相同的消息产生不同的动作.通俗的说,多态性是指一个名字定义不同的函数,这些函数执行不同但又类似的操作,即用同样的接口访问功能不同的函数,从而实现“一个接口 ...
- NullPointerException at android.widget.AbsListView.obtainView at android.widget.ListView.makeAndAddView
使用ExpandableListView的时候,报如下错.网上搜索发现原来是在CommonNumberQueryAdapter的getGroupView()方法里返回的是null,注意细节哦!!! 1 ...
- IOS6学习笔记(二)
四.使用关联引用为分类添加数据 虽然不能在分类中创建实例变量,但是可以创建关联引用(associative reference).通过关联引用,你可以向任何对象中添加键-值(key-value)数据. ...
- ASP.NET MVC下判断用户登录和授权的方法
日常开发的绝大多数系统中,都涉及到管理用户的登录和授权问题.登录功能(Authentication),针对于所有用户都开放:而授权(Authorization),则对于某种用户角色才开放. 在asp. ...
- How to upgrade workflow assembly in MOSS 2007
This problem generally start when you are having an existing custom workflow and there are instances ...
- MVC中的CSRF解决方案
我们使用Ajax访问请求的时候,攻击者可能盗用了用户身份,以用户合法身份发送恶意请求. 具体预防措施, 1.在Html表单里面使用@Html.AntiForgeryToken(),这玩意会生成一对加密 ...
- JAVA- File类
File类是IO包中唯一代表磁盘文件本身的对象.File类定义了一些与一台无关的方法来操作文件,可以通过调用File类中的方法,实现创建.修改.删除文件等功能.File类的对象主要用来获取文件本身的一 ...