CREATE A ENERGY / HEALTH BAR HUD
1. Open the Play scene which you had created in the previous post. If you've not created the Play scene, create a New Scene and save it as Play, of course you can name it whatever you want.
2. Once you open the scene, you should have a Main Camera, I would suggest you toPosition it at (0, 1, -15)
3. Add a Directional Light to the scene by navigating to Gameobject->Light->Directional Light. Position it at (0, 1, -15) as well.
4. Add a Cube to the scene from Gameobject->3D Object->Cube. Rename it as Player. Position it at (-1, 1, -10). Add a Rigidbody component to this Player and uncheck the Use Gravity checkbox.
5. Create another Cube object and rename it as Fire. Position it at (2, 1, -10). Check the Is Trigger checkbox of the Fire's Box Collider component.

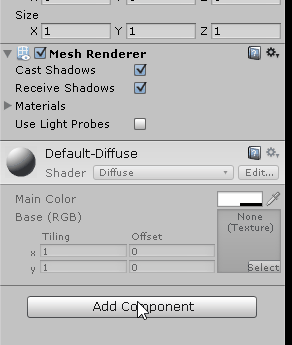
You can add a material to this Fire if you want, just like I did.
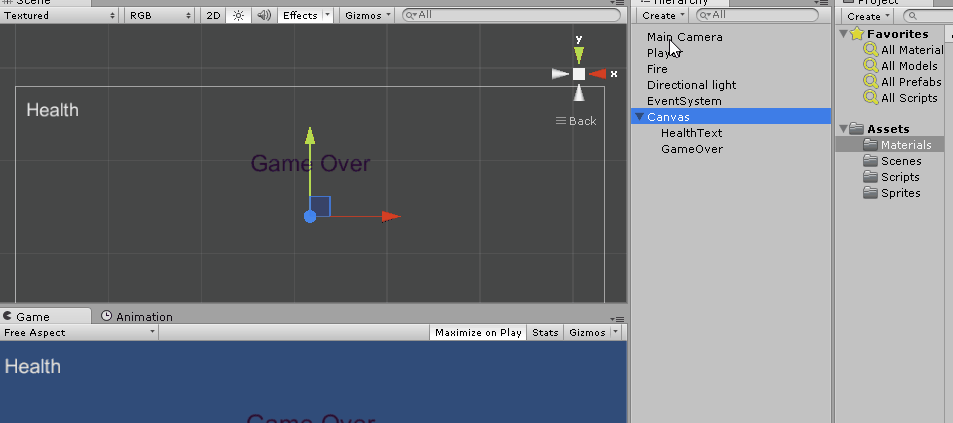
6. It is now time to add a Text UI component named Health, to indicate a Health Bar HUD.
7. Place the text so that it is visible on the top left corner of the Game screen. Make sure you move the anchor points with the text as well.

The above image shows you the things that I configured. You can follow it if you like or you can configure it the way you want.
1 signifies the position of the Health text
2 I have renamed the Text to HealthText.
3 Signifies the Position of the HelathText Rect Transform and also it's Anchor's min maxpositions. Also the Text content is changed to Health.
4 Best Fit is checked so as to make the Text dynamic. Max and Min size are set. Color of the font has been changed to White.
(Overlook the error in the console)
8. Create another Text element under the Canvas named GameOver. Position it wherever you want to with the anchor points placed at the four corners. Also check the Best Fitcheckbox. Change the font color if you want to.

9. It is time to add a Slider, which will be used to indicate the Health of the Player. Place it besides the Health text and resize it as per your needs with the anchors placed around the corners.
10. We will disable the slider handle as we don't need it.
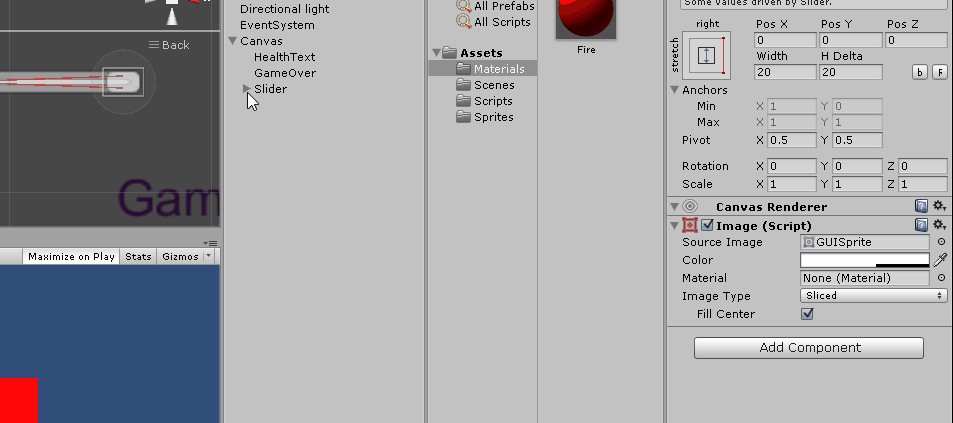
11. Change the Slider Fill color to Green

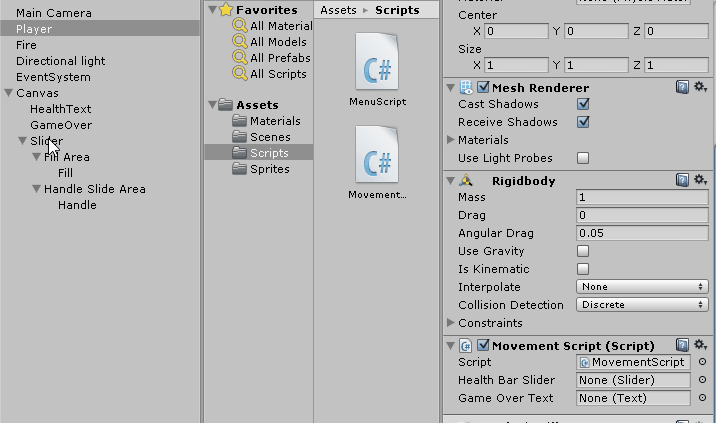
12. Create a C# script named MovementScript in the Scripts folder. Attach it to the PlayerGameObject. Open this script and add the below code to it.
using UnityEngine;

using System.Collections;

using UnityEngine.UI;

public class MovementScript : MonoBehaviour {

 public Slider healthBarSlider;  //reference for slider

 public Text gameOverText;   //reference for text

 private bool isGameOver = false; //flag to see if game is over

 void Start(){

  gameOverText.enabled = false; //disable GameOver text on start

 }

 // Update is called once per frame

 void Update () {

  //check if game is over i.e., health is greater than 0

  if(!isGameOver)

   transform.Translate(Input.GetAxis("Horizontal")*Time.deltaTime*10f, 0, 0); //get input

 }

 //Check if player enters/stays on the fire

 void OnTriggerStay(Collider other){

  //if player triggers fire object and health is greater than 0

  if(other.gameObject.name=="Fire" && healthBarSlider.value>0){

   healthBarSlider.value -=.011f;  //reduce health

  }

  else{

   isGameOver = true;    //set game over to true

   gameOverText.enabled = true; //enable GameOver text

  }

 }

}
- In the Start function we disable the GameOver text as we need it to be displayed only when the health is zero.
- The code above is very simple. The Update function gets input from the keyboard as long as the isGameOver flag is false. Press Right Arrow to move the Player to Right and Left Arrow to move it Left.
- OnTriggerStay function checks for contact between the Player and Fire object as long as the slider value is greater than zero. If the Player is in contact with the Fire, it's health will reduce at a rate of 0.01 units/frame. This value is reflected on the Slider. If the health value is zero, we will enable the GameOver text.
(Note: The slider value is set to 1 by default)

13. Save the script and return to Unity. Add the Slider and GameOver text elements to the script reference fields as below:
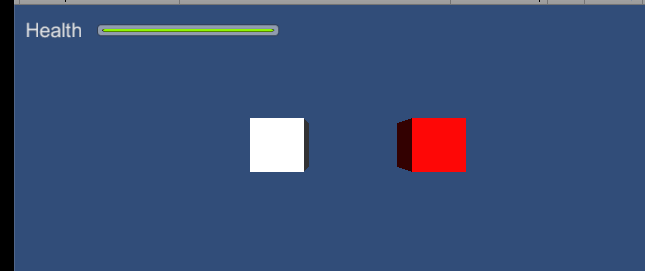
Now, your Health Bar HUD is all ready to be tested. Press the Play button to test your scene. Use the left and right arrow keys to move the Player.
See you around.
Also check out,
Unity 4.6 New GUI - Create a Blinking / Flashing Text
Dynamic Canvas Using Canvas Scaler / Reference Resolution - New Unity 4.6 GUI
Unity 4.6 GUI - Create A Dynamic Menu With The New UI
Unity 4.6 GUI - Create A Health Bar HUD
Unity 4.6 GUI - Create A Level Select Scroll Menu
CREATE A ENERGY / HEALTH BAR HUD的更多相关文章
- Create a “% Complete” Progress Bar with JS Link in SharePoint 2013
Create a “% Complete” Progress Bar with JS Link in SharePoint 2013 SharePoint 2013 has a lot new fea ...
- how to create a ring progress bar in web skills
how to create a ring progress bar in web skills ring progress bar & circle progress bar canvas j ...
- UI相关教程:HUD、UMG和Widget
转自:http://aigo.iteye.com/blog/2258612 蓝图脚本来处理 ================================================== 用UM ...
- 12岁的少年教你用Python做小游戏
首页 资讯 文章 频道 资源 小组 相亲 登录 注册 首页 最新文章 经典回顾 开发 设计 IT技术 职场 业界 极客 创业 访谈 在国外 - 导航条 - 首页 最新文章 经典回顾 开发 ...
- Ceph常用命令
目录 [1.环境准备] [2.部署管理] [3.集群扩容] [4.用户管理] [5.密钥环管理] [6.块设备管理] [7.快照管理] [8.参考链接] 简要说明: 最近心血来潮,对分布式存储感兴趣, ...
- PIXI 宝物猎人(7)
介绍 ,本实例来自官网 代码结构 打开 treasureHunter.html 文件,你将会看到所有的代码都在一个大的文件里.下面是一个关于如何组织所有代码的概览: //Setup Pixi and ...
- Unity 2018 Cookbook (Matt Smith 著)
1. Displaying Data with Core UI Elements (已看) 2. Responding to User Events for Interactive UIs (已看) ...
- Python制作的射击游戏
如果其他朋友也有不错的原创或译文,可以尝试推荐给伯乐在线.] 你有没有想过电脑游戏是怎样制作出来的?其实它没有你想象的那样复杂! 在这个教程里,你要学做一个叫<兔子和獾>的塔防游戏,兔子作 ...
- Website's Game source code
A Darkroom by doublespeakgames <!DOCTYPE html> <html itemscope itemtype="https://schem ...
随机推荐
- MySQL中表名大小写问题
在设计数据表时,有自己特有的规则:英文单词的首字母大写,比如表名User, Article, UserRole, 等等,这种办法使用得很顺手习惯,在以往使用的MS SQL Server.MS Acce ...
- 从源代码的角度分析--在BaseAdapter调用notifyDataSetChanged()之后发生了什么
导师安排我做一个小项目,其中涉及到利用Adapter作为ListView的适配器,为ListView提供数据.选中某一项后,要让这一项变成选中状态,也就是背景图片要换一下.下面我就用一个小例子来模拟. ...
- android selector(如对TextView点击样式改变)
selector 1.selector 从单词的意思来说:选择者,选择器,就是对你的目标的控制. 从API来说: A controller for the selection of Selectabl ...
- paip.2013年技术趋势以及热点 v3.0 cao
paip.2013年技术趋势以及热点 v3.0 cao 作者Attilax 艾龙, EMAIL:1466519819@qq.com 来源:attilax的专栏 地址:http://blog.cs ...
- paip.-Djava.library.path -Djava.ext.dirs= 的区别
paip.-Djava.library.path -Djava.ext.dirs= 的区别 作者Attilax 艾龙, EMAIL:1466519819@qq.com 来源:attilax的专 ...
- paip.自定义java 泛型类与泛型方法的实现总结
paip.自定义java 泛型类与泛型方法的实现总结 ============泛型方法 public static <atiType,retType> retType reduce ...
- iOS开发---集成百度地图
由于iOS MapKit框架很多情况并不能满足我们的需求,我们可以选择集成百度地图,那该如何操作呢? 申请Key 登录百度API管理中心申请Key http://lbsyun.baidu.com/ap ...
- C#:实现快捷键自定义设置
代码下载 C#实现快捷键自定义设置 需求 项目开发过程中,需要实现类似有道词典的软件设置中的自定义快捷键功能,如下图所示: 当我们相继按下Ctrl+Alt+M的时候,软件就会自动将快捷键显示在文本框中 ...
- 转:主流数据恢复软件——EasyRecovery/Ashampoo Undeleter/Wise Data Recovery/Recuva/Undelete 360
转自:Baidu 空间 2012-10-05 13:57 主流数据恢复软件——EasyRecovery/Ashampoo Undeleter/Wise Data Recovery/Recuva/Und ...
- 小白学数据分析----->留存率与运营活动分析_I
有关留存率的事情最近扯得比较多,因为在分析数据的时候,越发觉得,分析一定是要来解决问题的,留存率不知何时突然变得流行了,在此讨论留存率倒不是因为流行,而是觉得以留存率为核心,的确是可以帮助我们解决不少 ...