仿9GAG制作过程(一)
有话要说:
准备开始学习Android应用程序的一个完整的设计过程。准备做一个仿9GAG的APP,前端界面设计+后台数据爬虫+后台接口设计,整个流程体验一遍。今天准备先把前端界面的框架给完成了。
成果图:

布局代码:
 <?xml version="1.0" encoding="utf-8"?>

 <android.support.v4.widget.DrawerLayout xmlns:android="http://schemas.android.com/apk/res/android"

     xmlns:app="http://schemas.android.com/apk/res-auto"

     xmlns:tools="http://schemas.android.com/tools"

     android:id="@+id/drawer_layout"

     android:layout_width="match_parent"

     android:layout_height="match_parent"

     android:fitsSystemWindows="true"

     tools:openDrawer="start">

     <include

         layout="@layout/activity_main_appbar"

         android:layout_width="match_parent"

         android:layout_height="match_parent" />

     <android.support.design.widget.NavigationView

         android:id="@+id/nav_view"

         android:layout_width="wrap_content"

         android:layout_height="match_parent"

         android:layout_gravity="start"

         android:fitsSystemWindows="false"

         app:headerLayout="@layout/activity_main_drawer_head"

         app:menu="@menu/activity_main_drawer_menu"

         android:theme="@style/MenuTextStyle"

          />

 </android.support.v4.widget.DrawerLayout>
主活动用了DrawerLayout的布局方式,通过设置DrawerLayout的openDrawer属性以及NavigationView的gravity属性来实现左侧的测拉区域。
下面来看看NavigationView的头部布局以及menu的布局:
 <?xml version="1.0" encoding="utf-8"?>

 <RelativeLayout

     xmlns:android="http://schemas.android.com/apk/res/android"

     android:layout_width="match_parent"

     android:layout_height="?attr/actionBarSize"

     android:background="@color/background">

     <RelativeLayout

         android:layout_width="match_parent"

         android:layout_height="match_parent">

         <de.hdodenhof.circleimageview.CircleImageView

             android:id="@+id/circleImageView"

             android:layout_width="28dp"

             android:layout_height="28dp"

             android:layout_centerVertical="true"

             android:layout_marginLeft="14dp"/>

         <TextView

             android:layout_width="wrap_content"

             android:layout_height="wrap_content"

             android:text="懒星人"

             android:layout_centerVertical="true"

             android:layout_marginLeft="14dp"

             android:layout_toRightOf="@id/circleImageView"

             android:textColor="@color/colorPrimary"/>

         <ImageView

             android:id="@+id/imageView"

             android:layout_width="wrap_content"

             android:layout_height="wrap_content"

             android:src="@drawable/ic_settings_gray_24dp"

             android:layout_centerVertical="true"

             android:layout_marginRight="14dp"

             android:layout_alignParentRight="true"/>

     </RelativeLayout>

     <View

         android:layout_alignParentBottom="true"

         android:layout_width="match_parent"

         android:layout_height="1dp"

         android:background="?android:listDivider"

         />

 </RelativeLayout>
这里用到了CircleImageView组件来实现图片缩放裁剪成圆形,作为左上角头像的布局。并且由于头部的布局与menu的布局之间没有直接的分割线,就用View来实现了一个分割线。
 <?xml version="1.0" encoding="utf-8"?>

 <menu xmlns:android="http://schemas.android.com/apk/res/android"

     xmlns:tools="http://schemas.android.com/tools"

     tools:showIn="navigation_view">

     <group

         android:id="@+id/group1"

         android:checkableBehavior="single">

         <item

             android:id="@+id/nav_home"

             android:icon="@drawable/ic_home_gray_24dp"

             android:title="@string/home" />

         <item

             android:id="@+id/nav_notifications"

             android:icon="@drawable/ic_notifications_gray_24dp"

             android:title="@string/notifications" />

     </group>

     <group android:id="@+id/group2">

         <item

             android:id="@+id/nav_share"

             android:icon="@drawable/ic_share_gray_24dp"

             android:title="@string/share" />

         <item

             android:id="@+id/nav_send"

             android:icon="@drawable/ic_send_gray_24dp"

             android:title="@string/send" />

     </group>

 </menu>
左侧menu的布局和主menu实现方式一致,通过menu的配置文件来实现。
在这里遇到了两个问题:
- 左侧menu字体不是粗体,但是需要粗体
- 左侧menu布局的图标和文字之间的间隔太大
第一个问题通过给NavigationView设置了主题,主题的主要意义就是加粗字体,如下代码:
<style name="MenuTextStyle">

        <item name="android:textStyle">bold</item>

</style>
第二个问题,通过阅读NavigationView的源码逐步找到了item的布局文件,布局文件为design_navigation_menu_item.xml,于是将布局文件复制到layout下,并将drawablePadding改成了20dp,如下代码:
 <?xml version="1.0" encoding="utf-8"?>

 <merge xmlns:android="http://schemas.android.com/apk/res/android">

     <CheckedTextView

         android:id="@+id/design_menu_item_text"

         android:layout_width="0dp"

         android:layout_height="match_parent"

         android:layout_weight="1"

         android:drawablePadding="20dp"

         android:gravity="center_vertical|start"

         android:maxLines="1"

         android:textAppearance="@style/TextAppearance.AppCompat.Body2"/>

     <ViewStub

         android:id="@+id/design_menu_item_action_area_stub"

         android:inflatedId="@+id/design_menu_item_action_area"

         android:layout="@layout/design_menu_item_action_area"

         android:layout_width="wrap_content"

         android:layout_height="match_parent"/>

 </merge>
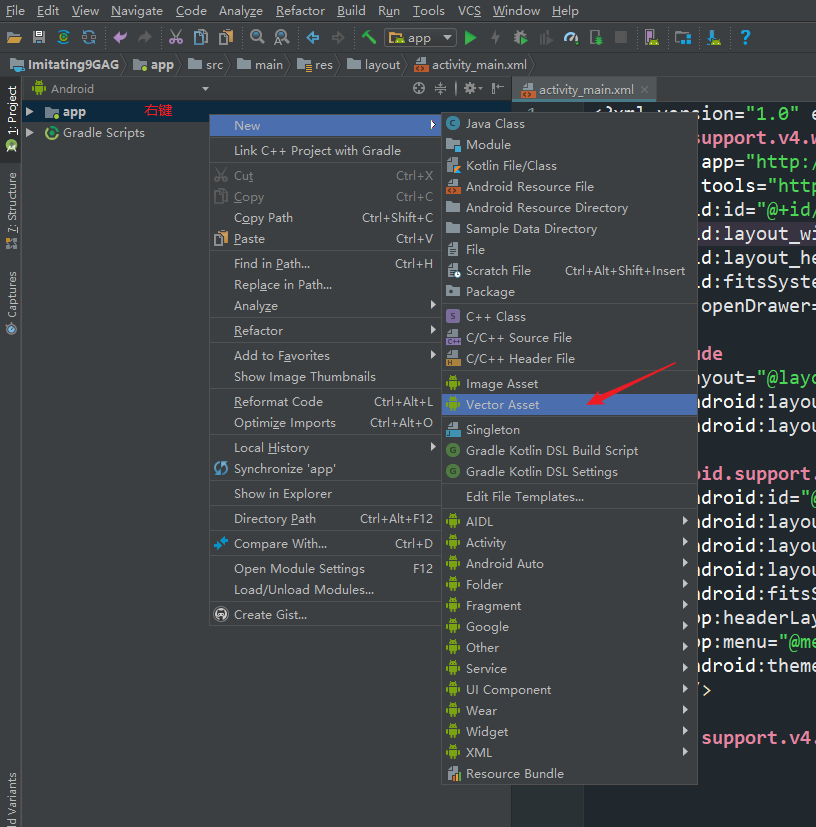
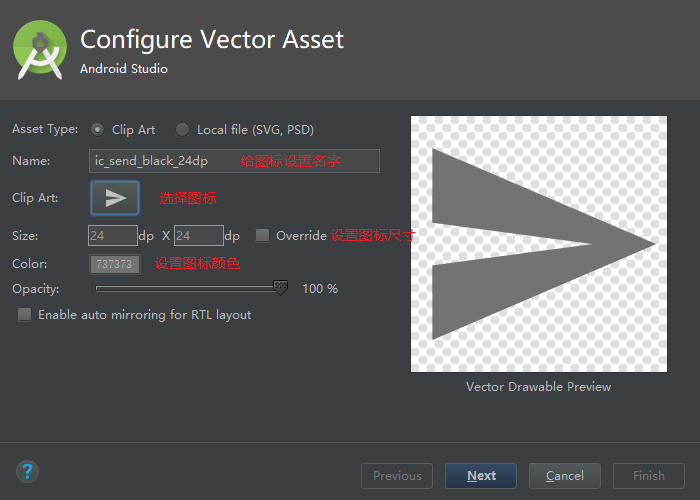
插一个知识点:
可以直接通过Android Studio来生成需要用到的图标,这里的图标我都是直接通过Android Studio生成的,生成步骤如下:
接下来说一下主页面的实现,是通过TabLayout+ViewPage的方式来实现的,先来看代码:
 <?xml version="1.0" encoding="utf-8"?>

 <android.support.design.widget.CoordinatorLayout xmlns:android="http://schemas.android.com/apk/res/android"

     xmlns:app="http://schemas.android.com/apk/res-auto"

     xmlns:tools="http://schemas.android.com/tools"

     android:layout_width="match_parent"

     android:layout_height="match_parent"

     tools:context=".activity.MainActivity">

     <android.support.design.widget.AppBarLayout

         android:layout_width="match_parent"

         android:layout_height="wrap_content"

         android:theme="@style/AppTheme.AppBarOverlay">

         <android.support.v7.widget.Toolbar

             android:id="@+id/toolbar"

             android:layout_width="match_parent"

             android:layout_height="?attr/actionBarSize"

             android:background="?attr/colorPrimary"

             app:layout_scrollFlags="scroll|enterAlways"

             app:popupTheme="@style/AppTheme.PopupOverlay" />

         <android.support.design.widget.TabLayout

             android:id="@+id/tabLayout"

             android:layout_width="match_parent"

             android:layout_height="wrap_content"

             app:tabBackground="@color/background"

             app:tabIndicatorColor="@color/colorPrimary"

             app:tabTextColor="@color/defaultColor"

             app:tabSelectedTextColor="@color/colorPrimary"

             app:tabTextAppearance="@style/TabText"/>

     </android.support.design.widget.AppBarLayout>

     <android.support.v4.view.ViewPager

         android:id="@+id/viewPage"

         android:layout_width="match_parent"

         android:layout_height="match_parent"

         app:layout_behavior="@string/appbar_scrolling_view_behavior"/>

 </android.support.design.widget.CoordinatorLayout>
这里需要注意一下几个知识点:
- 通过给Toolbar的layout_scrollFlags属性设置scroll|enterAlways并且给ViewPager设置layout_behavior属性来实现滑动的时候Toolbar消失。即当设置layout_behavior的组件滑动时设置layout_scrollFlags的组件会移出屏幕
- 给TabLayout的tabTextAppearance设置一个字体样式来实现Tab页加粗效果
下面主要来说一下activity部分的代码,先上代码:
 package com.example.lanxingren.imitating9gag.activity;

 import android.os.Bundle;

 import android.support.design.widget.NavigationView;

 import android.support.design.widget.TabLayout;

 import android.support.v4.app.Fragment;

 import android.support.v4.view.GravityCompat;

 import android.support.v4.view.ViewPager;

 import android.support.v4.widget.DrawerLayout;

 import android.support.v7.app.ActionBarDrawerToggle;

 import android.support.v7.app.AppCompatActivity;

 import android.support.v7.widget.Toolbar;

 import android.view.Menu;

 import android.view.MenuItem;

 import com.example.lanxingren.imitating9gag.R;

 import com.example.lanxingren.imitating9gag.adapter.MyFragmentPagerAdapter;

 import com.example.lanxingren.imitating9gag.fragment.HomeFragment;

 import com.squareup.picasso.Picasso;

 import java.util.ArrayList;

 import java.util.List;

 import butterknife.BindView;

 import butterknife.ButterKnife;

 import de.hdodenhof.circleimageview.CircleImageView;

 public class MainActivity extends AppCompatActivity

         implements NavigationView.OnNavigationItemSelectedListener {

     @BindView(R.id.toolbar)

     Toolbar toolbar;

     @BindView(R.id.drawer_layout)

     DrawerLayout drawer;

     @BindView(R.id.nav_view)

     NavigationView navigationView;

     @BindView(R.id.tabLayout)

     TabLayout tabLayout;

     @BindView(R.id.viewPage)

     ViewPager viewPager;

     @Override

     protected void onCreate(Bundle savedInstanceState) {

         super.onCreate(savedInstanceState);

         setContentView(R.layout.activity_main);

         ButterKnife.bind(this);

         //设置ActionBar

         setSupportActionBar(toolbar);

         //设置DrawerLayout的监听事件,其中后两个参数是给残障人士的语音

         ActionBarDrawerToggle toggle = new ActionBarDrawerToggle(

                 this, drawer, toolbar, R.string.navigation_drawer_open, R.string.navigation_drawer_close);

         //设置左上角的三杠图标

         toggle.syncState();

         drawer.addDrawerListener(toggle);

         //设置抽屉的监听事件

         navigationView.setNavigationItemSelectedListener(this);

         //直接findViewById会导致NPE,抽屉head部分的头像

         CircleImageView circleImageView = navigationView.getHeaderView(0)

                 .findViewById(R.id.circleImageView);

         Picasso.with(this).load("https://timgsa.baidu.com/timg?image&quality=80&size=b9999_10000&sec=1527745766743&di=c24134fe5233902ca1a60a8665c30a35&imgtype=0&src=http%3A%2F%2Fimg1.sc115.com%2Fuploads%2Fsc%2Fjpg%2F144%2F18628.jpg")

                 .into(circleImageView);

         //定义viewPage的适配器

         List<Fragment> fragments = new ArrayList();

         fragments.add(new HomeFragment());

         fragments.add(new HomeFragment());

         MyFragmentPagerAdapter adapter = new MyFragmentPagerAdapter(getSupportFragmentManager(), fragments);

         viewPager.setAdapter(adapter);

         tabLayout.setupWithViewPager(viewPager);

     }

     @Override

     public void onBackPressed() {

         if (drawer.isDrawerOpen(GravityCompat.START)) {

             drawer.closeDrawer(GravityCompat.START);

         } else {

             super.onBackPressed();

         }

     }

     /**

      * 右上角按钮图标

      * @param menu

      * @return

      */

     @Override

     public boolean onCreateOptionsMenu(Menu menu) {

         getMenuInflater().inflate(R.menu.main, menu);

         return true;

     }

     //右上角按钮点击事件

     @Override

     public boolean onOptionsItemSelected(MenuItem item) {

         return super.onOptionsItemSelected(item);

     }

     //左侧抽屉menu点击事件

     @SuppressWarnings("StatementWithEmptyBody")

     @Override

     public boolean onNavigationItemSelected(MenuItem item) {

         int id = item.getItemId();

         if (id == R.id.nav_home) {

         } else if (id == R.id.nav_notifications) {

         } else if (id == R.id.nav_send) {

         } else if (id == R.id.nav_share) {

         }

         drawer.closeDrawer(GravityCompat.START);

         return true;

     }

 }
知识点:
- 用了ButterKnife而不是findViewById来获取组件
- 用了Picasso来加载网络图片,头像以及内部都是通过这种方式来加载的
- 定义了MyFragmentPagerAdapter适配器来实现ViewPage的布局
MyFragmentPagerAdapter内部的数据实际上为HomeFragment,而该Fragment的布局实际上只是一个简单的RecyclerView,下面上HomeFragment的代码:
 package com.example.lanxingren.imitating9gag.fragment;

 import android.os.Bundle;

 import android.support.v4.app.Fragment;

 import android.support.v7.widget.LinearLayoutManager;

 import android.support.v7.widget.RecyclerView;

 import android.view.LayoutInflater;

 import android.view.View;

 import android.view.ViewGroup;

 import com.example.lanxingren.imitating9gag.R;

 import com.example.lanxingren.imitating9gag.adapter.NewsAdapter;

 import com.example.lanxingren.imitating9gag.bean.NewsBean;

 import java.util.ArrayList;

 import java.util.List;

 /**

  */

 public class HomeFragment extends Fragment {

     @Override

     public void onCreate(Bundle savedInstanceState) {

         super.onCreate(savedInstanceState);

     }

     @Override

     public View onCreateView(LayoutInflater inflater, ViewGroup container,

                              Bundle savedInstanceState) {

         return inflater.inflate(R.layout.fragment_home, container, false);

     }

     @Override

     public void onStart() {

         super.onStart();

         List<NewsBean> newsBeans = new ArrayList<NewsBean>();

         for (int i = 0; i < 30; i++) {

             newsBeans.add(new NewsBean("这是第 " + Integer.toString(i+1) + " 条有趣的段子!",

                     "http://ws4.sinaimg.cn/mw600/6c560b83ly1fruncq3z03j20ks0rs41b.jpg", 0));

         }

         LinearLayoutManager linearLayoutManager = new LinearLayoutManager(getContext());

         RecyclerView recyclerView = getView().findViewById(R.id.recyclerView);

         recyclerView.setAdapter(new NewsAdapter(newsBeans));

         recyclerView.setLayoutManager(linearLayoutManager);

     }

 }
RecyrView用了NewsAdapter适配器,适配器代码如下:
 package com.example.lanxingren.imitating9gag.adapter;

 import android.content.Context;

 import android.support.annotation.NonNull;

 import android.support.v7.widget.CardView;

 import android.support.v7.widget.RecyclerView;

 import android.view.LayoutInflater;

 import android.view.View;

 import android.view.ViewGroup;

 import android.widget.ImageView;

 import android.widget.TextView;

 import com.example.lanxingren.imitating9gag.R;

 import com.example.lanxingren.imitating9gag.bean.NewsBean;

 import com.squareup.picasso.Picasso;

 import java.util.List;

 public class NewsAdapter extends RecyclerView.Adapter<NewsAdapter.NewsHolder> {

     private List<NewsBean> myNewsList;

     private Context myContext;

     static class NewsHolder extends RecyclerView.ViewHolder {

         CardView cardView;

         TextView textView;

         ImageView imageView;

         private NewsHolder (View view) {

             super(view);

             cardView = (CardView) view;

             textView = view.findViewById(R.id.item_text);

             imageView = view.findViewById(R.id.item_image);

         }

     }

     public NewsAdapter (List<NewsBean> newsList) {

         this.myNewsList = newsList;

     }

     @Override

     public int getItemCount() {

         int count = 0;

         if (myNewsList != null) {

             count = myNewsList.size();

         }

         return count;

     }

     @NonNull

     @Override

     public NewsHolder onCreateViewHolder(@NonNull ViewGroup parent, int viewType) {

         if (myContext == null) {

             myContext = parent.getContext();

         }

         View view = LayoutInflater.from(myContext).inflate(R.layout.item_news, parent, false);

         return new NewsHolder(view);

     }

     @Override

     public void onBindViewHolder(@NonNull NewsHolder holder, int position) {

         NewsBean newsBean = myNewsList.get(position);

         holder.textView.setText(newsBean.getTitle());

         int screenWidth = myContext.getResources()

                 .getDisplayMetrics()

                 .widthPixels;

         Picasso.with(myContext)

                 .load(newsBean.getPicUrl())

                 .resize(screenWidth, 0)

                 .into(holder.imageView);

     }

 }
每一项的布局为item_news,一会儿看具体布局。在onBindViewHolder中给布局的textView设置了文字,给imageView设置了图片。
之前看别人的博客,经常会在适配器中定义一个myContext,我一直觉得没什么用。但是在这次实际编写适配器的过程中,发现了myContext还是有很多地方要用到的。
下面来看看item_news的布局,代码如下:
 <?xml version="1.0" encoding="utf-8"?>

 <android.support.v7.widget.CardView xmlns:android="http://schemas.android.com/apk/res/android"

     android:layout_width="match_parent"

     android:layout_height="wrap_content"

     xmlns:app="http://schemas.android.com/apk/res-auto"

     android:layout_marginVertical="10dp"

     app:cardCornerRadius="0dp"

     android:elevation="0dp">

     <LinearLayout

         android:layout_width="match_parent"

         android:layout_height="wrap_content"

         android:orientation="vertical"

         >

         <RelativeLayout

             android:layout_width="match_parent"

             android:layout_height="40dp"

             android:gravity="center">

             <TextView

                 android:id="@+id/item_text"

                 android:textStyle="bold"

                 android:textColor="@color/colorPrimary"

                 android:layout_width="wrap_content"

                 android:layout_height="wrap_content"

                 android:layout_alignParentLeft="true"

                 android:layout_marginLeft="14dp"/>

             <ImageView

                 android:layout_width="wrap_content"

                 android:layout_height="wrap_content"

                 android:layout_alignParentRight="true"

                 android:src="@drawable/ic_expand_more_gray_24dp"

                 android:layout_marginRight="14dp"/>

         </RelativeLayout>

         <ImageView

             android:id="@+id/item_image"

             android:layout_width="match_parent"

             android:layout_height="wrap_content"

             android:scaleType="fitCenter"/>

         <LinearLayout

             android:layout_width="match_parent"

             android:layout_height="40dp"

             android:orientation="horizontal"

             android:gravity="center">

             <LinearLayout

                 android:layout_width="0dp"

                 android:layout_weight="1"

                 android:layout_height="wrap_content"

                 android:orientation="horizontal">

                 <ImageView

                     android:layout_width="0dp"

                     android:layout_weight="1"

                     android:layout_height="wrap_content"

                     android:src="@drawable/ic_thumb_up_gray_24dp"

                     android:scaleType="fitEnd"/>

                 <TextView

                     android:layout_width="0dp"

                     android:layout_weight="1"

                     android:layout_height="wrap_content"

                     android:gravity="center"

                     android:text="5k"/>

                 <ImageView

                     android:layout_width="0dp"

                     android:layout_weight="1"

                     android:layout_height="wrap_content"

                     android:src="@drawable/ic_thumb_down_gray_24dp"

                     android:scaleType="fitStart"/>

             </LinearLayout>

             <View

                 android:layout_width="1dp"

                 android:layout_height="20dp"

                 android:background="?android:listDivider"/>

             <LinearLayout

                 android:layout_width="0dp"

                 android:layout_weight="1"

                 android:layout_height="wrap_content"

                 android:gravity="center">

                 <ImageView

                     android:layout_width="0dp"

                     android:layout_weight="1"

                     android:layout_height="wrap_content"

                     android:src="@drawable/ic_comment_gray_24dp"

                     android:scaleType="fitEnd"

                     android:paddingRight="5dp"/>

                 <TextView

                     android:layout_width="0dp"

                     android:layout_weight="1"

                     android:layout_height="wrap_content"

                     android:gravity="left"

                     android:text="46"

                     android:paddingLeft="5dp"/>

             </LinearLayout>

             <View

                 android:layout_width="1dp"

                 android:layout_height="20dp"

                 android:background="?android:listDivider"/>

             <LinearLayout

                 android:layout_width="0dp"

                 android:layout_weight="1"

                 android:layout_height="wrap_content"

                 android:gravity="center">

                 <ImageView

                     android:layout_width="0dp"

                     android:layout_weight="1"

                     android:layout_height="wrap_content"

                     android:src="@drawable/ic_share_gray_24dp"

                     android:scaleType="fitEnd"

                     android:paddingRight="5dp"/>

                 <TextView

                     android:layout_width="0dp"

                     android:layout_weight="1"

                     android:layout_height="wrap_content"

                     android:gravity="left"

                     android:text="分享"

                     android:paddingLeft="5dp"/>

             </LinearLayout>

         </LinearLayout>

     </LinearLayout>

 </android.support.v7.widget.CardView>
每一项使用的是卡片式布局,使用了官方的CardView组件。
通过设置cardCornerRadius来设置圆角弧度为0,使得卡片为正矩形。
ImageView的scaleType的意思是图片如何填充,其中fitCenter为居中填充,fitStart为左对齐填充,fitEnd为右对齐填充。
写的比较仓促,如有疑问或者错误的地方欢迎留言指正。
仿9GAG制作过程(一)的更多相关文章
- 仿9GAG制作过程(四)
有话要说: 这次主要讲述主页面下拉刷新和上拉加载功能的实现. 主要是使用了SwipeRefreshLayout的布局方式,并在此基础上通过RecyclerView的特性增加了上拉加载的功能. 成果: ...
- 仿9GAG制作过程(五)
有话要说: 在做完了数据展示功能之后,就想着完善整个APP.发现现在后台非常的混乱,有好多点都不具备,比方说:图片应该有略缩图和原图,段子.评论.点赞应该联动起来,段子应该有创建时间等. 于是就重新设 ...
- 仿9GAG制作过程(三)
有话要说: 这次准备讲述后台服务器的搭建以及前台访问到数据的过程. 成果: 准备: 安装了eclipse 安装了Tomcat7 安装了数据库管理工具:Navicat 搭建服务器: 用eclipse直接 ...
- 仿9GAG制作过程(二)
有话要说: 这次准备讲述用python爬虫以及将爬来的数据存到MySQL数据库的过程,爬的是煎蛋网的无聊图. 成果: 准备: 下载了python3.7并配置好了环境变量 下载了PyCharm作为开发p ...
- [PCB制作] 1、记录一个简单的电路板的制作过程——四线二项步进电机驱动模块(L6219)
前言 现在,很多人手上都有一两个电子设备,但是却很少有人清楚其中比较关键的部分(PCB电路板)是如何制作出来的.我虽然懂点硬件,但是之前设计的简单系统都是自己在万能板上用导线自己焊接的(如下图左),复 ...
- rpt水晶报表制作过程
原文:rpt水晶报表制作过程 最近公司安排一个以前的项目,里面需要用到水晶报表,由于原来做这个项目的同事离职,所在公司的同事报表做成了rdlc类型的,而这类报表在加载的时候很难动态的从数据库加载数据, ...
- Android实训案例(九)——答题系统的思绪,自己设计一个题库的体验,一个思路清晰的答题软件制作过程
Android实训案例(九)--答题系统的思绪,自己设计一个题库的体验,一个思路清晰的答题软件制作过程 项目也是偷师的,决心研究一下数据库.所以写的还是很详细的,各位看官,耐着性子看完,实现结果不重要 ...
- [转帖]超能课堂 CPU制作过程
http://www.expreview.com/50814.html 一般来说,我们对IC芯片的了解仅限于它概念,但是对于已经应用到各式各样的数码产品中IC芯片是怎么来的?大家可能只知道制作IC芯片 ...
- BabyLinux制作过程详解
转:http://www.360doc.com/content/05/0915/14/1429_12641.shtml BabyLinux制作过程详解 作者:GuCuiwen email:win2li ...
随机推荐
- JavaSSM框架面试
一.Spring面试题 1.Spring 在ssm中起什么作用? Spring:轻量级框架 作用:Bean工厂,用来管理Bean的生命周期和框架集成. 两大核心: 1.IOC/DI(控制反转/依赖注入 ...
- 深入理解Spring Redis的使用 (五)、常见问题汇总
目前我所知道的Redistemplate里面,我没有使用到的就是管道.这个可以进行批量的读写.类似于jdbc的batch.还有就是Redis的集群部署.但是由于我业务里没有这种需求,所以没有使用无法给 ...
- Hadoop 学生平均成绩
1.实例描述 通过一个计算学生平均成绩的例子来讲解开发MapReduce程序的流程.输入文件都是纯文本文件,输入文件中的每行内容均为一个学生的姓名和他相应的成绩,如果有多门学科,则每门学科为一个文件. ...
- Android OpenSL ES 开发:Android OpenSL 录制 PCM 音频数据
一.实现说明 OpenSL ES的录音要比播放简单一些,在创建好引擎后,再创建好录音接口基本就可以录音了.在这里我们做的是流式录音,所以需要用至少2个buffer来缓存录制好的PCM数据,这里我们可以 ...
- 通信统计接口字段填充内容shell脚本
现在通信行业上班,最麻烦的就是计算各个协议接口字段填充的内容是否正确.经历了小白似的一个个字段统计在到单个接口所有字段统计,然后到现在的多个接口一次统计.在大大节省了时间的同时,让自己有更充足的时间来 ...
- 14.Git分支-rebase有趣的例子、变基带来的问题及解决方案
1.有趣的变基例子 如下图所示,你创建了一个特性分支server,然后进行了一些提交(C3和C4),然后又从C3上创建了特性分支client,提交了C8和C9,最后你又回到了server,提交了C10 ...
- Mongodb的集合插入一个字段
在mongodb的现有集合中增加一个字段: db.rules.update({"_id" : ObjectId("587e5e0e09a4670334208e88&quo ...
- Flume篇---Flume安装配置与相关使用
一.前述 Copy过来一段介绍Apache Flume 是一个从可以收集例如日志,事件等数据资源,并将这些数量庞大的数据从各项数据资源中集中起来存储的工具/服务,或者数集中机制.flume具有高可用, ...
- xtrabackup备份
增量备份: xtrabackup --backup --target-dir=/data/backup/base --datadir=/var/lib/mysql xtrabackup --backu ...
- SpringCloud(6)---熔断降级理解、Hystrix实战
SpringCloud(6)---熔断降级理解.Hystrix实战 一.概念 1.为什么需要熔断降级 (1)需求背景 它是系统负载过高,突发流量或者网络等各种异常情况介绍,常用的解决方案. 在一个分布 ...