OpenShift应用镜像构建(1) S2I tomcat 镜像定制
参考并感谢https://www.jianshu.com/p/fd3e62263046
在对接项目制作应用镜像的过程中,经常发现避免不了的是需要写Dockerfile,(当然另外一种方式是直接run一个基础镜像,改完commit,这个就完全不建议了),这需要对Dockerfile以及镜像有一定的了解,但在项目中发现学习Dockerfile还是有学习成本的,虽然Dockerfile已经足够简单,但仍然还是有不少图形化的需求。Dockerfile的图像化一方面不好设计,另外看市面上也没有类似产品,而这个做应用镜像的工作在项目对接过程中耗费不少的时间。总结下来的问题是:
制作应用镜像的问题
- Dockerfile有学习成本
- 熟悉部署的成本,并不是每个人都熟悉应用的部署。
S2I模式的价值
- 避免了从无到有写一个Dockerfile,项目成员只需要关注代码上(如何构建的过程,都可以通过S2I的镜像完成,自动生成一个应用镜像)
- 如果应用配置不愿意和代码放在一起,支持将配置放在独立目录下
- S2I完整的覆盖了容器CICD的全过程(Assembe如何装配镜像,Run是如何运行镜像)
- 需要针对某个特定的项目做好S2I镜像。
s2i镜像定制流程图如下

看上去很复杂,其实只要import-images后,当前项目的所有服务都可以重用这套imagestream了。
1.下载source-to-image 最新版解压配置到path
https://github.com/openshift/source-to-image/releases
2.创建 S2I Builder镜像
s2i create s2i-tomcat s2i-tomcat
3.修改文件,编辑Dockerfile,加入maven需要的setting以及修改assemble脚本
ericdeMacBook-Pro:s2i-tomcat ericnie$ cat Dockerfile

FROM openshift/base-centos7

EXPOSE

ENV TOMCAT_VERSION=8.5. \

    MAVEN_VERSION=3.5. \

    STI_SCRIPTS_PATH=/usr/libexec/s2i/

LABEL io.k8s.description="Platform for building and running JEE applications on Tomcat" \

      io.k8s.display-name="Tomcat Builder" \

      io.openshift.expose-services="8080:http" \

      io.openshift.tags="builder,tomcat" \

      io.openshift.s2i.destination="/opt/s2i/destination"

COPY apache-maven-3.5.-bin.tar /

COPY apache-tomcat-8.5..tar /

# Install Maven, Tomcat 8.5.

RUN INSTALL_PKGS="tar java-1.8.0-openjdk java-1.8.0-openjdk-devel" && \

    yum install -y --enablerepo=centosplus $INSTALL_PKGS && \

    rpm -V $INSTALL_PKGS && \

    yum clean all -y && \

    tar -xvf /apache-maven-3.5.-bin.tar    -C /usr/local && \

    ln -sf /usr/local/apache-maven-$MAVEN_VERSION/bin/mvn /usr/local/bin/mvn && \

    mkdir -p $HOME/.m2 && \

    mkdir -p /tomcat && \

    tar -xvf /apache-tomcat-8.5..tar --strip-components= -C /tomcat && \

    rm -rf /tomcat/webapps/* && \

    mkdir -p /opt/s2i/destination && \

    mkdir /tmp/src && \

    mkdir -p /opt/maven/repository/ && \

    chmod 777 /opt/maven/repository

# Add s2i customizations

ADD ./settings.xml $HOME/.m2/

# Copy the S2I scripts from the specific language image to $STI_SCRIPTS_PATH

#COPY ./s2i/bin/ $STI_SCRIPTS_PATH

COPY ./s2i/bin/ /usr/libexec/s2i

RUN chmod -R a+rw /tomcat && \

    chmod a+rwx /tomcat/* && \

    chmod +x /tomcat/bin/*.sh && \

    chmod -R a+rw $HOME && \

    chmod -R +x $STI_SCRIPTS_PATH && \

    chmod -R g+rw /opt/s2i/destination

USER 1001

CMD $STI_SCRIPTS_PATH/usage
需要说明的是这不是一个一般的Dockerfile镜像构建文件,而是S2I的构建镜像,除了包含运行所需要的jdk,tomcat外,还包含如下内容
- 一系列说明镜像的openshift元数据的label
- maven构建包,用户编译打包源代码,形成war,jar等编译后工件
- s2i的工具,包括用于编译的命令assemble和运行的命令run
所以这是一个针对特定环境的流水线构建的镜像。
需要注意的是maven配置的settings.xml, 主要指定了repository存放的路径,以及jdk的版本
ericdeMacBook-Pro:s2i-tomcat ericnie$ cat settings.xml

<?xml version="1.0" encoding="UTF-8"?>

<settings xmlns="http://maven.apache.org/SETTINGS/1.0.0"

          xmlns:xsi="http://www.w3.org/2001/XMLSchema-instance"

          xsi:schemaLocation="http://maven.apache.org/SETTINGS/1.0.0 http://maven.apache.org/xsd/settings-1.0.0.xsd">

  <localRepository>/opt/maven/repository</localRepository>

  <interactiveMode>true</interactiveMode>

  <offline>false</offline>

  <pluginGroups>

  </pluginGroups>

  <servers>

    <server>

      <id>deploymentRepo</id>

      <username>repouser</username>

      <password>repopwd</password>

    </server>

  </servers>

  <mirrors>

    <mirror>

      <id>mirrorId</id>

      <mirrorOf>repositoryId</mirrorOf>

      <name>Human Readable Name for this Mirror.</name>

      <url>http://my.repository.com/repo/path</url>

    </mirror>

  </mirrors>

  <profiles>

    <profile>

      <id>jdk-1.8</id>

      <activation>

        <activeByDefault>true</activeByDefault>

        <jdk>1.8</jdk>

      </activation>

      <properties>

          <maven.compiler.source>1.8</maven.compiler.source>

          <maven.compiler.target>1.8</maven.compiler.target>

          <maven.compiler.compilerVersion>1.8</maven.compiler.compilerVersion>

     </properties>

    </profile>

  </profiles>

  <activeProfiles>

    <activeProfile>jdk-1.8</activeProfile>

  </activeProfiles>

</settings>
assemble主要负责把源代码拷贝入镜像,然后编译打包的过程,这里可以参考
https://github.com/openshift/source-to-image/blob/master/docs/builder_image.md
这里明确说明了这句
s2i untars that file and places its contents into the destination specified with either the --destination flag or the value of the io.openshift.s2i.destination label set in the builder image (the default destination is /tmp).
也就是如果没有设定io.openshift.s2i.destination的label,系统默认会把代码放到/tmp下,但如果设定了,就会放到label指定的路径,这个问题搞得我build了好多遍的镜像。而Dockerfile中明确设定的label是
io.openshift.s2i.destination="/opt/s2i/destination
最后的assemble
ericdeMacBook-Pro:bin ericnie$ cat assemble

#!/bin/bash -e

#

# S2I assemble script for the 's2i-tomcat' image.

# The 'assemble' script builds your application source so that it is ready to run.

#

# For more information refer to the documentation:

#    https://github.com/openshift/source-to-image/blob/master/docs/builder_image.md

#

# If the 's2i-tomcat' assemble script is executed with the '-h' flag, print the usage.

if [[ "$1" == "-h" ]]; then

    exec /usr/libexec/s2i/usage

fi

# Restore artifacts from the previous build (if they exist).

#

if [ "$(ls /tmp/artifacts/ 2>/dev/null)" ]; then

  echo "---> Restoring build artifacts..."

  mv /tmp/artifacts/. ./

fi

echo "---> Installing application source..."

#cp -Rf /tmp/src/. ./

a=`ls /tmp/`

echo $a

echo "**********"

b=`ls /opt/s2i/destination/`

echo $b

echo "------***"

c=`ls /opt/s2i/destination/src`

echo $c

cp -R /opt/s2i/destination/src/.  ./

echo "---> Building application from source..."

# TODO: Add build steps for your application, eg npm install, bundle install, pip install, etc.

mvn -Dmaven.test.skip=true clean package

mv ./target/*.war /tomcat/webapps/
run命令
ericdeMacBook-Pro:bin ericnie$ cat run

#!/bin/bash -e

#

# S2I run script for the 's2i-tomcat' image.

# The run script executes the server that runs your application.

#

# For more information see the documentation:

#    https://github.com/openshift/source-to-image/blob/master/docs/builder_image.md

#

#exec asdf -p

echo "==========now running==========="

bash -c "/tomcat/bin/catalina.sh run"
4.把文件传入github代码库
现在本地运行git init,git add .和git commit 命令
ericdeMacBook-Pro:minishift ericnie$ cd s2i-tomcat

ericdeMacBook-Pro:s2i-tomcat ericnie$ ls

Dockerfile          Dockerfile.original Makefile            README.md           s2i                 test

ericdeMacBook-Pro:s2i-tomcat ericnie$ git init

Initialized empty Git repository in /Users/ericnie/minishift/s2i-tomcat/.git/

ericdeMacBook-Pro:s2i-tomcat ericnie$ git add .

ericdeMacBook-Pro:s2i-tomcat ericnie$ git commit -m "first commit"

[master (root-commit) 21abd16] first commit

 Committer: eric nie <ericnie@ericdeMacBook-Pro.local>

Your name and email address were configured automatically based

on your username and hostname. Please check that they are accurate.

You can suppress this message by setting them explicitly. Run the

following command and follow the instructions in your editor to edit

your configuration file:

    git config --global --edit

After doing this, you may fix the identity used for this commit with:

    git commit --amend --reset-author

  files changed,  insertions(+)

 create mode  Dockerfile

 create mode  Dockerfile.original

 create mode  Makefile

 create mode  README.md

 create mode  s2i/bin/assemble

 create mode  s2i/bin/run

 create mode  s2i/bin/save-artifacts

 create mode  s2i/bin/usage

 create mode  test/run

 create mode  test/test-app/index.html
在远程生成repository.
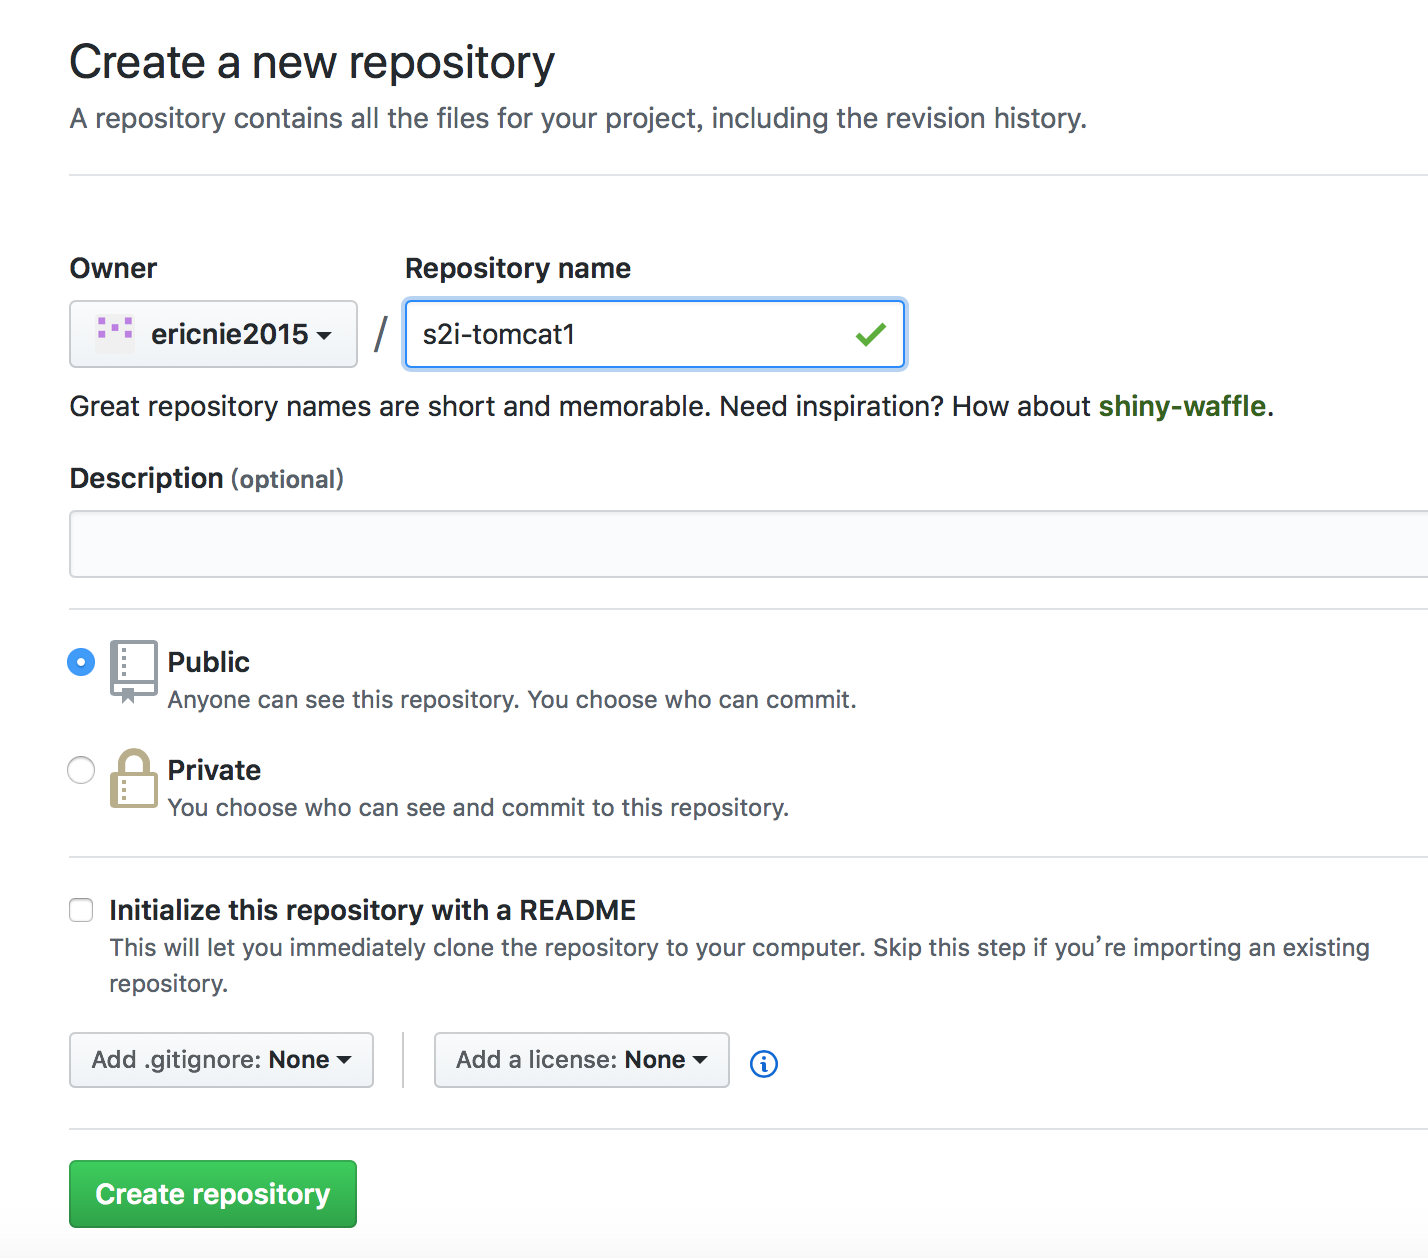
然后运行git remote add origin和push命令
ericdeMacBook-Pro:s2i-tomcat ericnie$ git remote add origin https://github.com/ericnie2015/s2i-tomcat.git

ericdeMacBook-Pro:s2i-tomcat ericnie$ git push -u origin master

Enumerating objects: , done.

Counting objects: % (/), done.

Delta compression using up to  threads.

Compressing objects: % (/), done.

Writing objects: % (/), 6.30 KiB | 3.15 MiB/s, done.

Total  (delta ), reused  (delta )

remote:

remote: Create a pull request for 'master' on GitHub by visiting:

remote:      https://github.com/ericnie2015/s2i-tomcat/pull/new/master

remote:

To https://github.com/ericnie2015/s2i-tomcat.git

 * [new branch]      master -> master

Branch 'master' set up to track remote branch 'master' from 'origin'.

ericdeMacBook-Pro:s2i-tomcat ericnie$ git push origin master

Everything up-to-date

ericdeMacBook-Pro:s2i-tomcat ericnie$
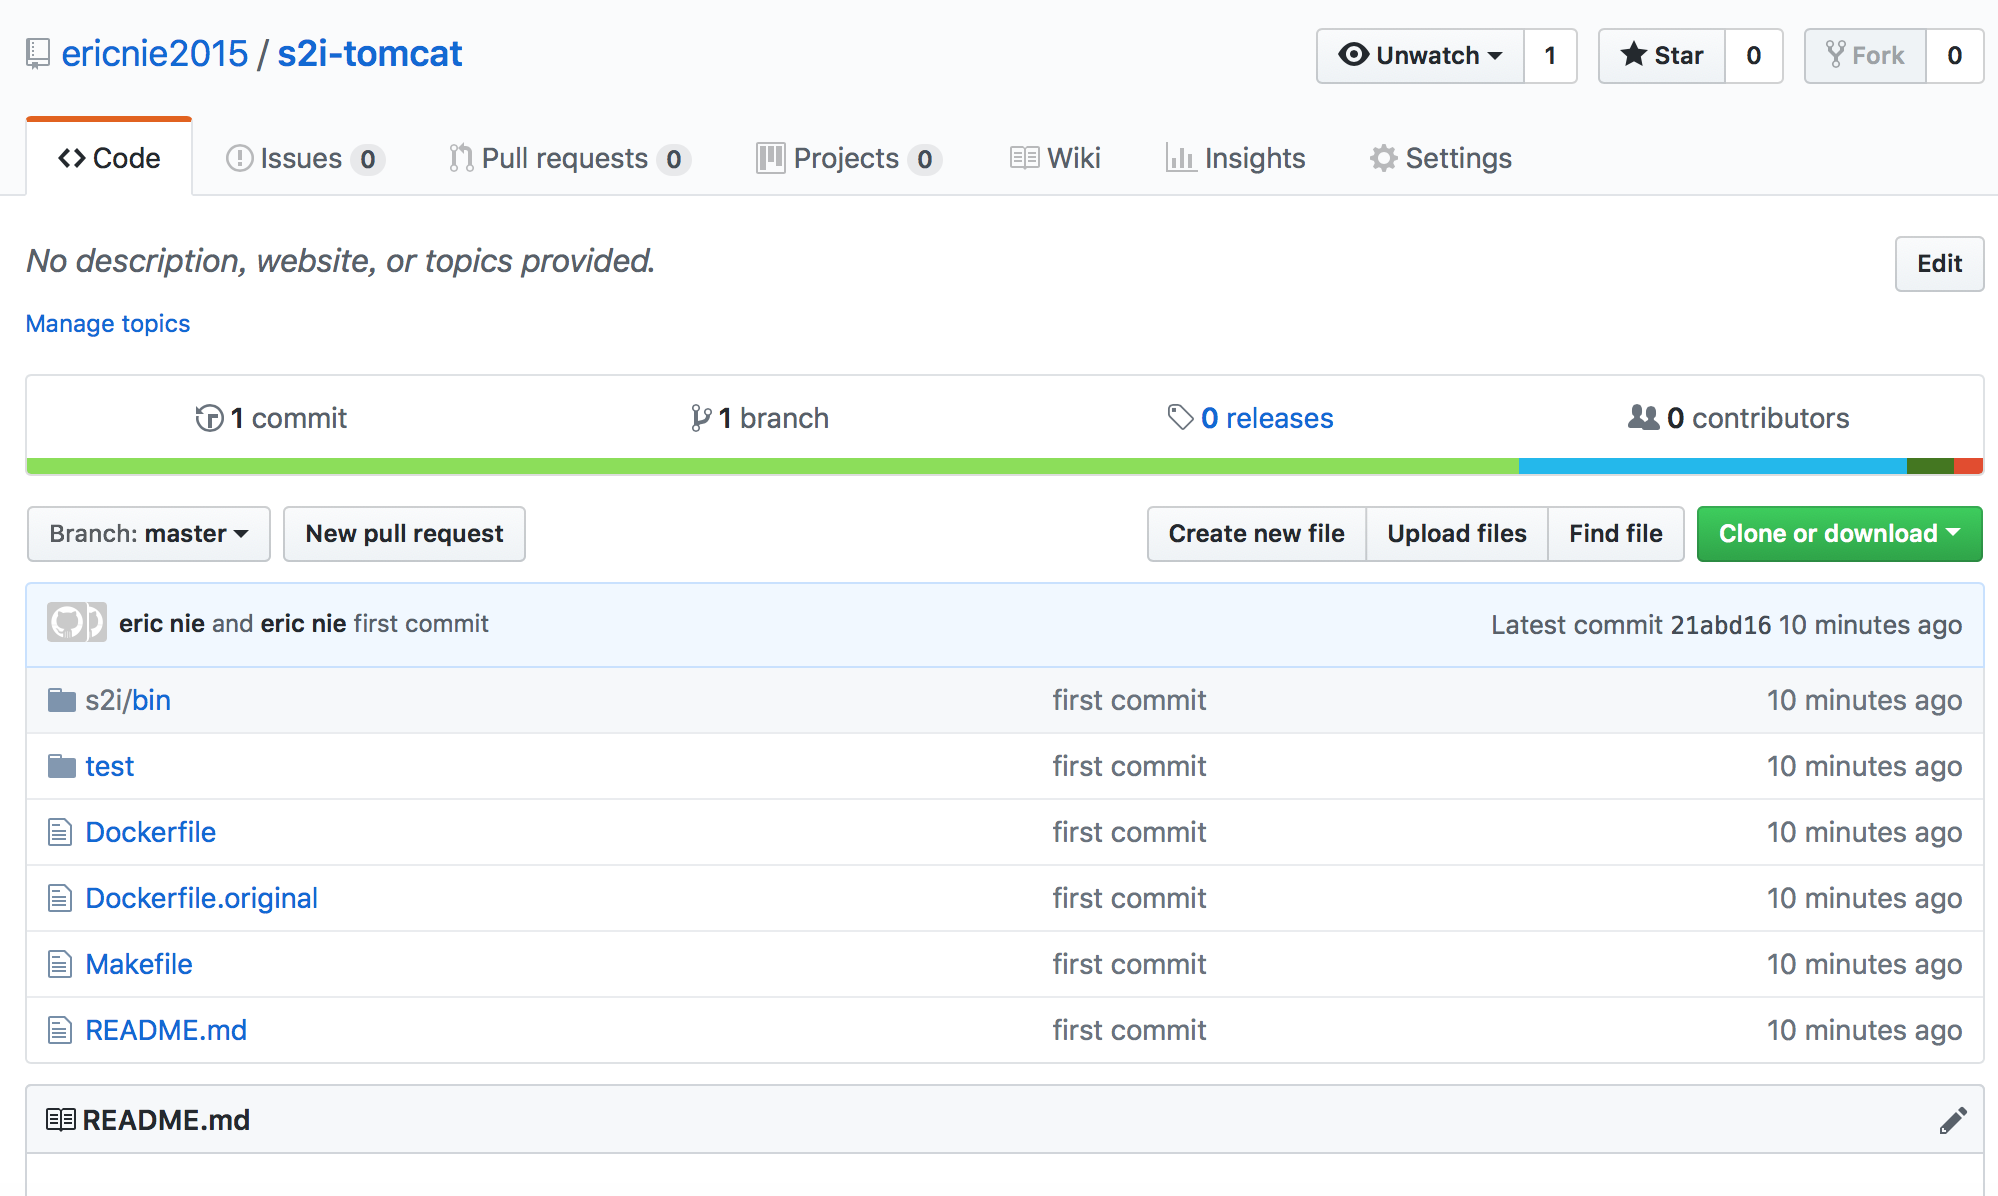
最后看到本地的文件推送到远端
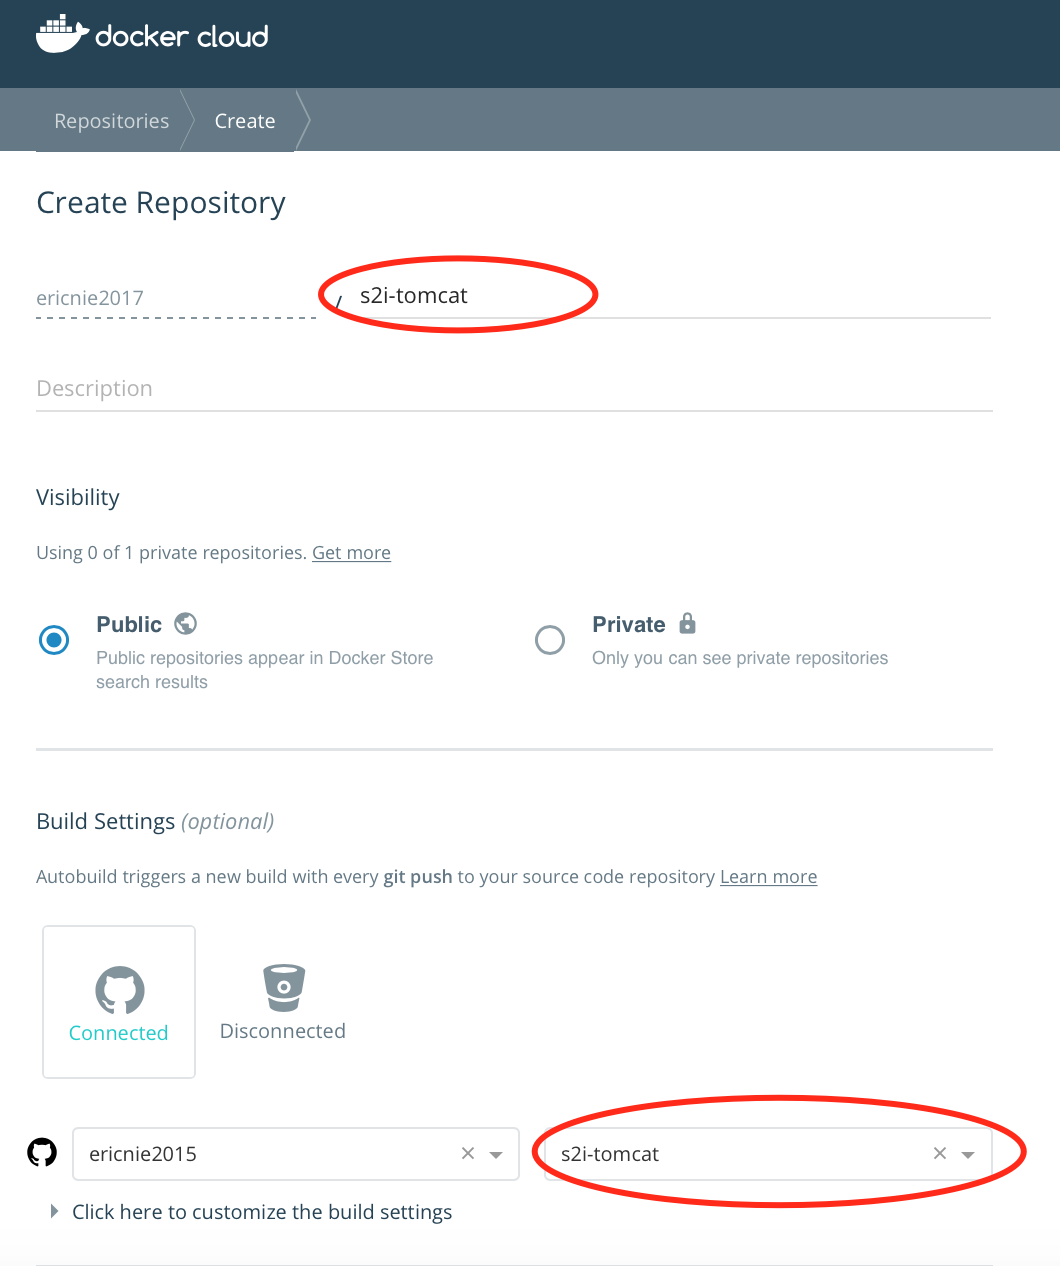
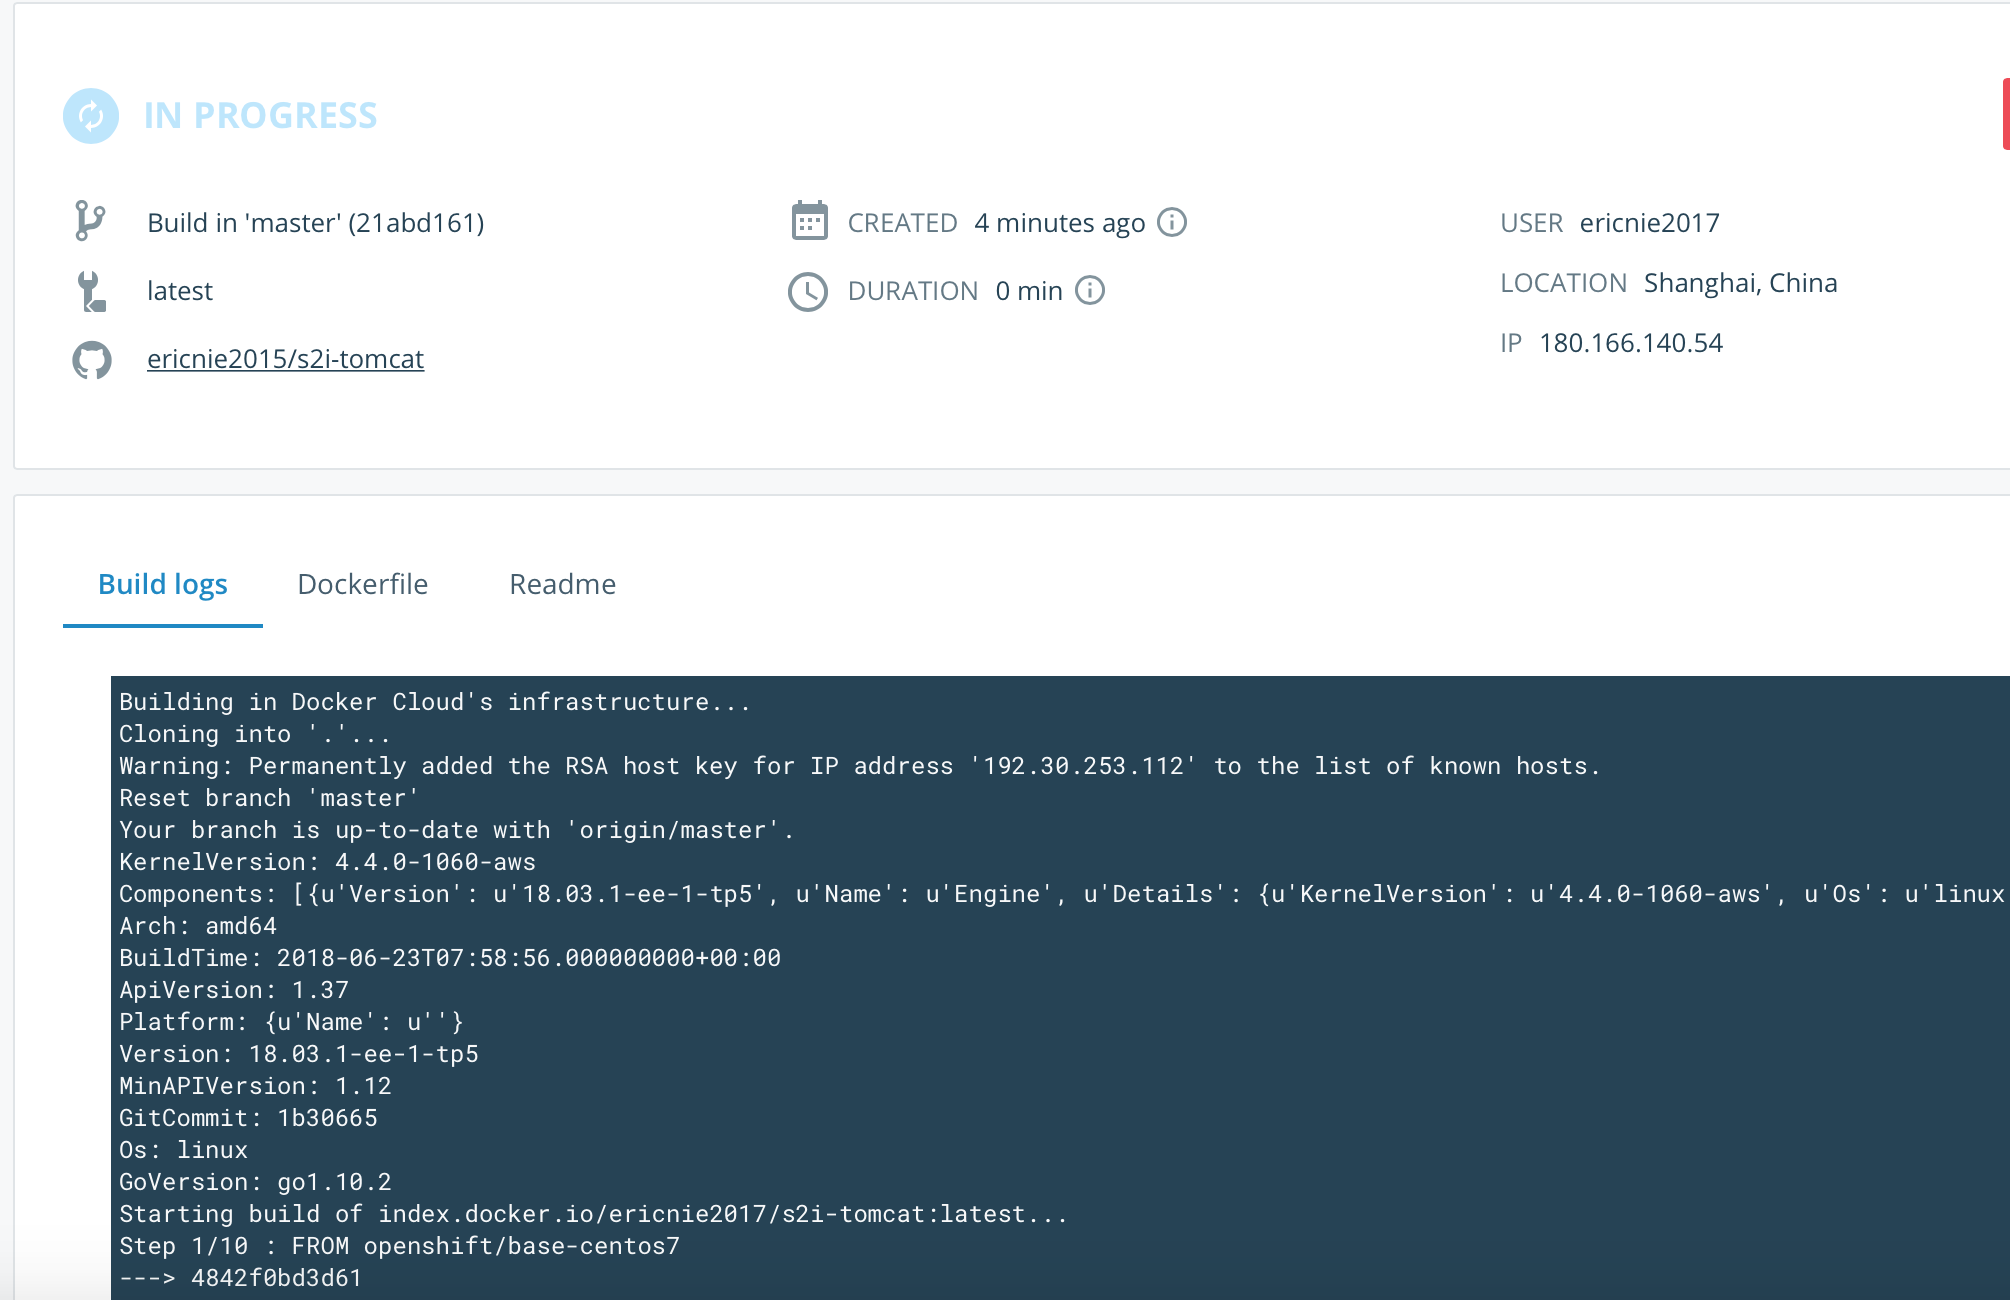
5.在cloud.docker.com中关联这个项目,然后build镜像
6.把镜像加入openshift image stream
先在openshift中切换成system:admin用户(注意,system用户和system:admin不一样,system仍然没有访问openshift 命名空间权限)
ericdeMacBook-Pro:s2i-tomcat ericnie$ oc login -u system:admin

Logged into "https://192.168.99.100:8443" as "system:admin" using existing credentials.

You have access to the following projects and can switch between them with 'oc project <projectname>':

  * default

    kube-dns

    kube-proxy

    kube-public

    kube-system

    myproject

    openshift

    openshift-apiserver

    openshift-controller-manager

    openshift-core-operators

    openshift-infra

    openshift-node

    openshift-web-console

    test

Using project "default".
然后运行import-image(如果虚拟机无法访问外网,请先docker login到openshift的registry,然后先手工pull一下镜像到本地)
ricdeMacBook-Pro:s2i-tomcat ericnie$ oc import-image ericnie2017/s2i-tomcat:latest -n openshift --confirm --insecure

The import completed successfully.

Name:            s2i-tomcat

Namespace:        openshift

Created:         seconds ago

Labels:            <none>

Annotations:        openshift.io/image.dockerRepositoryCheck=--19T15::19Z

Docker Pull Spec:    172.30.1.1:/openshift/s2i-tomcat

Image Lookup:        local=false

Unique Images:

Tags:

latest

  tagged from ericnie2017/s2i-tomcat:latest

    will use insecure HTTPS or HTTP connections

  * ericnie2017/s2i-tomcat@sha256:3a82fea61a9d2c665f522d656d6112b78d744645c38d096971460b9380b5f933

       seconds ago

Image Name:    s2i-tomcat:latest

Docker Image:    ericnie2017/s2i-tomcat@sha256:3a82fea61a9d2c665f522d656d6112b78d744645c38d096971460b9380b5f933

Name:        sha256:3a82fea61a9d2c665f522d656d6112b78d744645c38d096971460b9380b5f933

Created:     seconds ago

Annotations:    image.openshift.io/dockerLayersOrder=ascending

Image Size:    .7MB (first layer .39MB, last binary layer .177MB)

Image Created:     minutes ago

Author:        <none>

Arch:        amd64

Entrypoint:    container-entrypoint

Command:    /bin/sh -c $STI_SCRIPTS_PATH/usage

Working Dir:    /opt/app-root/src

User:

Exposes Ports:    /tcp

Docker Labels:    build-date=

        io.k8s.description=Platform for building and running JEE applications on Tomcat

        io.k8s.display-name=Tomcat Builder

        io.openshift.builder-base-version=bfd4736

        io.openshift.expose-services=:http

        io.openshift.s2i.destination=/opt/s2i/destination

        io.openshift.s2i.scripts-url=image:///usr/libexec/s2i

        io.openshift.tags=builder,tomcat

        io.s2i.scripts-url=image:///usr/libexec/s2i

        license=GPLv2

        name=CentOS Base Image

        vendor=CentOS

Environment:    PATH=/opt/app-root/src/bin:/opt/app-root/bin:/usr/local/sbin:/usr/local/bin:/usr/sbin:/usr/bin:/sbin:/bin

        STI_SCRIPTS_URL=image:///usr/libexec/s2i

        STI_SCRIPTS_PATH=/opt/s2i/

        HOME=/opt/app-root/src

        BASH_ENV=/opt/app-root/etc/scl_enable

        ENV=/opt/app-root/etc/scl_enable

        PROMPT_COMMAND=. /opt/app-root/etc/scl_enable

        TOMCAT_VERSION=8.5.

        MAVEN_VERSION=3.5.
通过命令修改镜像的annotation
oc edit is/s2i-tomcat -n openshift
主要加入和修改了下面标黑体的部分,如果没有,请注意iconClass,找一个现在有的图标的iconClass.
 name: s2i-tomcat

  namespace: openshift

  resourceVersion: ""

  selfLink: /apis/image.openshift.io/v1/namespaces/openshift/imagestreams/s2i-tomcat

  uid: 19d2fb2d-bc1f-11e8-a40a-0800276bcf3b

spec:

  lookupPolicy:

    local: false

  tags:

  - annotations:

      description: Build and run Tomcat applications on CentOS . For more information

        about using this builder image, including OpenShift considerations, see https://github.com/silentwu/s2i-tomcat.git.

      iconClass: icon-wildfly

      openshift.io/display-name: Tomcat 8.5.

      openshift.io/provider-display-name: Rabbit blog, http://blog.xianshiyue.com

      sampleRepo: https://github.com/ericnie2015/openshift-tomcat.git

      supports: tomcat:8.5.,jee,java

      tags: builder,tomcat,java

      version: 8.5.

    from:

      kind: DockerImage

      name: ericnie2017/s2i-tomcat:latest

    generation:
7.建立openshift project,然后构建
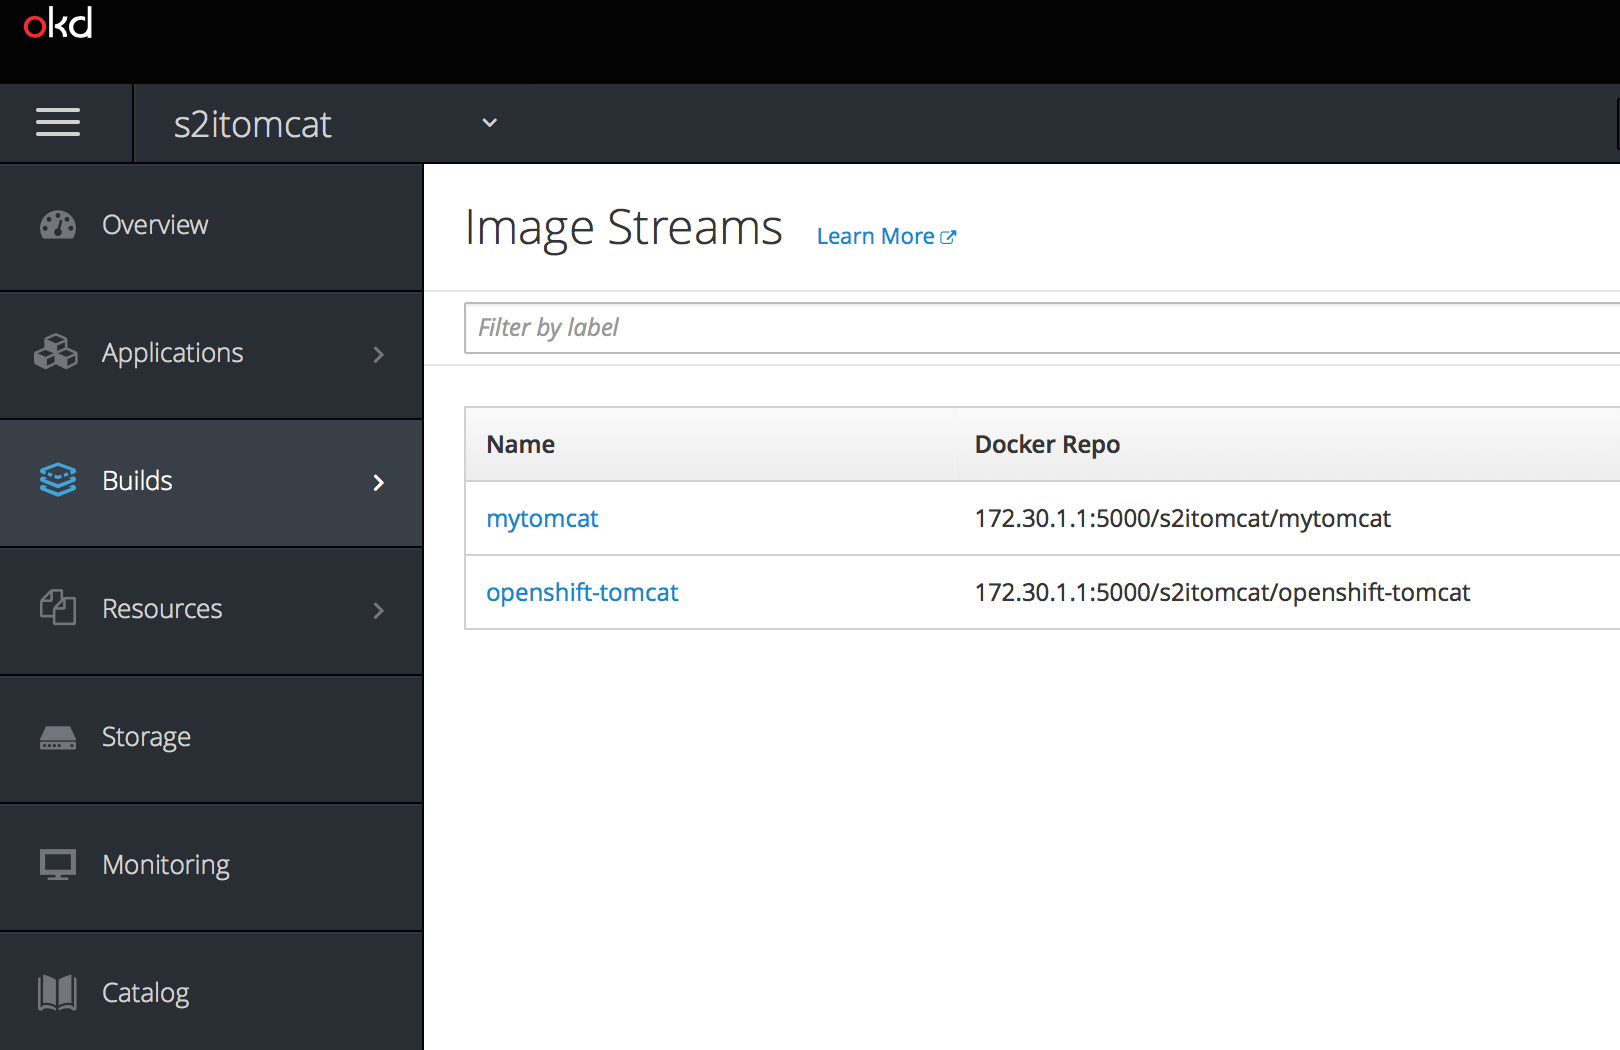
用developer登录,如果没有看见新的is,请登出重新登录
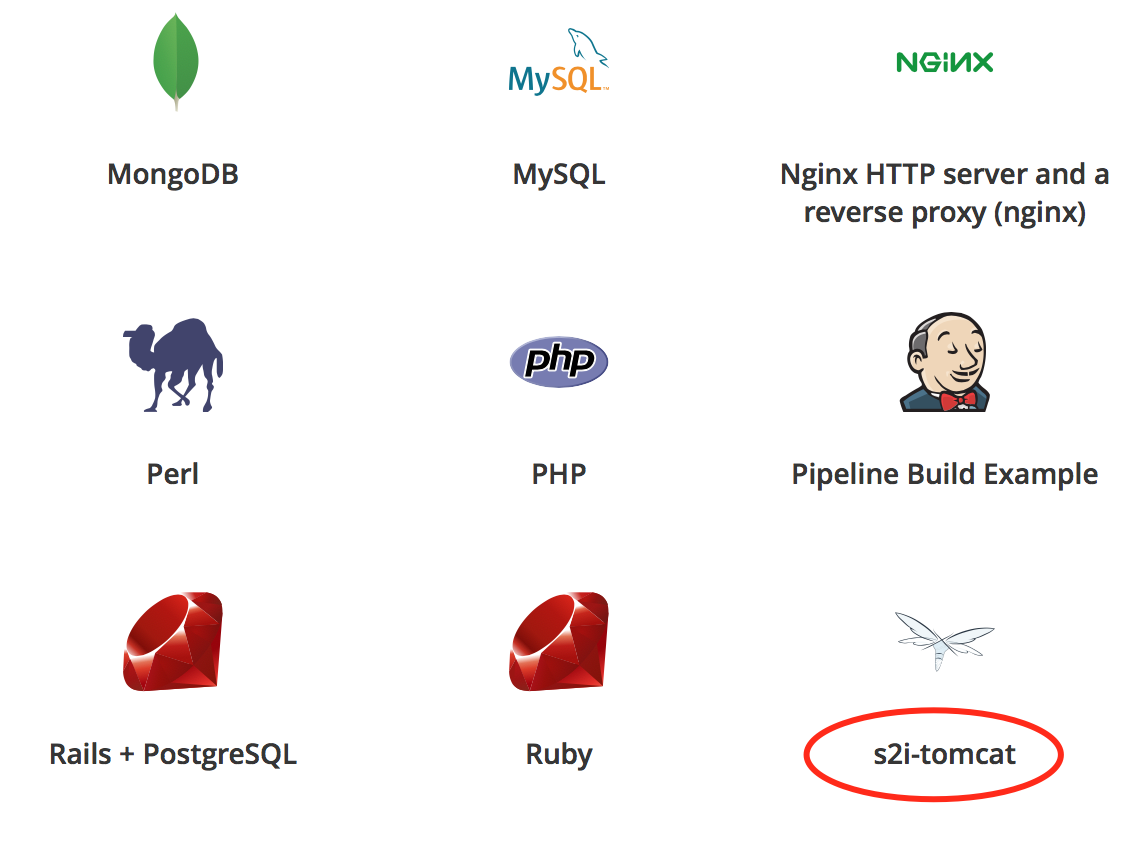
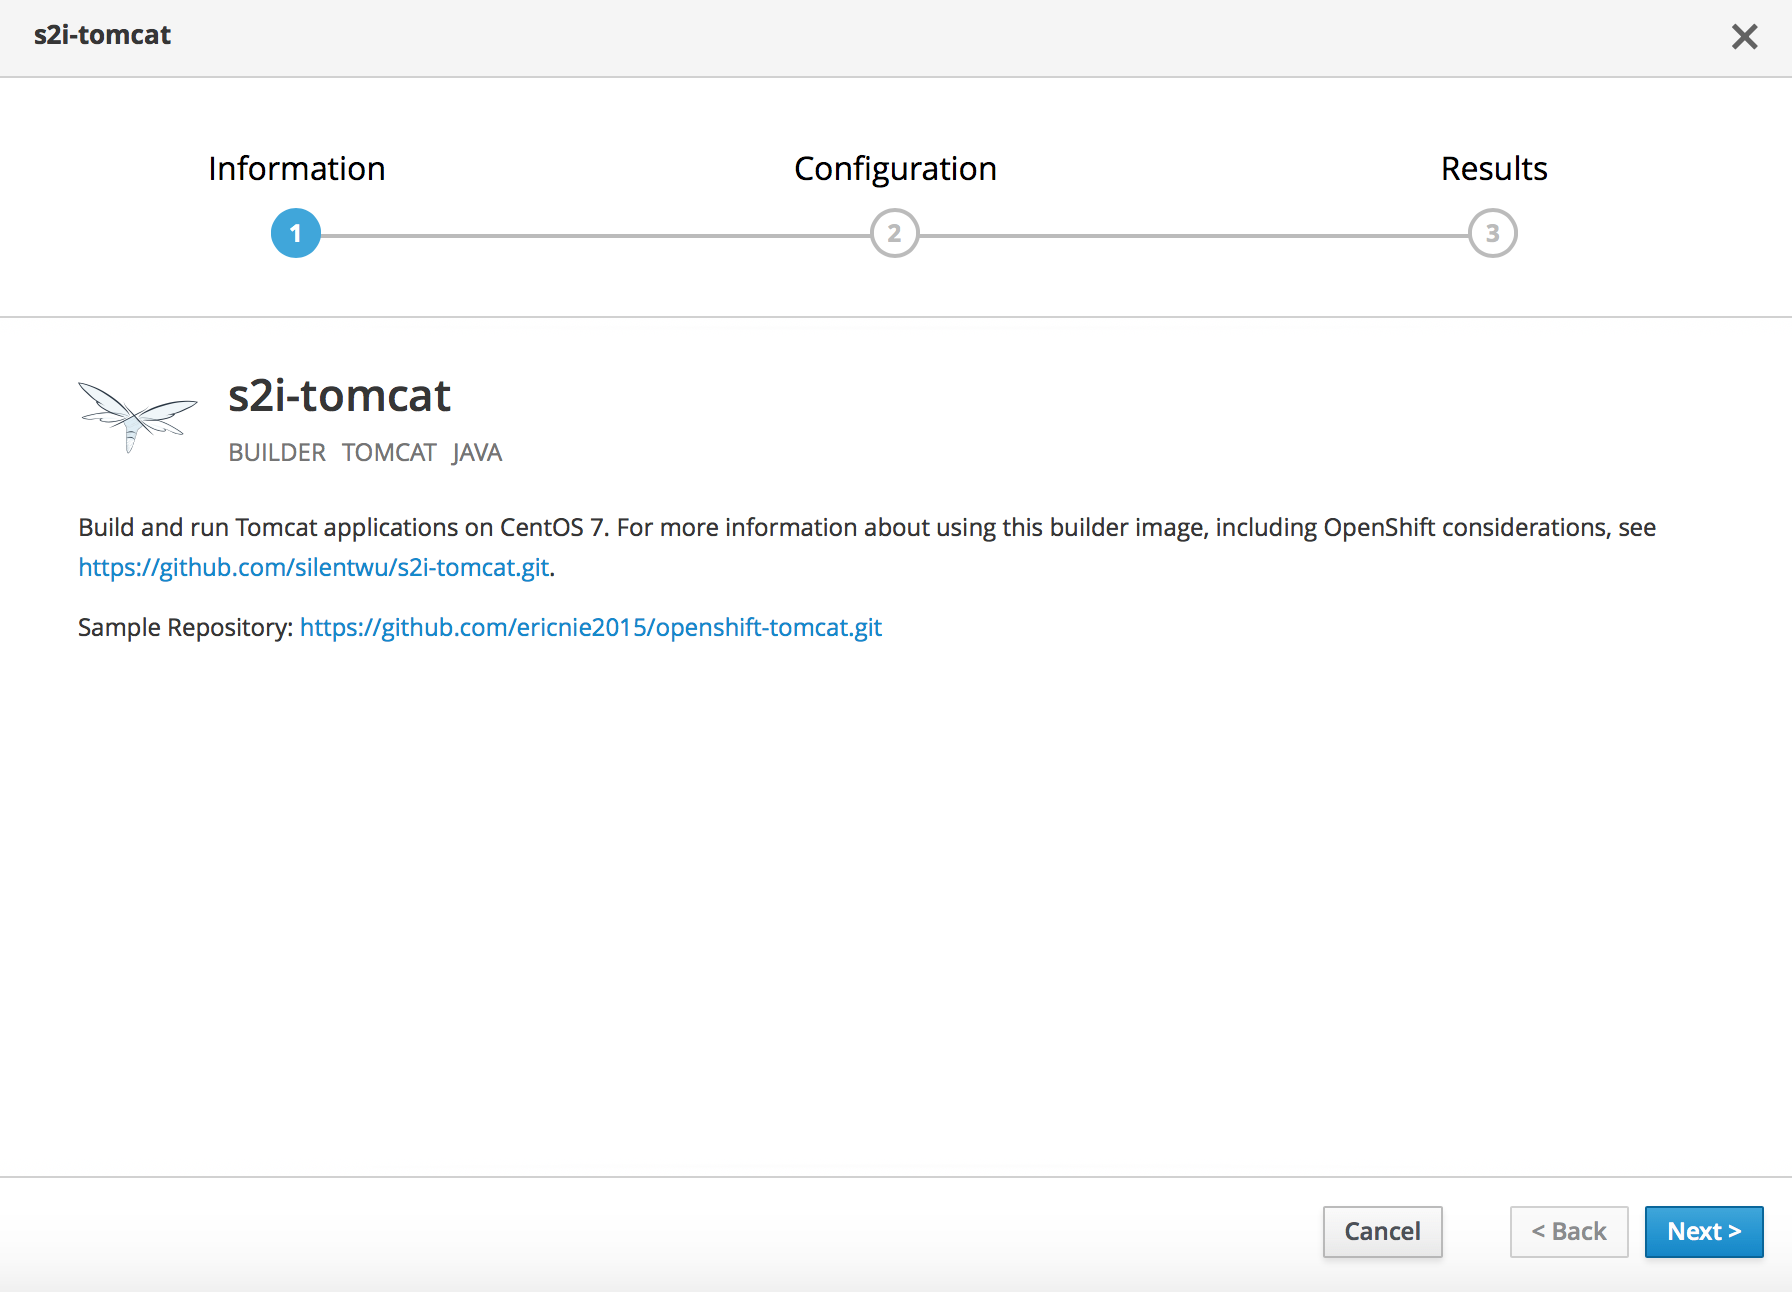
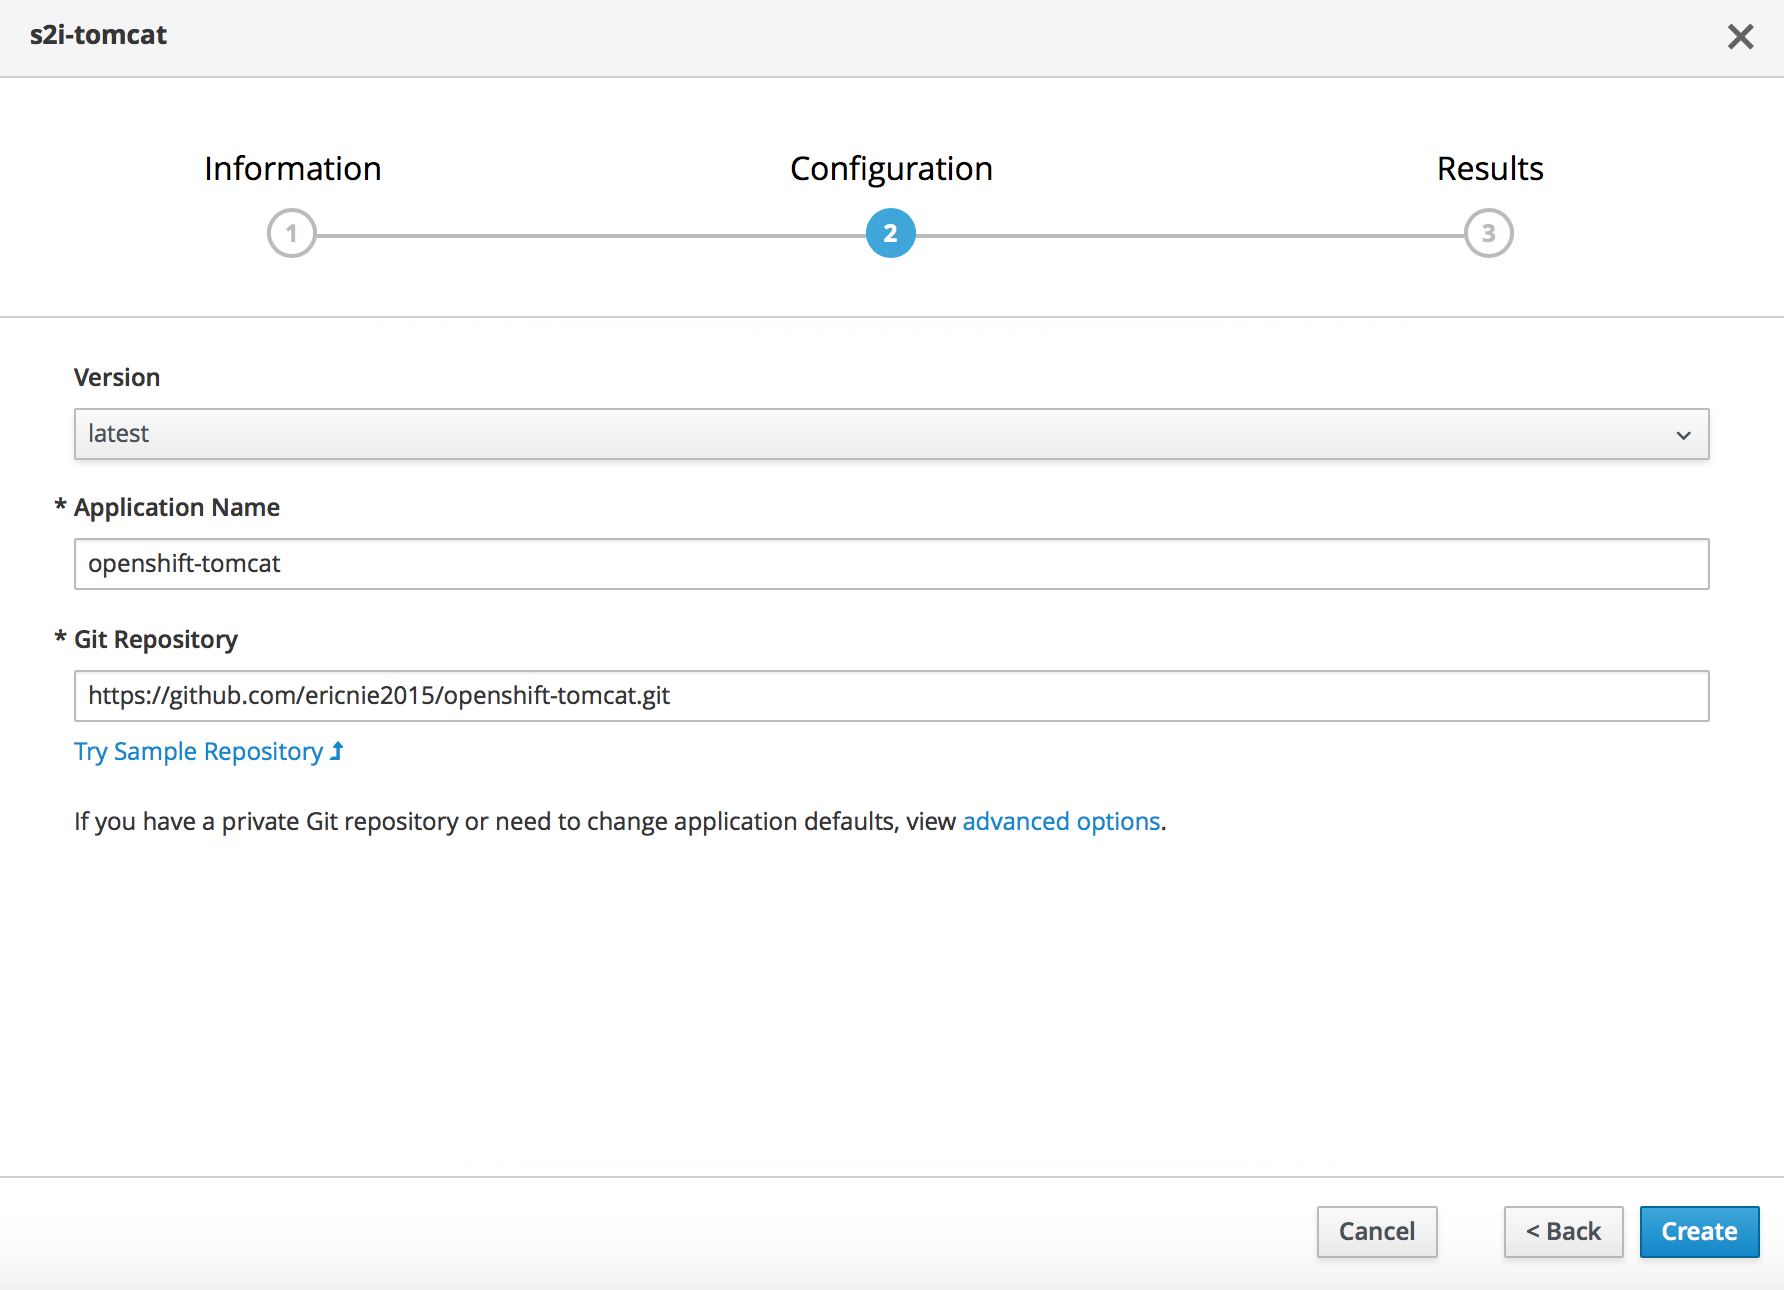
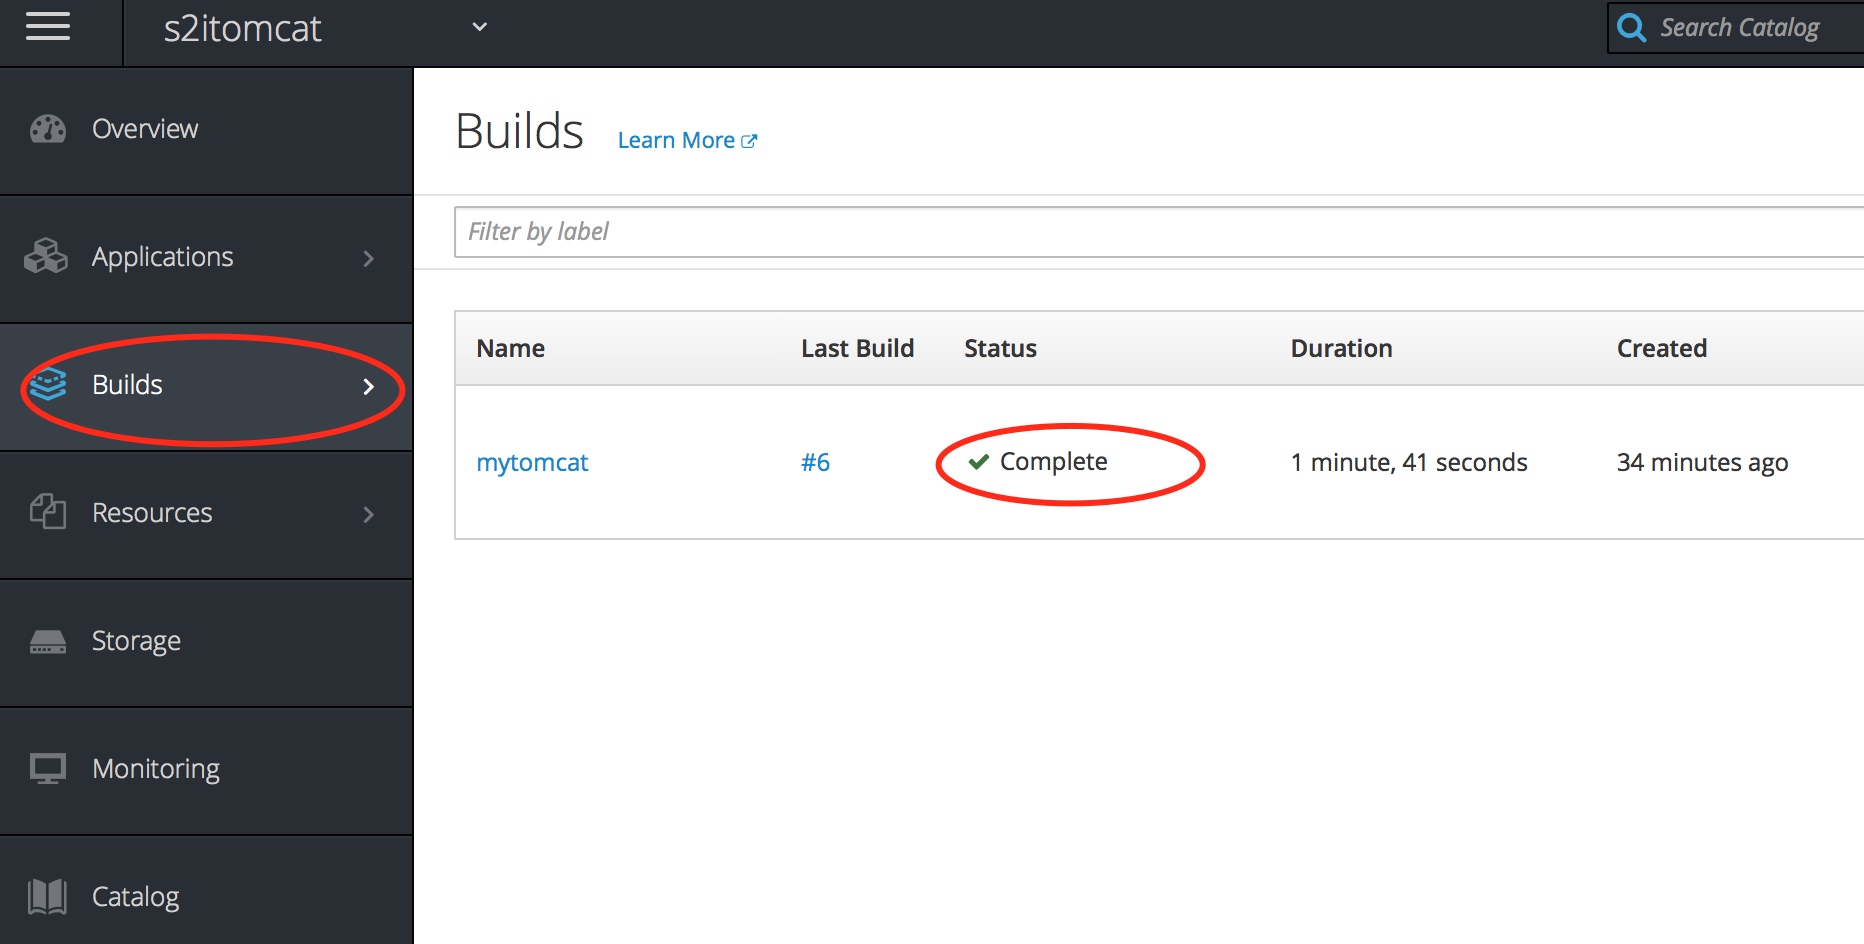
在image Stream中可以看到构建的镜像。
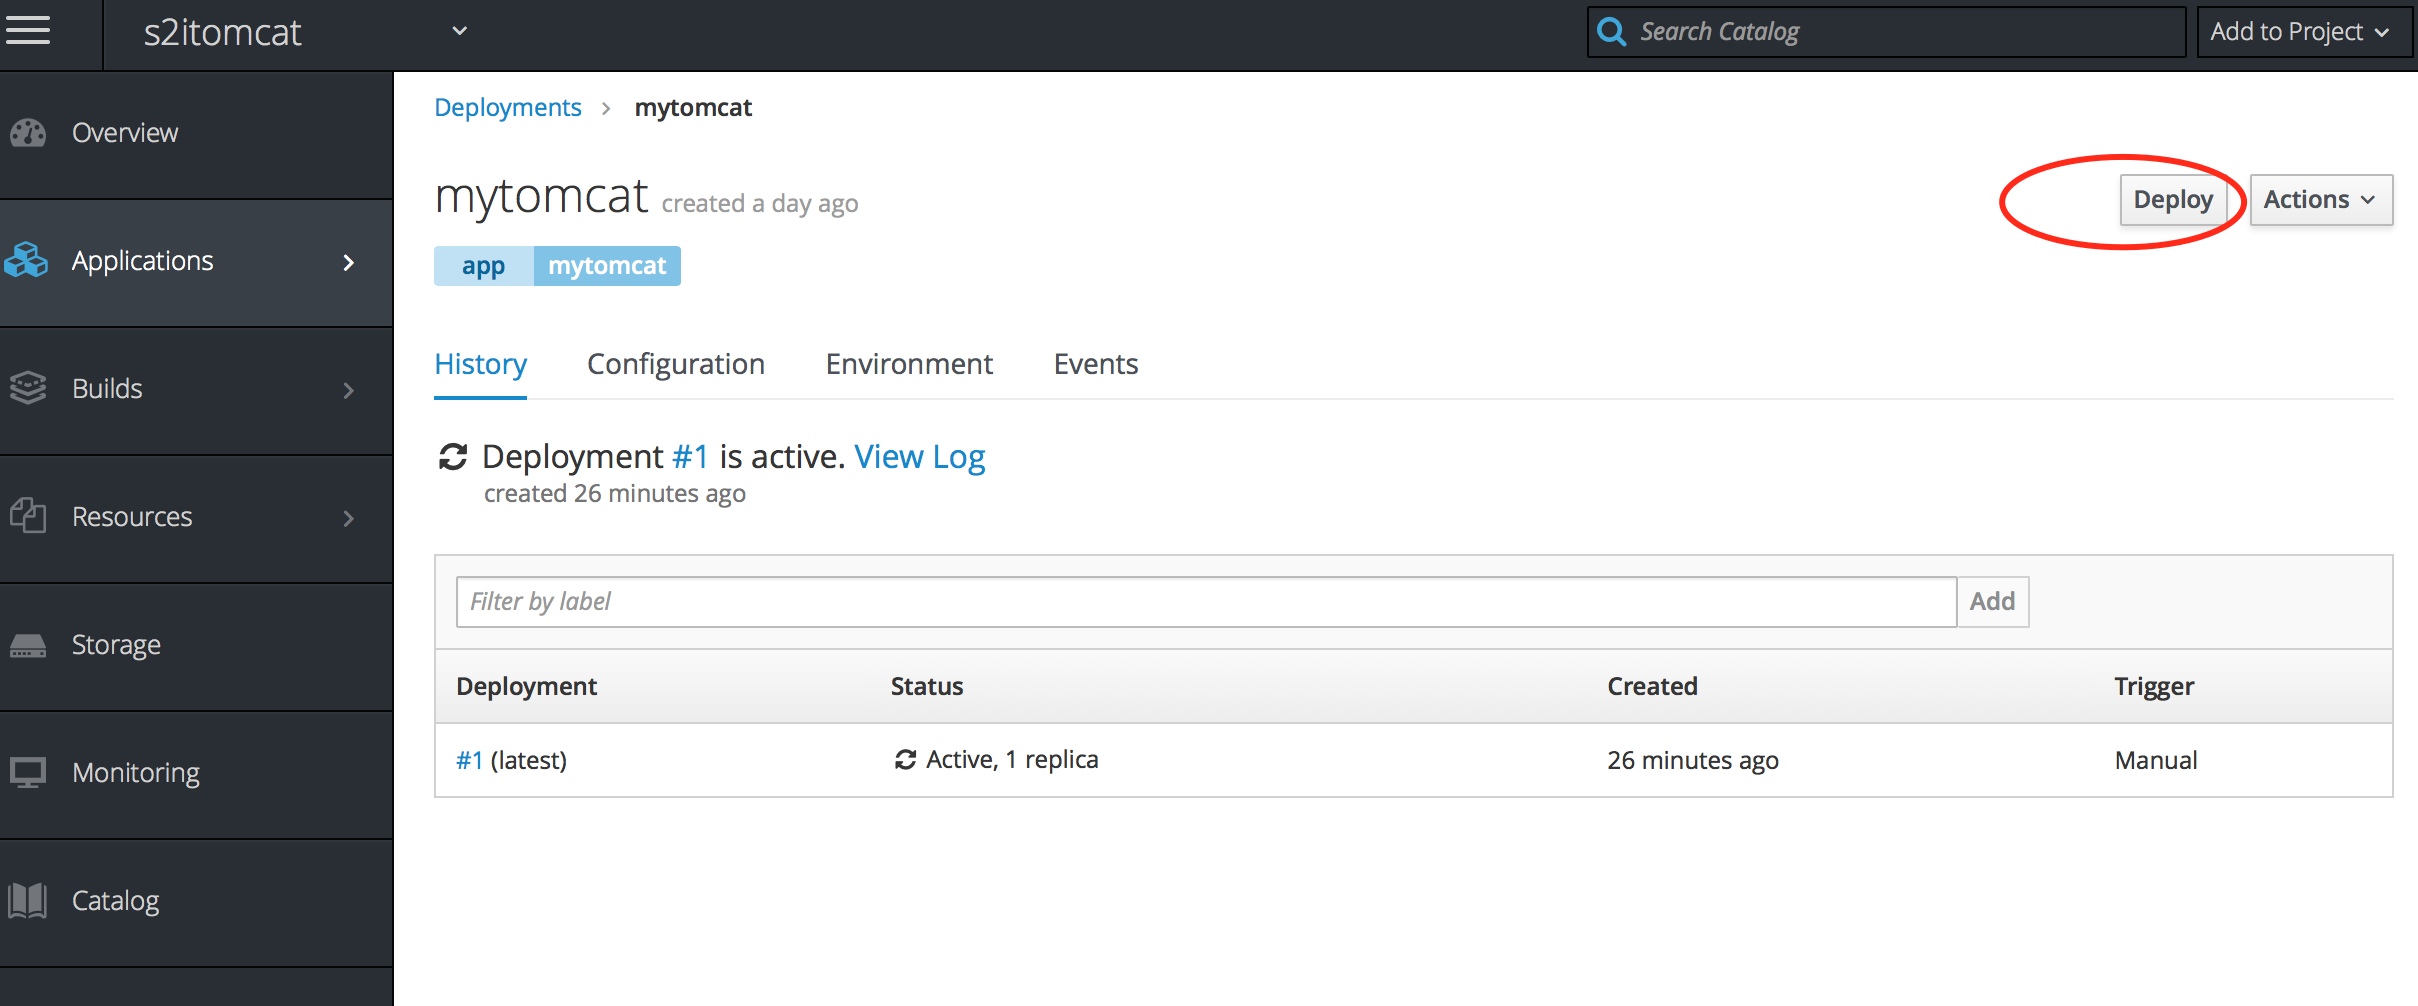
注意: 这里又想半天,折腾啊。。。
build过程只是建立镜像和push镜像,但并不会部署deployment和services,因此需要deploy一下应用
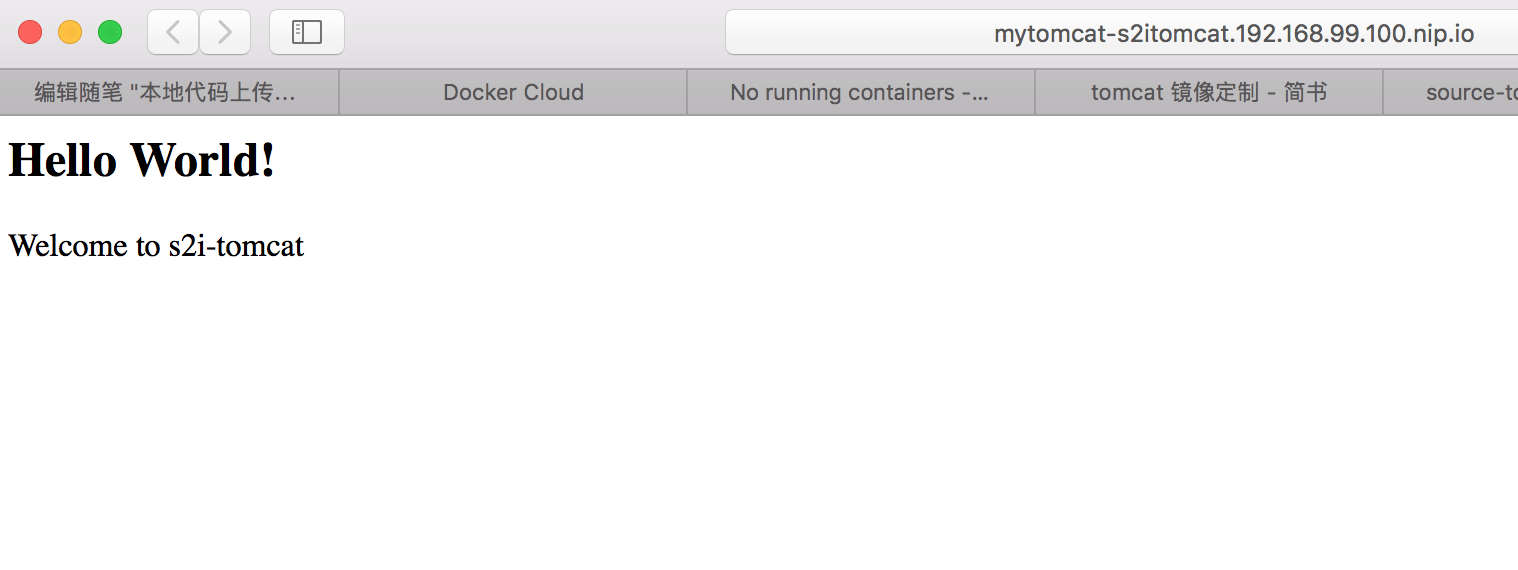
应用访问
8.客户化标准镜像
针对应用需要修改配置,放入第三方jar包以及和应用相关的配置,可以放在源代码库中,比如
ericdeMacBook-Pro:minishift ericnie$ tree openshift-tomcat

openshift-tomcat

├── README.md

├── config

│   └── catalina.sh

├── pom.xml

└── src

    └── main

        └── webapp

            ├── WEB-INF

            │   └── web.xml

            └── index.jsp
修改的catalina.sh以及第三方的jar包和配置文件可以放在这个目录下
然后修改assemble文件,加入覆盖语句即可
cp /opt/s2i/destination/src/config/catalina.sh /tomcat/bin/catalina.sh
OpenShift应用镜像构建(1) S2I tomcat 镜像定制的更多相关文章
- 构建自己的Tomcat镜像
在很多情况下,我们会不满足于官方提供的Tomcat镜像.比如官方镜像的时区为UTC时间,并不是北京时间:再比如在特定硬件环境下,jdk的随机数生成器初始化过慢问题.此时,我们就会考虑构建自己的Tomc ...
- 四:(之四)基于已有镜像构建自己的Docker镜像
4构建自己的Docker镜像 4.1常用命令: 等同于docker commit 将一个被改变的容器创建成一个新的image 等同于docker build 通过Dockerfile创建一个image ...
- docker dockerfile构建自己的tomcat镜像
文件 1.apache-tomcat-8.5.24.tar.gz, jdk-8u151-linux-x64.tar.gz Dockerfile文件: FROM centosWORKDIR /usrCO ...
- 基于官方mysql镜像构建自己的mysql镜像
参考文章:https://www.jb51.net/article/115422.htm搭建步骤 1.首先创建Dckerfile: 1 2 3 4 5 6 7 8 9 10 11 12 FROM my ...
- 官方Tomcat镜像Dockerfile分析及镜像使用
官方Tomcat镜像 地址:https://hub.docker.com/_/tomcat/ 镜像的Full Description中,我们可以得到许多信息,这里简单介绍下: Supported ta ...
- Docker镜像构建之Dockerfile
在 Docker 中构建镜像最常用的方式就是使用 Dockerfile.Dockerfile 是一个用来构建镜像的文本文件. 官方文档:https://docs.docker.com/engine/r ...
- centos7创建docker tomcat镜像
1 准备宿主系统 准备一个 CentOS 7操作系统,具体要求如下: 必须是 64 位操作系统 建议内核在 3.8 以上 通过以下命令查看您的 CentOS 内核: 1 # uname -r 2 安装 ...
- OpenShift应用镜像构建(2) - 链式构建
Openshift对于应用构建提供了三种模式 从应用的源代码构建并部署,Openshift通过一个S2I的构建过程编译打包并实现发布,具体可以参考 https://www.cnblogs.com/er ...
- OpenShift应用镜像构建(4) - fabric8-maven-plugin
适合开发的构建fabric8-maven-plugin 在项目过程中越来越多的出现在开发阶段就需要把部分微服务直接做容器化发布,然后自己的代码还需要和这些发布后的微服务进行调用的开发过程,这个阶段基本 ...
随机推荐
- 如何在本地用vs调试微信接口
这段时间在研究微信,看了网上很多都是把项目发布之后在服务器上调试,可以我想可以直接在vs上面设置断点调试 刚开始才用 http://www.cnblogs.com/hanzhaoxin/p/45186 ...
- Geoserver发布缓存切片(制定Gridsets)
EPSG:4326 Level Pixel Size Scale Name Tiles 0 1: 2 x 1 1 1: 4 x 2 2 1: 8 x 4 3 1: 16 x 8 4 ...
- 【Spring事务的事务属性】
大家都知道,Spring的声明式事务是通过事务属性来定义的,而spring的事务属性包含了5个方面:传播行为,隔离级别,是否只读,事务超时,回滚规则: 传播行为 传播行为,是属于事务边界相关的属性,定 ...
- css设置div等标签背景半透明
三种方式: 1. background-color: transparent; 直接设置背景为透明 2.这种是子元素也会跟着变成半透明 /* 背景半透明,1为不透明 */ opacity: 0.5; ...
- linux命令(6):tar命令
压缩方法:tar zcvf test.tar.gz test [表示把文件夹目录压缩成test.tar.gz文件保存] 解压方法:tar zxvf test.tar.gz –C /home [表示解压 ...
- MITx 创业101 寻找你的顾客
来自MITx的创业课 步骤一 市场分割(Market Segmentation) 头脑风暴所有可能的市场,关注可能性 寻找最终用户(End User)——会使用你的产品的用户,但不一定会付钱 思考产品 ...
- 山东BOSS性能压力测试
1. 概述 在山东BOSS性能压力测试过程中,发现脚本对于整个压力测试过程的重要性,一个压力测试脚本录制和编辑修改得怎么样直接影响后面压力测试的执行.通常情况下,脚本应尽可能的精简,就像写代码一样.针 ...
- 开源游戏地图编辑器MarbleMap
开源游戏地图编辑器MarbleMap MIT协议,MarbleMap是一款as3开发的游戏地图编辑器,他免费开源,同时支持Cocos2d-x坐标系和AS3坐标系,功能丰富,不过是一款新推出的开源项目, ...
- VS2015运行 cordova 时候提示无法运行解决
出现此问题的原因是在于npm程序损坏了.vs调用的npm程序并不是在node安装目录下的npm,而是在: C:\Users\用户名\AppData\Roaming\Microsoft\VisualSt ...
- 转:智能模糊测试工具 Winafl 的使用与分析
本文为 椒图科技 授权嘶吼发布,如若转载,请注明来源于嘶吼: http://www.4hou.com/technology/2800.html 注意: 函数的偏移地址计算方式是以IDA中出现的Imag ...