自定义控件CustomAlertView
【记录】【完整代码最下】
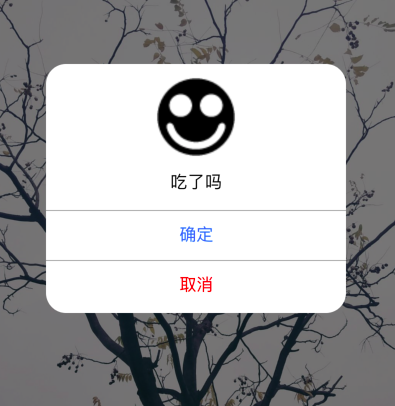
效果如下:
可行性分析:
由于系统自带的UIAlertView样式简单,只有两种样式,想要理想的样式就要自定义控件了
文件名取为:CustomAlertView
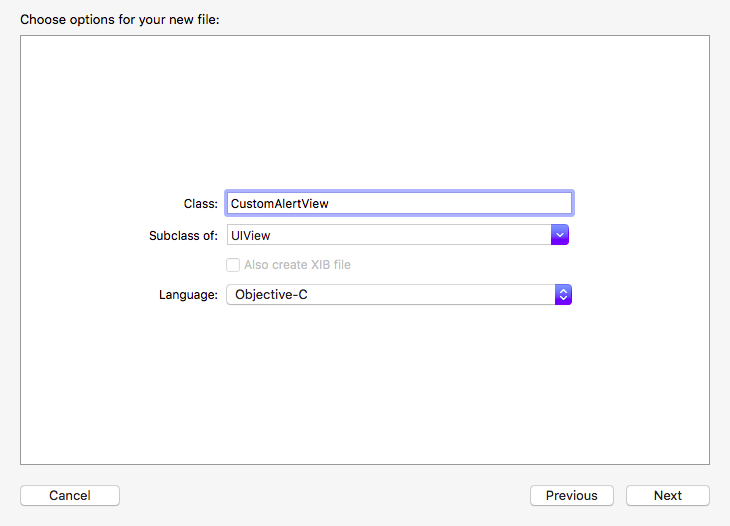
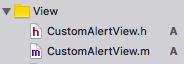
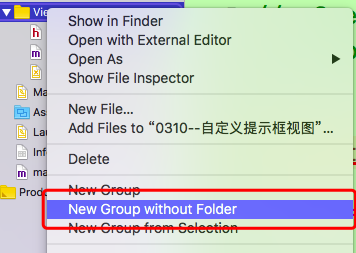
创建文件如下(大型项目最好把全部的view都放进一个group中)
接下来要定义AlertView的界面,用xib来直接拖取控件更加方便
1.创建xib文件
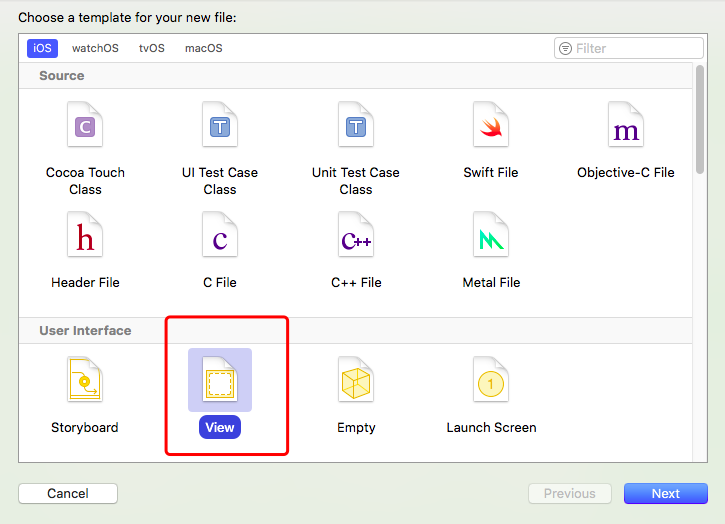
文件名要跟类名一致(方便操作)

2.在xib文件里面直接拖取控件
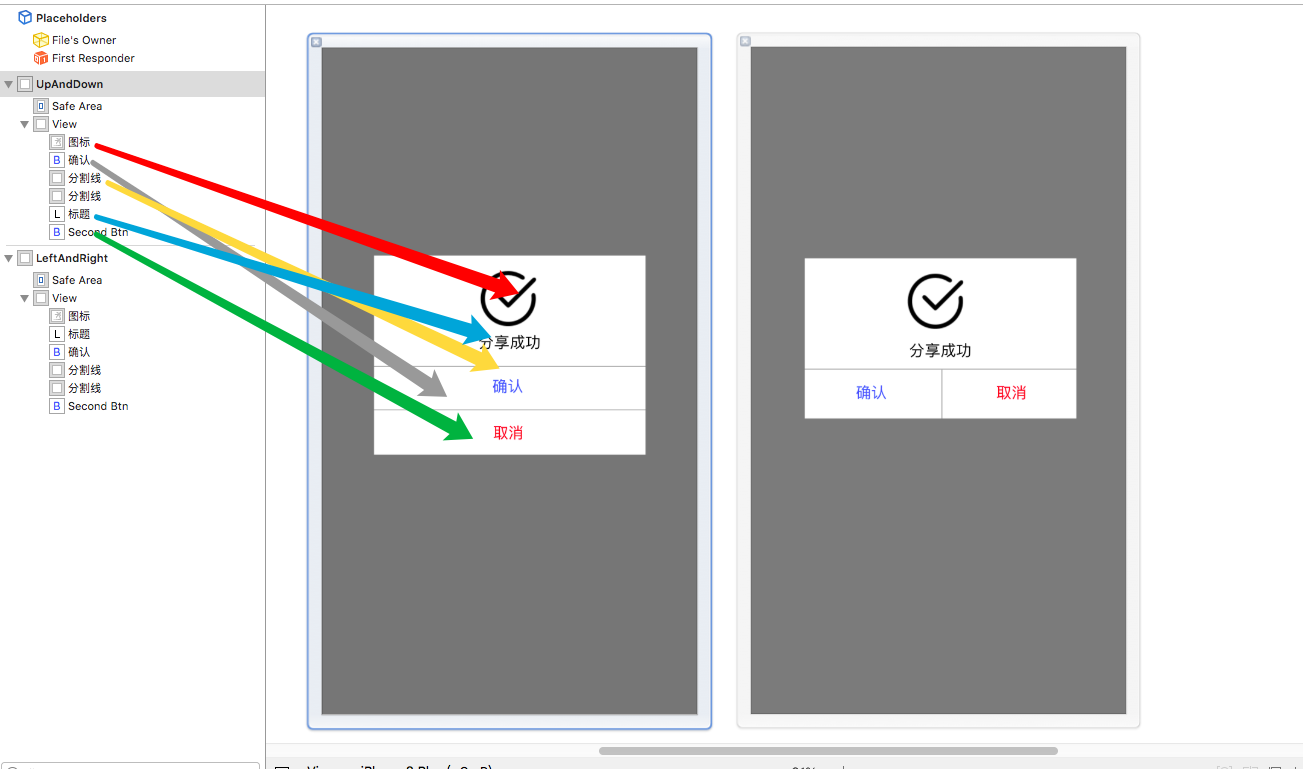
对应的就是这样子 ,把对应的控件名称改成能够清楚看出来的
因为是模仿系统的样式,布局了左右btn样式和上下btn
3.修改class的值为类名 两个都要

4.将如图框起来的view的背景色改成
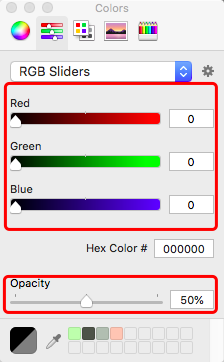
5.效果图中的提示框圆角效果
这个效果在xib中设置,要选中这后面的view
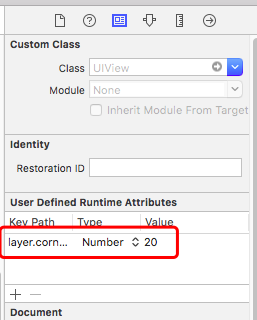
属性名称:layer.cornerRadius
6.在CustomAlertView类中定义一个类方法
这个类方法是一个对外的接口,当外部要使用自定义类创建一个框架时就可以直接调用。
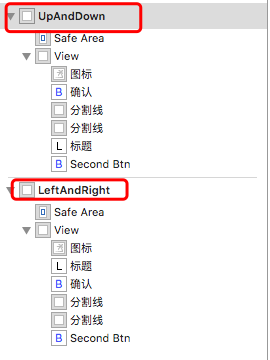
因为我在xib文件里面的创建视图的顺序是先 上下型 再左右型的,因此可以枚举出两种类型的视图。
- 1 #import <UIKit/UIKit.h>
- 2
- 3 typedef enum{
- 4 kCustomAlertViewSytleUpAndDown,//默认=0
- 5 kCustomAlertViewSytleLeftAndRight//默认=1
- 6 }kCustomAlertViewSytle;
- 7
- 8
- 9 @interface CustomAlertView : UIView
- 10
- 11 +(CustomAlertView *)alertViewWithImagename:(NSString *)imgName andTitle:(NSString *)title andSytle:(kCustomAlertViewSytle)sytle;
- 12
- 13
- 14
- 15 @end
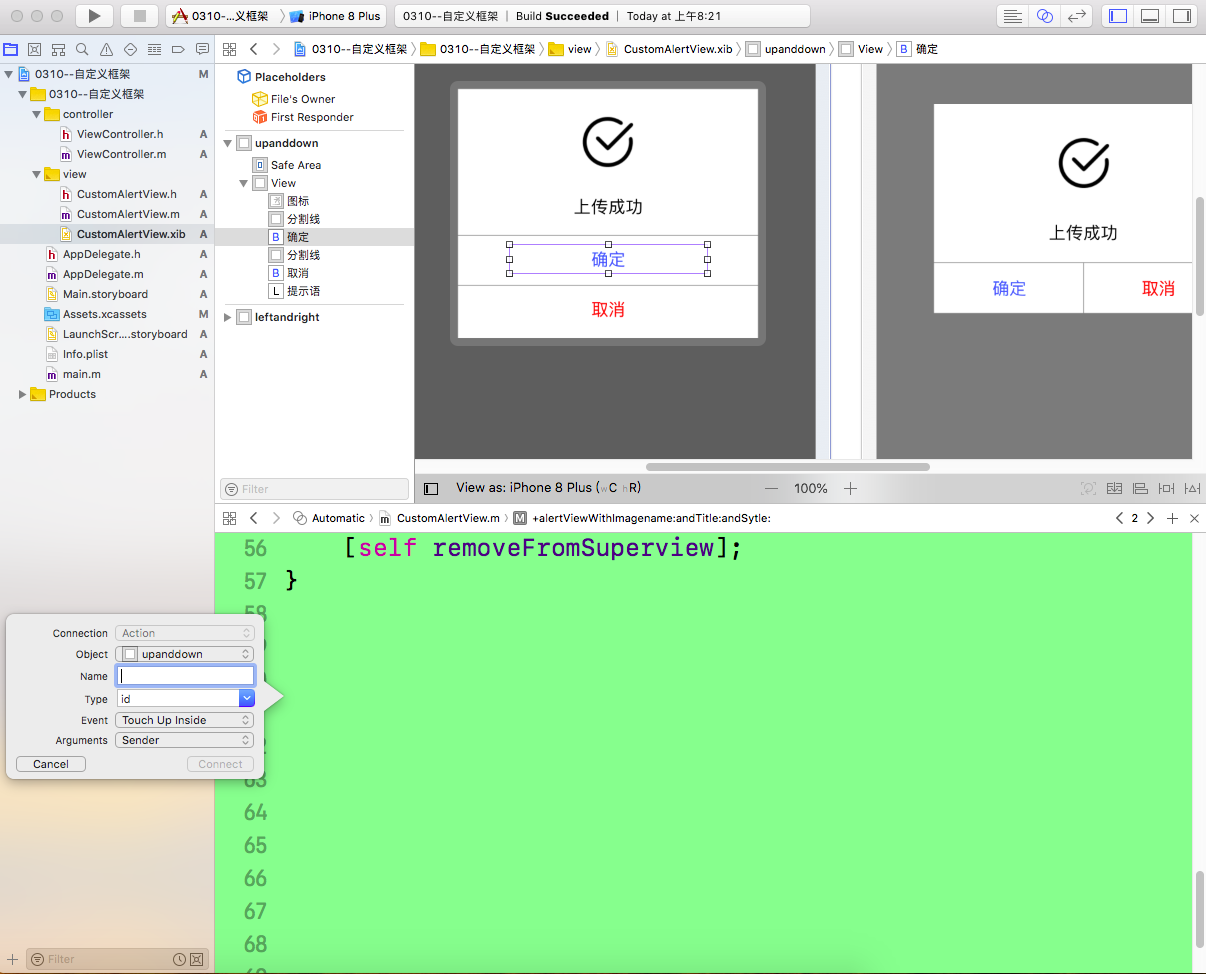
7.在CustomAlertView.m文件中读取xib中的自定义控件视图
定义了类方法,下一步在.m文件中实现方法,在实现方法过程中发现要用到xib中的控件属性
因此,在xib中拖属性添加在CustomAlertView.m文件中

虽然我在xib中创建的视图是两套,但是其中的控件都是一一对应的,因此每个属性可以关联两个控件(这是特殊情况,一般一个xib只创建一个视图)
接下来读取xib文件。用到的方法是
- (nullable NSArray *)loadNibNamed:(NSString *)name owner:(nullable id)owner options:(nullable NSDictionary *)options;
注意到,这个方法读出来的返回值是一个数组,xib文件中如果有多个视图,那么读出来数组的顺序就跟下图的顺序一样。

实现代码如下:
- 1 +(CustomAlertView *)alertViewWithImagename:(NSString *)imgName andTitle:(NSString *)title andSytle:(kCustomAlertViewSytle)sytle{
- 2 //从xib中读取视图数组
- 3 NSArray *arr = [[NSBundle mainBundle]loadNibNamed:@"CustomAlertView" owner:nil options:nil];
- 4 //根据sytle值读取数组中的第几个
- 5 CustomAlertView *aCAV = [arr objectAtIndex:sytle];
- 6 //把传过来的图片名称和标题名称赋值
- 7 //要先判断是否为空。若为空则默认xib中已设置的
- 8 if (imgName != nil) {
- 9 [aCAV.iconImageView setImage:[UIImage imageNamed:imgName]];
- 10 }
- 11 if (title != nil) {
- 12 [aCAV.titleLabel setText:title];
- 13 }
- 14
- 15
- 16 return aCAV;
- 17 }
8.让自定义提示框显示在界面上和消失(这里还没有给提示框的按钮设置事件)
显示界面有两种方法,一种是在创建完对象给一个参数值,再在方法实现中让addsubview,这种方法的实现相对简单。
实现代码如下:
- 1 -(void)showInView:(UIView *)fatherView{
- 2 [fatherView addSubview:self];
- 3 }
这种方法相对简单,作为一个自己使用的类来说是足够用的。但如果作为一个可导入的第三方工具类来说,就有点麻烦了。
如果能直接用一个方法就能让提示框显示在界面上肯定是更加方便,例如 [self show];
(其实我这里也没有理解清楚appdelegate)
***记得导入#import "AppDelegate.h"
- 1 - (void)show{
- 2 // 将这个视图添加到当前界面的最外层
- 3 // 找到当前的这个界面
- 4 // UIWindow -> 添加视图
- 5 // 1.找到应用程序唯一的代理对象AppDelegate
- 6 AppDelegate *appD = (AppDelegate *)[UIApplication sharedApplication].delegate;
- 7 //
- 8 // 2.获取程序的窗口
- 9 self.frame = [UIScreen mainScreen].bounds;
- 10 [appD.window addSubview:self];
- 11 }
还有一种:
- 1 -(void)show{
- 2
- 3 //找到当前这个界面的那个视图
- 4 //UIWindow->rootViewController->UIView ->添加视图
- 5 //1.找到应用程序的代理对象
- 6 AppDelegate *appD = (AppDelegate *)[UIApplication sharedApplication].delegate;
- 7
- 8 //2.找到窗口默认控制的那个根视图控制器
- 9 UIViewController *rootVC = appD.window.rootViewController;
- 10
- 11 //3.在这个控制器的视图上面添加一个子视图
- 12 self.frame = rootVC.view.bounds;
- 13 [rootVC.view addSubview:self];
- 14
- 15
- 16
- 17 }
消失:
- 1 - (void)dismiss{
- 2 [self removeFromSuperview];
- 3 }
这里先运行一下,在ViewController.m中任意创建图片
- 1 - (void)viewDidLoad {
- 2 [super viewDidLoad];
- 3 // Do any additional setup after loading the view, typically from a nib.
- 4 UIImageView *imgview = [[UIImageView alloc]initWithImage:[UIImage imageNamed:@"tree"]];
- 5 imgview.frame = self.view.bounds;
- 6 [self.view addSubview:imgview];
- 7 }
- 1 -(void)touchesBegan:(NSSet<UITouch *> *)touches withEvent:(UIEvent *)event{
- 2 CustomAlertView *alertView = [CustomAlertView alertViewWithImagename:@"ok" andTitle:@"吃了吗" andSytle:kCustomAlertViewSytleUpAndDown];
- 3
- 4 [alertView show];
- 5
- 6 }
还没设置按钮点击事件因此不会有反应。
9.接下来设置按钮的点击事件

创建的自定义提示框的按钮的title要可以改变,也可以在点击完按钮之后再完成点别的事件。
因为完成 这些事 是要在按钮被点击后执行的,因此 这些事的执行代码 应该在btndidclicked方法里面。
所以,要有2个block来保存数据,等到点击按钮的时候再执行。(也可以用通知或者delegate来做)
- 1 //定义两个block 用于接收外部传递过来的block的类型
- 2 typedef void (^SureBtnBlock)(void);
- 3 typedef void (^CancelBtnBlock)(void);
- 1 -(void)setSureBtnWithTitle:(NSString *)title andComlished:(SureBtnBlock)sureblock;
- 2
- 3 -(void)setCancelBtnWithTitle:(NSString *)title andComlished:(CancelBtnBlock)cancelblock;
- 1 -(void)setSureBtnWithTitle:(NSString *)title andComlished:(SureBtnBlock)sureblock{
- 2 //这里判断一下外部是否传title值
- 3 if (title != nil) {
- 4 [self.sureBtn setTitle:title forState:UIControlStateNormal];
- 5 }
- 6 //这里发现要用一个属性变量来保存住外部传过来的sureblock
- 7 self.sureblock = sureblock;
- 8 }
- 9
- 10 -(void)setCancelBtnWithTitle:(NSString *)title andComlished:(CancelBtnBlock)cancelblock{
- 11 if (title != nil) {
- 12 [self.cancelBtn setTitle:title forState:UIControlStateNormal];
- 13 }
- 14
- 15 self.cancelblock = cancelblock;
- 16
- 17
- 18
- 19 }
- 1 //block 用copy
- 2 @property (nonatomic , copy) SureBtnBlock sureblock;
- 3
- 4 @property (nonatomic , copy) CancelBtnBlock cancelblock;
根据上面的分析,在btn的点击事件中执行外部传来的block
- 1 - (IBAction)sureBTNdidClicked:(id)sender {
- 2 //先让提示框消失
- 3 [self dismiss];
- 4 //执行一下block
- 5 self.sureblock();
- 6 }
- 7
- 8
- 9
- 10 - (IBAction)cancelBTNdidClicked:(id)sender {
- 11 //先让提示框消失
- 12 [self dismiss];
- 13 //执行一下block
- 14 self.cancelblock();
- 15
- 16 }
接下来我在viewcontroller的触摸事件中配置了提示框
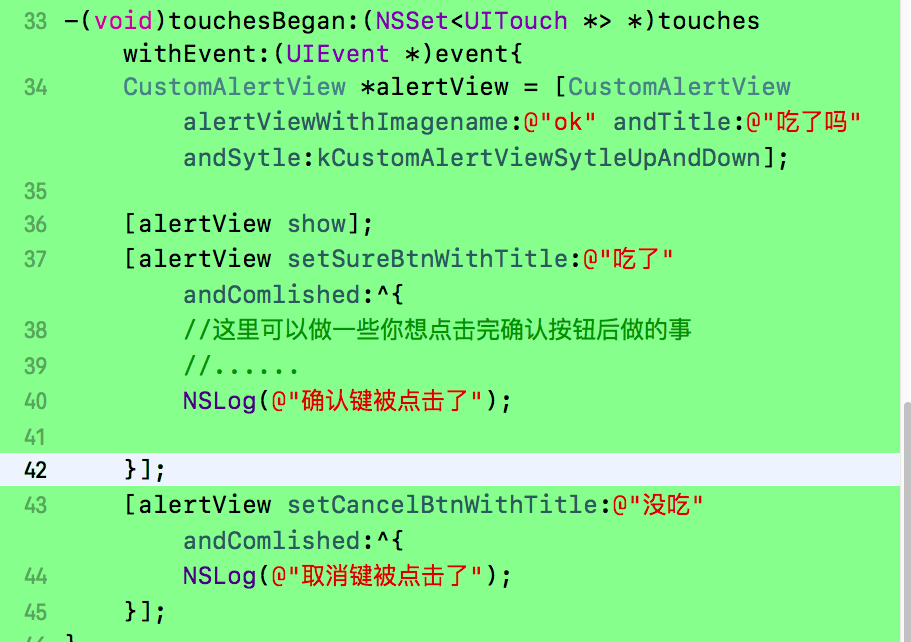
效果如下:
附源代码
- 1 //
- 2 // CustomAlertView.h
- 3 // 0310--自定义框架
- 4 //
- 5 // Created by MyMac on 2019/3/12.
- 6 // Copyright 2019年 MyMac. All rights reserved.
- 7 //
- 8
- 9 #import <UIKit/UIKit.h>
- 10 //定义两个block 用于接收外部传递过来的block的类型
- 11 typedef void (^SureBtnBlock)(void);
- 12 typedef void (^CancelBtnBlock)(void);
- 13
- 14
- 15 typedef enum{
- 16 kCustomAlertViewSytleUpAndDown,
- 17 kCustomAlertViewSytleLeftAndRight
- 18 }kCustomAlertViewSytle;
- 19
- 20
- 21 @interface CustomAlertView : UIView
- 22
- 23 +(CustomAlertView *)alertViewWithImagename:(NSString *)imgName andTitle:(NSString *)title andSytle:(kCustomAlertViewSytle)sytle;
- 24
- 25 -(void)show;
- 26
- 27 -(void)dismiss;
- 28
- 29 -(void)setSureBtnWithTitle:(NSString *)title andComlished:(SureBtnBlock)sureblock;
- 30
- 31 -(void)setCancelBtnWithTitle:(NSString *)title andComlished:(CancelBtnBlock)cancelblock;
- 32
- 33
- 34
- 35 @end
- 1 //
- 2 // CustomAlertView.m
- 3 // 0310--自定义框架
- 4 //
- 5 // Created by MyMac on 2019/3/12.
- 6 // Copyright 2019年 MyMac. All rights reserved.
- 7 //
- 8
- 9 #import "CustomAlertView.h"
- 10 #import "AppDelegate.h"
- 11 @interface CustomAlertView()
- 12 @property (weak, nonatomic) IBOutlet UIImageView *iconImageView;
- 13
- 14 @property (weak, nonatomic) IBOutlet UILabel *titleLabel;
- 15
- 16 @property (weak, nonatomic) IBOutlet UIButton *sureBtn;
- 17
- 18 @property (weak, nonatomic) IBOutlet UIButton *cancelBtn;
- 19
- 20 //block 用copy
- 21 @property (nonatomic , copy) SureBtnBlock sureblock;
- 22
- 23 @property (nonatomic , copy) CancelBtnBlock cancelblock;
- 24 @end
- 25
- 26
- 27
- 28 @implementation CustomAlertView
- 29 +(CustomAlertView *)alertViewWithImagename:(NSString *)imgName andTitle:(NSString *)title andSytle:(kCustomAlertViewSytle)sytle{
- 30 //从xib中读取视图数组
- 31 NSArray *arr = [[NSBundle mainBundle]loadNibNamed:@"CustomAlertView" owner:nil options:nil];
- 32 //根据sytle值读取数组中的第几个
- 33 CustomAlertView *aCAV = [arr objectAtIndex:sytle];
- 34 //把传过来的图片名称和标题名称赋值
- 35 //要先判断是否为空。若为空则默认xib中已设置的
- 36 if (imgName != nil) {
- 37 [aCAV.iconImageView setImage:[UIImage imageNamed:imgName]];
- 38 }
- 39 if (title != nil) {
- 40 [aCAV.titleLabel setText:title];
- 41 }
- 42
- 43
- 44 return aCAV;
- 45 }
- 46
- 47
- 48
- 49 -(void)show{
- 50 //首先找到唯一控制这个viewcontroller的appdelegate
- 51 AppDelegate *delegate = (AppDelegate *)[UIApplication sharedApplication].delegate;
- 52 //找到默认控制的窗口
- 53 [delegate.window addSubview:self];
- 54
- 55 }
- 56
- 57
- 58 -(void)dismiss{
- 59 [self removeFromSuperview];
- 60 }
- 61
- 62
- 63
- 64 - (IBAction)sureBTNdidClicked:(id)sender {
- 65 //先让提示框消失
- 66 [self dismiss];
- 67 //执行一下block
- 68 self.sureblock();
- 69 }
- 70
- 71
- 72
- 73 - (IBAction)cancelBTNdidClicked:(id)sender {
- 74 //先让提示框消失
- 75 [self dismiss];
- 76 //执行一下block
- 77 self.cancelblock();
- 78
- 79 }
- 80
- 81 -(void)setSureBtnWithTitle:(NSString *)title andComlished:(SureBtnBlock)sureblock{
- 82 //这里判断一下外部是否传title值
- 83 if (title != nil) {
- 84 [self.sureBtn setTitle:title forState:UIControlStateNormal];
- 85 }
- 86 //这里发现要用一个属性变量来保存住外部传过来的sureblock
- 87 self.sureblock = sureblock;
- 88 }
- 89
- 90 -(void)setCancelBtnWithTitle:(NSString *)title andComlished:(CancelBtnBlock)cancelblock{
- 91 if (title != nil) {
- 92 [self.cancelBtn setTitle:title forState:UIControlStateNormal];
- 93 }
- 94
- 95 self.cancelblock = cancelblock;
- 96 }
- 97
- 98
- 99
- 100 @end
- 1 //
- 2 // ViewController.m
- 3 // 0310--自定义框架
- 4 //
- 5 // Created by MyMac on 2019/3/12.
- 6 // Copyright 2019年 MyMac. All rights reserved.
- 7 //
- 8
- 9 #import "ViewController.h"
- 10 #import "CustomAlertView.h"
- 11 @interface ViewController ()
- 12
- 13 @end
- 14
- 15 @implementation ViewController
- 16
- 17 - (void)viewDidLoad {
- 18 [super viewDidLoad];
- 19 // Do any additional setup after loading the view, typically from a nib.
- 20 UIImageView *imgview = [[UIImageView alloc]initWithImage:[UIImage imageNamed:@"tree"]];
- 21 imgview.frame = self.view.bounds;
- 22 [self.view addSubview:imgview];
- 23 }
- 24
- 25
- 26
- 27
- 28 - (void)didReceiveMemoryWarning {
- 29 [super didReceiveMemoryWarning];
- 30 // Dispose of any resources that can be recreated.
- 31 }
- 32
- 33 -(void)touchesBegan:(NSSet<UITouch *> *)touches withEvent:(UIEvent *)event{
- 34 CustomAlertView *alertView = [CustomAlertView alertViewWithImagename:@"ok" andTitle:@"吃了吗" andSytle:kCustomAlertViewSytleUpAndDown];
- 35
- 36 [alertView show];
- 37 [alertView setSureBtnWithTitle:@"吃了" andComlished:^{
- 38 //这里可以做一些你想点击完确认按钮后做的事
- 39 //......
- 40 NSLog(@"确认键被点击了");
- 41
- 42 }];
- 43 [alertView setCancelBtnWithTitle:@"没吃" andComlished:^{
- 44 NSLog(@"取消键被点击了");
- 45 }];
- 46 }
- 47
- 48
- 49
- 50 @end
自定义控件CustomAlertView的更多相关文章
- android自定义控件一站式入门
自定义控件 Android系统提供了一系列UI相关的类来帮助我们构造app的界面,以及完成交互的处理. 一般的,所有可以在窗口中被展示的UI对象类型,最终都是继承自View的类,这包括展示最终内容的非 ...
- ASP.NET MVC学习之母版页和自定义控件的使用
一.母板页_Layout.cshtml类似于传统WebForm中的.master文件,起到页面整体框架重用的目地1.母板页代码预览 <!DOCTYPE html> <html> ...
- C# 自定义控件VS用户控件
1 自定义控件与用户控件区别 WinForm中, 用户控件(User Control):继承自 UserControl,主要用于开发 Container 控件,Container控件可以添加其他Con ...
- 自定义控件之 圆形 / 圆角 ImageView
一.问题在哪里? 问题来源于app开发中一个很常见的场景——用户头像要展示成圆的: 二.怎么搞? 机智的我,第一想法就是,切一张中间圆形透明.四周与底色相同.尺寸与头像相同的蒙板图片,盖在 ...
- 如何开发FineReport的自定义控件?
FineReport作为插件化开发的报表软件,有些特殊需求的功能需要自己开发,开发的插件包帆软官方有提提供,可以去帆软论坛上找,本文将主要介绍如何开发一个自定义控件,这里讲讲方法论. 第一步:实例化一 ...
- WPF自定义控件第二 - 转盘按钮控件
继之前那个控件,又做了一个原理差不多的控件.这个控件主要模仿百度贴吧WP版帖子浏览界面左下角那个弹出的按钮盘.希望对大家有帮助. 这个控件和之前的也差不多,为了不让大家白看,文章最后发干货. 由于这个 ...
- 【Win 10应用开发】AdaptiveTrigger在自定义控件中是可以触发的
前些天,看到有网友给我留言,说AdaptiveTrigger在自定义控件(模板化控件)中不能触发.因为当时我正在写其他的代码,就没有去做实验来验证,于是我就给这位网友提了使用GotoVisualSta ...
- WPF自定义控件与样式(3)-TextBox & RichTextBox & PasswordBox样式、水印、Label标签、功能扩展
一.前言.预览 申明:WPF自定义控件与样式是一个系列文章,前后是有些关联的,但大多是按照由简到繁的顺序逐步发布的等,若有不明白的地方可以参考本系列前面的文章,文末附有部分文章链接. 本文主要是对文本 ...
- Android自定义控件之自定义ViewGroup实现标签云
前言: 前面几篇讲了自定义控件绘制原理Android自定义控件之基本原理(一),自定义属性Android自定义控件之自定义属性(二),自定义组合控件Android自定义控件之自定义组合控件(三),常言 ...
随机推荐
- Kubernetes Deployment 源码分析(一)
概述Deployment 基础创建 DeploymentReplicaSet滚动更新失败回滚历史版本回滚其他特性小结 概述 Deployment 是最常用的 Kubernetes 原生 Workloa ...
- Redis INFO CPU 信息详解
一.INFO CPU 通过INFO CPU命令可以查看Redis进程对于CPU的使用情况,如下: 这几个字段的含义如下所示: used_cpu_sys: System CPU consumed by ...
- node 读取文件内容并响应
node 读取文件内容并响应 const http = require('http'); const fs = require('fs') //创建 Server const server = htt ...
- adduser vs useradd
Always use adduser (and deluser when deleting users) when you're creating new users from the command ...
- 《Python语言程序设计》【第1周】Python基本语法元素
实例:温度转化 #TempConvert.py 单行注释 ''' TemConvert.py ''' # 多行注释 TempStr = input("请输入带有符号的温度值: ") ...
- 测试开发【提测平台】分享14-Vue图标Icon几种用法并利用其一优化菜单
微信搜索[大奇测试开],关注这个坚持分享测试开发干货的家伙. 回归主线更新,由于本次知识点只有一个,就不给思维导图了,在上系列测试平台开发实践中主要学习了页面直接的转跳方法和远程搜索的如何做,最终实现 ...
- Python 爬取 拉钩
... from urllib import request from urllib import parse from urllib.error import URLError import jso ...
- python实现分水岭算法
目录: 问题:分水岭算法对图像分割很有作用,怎么把对象分割开来的?分水岭算法是比较完美的分割,跟前面的讲的轮廓不一样! (一)原理 (二)实现 (一)原理 opencv中的分水岭算法是基于距离变换的, ...
- 90-95年CPU功耗感知调度研究
最近读了三篇1990-1995年的通过调度来降低cpu能耗的文章[1] [2] [3],简单总结一下该年代单核CPU功耗感知的调度策略. Motivation 随着便携式设备逐渐兴起,人们对降低其功耗 ...
- vue 3 学习笔记 (六)——watch 、watchEffect 新用法
选项式API与之前写法相同,本篇文章主要通过 Options API 和 Composition API 对比 watch 的使用方法,让您快速掌握 vue3 中 watch 新用法.建议收藏! 一. ...