Python Scrapy 爬虫框架实例
之前有介绍 scrapy 的相关知识,但是没有介绍相关实例,在这里做个小例,供大家参考学习。
注:后续不强调python 版本,默认即为python3.x。
爬取目标
这里简单找一个图片网站,获取图片的先关信息。
该网站网址: http://www.58pic.com/c/
创建项目
终端命令行执行以下命令
scrapy startproject AdilCrawler
命令执行后,会生成如下结构的项目。

执行结果如下

如上图提示,cd 到项目下,可以执行 scrapy genspider example example.com 命令,创建 名为example,域名为example.com 的 爬虫文件。
编写items.py
这里先简单抓取图片的作者名称、图片主题等信息。

# -*- coding: utf-8 -*-

# Define here the models for your scraped items

#

# See documentation in:

# https://doc.scrapy.org/en/latest/topics/items.html

import scrapy

class AdilcrawlerItem(scrapy.Item):

    # define the fields for your item here like:

    # name = scrapy.Field()

    author = scrapy.Field()   # 作者

    theme = scrapy.Field()    # 主题
编写spider文件
进入AdilCrawler目录,使用命令创建一个基础爬虫类:
 scrapy genspider  thousandPic www.58pic.com

#  thousandPic为爬虫名,www.58pic.com为爬虫作用范围
执行命令后会在spiders文件夹中创建一个thousandPic.py的文件,现在开始对其编写:
# -*- coding: utf-8 -*-

import scrapy

# 爬虫 小试

class ThousandpicSpider(scrapy.Spider):

    name = 'thousandPic'

    allowed_domains = ['www.58pic.com']

    start_urls = ['http://www.58pic.com/c/']

    def parse(self, response):

        '''

        查看页面元素

         /html/body/div[4]/div[3]/div/a/p[2]/span/span[2]/text()

          因为页面中 有多张图,而图是以 /html/body/div[4]/div[3]/div[i]  其中i  为变量 作为区分的 ,所以为了获取当前页面所有的图

          这里 不写 i 程序会遍历 该 路径下的所有 图片。

        '''# author 作者

        # theme  主题

        author = response.xpath('/html/body/div[4]/div[3]/div/a/p[2]/span/span[2]/text()').extract()

        theme = response.xpath('/html/body/div[4]/div[3]/div/a/p[1]/span[1]/text()').extract()

        # 使用 爬虫的log 方法在控制台输出爬取的内容。

        self.log(author)

        self.log(theme)

        # 使用遍历的方式 打印出 爬取的内容,因为当前一页有20张图片。

        for i in range(1, 21):

            print(i,' **** ',theme[i - 1], ': ',author[i - 1] )
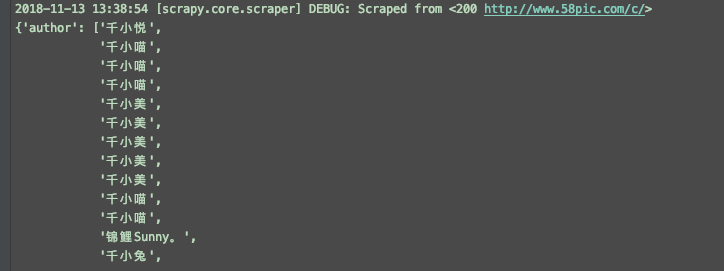
执行命令,查看打印结果
scrapy crawl thousandPic
结果如下,其中DEBUG为 log 输出。

代码优化
引入 item AdilcrawlerItem
# -*- coding: utf-8 -*-

import scrapy

# 这里使用 import 或是 下面from 的方式都行,关键要看 当前项目在pycharm的打开方式,是否是作为一个项目打开的,建议使用这一种方式。

import AdilCrawler.items as items

# 使用from 这种方式,AdilCrawler 需要作为一个项目打开。

# from AdilCrawler.items import AdilcrawlerItem

class ThousandpicSpider(scrapy.Spider):

    name = 'thousandPic'

    allowed_domains = ['www.58pic.com']

    start_urls = ['http://www.58pic.com/c/']

    def parse(self, response):

        '''

        查看页面元素

         /html/body/div[4]/div[3]/div/a/p[2]/span/span[2]/text()

          因为页面中 有多张图,而图是以 /html/body/div[4]/div[3]/div[i]  其中i  为变量 作为区分的 ,所以为了获取当前页面所有的图

          这里 不写 i 程序会遍历 该 路径下的所有 图片。

        '''

        item = items.AdilcrawlerItem()

        # author 作者

        # theme  主题

        author = response.xpath('/html/body/div[4]/div[3]/div/a/p[2]/span/span[2]/text()').extract()

        theme = response.xpath('/html/body/div[4]/div[3]/div/a/p[1]/span[1]/text()').extract()

        item['author'] = author

        item['theme']  = theme

        return item
保存结果到文件
执行命令如下
scrapy crawl thousandPic -o items.json
会生成如图的文件

再次优化,使用 ItemLoader 功能类
使用itemLoader ,以取代杂乱的extract()和xpath()。
代码如下:
# -*- coding: utf-8 -*-

import scrapy

from AdilCrawler.items import AdilcrawlerItem

# 导入 ItemLoader 功能类

from scrapy.loader import ItemLoader

# optimize  优化

# 爬虫项目优化

class ThousandpicoptimizeSpider(scrapy.Spider):

    name = 'thousandPicOptimize'

    allowed_domains = ['www.58pic.com']

    start_urls = ['http://www.58pic.com/c/']

    def parse(self, response):

        '''

        查看页面元素

         /html/body/div[4]/div[3]/div/a/p[2]/span/span[2]/text()

          因为页面中 有多张图,而图是以 /html/body/div[4]/div[3]/div[i]  其中i  为变量 作为区分的 ,所以为了获取当前页面所有的图

          这里 不写 i 程序会遍历 该 路径下的所有 图片。

        '''

        # 使用功能类 itemLoader,以取代 看起来杂乱的 extract() 和 xpath() ,优化如下

        i = ItemLoader(item = AdilcrawlerItem(),response = response )

        # author 作者

        # theme  主题

        i.add_xpath('author','/html/body/div[4]/div[3]/div/a/p[2]/span/span[2]/text()')

        i.add_xpath('theme','/html/body/div[4]/div[3]/div/a/p[1]/span[1]/text()')

        return i.load_item()
编写pipelines文件
默认pipelines.py 文件
# -*- coding: utf-8 -*-

# Define your item pipelines here

#

# Don't forget to add your pipeline to the ITEM_PIPELINES setting

# See: https://doc.scrapy.org/en/latest/topics/item-pipeline.html

class Adilcrawler1Pipeline(object):

    def process_item(self, item, spider):

        return item
优化后代码如下
# -*- coding: utf-8 -*-

# Define your item pipelines here

#

# Don't forget to add your pipeline to the ITEM_PIPELINES setting

# See: https://doc.scrapy.org/en/latest/topics/item-pipeline.html

import json

class AdilcrawlerPipeline(object):

    '''

        保存item数据

    '''

    def __init__(self):

        self.filename = open('thousandPic.json','w')

    def process_item(self, item, spider):

        #  ensure_ascii=False 可以解决 json 文件中 乱码的问题。

        text = json.dumps(dict(item), ensure_ascii=False) + ',\n'   #  这里是一个字典一个字典存储的,后面加个 ',\n' 以便分隔和换行。

        self.filename.write(text)

        return item

    def close_spider(self,spider):

        self.filename.close()
settings文件设置
修改settings.py配置文件
找到pipelines 配置进行修改
# Configure item pipelines

# See https://doc.scrapy.org/en/latest/topics/item-pipeline.html

# ITEM_PIPELINES = {

#    'AdilCrawler.pipelines.AdilcrawlerPipeline': 300,

# }

# 启动pipeline 必须将其加入到“ITEM_PIPLINES”的配置中

# 其中根目录是tutorial,pipelines是我的pipeline文件名,TutorialPipeline是类名

ITEM_PIPELINES = {

    'AdilCrawler.pipelines.AdilcrawlerPipeline': 300,

}

# 加入后,相当于开启pipeline,此时在执行爬虫,会执行对应的pipelines下的类,并执行该类相关的方法,比如这里上面的保存数据功能。
执行命令
scrapy crawl thousandPicOptimize
执行后生成如下图文件及保存的数据

使用CrawlSpider类进行翻页抓取
使用crawl 模板创建一个 CrawlSpider
执行命令如下
scrapy genspider -t crawl thousandPicPaging www.58pic.com
items.py 文件不变,查看 爬虫 thousandPicPaging.py 文件
# -*- coding: utf-8 -*-

import scrapy

from scrapy.linkextractors import LinkExtractor

from scrapy.spiders import CrawlSpider, Rule

class ThousandpicpagingSpider(CrawlSpider):

    name = 'thousandPicPaging'

    allowed_domains = ['www.58pic.com']

    start_urls = ['http://www.58pic.com/']

    rules = (

        Rule(LinkExtractor(allow=r'Items/'), callback='parse_item', follow=True),

    )

    def parse_item(self, response):

        i = {}

        #i['domain_id'] = response.xpath('//input[@id="sid"]/@value').extract()

        #i['name'] = response.xpath('//div[@id="name"]').extract()

        #i['description'] = response.xpath('//div[@id="description"]').extract()

        return i
修改后如下
# -*- coding: utf-8 -*-

import scrapy

# 导入链接规则匹配类,用来提取符合规则的连接

from scrapy.linkextractors import LinkExtractor

# 导入CrawlSpider类和Rule

from scrapy.spiders import CrawlSpider, Rule

import AdilCrawler.items as items

class ThousandpicpagingSpider(CrawlSpider):

    name = 'thousandPicPaging'

    allowed_domains = ['www.58pic.com']

    # 修改起始页地址

    start_urls = ['http://www.58pic.com/c/']

    # Response里链接的提取规则,返回的符合匹配规则的链接匹配对象的列表

    # http://www.58pic.com/c/1-0-0-03.html  根据翻页连接地址,找到 相应的 正则表达式   1-0-0-03  -> \S-\S-\S-\S\S  而且 这里使用 allow

    # 不能使用 restrict_xpaths ,使用 他的话,正则将失效

    page_link = LinkExtractor(allow='http://www.58pic.com/c/\S-\S-\S-\S\S.html', allow_domains='www.58pic.com')

    rules = (

        # 获取这个列表里的链接,依次发送请求,并且继续跟进,调用指定回调函数处理

        Rule(page_link, callback='parse_item', follow=True),  # 注意这里的 ',' 要不会报错

    )

    # 加上这个 方法是为了 解决 parse_item() 不能抓取第一页数据的问题 parse_start_url 是 CrawlSpider() 类下的方法,这里重写一下即可

    def parse_start_url(self, response):

        i = items.AdilcrawlerItem()

        author = response.xpath('/html/body/div[4]/div[3]/div/a/p[2]/span/span[2]/text()').extract()

        theme = response.xpath('/html/body/div[4]/div[3]/div/a/p[1]/span[1]/text()').extract()

        i['author'] = author

        i['theme'] = theme

        yield i

    # 指定的回调函数

    def parse_item(self, response):

        i = items.AdilcrawlerItem()

        author = response.xpath('/html/body/div[4]/div[3]/div/a/p[2]/span/span[2]/text()').extract()

        theme = response.xpath('/html/body/div[4]/div[3]/div/a/p[1]/span[1]/text()').extract()

        i['author'] = author

        i['theme'] = theme

        yield i
再次执行
scrapy crawl thousandPicPaging
查看执行结果,可以看到是有4页的内容

再次优化引入 ItemLoader 类
# -*- coding: utf-8 -*-

import scrapy

# 导入链接规则匹配类,用来提取符合规则的连接

from scrapy.linkextractors import LinkExtractor

# 导入CrawlSpider类和Rule

from scrapy.loader import ItemLoader

from scrapy.spiders import CrawlSpider, Rule

import AdilCrawler.items as items

class ThousandpicpagingopSpider(CrawlSpider):

    name = 'thousandPicPagingOp'

    allowed_domains = ['www.58pic.com']

    # 修改起始页地址

    start_urls = ['http://www.58pic.com/c/']

    # Response里链接的提取规则,返回的符合匹配规则的链接匹配对象的列表

    # http://www.58pic.com/c/1-0-0-03.html  根据翻页连接地址,找到 相应的 正则表达式   1-0-0-03  -> \S-\S-\S-\S\S  而且 这里使用 allow

    # 不能使用 restrict_xpaths ,使用 他的话,正则将失效

    page_link = LinkExtractor(allow='http://www.58pic.com/c/\S-\S-\S-\S\S.html', allow_domains='www.58pic.com')

    rules = (

        # 获取这个列表里的链接,依次发送请求,并且继续跟进,调用指定回调函数处理

        Rule(page_link, callback='parse_item', follow=True),  # 注意这里的 ',' 要不会报错

    )

    # 加上这个 方法是为了 解决 parse_item() 不能抓取第一页数据的问题 parse_start_url 是 CrawlSpider() 类下的方法,这里重写一下即可

    def parse_start_url(self, response):

        i = ItemLoader(item = items.AdilcrawlerItem(),response = response )

        i.add_xpath('author','/html/body/div[4]/div[3]/div/a/p[2]/span/span[2]/text()')

        i.add_xpath('theme','/html/body/div[4]/div[3]/div/a/p[1]/span[1]/text()')

        yield  i.load_item()

    # 指定的回调函数

    def parse_item(self, response):

        i = ItemLoader(item = items.AdilcrawlerItem(),response = response )

        i.add_xpath('author','/html/body/div[4]/div[3]/div/a/p[2]/span/span[2]/text()')

        i.add_xpath('theme','/html/body/div[4]/div[3]/div/a/p[1]/span[1]/text()')

        yield  i.load_item()
执行结果是一样的。
最后插播一条 在线正则表达式测试 工具的广告,地址: http://tool.oschina.net/regex/
应用如下

Python Scrapy 爬虫框架实例的更多相关文章
- Python Scrapy 爬虫框架实例(一)
之前有介绍 scrapy 的相关知识,但是没有介绍相关实例,在这里做个小例,供大家参考学习. 注:后续不强调python 版本,默认即为python3.x. 爬取目标 这里简单找一个图片网站,获取图片 ...
- scrapy爬虫框架实例一,爬取自己博客
本篇就是利用scrapy框架来抓取本人的博客,博客地址:http://www.cnblogs.com/shaosks scrapy框架是个比较简单易用基于python的爬虫框架,相关文档:http:/ ...
- scrapy爬虫框架实例二
本实例主要通过抓取慕课网的课程信息来展示scrapy框架抓取数据的过程. 1.抓取网站情况介绍 抓取网站:http://www.imooc.com/course/list 抓取内容:要抓取的内容是全部 ...
- python scrapy爬虫框架概念介绍(个人理解总结为一张图)
python的scrapy是一个为了爬取网站数据,提取结构性数据而编写的应用框架 python和scrapy的安装就不介绍了,资料很多 这里我个人总结一下,能更加快理解scrapy和快速上手一个简 ...
- [Python] Scrapy爬虫框架入门
说明: 本文主要学习Scrapy框架入门,介绍如何使用Scrapy框架爬取页面信息. 项目案例:爬取腾讯招聘页面 https://hr.tencent.com/position.php?&st ...
- python - scrapy 爬虫框架(创建, 持久化, 去重, 深度, cookie)
## scrapy 依赖 twisted - twisted 是一个基于事件循环的 异步非阻塞 框架/模块 ## 项目的创建 1. 创建 project scrapy startproject ...
- Python Scrapy爬虫框架之初次使用
此篇博客为本人对小甲鱼的课程的总结. 关于Scrapy的安装网上都有方法,这里便不再叙述. 使用Scrapy抓取一个网站一共需要四个步骤: 0.创建一个Scrapy项目: 1.定义Item容器: 2. ...
- python - scrapy 爬虫框架 ( 起始url的实现,深度和优先级,下载中间件 )
1. start_urls -- 起始URL 的内部实现(将迭代器转换为生成器) class QSpider(scrapy.Spider): name = 'q' allowed_domains ...
- (1)python Scrapy爬虫框架
部署 1.安装python3.6 64bit 2.下载pywin32 https://sourceforge.net/projects/pywin32/files/pywin32/ 双击安装 3.下 ...
随机推荐
- lnmp+tp5安装纪要
1: lnmp : https://lnmp.org/install.html 官网安装帮助 运行命令:wget http://soft.vpser.net/lnmp/lnmp1.6.tar.gz ...
- nmcli简单使用
nmcli connection 查看所有网卡信息 nmcli connection show ens33 查看网卡具体信息 nmcli connection reload 是配置文件生效
- ~request库的使用
官方文档: (中文)http://cn.python-requests.org/zh_CN/latest/ (英文)https://2.python-requests.org//en/master/a ...
- 机器学习之逻辑回归(Logistic)笔记
在说逻辑回归之前,可以先说一说逻辑回归与线性回归的区别: 逻辑回归与线性回归在学习规则形式上是完全一致的,它们的区别在于hθ(x(i))为什么样的函数 当hθ(x(i))=θTx(i)时,表示的是线性 ...
- 二十、网卡框架分析、虚拟网卡驱动和DM9621驱动分析
一.网络设备驱动的结构 网卡设备不同于字符设备和块设备, 网络设备并不对应于/dev目录下的文件,它存放在/sys/class/net目录下. Linux系统对网络设备驱动定义了四个层次: 1. 网络 ...
- mybatis与Spring集成(Aop整合PagerAspect插件)
目的: Mybatis与spring集成 Aop整合pagehelper插件 Mybatis与spring集成 导入pom依赖 <?xml version="1.0" enc ...
- windows安装docker,快捷启动方式无法启动
1.在双击“Docker Quickstart Terminal”时弹出缺少快捷方式,截图如下 2.单机快捷方式查看属性,发现配置的git位置是有问题的 现在只需要把git的正确地址配置好就可以了 现 ...
- springMVC关于异常优先级的处理
优先级 既然在SpringMVC中有两种处理异常的方式,那么就存在一个优先级的问题: 当发生异常的时候,SpringMVC会如下处理: (1)SpringMVC会先从配置文件找异常解析器Handler ...
- Asp.Net Mvc Area二级域名
参考:https://blog.maartenballiauw.be/post/2009/05/20/aspnet-mvc-domain-routing.html 参考:https://www.cnb ...
- 数据多的时候为什么要使用redis而不用mysql?
2018-06-28 136465569... 转自 庆亮trj21bc... 修改 微信 分享: Redis和MySQL的应用场景是不同的. 通常来说,没有说用Redis就不用MySQL的这 ...