iOS-屏幕适配-UI布局
iOS 屏幕适配:autoResizing autoLayout和sizeClass
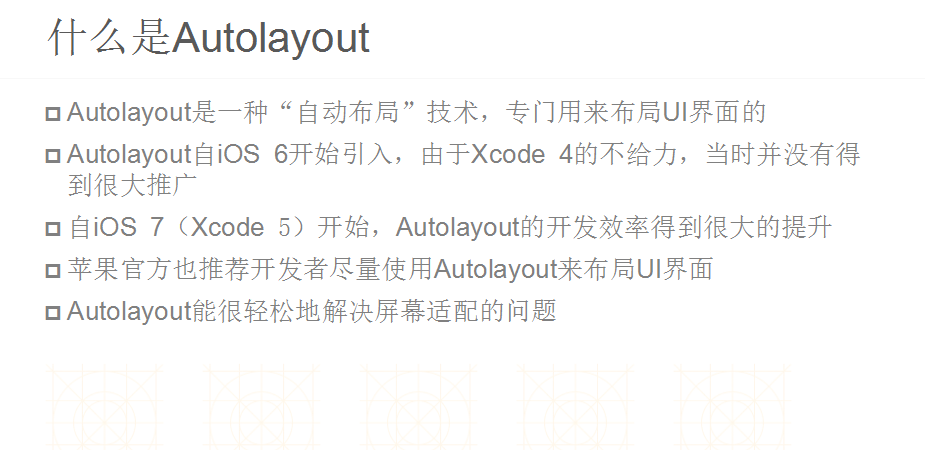
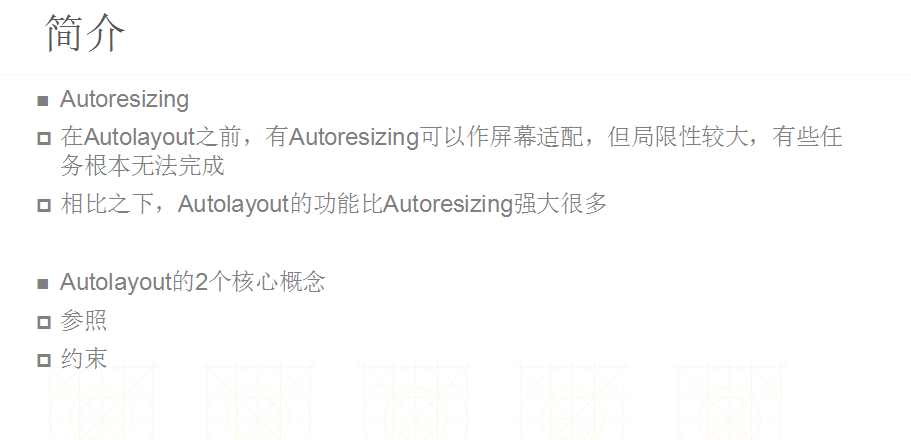
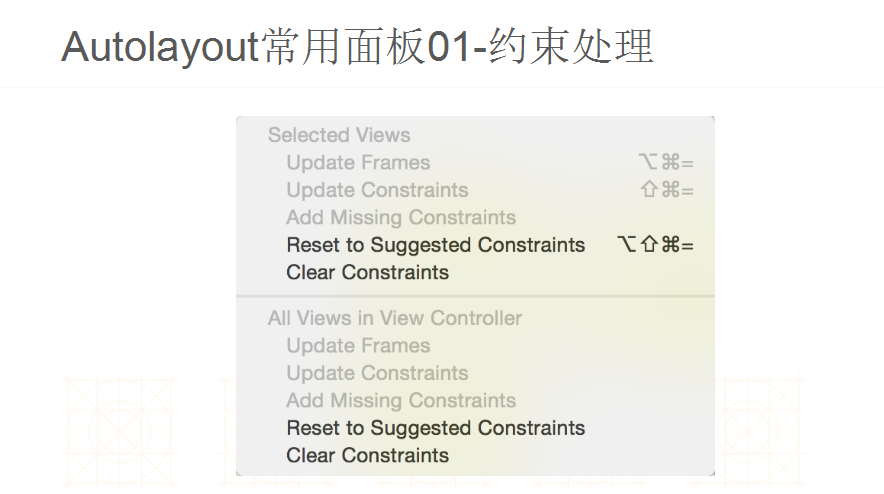
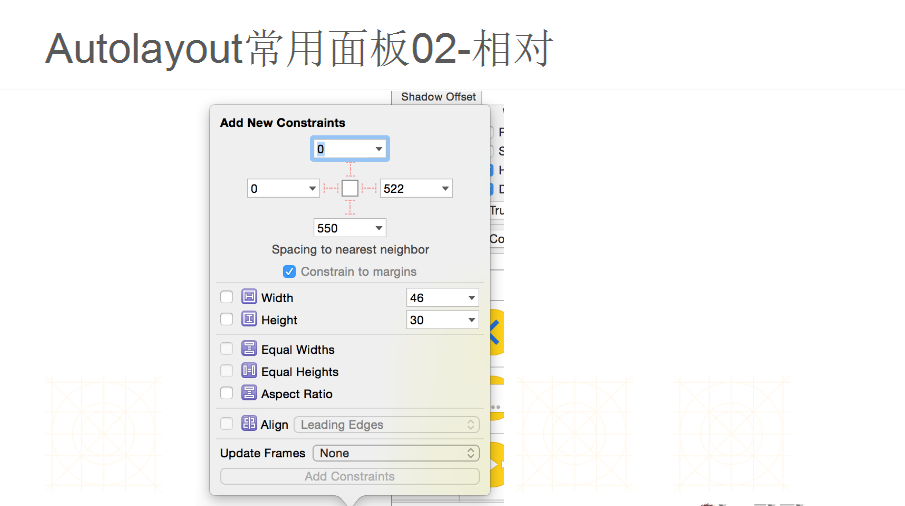
一.图片解说
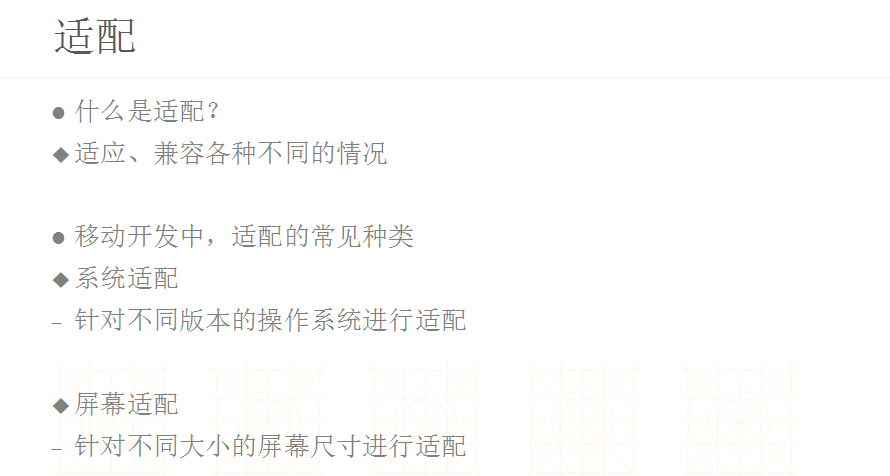
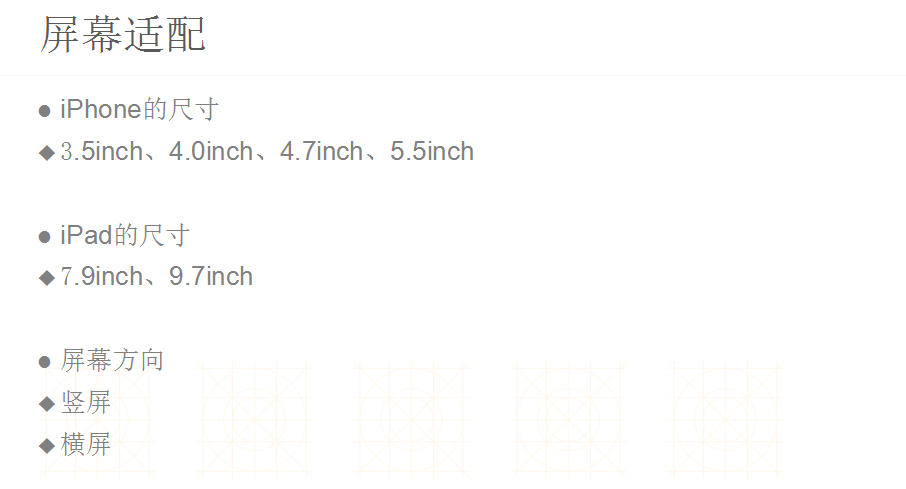

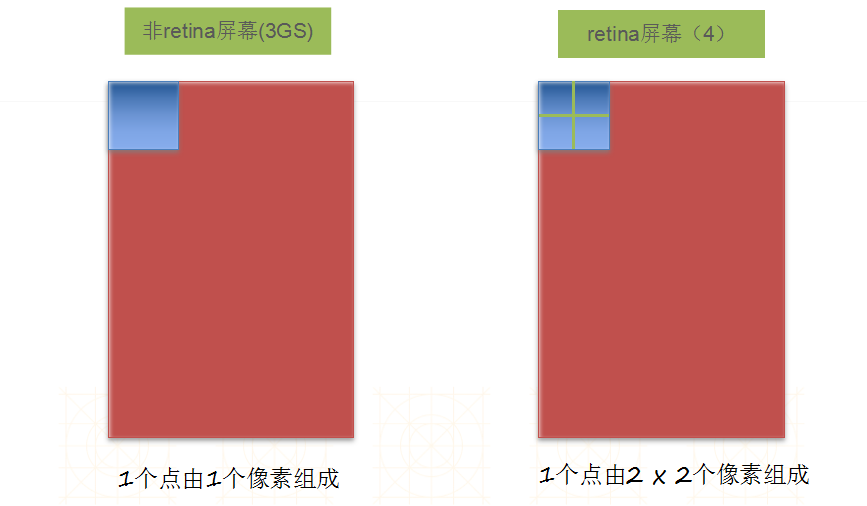
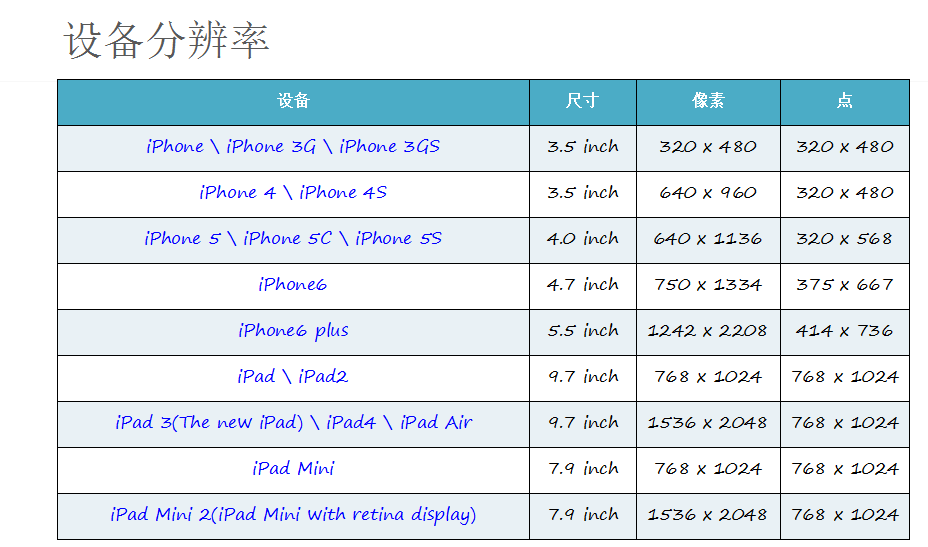
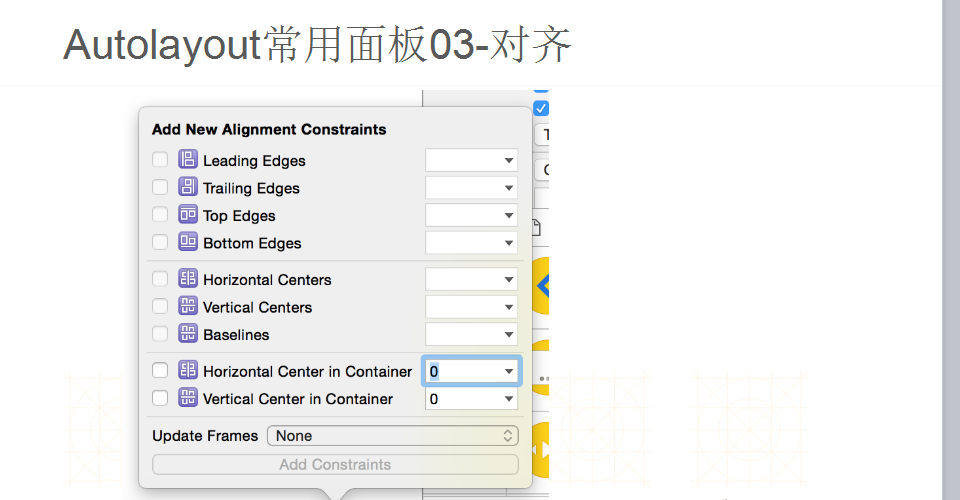
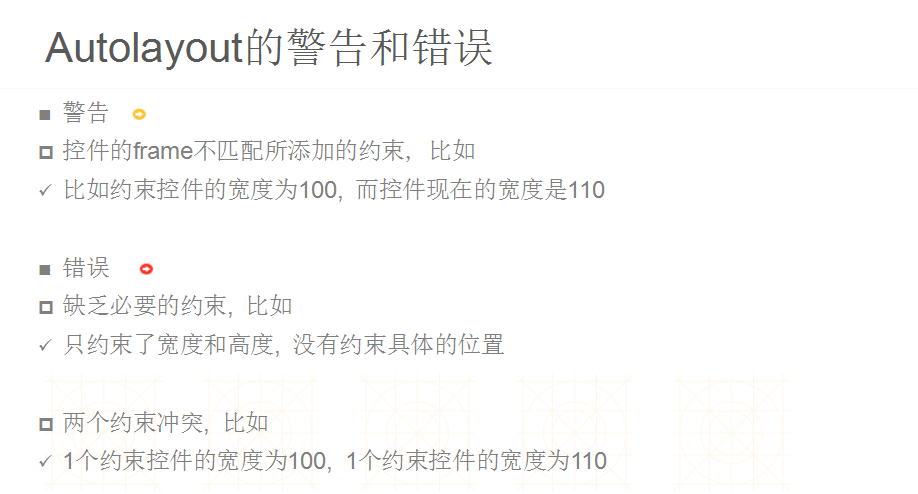
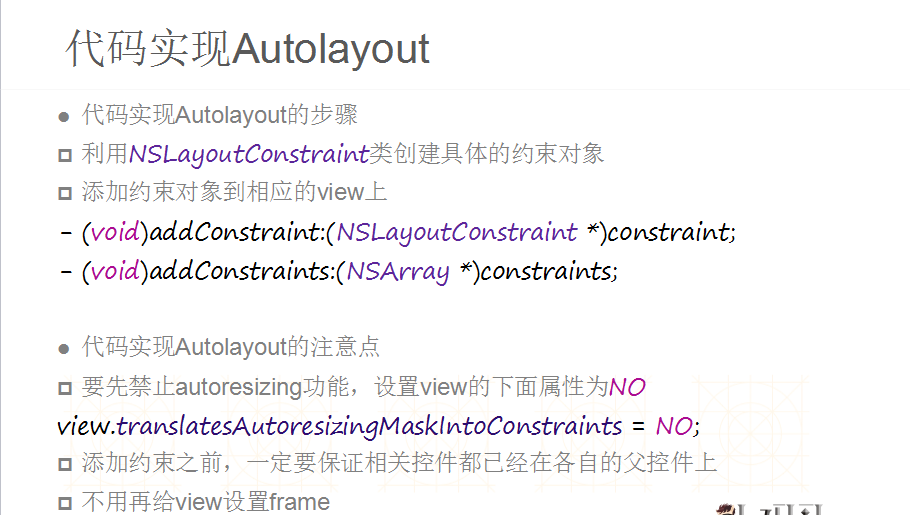
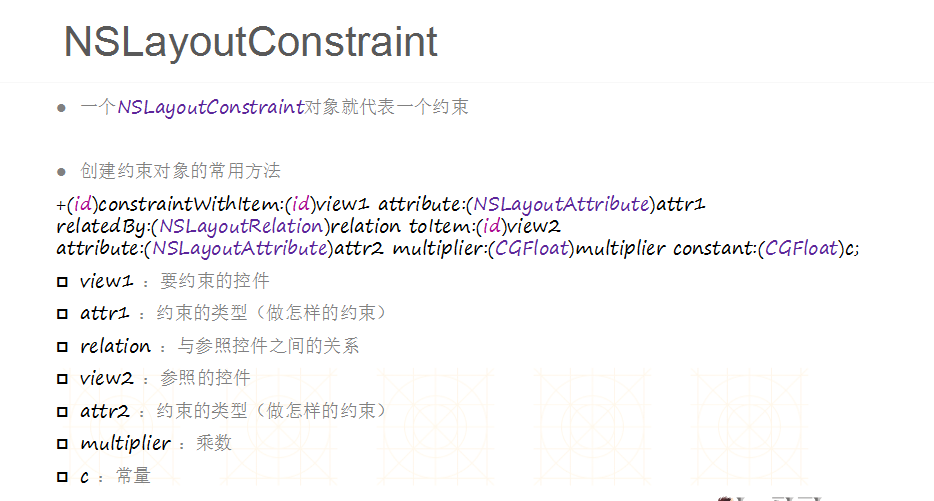

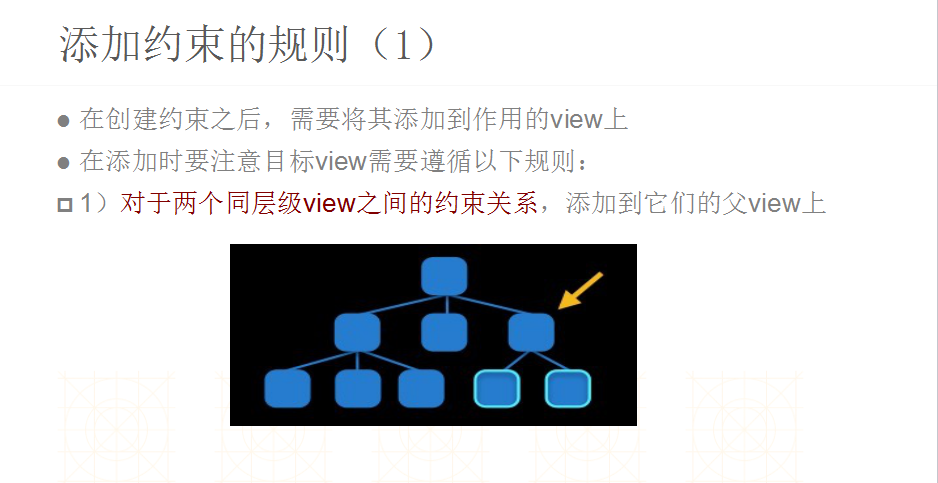


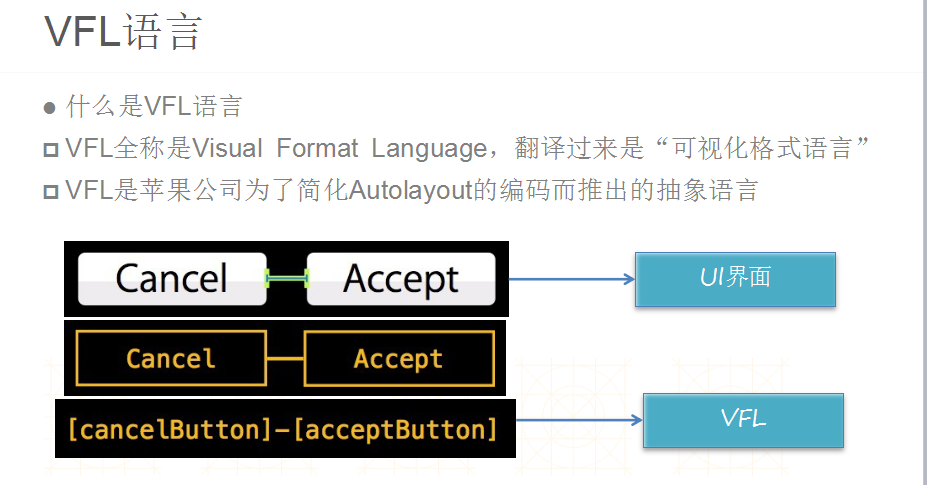
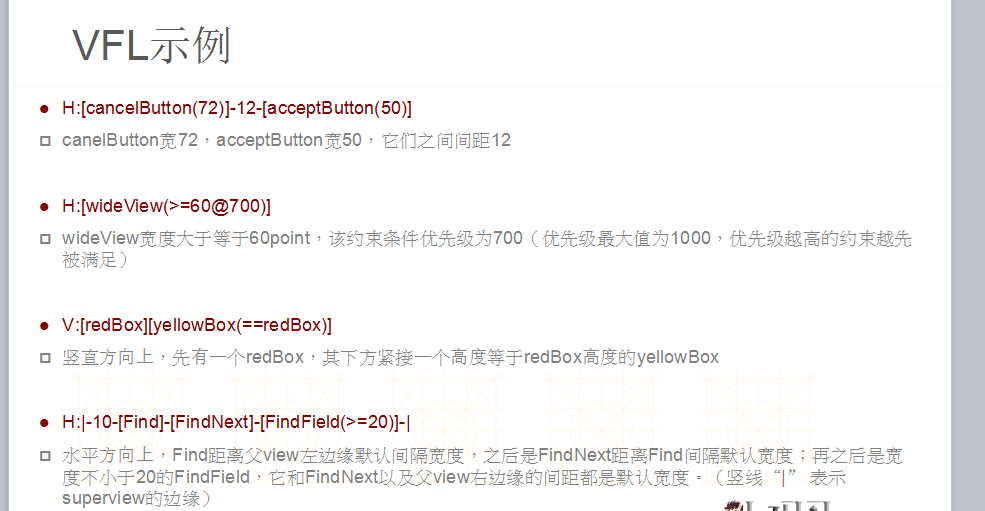
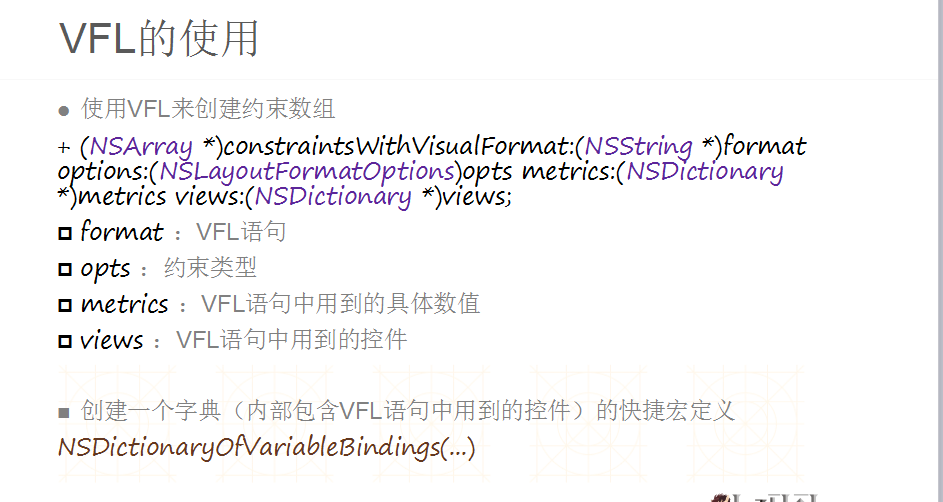
--------------------------------------------------------------------------------------------------------------------------------------------------------------

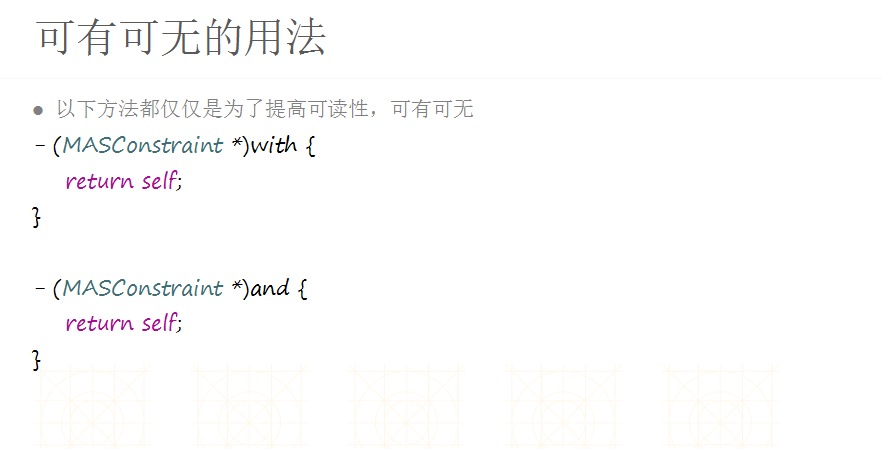
二.AutoLayout
1.前言
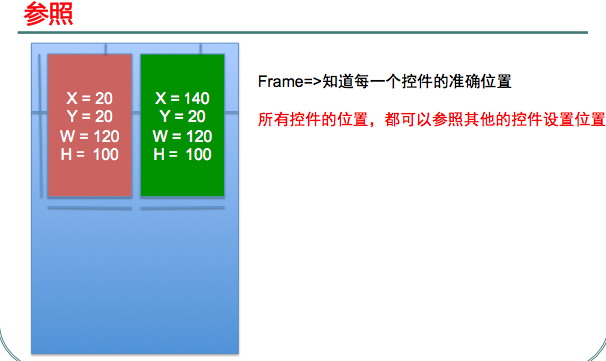
2.什么是AutoLayout
3.AutoLayout的优势
4.AutoLayout和Autoresizing Mask的区别
5.AutoLayout的基本使用
6.添加和刷新约束(代码)
-(void)addConstraint:(NSLayoutConstraint *)constraint
•刷新约束的改变
-setNeedsUpdateConstraints
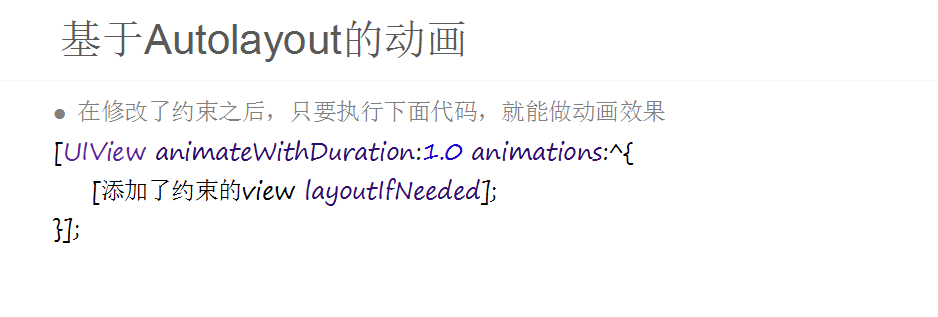
-layoutIfNeeded
[button setTranslatesAutoresizingMaskIntoConstraints:NO];
|
1
2
3
4
5
6
7
8
9
|
// 2.1 水平方向的约束NSLayoutConstraint *constraintX = [NSLayoutConstraint constraintWithItem:button attribute:NSLayoutAttributeCenterX relatedBy:NSLayoutRelationEqual toItem:self.view attribute:NSLayoutAttributeCenterX multiplier:1.0f constant:0.0f];[self.view addConstraint:constraintX];// 2.2 垂直方向的约束NSLayoutConstraint *constraintY = [NSLayoutConstraint constraintWithItem:button attribute:NSLayoutAttributeCenterY relatedBy:NSLayoutRelationEqual toItem:self.view attribute:NSLayoutAttributeCenterY multiplier:1.0f constant:0.0f];[self.view addConstraint:constraintY]; |
6.使用AutoLayout容易出现的错误

/* Initial views setup */ - (void)setupViews
{
self.redView = [UIView new];
self.redView.translatesAutoresizingMaskIntoConstraints = NO;
self.redView.backgroundColor = [UIColor colorWithRed:0.95 green:0.47 blue:0.48 alpha:1.0]; self.yellowView = [UIView new];
self.yellowView.translatesAutoresizingMaskIntoConstraints = NO;
self.yellowView.backgroundColor = [UIColor colorWithRed:1.00 green:0.83 blue:0.58 alpha:1.0]; [self.view addSubview:self.redView];
[self.view addSubview:self.yellowView]; } /*
Hey Devs... the code in the next functions has to be intended for tutorial purposes only.
I have created work-alone examples that contain a lot of code duplication... not a good practice but way easier to explain :P
*/ /* EXAMPLE 1 */ - (void)example_1
{ // 1. Create a dictionary of views
NSDictionary *viewsDictionary = @{@"redView":self.redView}; // 2. Define the redView Size
NSArray *constraint_H = [NSLayoutConstraint constraintsWithVisualFormat:@"V:[redView(100)]"
options:0
metrics:nil
views:viewsDictionary]; NSArray *constraint_V = [NSLayoutConstraint constraintsWithVisualFormat:@"H:[redView(100)]"
options:0
metrics:nil
views:viewsDictionary];
[self.redView addConstraints:constraint_H];
[self.redView addConstraints:constraint_V]; // 3. Define the redView Position
NSArray *constraint_POS_V = [NSLayoutConstraint constraintsWithVisualFormat:@"V:|-30-[redView]"
options:0
metrics:nil
views:viewsDictionary]; NSArray *constraint_POS_H = [NSLayoutConstraint constraintsWithVisualFormat:@"H:|-20-[redView]"
options:0
metrics:nil
views:viewsDictionary]; // 3.B ...and try to change the visual format string
//NSArray *constraint_POS_V = [NSLayoutConstraint constraintsWithVisualFormat:@"V:[redView]-30-|" options:0 metrics:nil views:viewsDictionary];
//NSArray *constraint_POS_H = [NSLayoutConstraint constraintsWithVisualFormat:@"H:|-[redView]" options:0 metrics:nil views:viewsDictionary]; [self.view addConstraints:constraint_POS_H];
[self.view addConstraints:constraint_POS_V];
} /* EXAMPLE 2 */ - (void)example_2
{ // 1. Create a dictionary of views
NSDictionary *viewsDictionary = @{@"redView":self.redView, @"yellowView":self.yellowView}; // 2. Define the views Sizes
NSArray *red_constraint_H = [NSLayoutConstraint constraintsWithVisualFormat:@"V:[redView(100)]"
options:0
metrics:nil
views:viewsDictionary];
NSArray *red_constraint_V = [NSLayoutConstraint constraintsWithVisualFormat:@"H:[redView(100)]"
options:0
metrics:nil
views:viewsDictionary];
[self.redView addConstraints:red_constraint_H];
[self.redView addConstraints:red_constraint_V]; NSArray *yellow_constraint_H = [NSLayoutConstraint constraintsWithVisualFormat:@"V:[yellowView(200)]"
options:0
metrics:nil
views:viewsDictionary]; NSArray *yellow_constraint_V = [NSLayoutConstraint constraintsWithVisualFormat:@"H:[yellowView(100)]"
options:0
metrics:nil
views:viewsDictionary];
[self.yellowView addConstraints:yellow_constraint_H];
[self.yellowView addConstraints:yellow_constraint_V]; // 3. Define the views Positions
NSArray *constraint_POS_V = [NSLayoutConstraint constraintsWithVisualFormat:@"V:|-30-[redView]-40-[yellowView]"
options:0
metrics:nil
views:viewsDictionary]; NSArray *constraint_POS_H = [NSLayoutConstraint constraintsWithVisualFormat:@"H:|-20-[redView]-10-[yellowView]"
options:0
metrics:nil
views:viewsDictionary]; [self.view addConstraints:constraint_POS_V];
[self.view addConstraints:constraint_POS_H]; } /* EXAMPLE 3 */ - (void)example_3
{ // 1. Create a dictionary of views
NSDictionary *viewsDictionary = @{@"redView":self.redView, @"yellowView":self.yellowView}; // 2. Define the views Sizes
NSArray *red_constraint_H = [NSLayoutConstraint constraintsWithVisualFormat:@"V:[redView(100)]"
options:0
metrics:nil
views:viewsDictionary]; NSArray *red_constraint_V = [NSLayoutConstraint constraintsWithVisualFormat:@"H:[redView(100)]"
options:0
metrics:nil
views:viewsDictionary];
[self.redView addConstraints:red_constraint_H];
[self.redView addConstraints:red_constraint_V]; NSArray *yellow_constraint_H = [NSLayoutConstraint constraintsWithVisualFormat:@"V:[yellowView(150)]"
options:0
metrics:nil
views:viewsDictionary]; NSArray *yellow_constraint_V = [NSLayoutConstraint constraintsWithVisualFormat:@"H:[yellowView(100)]"
options:0
metrics:nil
views:viewsDictionary];
[self.yellowView addConstraints:yellow_constraint_H];
[self.yellowView addConstraints:yellow_constraint_V]; // 3. Define the views Positions using options
NSArray *constraint_POS_V = [NSLayoutConstraint constraintsWithVisualFormat:@"V:|-120-[redView]"
options:0
metrics:nil
views:viewsDictionary]; NSArray *constraint_POS = [NSLayoutConstraint constraintsWithVisualFormat:@"H:|-20-[redView]-10-[yellowView]"
options:NSLayoutFormatAlignAllTop
metrics:nil views:viewsDictionary]; [self.view addConstraints:constraint_POS_V];
[self.view addConstraints:constraint_POS]; } /* EXAMPLE 4 */ - (void)example_4
{
// 1. Create a dictionary of views and metrics
NSDictionary *viewsDictionary = @{@"redView":self.redView, @"yellowView":self.yellowView};
NSDictionary *metrics = @{@"redWidth": @100,
@"redHeight": @100,
@"yellowWidth": @100,
@"yellowHeight": @150,
@"topMargin": @120,
@"leftMargin": @20,
@"viewSpacing":@10
}; // 2. Define the views Sizes
NSArray *red_constraint_H = [NSLayoutConstraint constraintsWithVisualFormat:@"V:[redView(redHeight)]"
options:0
metrics:metrics
views:viewsDictionary]; NSArray *red_constraint_V = [NSLayoutConstraint constraintsWithVisualFormat:@"H:[redView(redWidth)]"
options:0
metrics:metrics
views:viewsDictionary];
[self.redView addConstraints:red_constraint_H];
[self.redView addConstraints:red_constraint_V]; NSArray *yellow_constraint_H = [NSLayoutConstraint constraintsWithVisualFormat:@"V:[yellowView(yellowHeight)]"
options:0
metrics:metrics
views:viewsDictionary]; NSArray *yellow_constraint_V = [NSLayoutConstraint constraintsWithVisualFormat:@"H:[yellowView(yellowWidth)]"
options:0
metrics:metrics
views:viewsDictionary]; [self.yellowView addConstraints:yellow_constraint_H];
[self.yellowView addConstraints:yellow_constraint_V]; // 3. Define the views Positions
NSArray *constraint_POS_V = [NSLayoutConstraint constraintsWithVisualFormat:@"V:|-topMargin-[redView]"
options:0
metrics:metrics
views:viewsDictionary]; NSArray *constraint_POS = [NSLayoutConstraint constraintsWithVisualFormat:@"H:|-leftMargin-[redView]-viewSpacing-[yellowView]"
options:NSLayoutFormatAlignAllTop
metrics:metrics
views:viewsDictionary]; [self.view addConstraints:constraint_POS_V];
[self.view addConstraints:constraint_POS];
} /* EXAMPLE 5 */ - (void)example_5
{
// 1. Create a dictionary of views and metrics
NSDictionary *viewsDictionary = @{@"redView":self.redView};
NSDictionary *metrics = @{@"vSpacing":@30, @"hSpacing":@10}; // 2. Define the view Position and automatically the Size
NSArray *constraint_POS_V = [NSLayoutConstraint constraintsWithVisualFormat:@"V:|-vSpacing-[redView]-vSpacing-|"
options:0
metrics:metrics
views:viewsDictionary]; NSArray *constraint_POS_H = [NSLayoutConstraint constraintsWithVisualFormat:@"H:|-hSpacing-[redView]-hSpacing-|"
options:0
metrics:metrics
views:viewsDictionary]; [self.view addConstraints:constraint_POS_V];
[self.view addConstraints:constraint_POS_H];
} /* EXAMPLE 6 */ - (void)example_6
{
// 1. Create a dictionary of views
NSDictionary *viewsDictionary = @{@"redView": self.redView, @"yellowView": self.yellowView};
NSDictionary *metrics = @{@"vSpacing":@30, @"hSpacing":@10}; // 2. Define the view Position and automatically the Size (for the redView)
NSArray *constraint_POS_V = [NSLayoutConstraint constraintsWithVisualFormat:@"V:|-vSpacing-[redView]-vSpacing-|"
options:0
metrics:metrics
views:viewsDictionary]; NSArray *constraint_POS_H = [NSLayoutConstraint constraintsWithVisualFormat:@"H:|-hSpacing-[redView]-hSpacing-|"
options:0
metrics:metrics
views:viewsDictionary]; [self.view addConstraints:constraint_POS_V];
[self.view addConstraints:constraint_POS_H]; // 3. Define sizes thanks to relations with another view (yellowView in relation with redView)
[self.view addConstraint:[NSLayoutConstraint
constraintWithItem:self.yellowView
attribute:NSLayoutAttributeWidth
relatedBy:NSLayoutRelationEqual
toItem:self.redView
attribute:NSLayoutAttributeWidth
multiplier:0.5
constant:0.0]]; [self.view addConstraint:[NSLayoutConstraint
constraintWithItem:self.yellowView
attribute:NSLayoutAttributeHeight
relatedBy:NSLayoutRelationEqual
toItem:self.redView
attribute:NSLayoutAttributeHeight
multiplier:0.5
constant:0.0]]; // 4. Define position thanks to relations with another view (yellowView in relation with redView)
[self.view addConstraint:[NSLayoutConstraint
constraintWithItem:self.yellowView
attribute:NSLayoutAttributeCenterX
relatedBy:NSLayoutRelationEqual
toItem:self.redView
attribute:NSLayoutAttributeCenterX
multiplier:1.0
constant:0.0]]; [self.view addConstraint:[NSLayoutConstraint
constraintWithItem:self.yellowView
attribute:NSLayoutAttributeCenterY
relatedBy:NSLayoutRelationEqual
toItem:self.redView
attribute:NSLayoutAttributeCenterY
multiplier:1.0
constant:0.0]]; }

Masonry -- 使用纯代码进行iOS应用的autolayout自适应布局
简介
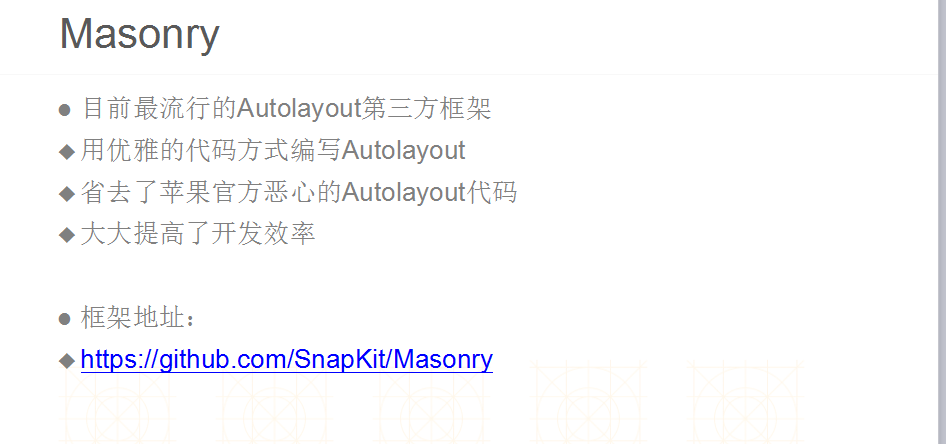
简化iOS应用使用纯代码机型自适应布局的工作,使用一种简洁高效的语法替代NSLayoutConstraints.
- 项目主页: Masonry
- 最新示例: 点击下载
- 项目简议: 如果再看到关于纯代码,xib或storyboard,使用哪种方式进行UI布局更合适的讨论,请推荐他们先试用下 Masonry. Masonry,像xib一样快速,同时拥有作为纯代码方式的灵活性 -- github关注度 7800 + 是有原因的!
快速入门
安装
使用 CocoaPods 安装
pod 'Masonry'推荐在你的在 prefix.pch 中引入头文件:
// 定义这个常量,就可以在使用Masonry不必总带着前缀 `mas_`:

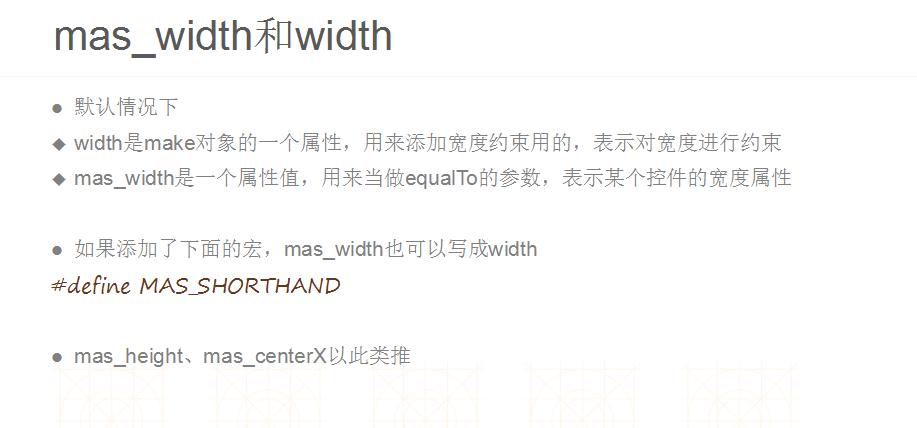
#define MAS_SHORTHAND

// 定义这个常量,以支持在 Masonry 语法中自动将基本类型转换为 object 类型:

#define MAS_SHORTHAND_GLOBALS

#import "Masonry.h"
使用
初始Masonry
这是使用MASConstraintMaker创建的约束:
/* 注意:view1应首先添加为某个视图的子视图,superview是一个局部变量,指view1的父视图. */

UIEdgeInsets padding = UIEdgeInsetsMake(10, 10, 10, 10);

[view1 mas_makeConstraints:^(MASConstraintMaker *make) {

    make.top.equalTo(superview.mas_top).offset(padding.top);

    make.left.equalTo(superview.mas_left).offset(padding.left);

    make.bottom.equalTo(superview.mas_bottom).offset(-padding.bottom);

    make.right.equalTo(superview.mas_right).offset(-padding.right);

}];
甚至可以更短:
[view1 mas_makeConstraints:^(MASConstraintMaker *make) {

    make.edges.equalTo(superview).insets(padding);

}];
不止可以表达相等关系
.equalTo等价于 NSLayoutRelationEqual
.lessThanOrEqualTo等价于 NSLayoutRelationLessThanOrEqual
.greaterThanOrEqualTo等价于 NSLayoutRelationGreaterThanOrEqual
这三个表达相等关系的语句,可以接受一个参数;此参数可以为以下任意一个:
1. MASViewAttribute
make.centerX.lessThanOrEqualTo(view2.mas_left);| MASViewAttribute | NSLayoutAttribute |
|---|---|
| view.mas_left | NSLayoutAttributeLeft |
| view.mas_right | NSLayoutAttributeRight |
| view.mas_top | NSLayoutAttributeTop |
| view.mas_bottom | NSLayoutAttributeBottom |
| view.mas_leading | NSLayoutAttributeLeading |
| view.mas_trailing | NSLayoutAttributeTrailing |
| view.mas_width | NSLayoutAttributeWidth |
| view.mas_height | NSLayoutAttributeHeight |
| view.mas_centerX | NSLayoutAttributeCenterX |
| view.mas_centerY | NSLayoutAttributeCenterY |
| view.mas_baseline | NSLayoutAttributeBaseline |
2. UIView/NSView
如果你需要 view.left 大于或等于label.left:
// 下面两个约束是完全等效的.

make.left.greaterThanOrEqualTo(label);

make.left.greaterThanOrEqualTo(label.mas_left);
3. NSNumber
自适应布局允许将宽度或高度设置为固定值.
如果你想要给视图一个最小或最大值,你可以这样:
//width >= 200 && width <= 400

make.width.greaterThanOrEqualTo(@200);

make.width.lessThanOrEqualTo(@400)
但是自适应布局不支持将 left,right, centerY等设为固定值.
如果你给这些属性传递一个常量, Masonry会自动将它们转换为相对于其父视图的相对值:
//creates view.left = view.superview.left + 10

make.left.lessThanOrEqualTo(@10)
除了使用 NSNumber 外,你可以使用基本数据类型或者结构体来创建约束:
make.top.mas_equalTo(42);

make.height.mas_equalTo(20);

make.size.mas_equalTo(CGSizeMake(50, 100));

make.edges.mas_equalTo(UIEdgeInsetsMake(10, 0, 10, 0));

make.left.mas_equalTo(view).mas_offset(UIEdgeInsetsMake(10, 0, 10, 0));
4. NSArray
一个数组,里面可以混合是前述三种类型的任意几种:
// 表达三个视图等高的约束.

make.height.equalTo(@[view1.mas_height, view2.mas_height]);

make.height.equalTo(@[view1, view2]);

make.left.equalTo(@[view1, @100, view3.right]);
约束的优先级
.priority允许你指定一个精确的优先级,数值越大优先级越高.最高1000.
.priorityHigh等价于 UILayoutPriorityDefaultHigh.优先级值为 750.
.priorityMedium介于高优先级和低优先级之间,优先级值在 250~750之间.
.priorityLow等价于 UILayoutPriorityDefaultLow, 优先级值为 250.
优先级可以在约束的尾部添加:
make.left.greaterThanOrEqualTo(label.mas_left).with.priorityLow();

make.top.equalTo(label.mas_top).with.priority(600);
等比例自适应
.multipliedBy允许你指定一个两个视图的某个属性等比例变化
item1.attribute1 = multiplier × item2.attribute2 + constant,此为约束的计算公式,.multipliedBy本质上是用来限定multiplier的注意,因为编程中的坐标系从父视图左上顶点开始,所以指定基于父视图的left或者top的multiplier是没有意义的,因为父视图的left和top总为0.
如果你需要一个视图随着父视图的宽度和高度,位置自动变化,你应该同时指定 right,bottom,width,height与父视图对应属性的比例(基于某个尺寸下的相对位置计算出的比例),并且constant必须为0.
// 指定宽度为父视图的 1/4.

make.width.equalTo(superview).multipliedBy(0.25);
工具方法
Masonry提供了一些工具方法来进一步简化约束的创建.
edges 边界
//使 top, left, bottom, right等于 view2

make.edges.equalTo(view2);

//使 top = superview.top + 5, left = superview.left + 10,

//      bottom = superview.bottom - 15, right = superview.right - 20

make.edges.equalTo(superview).insets(UIEdgeInsetsMake(5, 10, 15, 20))
size 尺寸
// 使宽度和高度大于或等于 titleLabel

make.size.greaterThanOrEqualTo(titleLabel)

//使 width = superview.width + 100, height = superview.height - 50

make.size.equalTo(superview).sizeOffset(CGSizeMake(100, -50))
center 中心
//使 centerX和 centerY = button1

make.center.equalTo(button1)

//使 centerX = superview.centerX - 5, centerY = superview.centerY + 10

make.center.equalTo(superview).centerOffset(CGPointMake(-5, 10))
你可以使用链式语法来增强代码可读性:
// 除top外,其他约束都与父视图相等.

make.left.right.bottom.equalTo(superview);

make.top.equalTo(otherView);
更新约束
有时,你需要修改已经存在的约束来实现动画效果或者移除/替换已有约束.
在 Masonry 中,有几种不同的更新视图约束的途径:
1. References 引用
你可以把 Masonry 语法返回的约束或约束数组,存储到一个局部变量或者类的属性中,以供后续操作某个约束.
// 声明属性

@property (nonatomic, strong) MASConstraint *topConstraint;

...

// when making constraints

[view1 mas_makeConstraints:^(MASConstraintMaker *make) {

    self.topConstraint = make.top.equalTo(superview.mas_top).with.offset(padding.top);

    make.left.equalTo(superview.mas_left).with.offset(padding.left);

}];

...

// 然后你就可以操作这个属性.

[self.topConstraint uninstall];
2. mas_updateConstraints
如果你只是想添加新的约束,你可以使用便利方法mas_updateConstraints,不需要使用 mas_makeConstraints. mas_updateConstraints,不会移除已经存在的约束(即使新旧约束间相互冲突).
// 重写视图的updateConstraints方法: 这是Apple推荐的添加/更新约束的位置.

// 这个方法可以被多次调用以响应setNeedsUpdateConstraints方法.

// setNeedsUpdateConstraints 可以被UIKit内部调用或者由开发者在自己的代码中调用以更新视图约束.

- (void)updateConstraints {

    [self.growingButton mas_updateConstraints:^(MASConstraintMaker *make) {

        make.center.equalTo(self);

        make.width.equalTo(@(self.buttonSize.width)).priorityLow();

        make.height.equalTo(@(self.buttonSize.height)).priorityLow();

        make.width.lessThanOrEqualTo(self);

        make.height.lessThanOrEqualTo(self);

    }];

    //根据apple机制,最后应调用父类的updateConstraints方法.

    [super updateConstraints];

}
3. mas_remakeConstraints
mas_remakeConstraints与mas_updateConstraints相似,不同之处在于: mas_remakeConstraints 会先移除视图上已有的约束,再去创建新的约束.
- (void)changeButtonPosition {

    [self.button mas_remakeConstraints:^(MASConstraintMaker *make) {

        make.size.equalTo(self.buttonSize);

        if (topLeft) {

        	make.top.and.left.offset(10);

        } else {

        	make.bottom.and.right.offset(-10);

        }

    }];

}
iOS-屏幕适配-UI布局的更多相关文章
- iOS屏幕适配
## iOS屏幕适配 ### iOS屏幕适配发展史 1> iPhone4以前(没有iPad) * 不需要屏幕适配 2> iPad.iPhone5等设备出现 * 需要做横竖屏适配 * aut ...
- 【转】iOS屏幕适配
一.iOS屏幕适配发展历程 设备 适配技术 4及以前(iPad未出) 直接用代码计算 有了iPad autoResizing 有不同屏幕的iPhone后 autoLayout 有更多不同屏幕的iPho ...
- Android实习生 —— 屏幕适配及布局优化
为什么要进行屏幕适配.对哪些设备进行适配?在近几年的发展当中,安卓设备数量逐渐增长,由于安卓设备的开放性,导致安卓设备的屏幕尺寸大小碎片化极为严重.从[友盟+]2016年手机生态发展报告H1中看截止1 ...
- iOS 屏幕适配:autoResizing autoLayout和sizeClass
1. autoResizing autoresizing是苹果早期的ui布局适配的解决办法,iOS6之前完全可以胜任了,因为苹果手机只有3.5寸的屏幕,在加上手机app很少支持横屏,所以iOS开发者基 ...
- iOS开发~UI布局(三)深入理解autolayout
一.概要 通过对iOS8界面布局的学习和总结,发现autolayout才是主角,autolayout是iOS6引入的新特性,当时还粗浅的学习了下,可是没有真正应用到项目中.随着iOS设备尺寸逐渐碎片化 ...
- iOS开发~UI布局(二)storyboard中autolayout和size class的使用详解
一.概要:前一篇初步的描述了size class的概念,那么实际中如何使用呢,下面两个问题是我们一定会遇到的: 1.Xcode6中增加了size class,在storyboard中如何使用? 2.a ...
- iOS开发~UI布局(一)初探Size Class
随着iOS8系统的发布,一个全新的页面UI布局概念出现,这个新特性将颠覆包括iOS7及之前版本的UI布局方式,这个新特性就是Size Class.Size Class配合Auto Layout可以解决 ...
- Auto Layout 在iOS屏幕适配中的使用
前几天在做iOS屏幕的适配,也就是让同样的UI控件的布局在不同屏幕的iOS设备上面都正确显示,storyBoard就无可避免的用到了Auto Layout.在这个过程中,我发现要熟练掌握Auto La ...
- 转:iOS 屏幕适配,autoResizing autoLayout和sizeClass图文详解
1. autoResizing autoresizing是苹果早期的ui布局适配的解决办法,iOS6之前完全可以胜任了,因为苹果手机只有3.5寸的屏幕,在加上手机app很少支持横屏,所以iOS开发者基 ...
随机推荐
- 循环遍历checkbox按钮,和点击后提示。
今天做了一个有关checkbox点击的项目,点击checkbox获取这行的数值,然后相加.运用的是jquery和PHP传值. $('input[type=checkbox]').click(funct ...
- jQuery实战
1.获取标签在文档中的位置 var left = $('.selected').offset().left; var top = $('.selected').offset().top; 2.获取选中 ...
- 关于android 加载https网页的问题
我在加载https网页时出现空白, 因此,我就百度一下,可以发现: webView.setWebViewClient(new WebViewClient(){ @Override public voi ...
- 16-1-27---JDBC复习(01)
JDBC数据库连接学习 用jdbc连接数据库 1.加载驱动 Class.forName(""); 用注册的方式会使内存中存在两个对象,而用上 ...
- 弱省互测#2 t3
题意 给出\(n\)个01字节和\(m\)个01字节,要求用后者去匹配前者,两个串能匹配当且仅当除了每个字节末位不同,其他位都要相同.问匹配后者至少有多少个末位不同.(\(1 \le m \le n ...
- 【ORACLE】 表空间信息
Linux 查看磁盘空间命令 格式: df -hl 显示格式为: 文件系统 容量 已用 可用 已用% 挂载点 [root@localhost opt]# dfFilesystem 1K-blo ...
- printf的特殊用法
printf的特殊用法:对于m.n的格式可以用如下方法表示 前边的 * 定义的是总的宽度,后边的 * 定义的是输出的个数.分别对应外面的参数m和n .这种方法的好处是可以在语句之外对参数m和n赋值 ...
- 我听说 C...
我听说在 c 语言的世界里,goto 和异常处理都是声名狼藉的东西,而我认为它们在一起就能化解各自的问题.
- DNS域名服务器
DNS是用来解析域名的,IP就相当于地址一样,不知道IP就没法访问指定网络.要上PC6下载站,输入www.pc6.com, 得先问问DNS大哥www.pc6.com在哪,然后Dns告诉你后,就上去了w ...
- SQL编程篇 (二) 定义与流程控制
分类: sql编程:标准的sql 编程 * 纯sql 在标准的编程中又分为 sqlserver-->T-sql oracle-->pl-sql(扩展) 变量:在使用变量之前先定义 声明变量 ...
