[转]nopCommerce Widgets and How to Create One
本文转自:https://dzone.com/articles/what-are-nopcommerce-widgets-and-how-to-create-one
A widget is a stand-alone application that can be embedded into third party sites by any user on a page. It's a small application that can be installed and executed within a web page by an end user. (Wikipedia).
What Are Widgets in Nopcommerce?
A widget is an element of a graphical user interface (GUI) that displays information which can be changed by the user or store admin. nopCommerce has several built-in widget plugins such as Google Analytics and Nivo Slider etc. When adding a widget to the public store, the site administrator needs to define (or select) a widget zone. Now, you must be wondering, what is a widget zone? A widget zone is part of the UI (user-interface) in the public store where the widget can be displayed or rendered. For example, you can place a Live Person chat widget on the left column or on the right column widget zone. Widget zones are basically the pre-defined locations in a nopCommerce public site that make it easier for the store admin to display any information.
How Widgets Are Different From Plugins in Nopcommerce?
In nopCommerce, a widget is used to add some kind of functionality or feature (or even display information) that can be rendered on some parts of the public site (also known as widget zones). Whereas, plugins in nopCommerce are used to extend the functionality of nopCommerce. nopCommerce has several types of plugins. Some examples are payment methods (such as PayPal), tax providers, shipping method computation methods (such as UPS, USP, FedEx), widgets (such as 'live chat' block), and many others.
Here you can find third-party plugins/extensions and themes which are developed by the nopCommerce community and partners: http://www.nopcommerce.com/extensions-and-themes.aspx
The Widget Structure, Required Files, and Locations
The first thing you need to do is to create a new "Class Library" project in the solution. It's a good practice to place all widgets (or plugins) into \Plugins directory in the root of your solution (do not mix up with \Plugins subdirectory located in \Nop.Web directory which is used for already deployed widgets and plugins). You can find more information about solution folders here.
Steps to Create a Custom Nopcommerce Widget
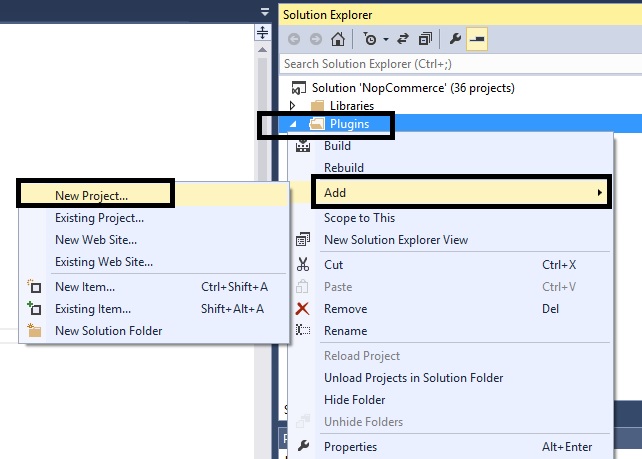
Step 1) Open the nopCommerce solution in Visual Studio (remember you need full source code)
Step 2) Right click on the plugin folder: Add > New Project
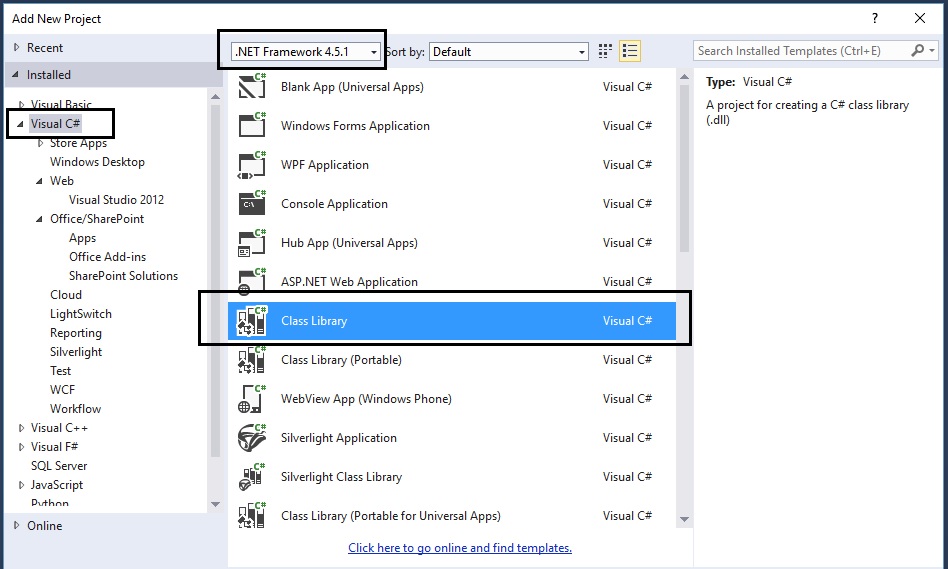
Step 3) On the add new project window:
select.NET Framework 4.5.1
select Visual C#
select Class Library
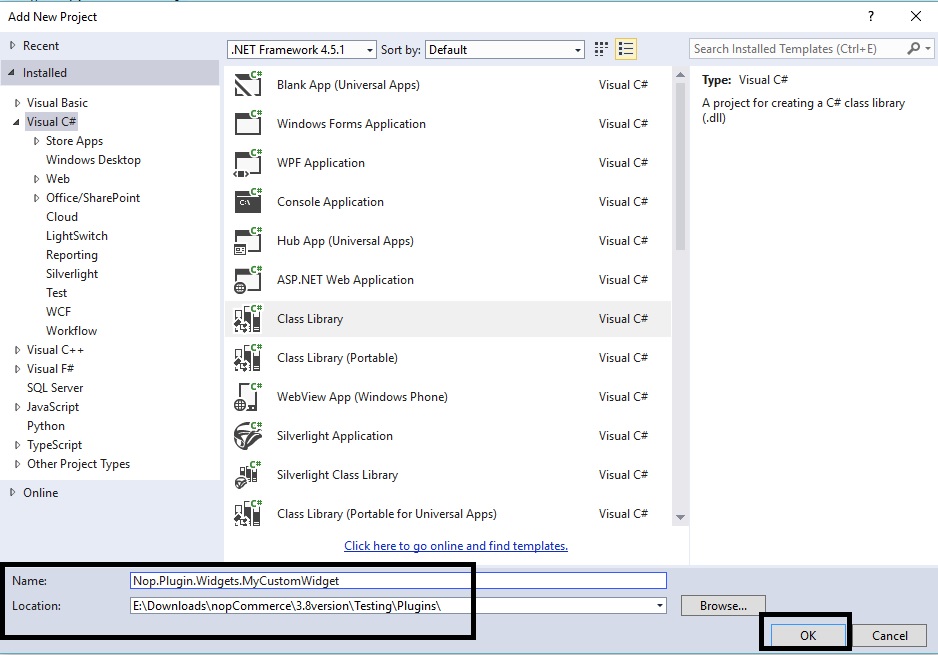
Step 4) Now, name the widget and set the location as follows:
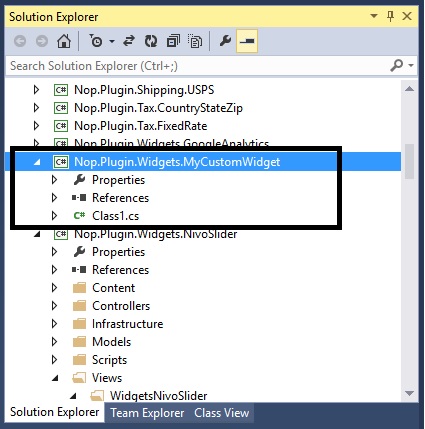
In this case, we are naming the plugin: Nop.Plugin.Widgets.MyCustomWidget
Location: You will need to click on the "Browse" button and select the plugin folder that contains the source code of all the plugins / widgets (not the folder inside Nop.Web that only contains the compiled dlls)
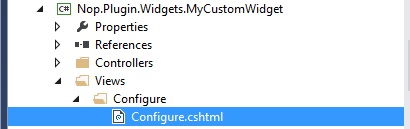
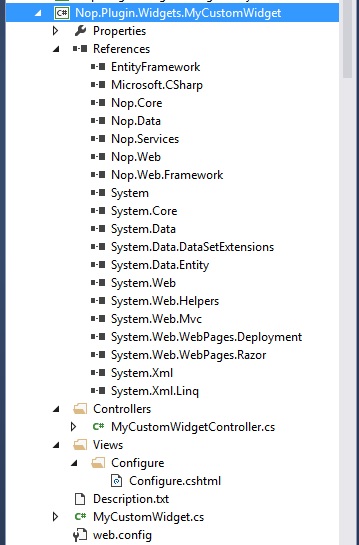
Step 5) Now, you should be able to see your custom widget project in the solution explorer like this:
Step 6) Now is the time to add all the correct references. Go to: References > Add Reference…
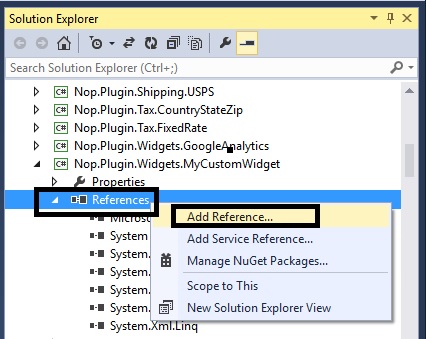
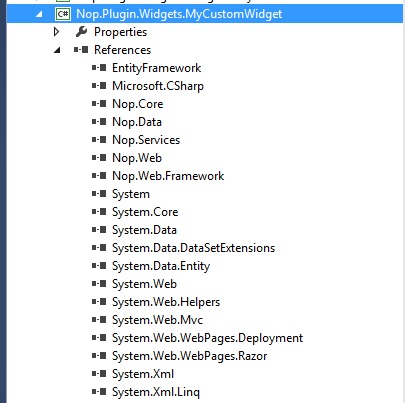
You will need to add all the references (see pic below). In case you are not able to find the right reference, simple go to any other plugin that has it and get the reference from there.
Step 7) You need to configure your custom widget in a proper structure.
Description.txt: The next step is creating a Description.txt file required for each widget. This file contains meta information describing your widget. Just copy this file from any other existing widget and modify it for your needs.
- Group: Widgets
- FriendlyName: MyCustomWidget
- SystemName: Nop.Plugin.Widgets.MyCustomWidget
- Version: 1.00
- SupportedVersions: 3.80
- Author: Lavish Kumar
- DisplayOrder: 1
- FileName: Nop.Plugin.Widgets.MyCustomWidget.dll
Web.config: You should also create a web.config file and ensure that it's copied to output. Just copy it from any existing widget.

Step 8) Add a class MyCustomWidget.cs and use the following code:

- using System;
- using System.Collections.Generic;
- using System.Linq;
- using System.Text;
- using System.Threading.Tasks;
- using System.IO;
- using System.Web.Routing;
- using Nop.Core;
- using Nop.Core.Plugins;
- using Nop.Services.Cms;
- using Nop.Services.Configuration;
- using Nop.Services.Localization;
- using Nop.Services.Media;
- using Nop.Services.Common;
- namespace Nop.Plugin.Widgets.MyCustomWidget
- {
- /// <summary>
- /// PLugin
- /// </summary>
- public class MyCustomWidget : BasePlugin, IWidgetPlugin
- {
- /// <summary>
- /// Gets widget zones where this widget should be rendered
- /// </summary>
- /// <returns>Widget zones</returns>
- public IList<string> GetWidgetZones()
- {
- return new List<string> { "home_page_before_categories" };
- }
- /// <summary>
- /// Gets a route for provider configuration
- /// </summary>
- /// <param name="actionName">Action name</param>
- /// <param name="controllerName">Controller name</param>
- /// <param name="routeValues">Route values</param>
- public void GetConfigurationRoute(out string actionName, out string controllerName, out RouteValueDictionary routeValues)
- {
- actionName = "Configure";
- controllerName = "MyCustomWidget";
- routeValues = new RouteValueDictionary { { "Namespaces", "Nop.Plugin.Widgets.MyCustomWidget.Controllers" }, { "area", null } };
- }
- /// <summary>
- /// Gets a route for displaying widget
- /// </summary>
- /// <param name="widgetZone">Widget zone where it's displayed</param>
- /// <param name="actionName">Action name</param>
- /// <param name="controllerName">Controller name</param>
- /// <param name="routeValues">Route values</param>
- public void GetDisplayWidgetRoute(string widgetZone, out string actionName, out string controllerName, out RouteValueDictionary routeValues)
- {
- actionName = "PublicInfo";
- controllerName = "MyCustomWidget";
- routeValues = new RouteValueDictionary
- {
- {"Namespaces", "Nop.Plugin.Widgets.MyCustomWidget.Controllers"},
- {"area", null},
- {"widgetZone", widgetZone}
- };
- }
- /// <summary>
- /// Install plugin
- /// </summary>
- public override void Install()
- {
- PluginManager.MarkPluginAsInstalled(this.PluginDescriptor.SystemName);
- }
- /// <summary>
- /// Uninstall plugin
- /// </summary>
- public override void Uninstall()
- {
- PluginManager.MarkPluginAsUninstalled(this.PluginDescriptor.SystemName);
- }
- }
- }
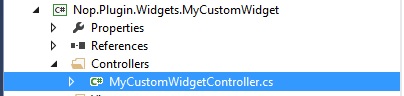
Step 9) Add a class MyCustomWidgetController.cs (in folder “Controllers” within your widget) and use the following code:
- using System;
- using System.Collections.Generic;
- using System.Data.Entity.Migrations;
- using System.Linq;
- using System.Text.RegularExpressions;
- using System.Web.Mvc;
- using Nop.Services;
- using Nop.Web.Framework.Controllers;
- using Nop.Web.Framework.Kendoui;
- using Nop.Services.Localization;
- using Nop.Services.Security;
- using Nop.Core.Domain.Localization;
- using Nop.Core.Data;
- using Nop.Core;
- using Nop.Web.Models.Common;
- using Nop.Core.Caching;
- using Nop.Web.Infrastructure.Cache;
- using Nop.Core.Infrastructure;
- namespace Nop.Plugin.Widgets.MyCustomWidget.Controllers
- {
- public class MyCustomWidgetController : BasePluginController
- {
- [AdminAuthorize]
- public ActionResult Configure()
- {
- return View("/Plugins/Widgets.MyCustomWidget/Views/Configure/Configure.cshtml");
- }
- public ActionResult PublicInfo(string widgetZone, object additionalData = null)
- {
- return View("/Plugins/Widgets.MyCustomWidget/Views/Configure/PublicInfo.cshtml");
- }
- }
- }
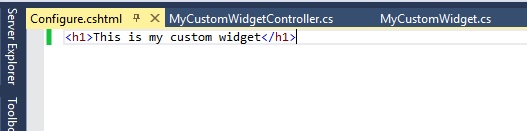
Step 10) Add a Configure.cshtml (View) inside “Views” folder – In this case we are creating a blank view
Note: Make sure the output directory (in properties) for your view (Configure.cshtml) is defined as “Copy if newer”
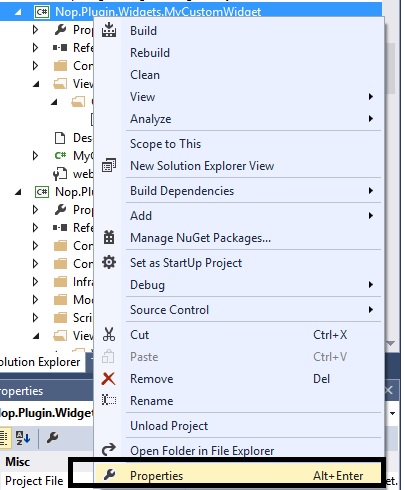
Step 11) Right click on the “Nop.Plugin.Widgets.MyCustomWidget” project and click “Properties”
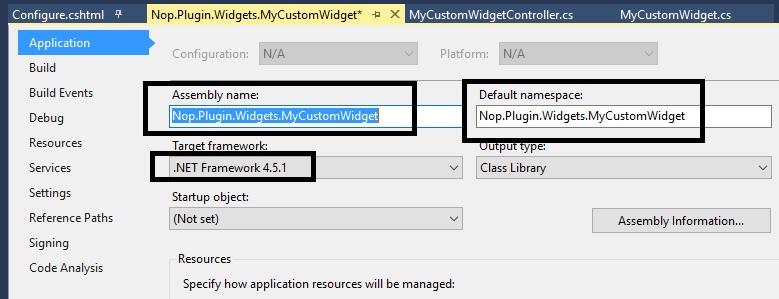
Make sure the assemble name and default namespaces are as follows (along with the.NET Framework):
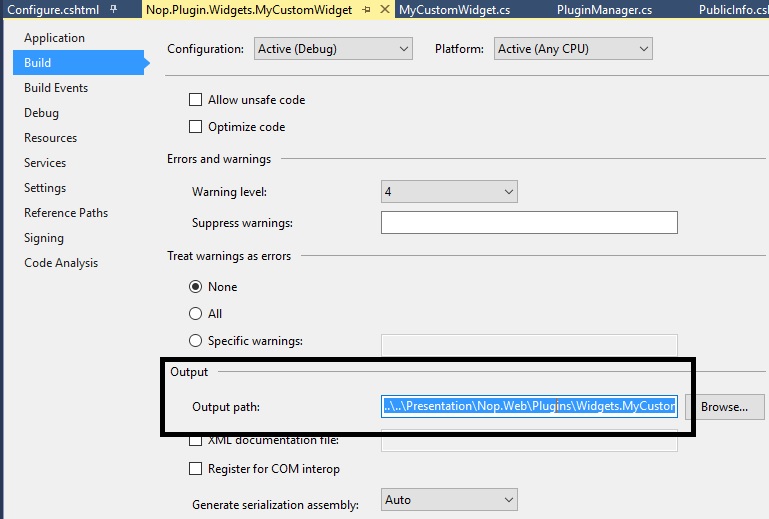
Go to the left tab “Build” in the properties window:
Scroll down to “Output” and make sure the path is same as:
..\..\Presentation\Nop.Web\Plugins\Widgets.MyCustomWidget\
Step 12) Make sure everything is saved and look like this (and follows this structure):
Step 13) Right click on your custom widget project and click “Build”
Step 14) After re-building your project, run the whole solution and go to the Administration section and “Clear cache”
Step 15) Go to the plugin directory and click on the button “Reload list of plugins”


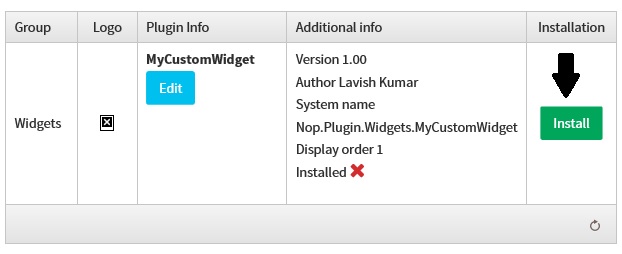
Step 16) Now, if you scroll down, you should be able to see your new custom widget in the list of plugins - Click on the “Install” button for your custom widget.
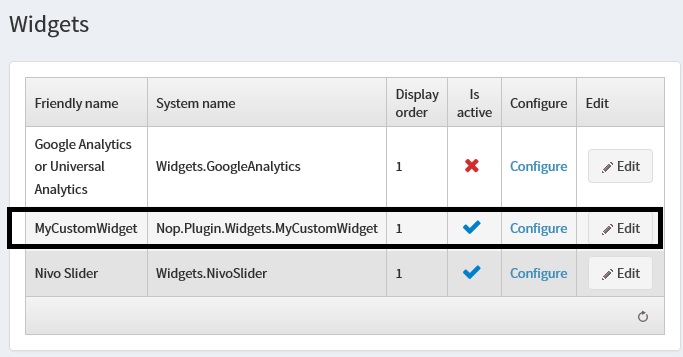
Step 17) Go to: Administration > Configuration > Widgets
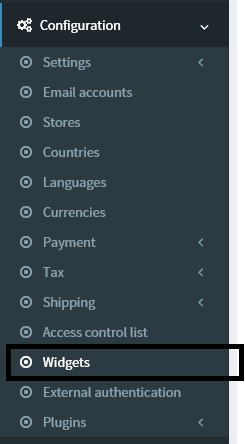
Now, you should be able to see your widget in the list.
Step 18) Click on the CONFIGURE link and you should be able to see your view like this:
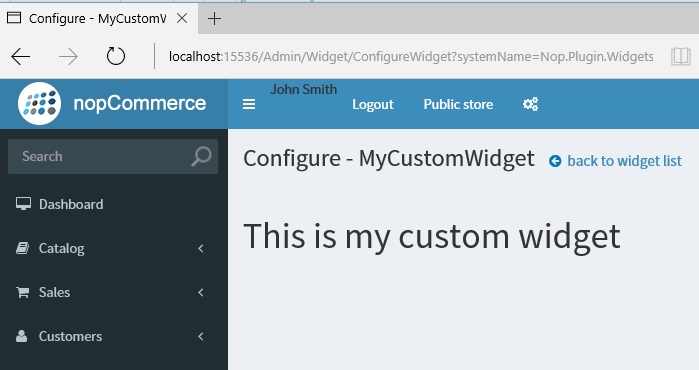
We have successfully created a nopCommerce widget. If you have any questions, please feel free to ask.
nopCommerce can be download here: http://www.nopcommerce.com/downloads.aspx
nopCommerce Version (used in this article): Version 3.80
nopCommerce Support: http://www.nopcommerce.com/boards/
[转]nopCommerce Widgets and How to Create One的更多相关文章
- pyqt的信号槽机制(转)
PySide/PyQt Tutorial: Creating Your Own Signals and Slots This article is part 5 of 8 in the series ...
- Dojo Widget系统(转)
Dojo 里所有的小部件(Widget)都会直接或间接的继承 dijit._Widget / dijit._WidgetBase dijit._Widget 是 dojo 1.6 和 1.6之前的版本 ...
- YII 主题
heming是一个在Web应用程序里定制网页外观的系统方式.通过采用一个新的主题,网页应用程序的整体外观可以立即和戏剧性的改变. 在Yii,每个主题由一个目录代表,包含view文件,layout文件和 ...
- Django之Form字段插件
一.Django内置Form组件: 在使用Django内置的Form组件时,里面包含了许多[字段]和[插件],也就是验证用户输入的请求以及生成显示在前端的HTML.下面介绍一下用法: F ...
- Wrapping calls to the Rational Functional Tester API——调用Rational Functional Tester封装的API
转自:http://www.ibm.com/developerworks/lotus/library/rft-api/index.html The Rational GUI automation to ...
- [STemWin教程入门篇] 第一期:emWin介绍
转自:http://bbs.armfly.com/read.php?tid=1544 SEGGER公司介绍 了解emWin之前,先了解一下SEGGER这家公司,了解生产商才能对emWin有更加全面的认 ...
- nopCommerce 3.9 大波浪系列 之 网页加载Widgets插件原理
一.插件简介 插件用于扩展nopCommerce的功能.nopCommerce有几种类型的插件如:支付.税率.配送方式.小部件等(接口如下图),更多插件可以访问nopCommerce官网. 我们看下后 ...
- [转]simple sample to create and use widget for nopcommerce
本文转自:http://badpaybad.info/simple-sample-to-create-and-use-widget-for-nopcommerce Here is very simpl ...
- [转]NopCommerce之视图设计
本文转自:http://blog.csdn.net/hygx/article/details/7324452 Designer's Guide Contents Overview 概述 Inst ...
随机推荐
- ASP.NET Core MVC/WebAPi 模型绑定探索
前言 相信一直关注我的园友都知道,我写的博文都没有特别枯燥理论性的东西,主要是当每开启一门新的技术之旅时,刚开始就直接去看底层实现原理,第一会感觉索然无味,第二也不明白到底为何要这样做,所以只有当你用 ...
- 一起学微软Power BI系列-使用技巧(1)连接Oracle与Mysql数据库
说起Oracle数据库,以前没用过Oracle不知道,但是这1年用Oracle后,发现真的是想狂吐槽,特别是那个.NET驱动和链接字符串,特别奇葩.总归是和其他数据库不一样,标新立异,不知道为何.另外 ...
- const extern static 终极指南
const extern static 终极指南 不管是从事哪种语言的开发工作,const extern static 这三个关键字的用法和原理都是我们必须明白的.本文将对此做出非常详细的讲解. co ...
- 【知识必备】RxJava+Retrofit二次封装最佳结合体验,打造懒人封装框架~
一.写在前面 相信各位看官对retrofit和rxjava已经耳熟能详了,最近一直在学习retrofit+rxjava的各种封装姿势,也结合自己的理解,一步一步的做起来. 骚年,如果你还没有掌握ret ...
- gRPC源码分析1-SSL/TLS
引子 前几天看到微信后台团队分享了TLS相关文章,正好gRPC里TLS数据加密是很重要的一块,于是整理出了这篇文章. 在gRPC里,如果仅仅是用来做后端微服务,可以考虑不加密.本文太长,先给个大纲. ...
- asp.net core 实战之 redis 负载均衡和"高可用"实现
1.概述 分布式系统缓存已经变得不可或缺,本文主要阐述如何实现redis主从复制集群的负载均衡,以及 redis的"高可用"实现, 呵呵双引号的"高可用"并不是 ...
- 图解Spark API
初识spark,需要对其API有熟悉的了解才能方便开发上层应用.本文用图形的方式直观表达相关API的工作特点,并提供了解新的API接口使用的方法.例子代码全部使用python实现. 1. 数据源准备 ...
- OpenGL shader 中关于顶点坐标值的思考
今天工作中需要做一个事情: 在shader内部做一些空间距离上的计算,而且需要对所有的点进行计算,符合条件的显示,不符合条件的点不显示. 思路很简单,在vertex shader内知道顶点坐标,进行计 ...
- spring mvc 数据校验
1.需要导入的jar包: slf4j-api-1.7.21.jar validation-api-1.0.0.GA.jar hibernate-validator-4.0.1.GA.jar 2.访问页 ...
- 《徐徐道来话Java》(2):泛型和数组,以及Java是如何实现泛型的
数组和泛型容器有什么区别 要区分数组和泛型容器的功能,这里先要理解三个概念:协变性(covariance).逆变性(contravariance)和无关性(invariant). 若类A是类B的子类, ...