CoreData (三)备
NSFetchedResultsController
什么是NSFetchedResultsController
NSFetchedResultsController是一个让人爱恨交加的一个类。如果使用得当,NSFetchedResultsController能帮组减少很多代码。如果使用不当,整个App就随时崩溃。
NSFetchedResultsController我觉得最初的设计应该是为了配合UITableView来使用的。因为UITableView在iOS的应用App中出场次数实在是太高了.而且UITableView是重要的数据展示View,所以需要频繁的向Model去请求数据,但是根据MVC来说,V不应该直接跟M联系的.这样就在Core Data下面出现了一个C—NSFetchedResultsController来把V和M协调起来. NSFetchedResultsController就是这个C.
NSFetchedResultsController是有两个重要的功能。
第一:NSFetchedResultsController是作用在Core Data上的,通过NSFetchRequest来查询Core Data里面的数据.可以返回按照组分好的数据.这样便于UITableView来显示.
第二:但Modle改变的时候NSFetchedResultsController能及时的发出通知.准确的说,应该是当NSManagedObjectContext发生改变的时候,NSFetchedResultsController能知道这些变化,然后发出通知出来.以便UITableview能及时的更新.
实现一个NSFetchedResultsController作为Data source的UITableView
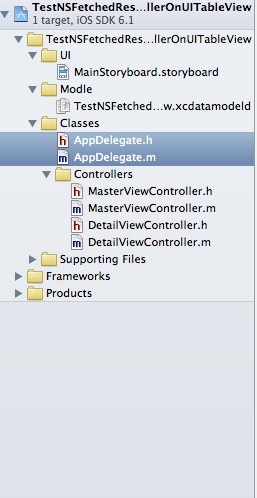
创建一个最小带Core Data的工程

选择Master-Detail Application

整理一下显示层级和结构使其看起来顺眼一些
确立目标
打开看以后 发现建立的工程是已经使用了NSFetchedResultsController
我们的目标是改写这个项目支持UITableView分组显示
首先修改Data Model
增加一个字段用来分组. 我们增加一个同样的Date用来记录此时的分钟数量.

初始化一个NSFetchedResultsController
这里假设你看过我的Core Data笔记1,2.默认你已经做好了Core Data stack的全部工作.然后再开始NSFetchedResultsController的初始化.
|
1
2
3
4
5
6
7
8
9
10
11
12
13
14
15
16
17
18
19
20
21
22
23
24
25
26
27
28
29
30
31
32
33
34
|
- (NSFetchedResultsController *)fetchedResultsController{ if (_fetchedResultsController != nil) { return _fetchedResultsController; } NSFetchRequest *fetchRequest = [[NSFetchRequest alloc] init]; // Edit the entity name as appropriate. NSEntityDescription *entity = [NSEntityDescription entityForName:@"Event" inManagedObjectContext:self.managedObjectContext]; [fetchRequest setEntity:entity]; // Set the batch size to a suitable number. [fetchRequest setFetchBatchSize:20]; // Edit the sort key as appropriate. NSSortDescriptor *sortDescriptor = [[NSSortDescriptor alloc] initWithKey:@"timeStamp" ascending:NO]; NSArray *sortDescriptors = @[sortDescriptor]; [fetchRequest setSortDescriptors:sortDescriptors]; // Edit the section name key path and cache name if appropriate. // nil for section name key path means "no sections". NSFetchedResultsController *aFetchedResultsController = [[NSFetchedResultsController alloc] initWithFetchRequest:fetchRequest managedObjectContext:self.managedObjectContext sectionNameKeyPath:@"sectionMinute" cacheName:@"Master"]; aFetchedResultsController.delegate = self; self.fetchedResultsController = aFetchedResultsController; NSError *error = nil; if (![self.fetchedResultsController performFetch:&error]) { // Replace this implementation with code to handle the error appropriately. // abort() causes the application to generate a crash log and terminate. You should not use this function in a shipping application, although it may be useful during development. NSLog(@"Unresolved error %@, %@", error, [error userInfo]); abort(); } return _fetchedResultsController;} |
这里是工程里面的NSFetchedResultsController的set方法.可以看出,第一我们创建一个NSFetchRequest查询.然后在用这个NSFetchRequest去创建一个NSFetchedResultsController.
|
1
|
NSFetchedResultsController *aFetchedResultsController = [[NSFetchedResultsController alloc] initWithFetchRequest:fetchRequest managedObjectContext:self.managedObjectContext sectionNameKeyPath:@"sectionMinute" cacheName:@"Master"]; |
第一个参数就是NSFetchRequest.
第二个参数是要指定在哪个context里面进行查询
第三个参数是根据什么key来分组.sectionNameKeyPath本来是nil是不分组,我改为我们需要分组的key值“sectionMinute”.
第四个参数 官方解释是这里点到The Cache的地方. 我的理解是cache只保留很少的一部分数据在磁盘上面,如果使用了Cache,在重建UITableView的时候, 就优先查询cache里面的数据.然后要在-performFetch:执行的时候才会去刷新新的数据.这样有助于UITableView的流畅性.
然后我加入Sections的方法
|
1
2
3
4
5
6
7
|
- (NSString *)tableView:(UITableView *)tableView titleForHeaderInSection:(NSInteger)section{ NSArray *sections = [[self fetchedResultsController] sections]; id <NSFetchedResultsSectionInfo> sectionInfo = nil; sectionInfo = [sections objectAtIndex:section]; return [sectionInfo name];} |
接着我添加
|
1
|
https://github.com/erica/NSDate-Extensions.git |
这个NSDate库进来.自己按照他的写法,写一个能获得当前时间秒数为0的方法.用来分组.
|
1
2
3
4
5
|
- (NSDate *) dateAtStartOfMinutes{ NSDateComponents *components = [CURRENT_CALENDAR components:DATE_COMPONENTS fromDate:self]; [components setSecond:0]; return [CURRENT_CALENDAR dateFromComponents:components];} |
然后改写insert方法
|
1
2
3
4
5
6
7
8
9
10
11
12
13
14
15
16
17
18
19
|
- (void)insertNewObject:(id)sender{ NSManagedObjectContext *context = [self.fetchedResultsController managedObjectContext]; NSEntityDescription *entity = [[self.fetchedResultsController fetchRequest] entity]; NSManagedObject *newManagedObject = [NSEntityDescription insertNewObjectForEntityForName:[entity name] inManagedObjectContext:context]; // If appropriate, configure the new managed object. // Normally you should use accessor methods, but using KVC here avoids the need to add a custom class to the template. [newManagedObject setValue:[NSDate date] forKey:@"timeStamp"]; [newManagedObject setValue:[[NSDate date] dateAtStartOfMinutes] forKey:@"sectionMinute"]; // Save the context. NSError *error = nil; if (![context save:&error]) { // Replace this implementation with code to handle the error appropriately. // abort() causes the application to generate a crash log and terminate. You should not use this function in a shipping application, although it may be useful during development. NSLog(@"Unresolved error %@, %@", error, [error userInfo]); abort(); }} |
其实就是加入了
|
1
|
[newManagedObject setValue:[[NSDate date] dateAtStartOfMinutes] forKey:@"sectionMinute"]; |
这句.
这样,简单的使用NSFetchedResultsController来显示分组的UITableView就搞定了.
当然因为建立的工程模板原因.很大一部分都是xCode搞定的.
被遗忘的地方
Sections数量,决定了有多少组
|
1
2
3
|
- (NSInteger)numberOfSectionsInTableView:(UITableView *)tableView{ return [[self.fetchedResultsController sections] count];} |
如果在初始化NSFetchedResultsController的时候sectionNameKeyPath为nil.这里应该会返回1.(就算没有数据也会返回1)
Row数量,决定每一组分别有多少行数据.
|
1
2
3
4
|
- (NSInteger)tableView:(UITableView *)tableView numberOfRowsInSection:(NSInteger)section{ id <NSFetchedResultsSectionInfo> sectionInfo = [self.fetchedResultsController sections][section]; return [sectionInfo numberOfObjects];} |
我前面说过NSFetchedResultsController就是为了配合UITableView而设计的.所以自然有根据indexPath来取对应的NSManagedObject的方法.
|
1
2
3
4
5
6
7
8
9
10
11
12
|
- (UITableViewCell *)tableView:(UITableView *)tableView cellForRowAtIndexPath:(NSIndexPath *)indexPath{ UITableViewCell *cell = [tableView dequeueReusableCellWithIdentifier:@"Cell" forIndexPath:indexPath]; [self configureCell:cell atIndexPath:indexPath]; return cell;}- (void)configureCell:(UITableViewCell *)cell atIndexPath:(NSIndexPath *)indexPath{ NSManagedObject *object = [self.fetchedResultsController objectAtIndexPath:indexPath]; cell.textLabel.text = [[object valueForKey:@"timeStamp"] description];} |
show

总结
写Blog实在是太累了. NSFetchedResultsController努力一天也才一点点.回去继续写. 下次要写NSFetchedResultsController通知方法.
CoreData (三)备的更多相关文章
- redis cluster + sentinel详细过程和错误处理三主三备三哨兵
redis cluster + sentinel详细过程和错误处理三主三备三哨兵1.基本架构192.168.70.215 7001 Master + sentinel 27001192.168.70. ...
- CoreData (四)备
监听NSFetchedResultsController 之前说过, NSFetchedResultsController是有两个重要的功能. 第一:NSFetchedResultsControlle ...
- iOS CoreData技术学习资源汇总
一.CoreData学习指引 1. 苹果官方:Core Data Programming Guide 什么是CoreData? 创建托管对象模型 初始化Core Data堆栈 提取对象 创建和修改自定 ...
- 阿里云ECS部署Redis主备哨兵集群遇到的问题
一.部署 详细部署步骤:https://blog.csdn.net/lihongtai/article/details/82826809 Redis5.0版本需要注意的参数配置:https://www ...
- redis介绍 (8) window 下redis的集群(cluster命令)
前言: 前段时间我在centos上搭建过一次redis集群,那是借助ruby搭建,这次我介绍一种纯redis集群命令的方式去搭建[最后我会简单介绍ruby搭建]. redis集群搭建(三主三备): 准 ...
- mongodb系列~mongodb数据迁移
一 简介:今天来聊聊mongo的数据迁移二 迁移 1 具体迁移命令 nohup mongodump --port --db dbname --collection tablename --qu ...
- iOS - Share Extension
1. 学 Share Extension 之前 先了解一下iOS的App Extension 2.1 创建Share Extension扩展Target ** 注:扩展不能单独创建,必须依赖于应用工程 ...
- 【Redis】集群方式
一.概述 1.1 Redis3.0版本之前 1.2 常见集群方案 二.Redis-Cluster原理 三.搭建集群方案 3.1 准备工作 3.2 创建模拟集群的文件夹 3.3 复制脚本 3.4 复制一 ...
- ORACLE Physical Standby DG 之switch over
DG架构图如下: 计划,切换之后的架构图: DG切换: 主备切换:这里所有的数据库数据文件.日志文件的路径是一致的 [旧主库]主库primarydb切换为备库standby3主库检查switchove ...
随机推荐
- CoreGraphics 之CGAffineTransform仿射变换(3)
CoreGraphics 之CGAffineTransform仿射变换(3) CoreGraphics 的 仿射变换 可以用于 平移.旋转.缩放变换路径 或者图形上下文. (1)平移变换将路径或图 ...
- [原创]零基础R语言教程---第一课---认识R语言
教程的录制的确是折腾了一番,一连录了二十多遍,有时候激动的说错了字,有时候不知道下一句说啥.. 不过好在第一课已经搞定了,哈哈. 虽然内容现在看起来还有点简单, 不过牛b也是一个过程嘛. 我会坚持下去 ...
- MySQL所有函数及操作符
参考:Function and Operator Reference Name Description ABS() Return the absolute value ACOS() Return th ...
- pmp论坛
PMP论坛: http://www.px101.com/specialpmp/ http://www.pmp.cn/ http://www.pmptuan.com/ http://www.mypm.n ...
- Thunderbird Mail 支持 Microsoft Exchange
Thunderbird地址:https://www.mozilla.org/en-US/thunderbird/ 插件下载地址:https://addons.mozilla.org/zh-CN/thu ...
- Android ToggleButton使用介绍
ToggleButton,就是开关按钮,包括选中和未选中状态,并且需要为不同的状态设置不同的事件处理: 例如:使用图片来展示ToggleButton不同的状态: MainActivity.java p ...
- MSSQL的编译和执行过程
原文地址:http://www.cncms.com.cn/mssql/3350_11.htm
- hdu2768-Cat vs. Dog:图论:二分匹配
Cat vs. Dog Time Limit: 2000/1000 MS (Java/Others) Memory Limit: 32768/32768 K (Java/Others)Total ...
- JMeter简单性能测试(适合初学者)
利用JMeter进行Web测试 JMeter介绍 脚本录制 运行JMeter进行测试 JMeter主要组件介绍 参数化设置 动态数据关联 使用命令行运行JM ...
- C#基础:C#4.0权威指南 杂笔一
1.c#中数组初始化的几种不同用法 int[] name = new int[NUM]; int[] name = {1, 2, 3, 4, 5, 6}; int[] ...