HorizontalScrollView水平滚动控件
HorizontalScrollView水平滚动控件
一、简介

用法ScrollView大致相同
二、方法
1)HorizontalScrollView水平滚动控件使用方法
1、在layout布局文件的最外层建立一个HorizontalScrollView控件
2、在HorizontalScrollView控件中加入一个LinearLayout控件,并且把它的orientation设置为horizontal
3、在LinearLayout控件中放入多个装有图片的ImageView控件
2)HorizontalScrollView和ScrollView混合使用方法
以先垂直后水平为例
1、在layout布局文件的最外层建立一个ScrollView控件
2、在ScrollView控件中加入一个LinearLayout控件,并且把它的orientation设置为vertical
3、在这个LinearLayout中添加多个已经弄好的HorizontalScrollView水平滚动控件
三、代码实例
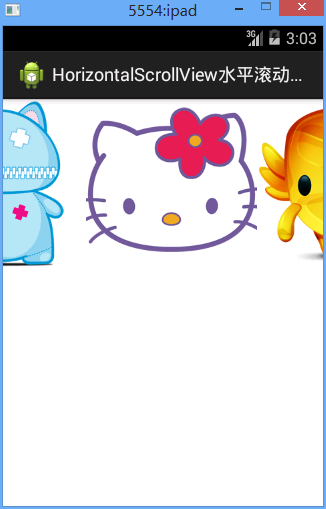
HorizontalScrollView水平滚动控件使用方法
1、水平滚动效果图:

2、水平滚动代码:
/Ex27ScrollView/res/layout/activity02.xml
 <?xml version="1.0" encoding="utf-8"?>

 <HorizontalScrollView xmlns:android="http://schemas.android.com/apk/res/android"

     android:layout_width="match_parent"

     android:layout_height="match_parent"

     android:scrollbars="none"

     >

     <LinearLayout

         android:layout_width="match_parent"

         android:layout_height="match_parent"

         android:orientation="horizontal"

         >

         <ImageView

             android:layout_width="wrap_content"

             android:layout_height="wrap_content"

             android:src="@drawable/item1"

             />

         <ImageView

             android:layout_width="wrap_content"

             android:layout_height="wrap_content"

             android:src="@drawable/item2"

             />

         <ImageView

             android:layout_width="wrap_content"

             android:layout_height="wrap_content"

             android:src="@drawable/item3"

             />

         <ImageView

             android:layout_width="wrap_content"

             android:layout_height="wrap_content"

             android:src="@drawable/item4"

             />

         <ImageView

             android:layout_width="wrap_content"

             android:layout_height="wrap_content"

             android:src="@drawable/item5"

             />

     </LinearLayout>

 </HorizontalScrollView>
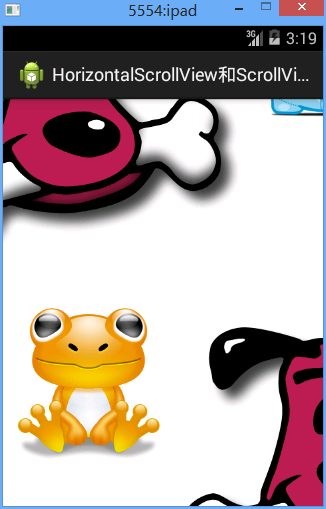
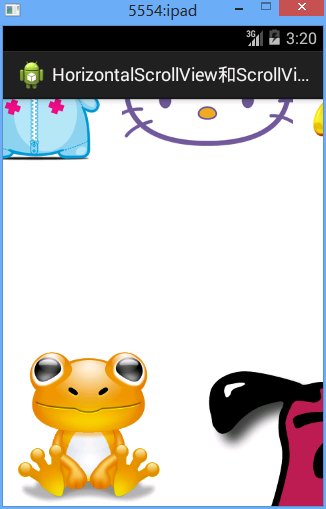
3、水平竖直混合滚动效果图
3、水平竖直混合滚动效果代码
/Ex27ScrollView/res/layout/activity03.xml
 <?xml version="1.0" encoding="utf-8"?>

 <ScrollView xmlns:android="http://schemas.android.com/apk/res/android"

     android:layout_width="match_parent"

     android:layout_height="match_parent"

     android:scrollbars="none" >

     <LinearLayout

         android:layout_width="match_parent"

         android:layout_height="match_parent"

         android:orientation="vertical" >

         <HorizontalScrollView

             android:layout_width="match_parent"

             android:layout_height="match_parent"

             android:scrollbars="none" >

             <LinearLayout

                 android:layout_width="match_parent"

                 android:layout_height="match_parent"

                 android:orientation="horizontal" >

                 <ImageView

                     android:layout_width="wrap_content"

                     android:layout_height="wrap_content"

                     android:src="@drawable/item1" />

                 <ImageView

                     android:layout_width="wrap_content"

                     android:layout_height="wrap_content"

                     android:src="@drawable/item2" />

                 <ImageView

                     android:layout_width="wrap_content"

                     android:layout_height="wrap_content"

                     android:src="@drawable/item3" />

                 <ImageView

                     android:layout_width="wrap_content"

                     android:layout_height="wrap_content"

                     android:src="@drawable/item4" />

                 <ImageView

                     android:layout_width="wrap_content"

                     android:layout_height="wrap_content"

                     android:src="@drawable/item5" />

             </LinearLayout>

         </HorizontalScrollView>

     </LinearLayout>

 </ScrollView>
四、注意点
1、始终注意HorizontalScrollView和ScrollView的直接儿子只有一个,一般都是LinearOut,保证了这个,怎么用也不会错
五、易错点
HorizontalScrollView水平滚动控件的更多相关文章
- UI控件之 ScrollView垂直滚动控件 和 HorizontalScrollView水平滚动控件的使用
1. ScrollView 垂直滚动控件的使用 ScrollView控件只是支持垂直滚动,而且在ScrollView中只能包含一个控件,通常是在< ScrollView >标签中定义了一个 ...
- 自己定义View实现水平滚动控件
前几天项目中须要使用到一个水平可滚动的选择条,类似下图效果(图片是从简书上一位作者那儿找来的,本篇也是在这位作者的文章的基础上改动的,站在大神的肩膀上,哈哈,因为原文没有提供demo,并且实现的效果跟 ...
- ScrollView垂直滚动控件
ScrollView垂直滚动控件 一.简介 二.方法 1)ScrollView垂直滚动控件使用方法 1.在layout布局文件的最外层建立一个ScrollView控件 2.在ScrollView控件中 ...
- Android文字跑马灯控件(文本自动滚动控件)
最近在开发一个应用,需要用到文本的跑马灯效果,图省事,在网上找,但老半天都找不到,后来自己写了一个,很简单,代码如下: import android.content.Context; import a ...
- Android自定义View,高仿QQ音乐歌词滚动控件!
最近在以QQ音乐为样板做一个手机音乐播放器,源码下篇博文放出.今天我想聊的是这个QQ音乐播放器中歌词显示控件的问题,和小伙伴们一起来探讨怎么实现这个歌词滚动的效果.OK,废话不多说,先来看看效果图: ...
- Android高级图片滚动控件,编写3D版的图片轮播器
转载请注明出处:http://blog.csdn.net/guolin_blog/article/details/17482089 大家好,好久不见了,最近由于工作特别繁忙,已经有一个多月的时间没写博 ...
- [android] 手机卫士自定义滚动控件
TextView控件设置单行显示 android:singleLine=”true” 设置TextView开始的位置显示省略号,android:ellipsize=”start” 设置滚动属性,and ...
- Android实现图片滚动控件,含页签功能,让你的应用像淘宝一样炫起来
首先题外话,今天早上起床的时候,手滑一下把我的手机甩了出去,结果陪伴我两年半的摩托罗拉里程碑一代就这么安息了,于是我今天决定怒更一记,纪念我死去的爱机. 如果你是网购达人,你的手机上一定少不了淘宝客户 ...
- 【Android】HorizontalScrollView内子控件横向拖拽
前言 网上ListView上下拖动的例子有,效果也很好,但是项目要横着拖的,只要硬着头皮自己写(主要是没找到合适的),参考文章1修改而来,分享一下. 声明 欢迎转载,但请保留文章原始出处:) 博客园 ...
随机推荐
- 客户端-服务器通信安全 sign key
API接口签名校验,如何安全保存appsecret? - 知乎 https://www.zhihu.com/question/40855191 要保证一般的客户端-服务器通信安全,可以使用3个密钥. ...
- 用户画像 销量预测 微观 宏观 bi
w 目前我们没有自己的平台 第三方平台又不会给任何我们想要的数据 没有用户的注册信息 全天候的行为信息 用户画像没法做 针对我们业务的bi做的思路是什么呢 数据中心怎么做销量预测呢 ...
- 洛谷 P3263 [JLOI2015]有意义的字符串
洛谷 首先,看到\((\frac{(b+\sqrt{d})}{2})^n\),很快能够想到一元二次方程的解\(\frac{-b\pm\sqrt{\Delta}}{2a}\). 所以可以推出,\(\fr ...
- 2014牡丹江——Known Notation
题目链接 题意: 输入一个长度不超过1000的字符串,包含数字(1-9)和星号(*).字符串中的空格已经丢失,所以连起来的数字串能够看成很多分开的数.也能够看成连续的数,即能够随意加入空格. 如今有两 ...
- 检测tomcat服务是否正常
由于tomcat服务经常会出现进程在,但是服务却无法正常响应的问题,而且进程跑在docker容器中,使用zabbix控制不是很方便,故此写了个简单的小脚本: #!/bin/bash #Author:f ...
- 剑指offer 面试40题
面试40题: 题目:最小的k个数 题:输入n个整数,找出其中最小的K个数.例如输入4,5,1,6,2,7,3,8这8个数字,则最小的4个数字是1,2,3,4,. 解题代码一: # -*- coding ...
- Shallow Copy & Deep Copy in Python list
今天在写一个小程序的时候用到了2维数组, 顺手就写成了[[0.0]*length]*length, 结果为了这个小错,调试了半个多小时, 其实之前对与浅复制和深复制已经做过学习和总结, 但真正编程用到 ...
- Python编码规范 -- Python Style Guide
Python代码风格规范. @1:参数缩进:(2种形式) <1> foo = long_function_name(var1, var2, var3, var4) #第1行有参数, 第2行 ...
- Java Web项目在Mac系统上启动时提示nodename nor servname provided
今天一不小心更新了Mac系统,然后在启动Java Web项目的时候,提示了java.net.UnknownHostException: MAC-mini-local nodename nor serv ...
- SpringMVC:学习笔记(9)——文件下载
SpringMVC—文件下载 说明 两个案例 1.为登录用户提供下载服务. 2.阻止仅通过输入网址即可获取下载. 文件下载概览 为了将文件发送给浏览器,我们需要在控制器中完成以下操作: 对请求处理方法 ...