Windows上安装Maven
Maven的具体参考书可以看:《Maven实战》
下载maven可以到:http://maven.apache.org/
Maven的eclipse基本使用可以在这里看到:http://www.iteye.com/topic/1123225
1、把下载下来的maven的zip文件随便解压到一个地方,比如:f:\tool\apache-maven-3.2.5
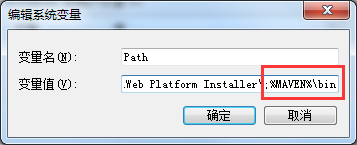
2、设置环境变量(雷同JAVA_HOME):
新加一个"MAVEN":

把"MAVEN"加到Path中:
%MAVEN%\bin
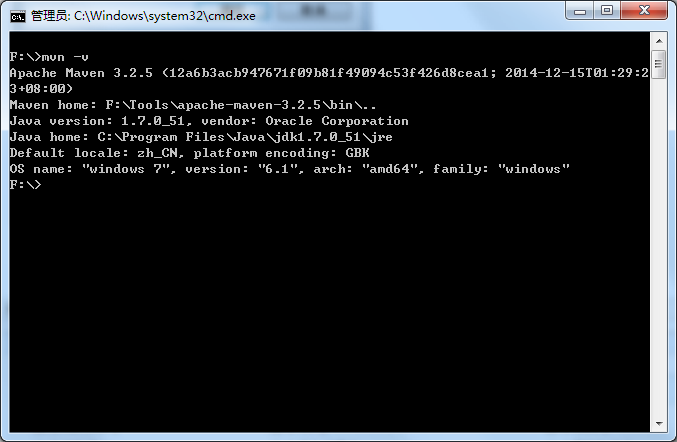
3、打开命令行看看maven是否已经正确配置:
打开cmd窗口:输入 mvn -version,出现如下内容表示安装成功。
4、生成Maven本地仓库。在Maven项目中,用户无需像以前一样自己下载依赖的jar包再放入项目中,只需要定义项目的 pom.xml 文件,对项目使用Maven命令时,Maven会自动从网络上下载相应的包到本地仓库,项目就可以直接使用本地仓库的包。第一次安装Maven时在windows的命令提示符窗口输入 mvn help:system 命令然后回车,等其执行完后就可以在 C:\Users\Admin\.m2\repository 看到 Maven 下载的一些文件。
mvn help:system
运行结果:

此命令运行完后,将会在windows用户文件夹自动生成一个“.m2”的文件夹,里头有一个repository目录,比如:
C:\Users\Admin\.m2
这是本地用户仓库,未来使用maven所自动下载的jar包会下载到这。
注:用户自定义本地仓库
maven 的仓库默认是放在本地用户的临时文件夹下面的 .m2 文件夹下的 repository 下,我的是在 C:\Users\Admin\.m2\repository 目录下,
现在我们来修改将它指定到我们自己的路径下,我现在要将仓库指定到 D:\Repositories\Maven 目录下,
找到maven的存放目录(或者安装目录)打开conf文件夹下的settings.xml文件,找到第53行,把注释去掉,修改成:
<localRepository> D:\Repositories\Maven</localRepository>
在 cmd 中敲并回车执行:mvn help:system 这时候 maven 就会从远程仓库开始下载一大堆的东西,迟早都要下载的,
注:使用用户级别的maven配置
Maven有一个全局配置文件为 Maven根目录/conf/settings.xml 文件(比如我的就是 C:\tools\apache-maven-3.2.5\conf\settings.xml),Maven默认是使用此配置文件,所有用户共享此配置。但是推荐每一个用户配置自己的配置文件,防止无意思影响系统中其他用户,只需要将全局的配置文件复制到用户目录下的 .m2 文件夹即可(我的当前用户是 Admin, 所以复制后为 C:\Users\Admin\.m2\settings.xml )。(如果没有 .m2 文件夹 请先执行上一步,maven会在当前用户的目录下生成 .m2 文件夹)。
注:eclipse 中安装 maven 插件
插件名字:m2eclipse,在eclipse菜单栏中选择Help --> Install New Software,你会看到一个Install的对话框,单击Add按钮,在name字段输入m2e,在Location字段中输入http://m2eclipse.sonatype.org/sites/m2e,单击OK,eclipse 会下载meeclipse安装站点上的资源信息,等待资源载入完成后按照提示安装即可
eclipse一般集成了此插件和一个内嵌的Maven
5、Eclipse配置Maven:
点击eclipse中的window->Perference->Maven->Installations,设置自己下载的Maven。

原eclipse自带的maven可移除,因为大多是版本不一样,会导致后面有莫名的问题。
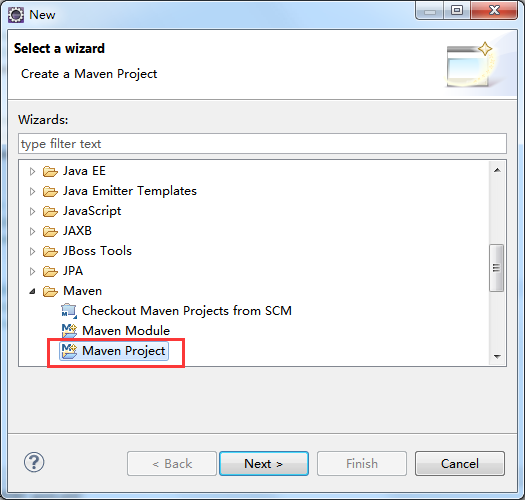
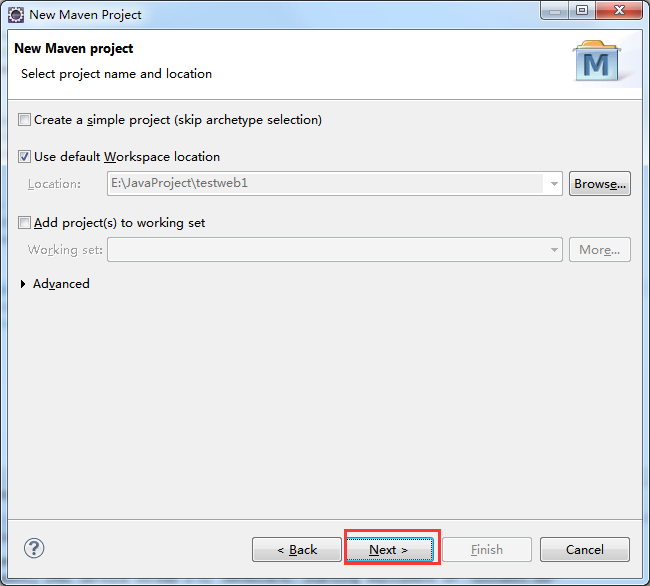
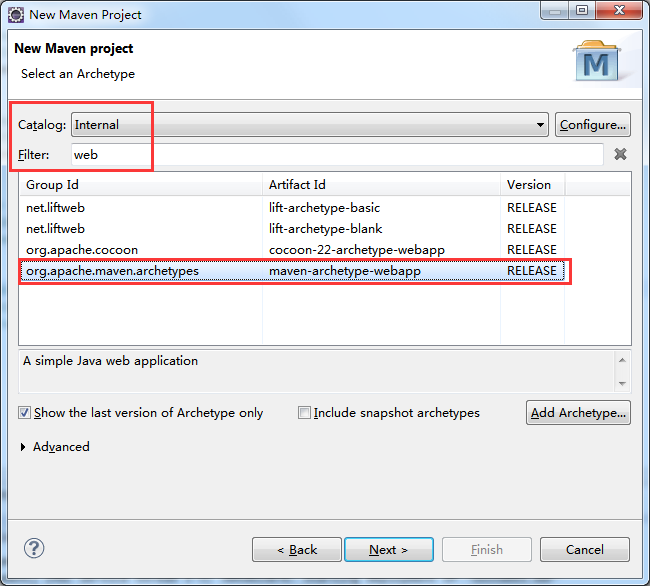
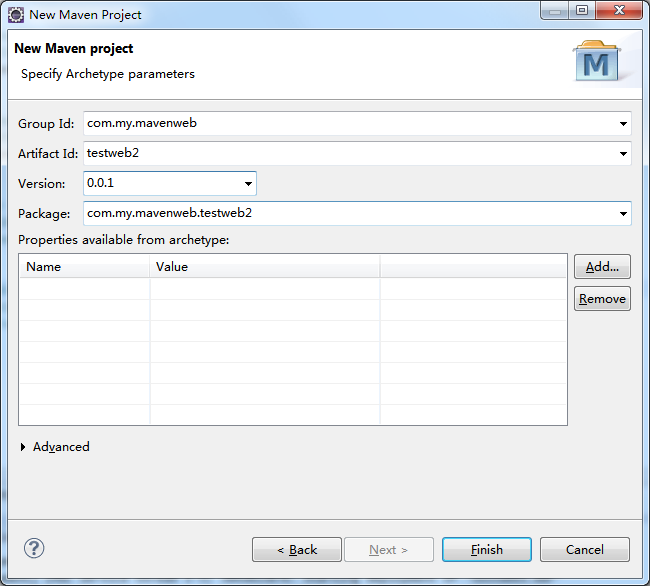
6、新建Maven的Web项目方法:
6.1)Ctrl + N:
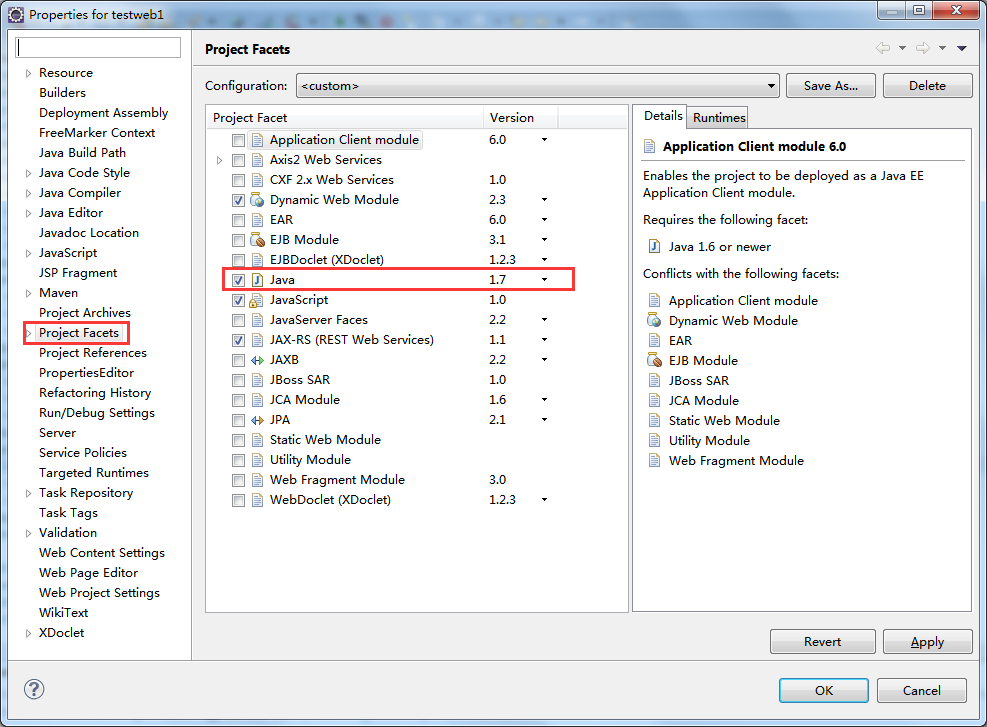
这样,一个Maven的web项目已经建成。但默认,Project Facet中的Java版本是1.5的,要把它修改为本地的java版本。
6.2)右键项目->Properties,把它修改为:
我这里是使用Tomcat,所以要把Dynamic Web Module中的Runtimes设为tomcat:

6.2)以Maven的默认契约新建一个src/main/java源文件夹:

这个文件夹需要手工建,不能以新建源文件夹方式来建。(如果新建提示已经存在,但事实上又没有,只需在buildpath中选用自己的jdk版本就行)
6.3)打开pom.xml文件,加入依赖(dependency)

- ...
- <properties>
- <project.build.sourceEncoding>UTF-8</project.build.sourceEncoding>
- <springversion>3.1.1.RELEASE</springversion>
- <junitversion>3.8.1</junitversion>
- </properties>
- <dependencies>
- <dependency>
- <groupId>junit</groupId>
- <artifactId>junit</artifactId>
- <version>${junitversion}</version>
- <scope>test</scope>
- </dependency>
- <dependency>
- <groupId>org.springframework</groupId>
- <artifactId>spring-aop</artifactId>
- <version>${springversion}</version>
- <type>jar</type>
- <scope>compile</scope>
- </dependency>
- <dependency>
- <groupId>org.springframework</groupId>
- <artifactId>spring-asm</artifactId>
- <version>${springversion}</version>
- <type>jar</type>
- <scope>compile</scope>
- </dependency>
- <dependency>
- <groupId>org.springframework</groupId>
- <artifactId>spring-aspects</artifactId>
- <version>${springversion}</version>
- <type>jar</type>
- <scope>compile</scope>
- </dependency>
- <dependency>
- <groupId>org.springframework</groupId>
- <artifactId>spring-beans</artifactId>
- <version>${springversion}</version>
- <type>jar</type>
- <scope>compile</scope>
- </dependency>
- <dependency>
- <groupId>org.springframework</groupId>
- <artifactId>spring-context</artifactId>
- <version>${springversion}</version>
- <type>jar</type>
- <scope>compile</scope>
- </dependency>
- <dependency>
- <groupId>org.springframework</groupId>
- <artifactId>spring-context-support</artifactId>
- <version>${springversion}</version>
- <type>jar</type>
- <scope>compile</scope>
- </dependency>
- <dependency>
- <groupId>org.springframework</groupId>
- <artifactId>spring-core</artifactId>
- <version>${springversion}</version>
- <type>jar</type>
- <scope>compile</scope>
- </dependency>
- <dependency>
- <groupId>org.springframework</groupId>
- <artifactId>spring-expression</artifactId>
- <version>${springversion}</version>
- <type>jar</type>
- <scope>compile</scope>
- </dependency>
- <dependency>
- <groupId>org.springframework</groupId>
- <artifactId>spring-jdbc</artifactId>
- <version>${springversion}</version>
- <type>jar</type>
- <scope>compile</scope>
- </dependency>
- <dependency>
- <groupId>org.springframework</groupId>
- <artifactId>spring-jms</artifactId>
- <version>${springversion}</version>
- <type>jar</type>
- <scope>compile</scope>
- </dependency>
- <dependency>
- <groupId>org.springframework</groupId>
- <artifactId>spring-orm</artifactId>
- <version>${springversion}</version>
- <type>jar</type>
- <scope>compile</scope>
- </dependency>
- <dependency>
- <groupId>org.springframework</groupId>
- <artifactId>spring-oxm</artifactId>
- <version>${springversion}</version>
- <type>jar</type>
- <scope>compile</scope>
- </dependency>
- <dependency>
- <groupId>org.springframework</groupId>
- <artifactId>spring-tx</artifactId>
- <version>${springversion}</version>
- <type>jar</type>
- <scope>compile</scope>
- </dependency>
- <dependency>
- <groupId>org.springframework</groupId>
- <artifactId>spring-web</artifactId>
- <version>${springversion}</version>
- <type>jar</type>
- <scope>compile</scope>
- </dependency>
- <dependency>
- <groupId>org.springframework</groupId>
- <artifactId>spring-webmvc</artifactId>
- <version>${springversion}</version>
- <type>jar</type>
- <scope>compile</scope>
- </dependency>
- <dependency>
- <groupId>org.springframework</groupId>
- <artifactId>spring-test</artifactId>
- <version>${springversion}</version>
- <type>jar</type>
- <scope>compile</scope>
- </dependency>
- <dependency>
- <groupId>javax.servlet</groupId>
- <artifactId>jstl</artifactId>
- <version>1.2</version>
- <type>jar</type>
- <scope>compile</scope>
- </dependency>
- <dependency>
- <groupId>commons-collections</groupId>
- <artifactId>commons-collections</artifactId>
- <version>3.1</version>
- </dependency>
- <dependency>
- <groupId>commons-logging</groupId>
- <artifactId>commons-logging</artifactId>
- <version>1.1</version>
- </dependency>
- </dependencies>
- ...
- </project>
保存pom.xml,eclipse会自动去到中央服务器中下载对应的jar包,jar包保存在用户文件夹的./m2下
这里,Maven的eclipse配置基本已经完成了。
7、构建和生成Maven

Eclipse中右键项目->Run As->Maven install
Maven默认会把生成的war文件、class所编译的文件都放在项目文件夹中的target目录下
1.安装m2eclipse的时候,遇见这种错误如何解决?错误请见详细信息。
问题:Cannot complete the install because one or more required items could not be found.
Software being installed: Maven Integration for Eclipse (Required) 0.12.1.20110112-1712 (or
g.maven.ide.eclipse.feature.feature.group 0.12.1.20110112-1712)
Missing requirement: Maven Project Model Edit Bundle 0.12.1.20110112-1712 (org.maven.id
e.eclipse.maven_model_edit 0.12.1.20110112-1712) requires 'bundle org.eclipse.emf.ecore 0.
0.0' but it could not be found
Cannot satisfy dependency:
From: Maven Integration for Eclipse (Required) 0.12.1.20110112-1712 (org.maven.ide.eclip
se.feature.feature.group 0.12.1.20110112-1712)
To: org.maven.ide.eclipse.maven_model_edit [0.12.1.20110112-1712] 他说有个文件找不到
。但是到Maven的m2e的链接中,相关文件又是存在的。试了很多次了。都有这个问题。
解决:先连接Helios Update site (Helios - http://download.eclipse.org/releases/helios),安装
插件Graphical Editing Framework Zest Visualization Toolkit SDK。然后再安装 M2Eclipse plug-ins 。
2:如果装的插件版本太高会报
Cannot complete the install because one or more required items could not be found. Software being installed: m2e - Maven Integration for Eclipse (includes I ncubating components) 1.5.0.20140606-0033 (org.eclipse.m2e.feature.feature. group 1.5.0.20140606-0033) Missing requirement: Maven Integration for Eclipse 1.5.0.20140606-0033 (o rg.eclipse.m2e.core 1.5.0.20140606-0033) requires 'bundle com.google.guava [14.0.1,16.0.0)' but it could not be found Cannot satisfy dependency: From: Maven Integration for Eclipse 1.5.0.20140606-0033 (org.eclipse.m2 e.core.ui 1.5.0.20140606-0033) To: bundle org.eclipse.m2e.core [1.5.0,1.6.0) Cannot satisfy dependency: From: m2e - Maven Integration for Eclipse (includes Incubating componen ts) 1.5.0.20140606-0033 (org.eclipse.m2e.feature.feature.group 1.5.0.201406 06-0033) 答案:这种情况换一个低版本的安装,如 Windows上安装Maven的更多相关文章
- windows上安装Maven与Gradle
(一)安装Maven 1.百度maven,进入官网http://maven.apache.org/download.cgi,选择Download,在选择相应的压缩包apache-maven-3.6.0 ...
- windows上安装maven及eclipse中配置maven
本地安装与配置: 1.jdk 在cmd中运行 Java -version 2.下载maven包 https://maven.apache.org/download.cgi下载最新版的Maven程序:( ...
- [Maven实战-许晓斌]-[第二章]-2.1在Windows上安装maven
来源:<maven实战> 1.检查JAVA_HOME和java -version C:\Users\admin>echo %JAVA_HOME% C:\Users\admin&g ...
- 在Windows上安装Maven
下载 Maven 最新版本. http://maven.apache.org/download.cgi 1,下载包后,解压到相应特定位置. 2,将 [解压位置]/bin 加入到Path 3, ...
- Windows下安装Maven
上篇文章刚说到Linux下安装maven的过程,有时候为了适合在本地构建项目开发,然后上传到远程服务器执行,需要在本地构建maven项目,那么一般就是在Windows下构建maven项目并导入到我们的 ...
- 在Windows上安装Nexus 3.2.0-01
在Windows上安装Nexus 环境: Windows 7 apache-maven-3.3.9 JDK 1.8 下载Nexus: https://sonatype-download.globa ...
- 在Windows上安装和配置Jenkins
一.windows上安装Jenkins 1.官网下载Jenkins安装包Jenkins.msi ,进入安装模式,选择默认配置,安装完成之后,就会默认打开浏览器 http://localhost:808 ...
- 在Windows上安装Elasticsearch 5.0
在windows上安装Elasticsearch Elasticsearch可以使用.zip软件包安装在Windows上. elasticsearch-service.bat命令,它将设置Elasti ...
- 在 Windows 上安装Rabbit MQ 指南
rabbitMQ是一个在AMQP协议标准基础上完整的,可服用的企业消息系统.他遵循Mozilla Public License开源协议.采用 Erlang 实现的工业级的消息队列(MQ)服务器. Ra ...
随机推荐
- java为什么要设置环境变量
1. PATH环境变量.作用是指定命令搜索路径,在shell下面执行命令时,它会到PATH变量所指定的路径中查找看是否能找到相 应的命令程序.我们需要把 jdk安装目录下的bin目录增加到现有的PAT ...
- yum install nginx
先安装nginx的yum源 http://nginx.org/en/linux_packages.html#stable 找到链接,安装: rpm -ivh http://nginx.org/pack ...
- AngularJs 入门系列-2 表单验证
对于日常的开发来说,最常见的开发场景就是通过表单编辑数据,这里涉及的问题就是验证问题. angularjs 内置已经支持了常见的验证方式,可以轻松实现表单验证. 1. 绑定 为了方便,我们在 $sco ...
- OKR——Objectives and Key Results
1.OKR天生就有两个典型特征: 1)在精不在多——因为它是用来明确工作重心的(set one's priorities): 2)全体公开.透明——当你能够看到你的同级(peers).小老板(直接上级 ...
- php产生随机数函数
<?php function generate_code($length = 4) { return rand(pow(10,($length-1)), pow(10,$length)-1); ...
- C# 自定义序列化问题
public class overdue { public int overdueTimes { get; set; } /// <summary ...
- 在SWING里嵌入SWT的组件
http://zhanghan3366.blog.163.com/blog/static/6966305220110505351568/ ——————————————————————————————— ...
- 自动化(Automation)兼容的数据类型
自动化(Automation)兼容的数据类型
- 命令行启动win7系统操作部分功能
control.exe /name microsoft.folderoptions 启动资源管理器的 文件夹属性 选项卡 control.exe /name Microsoft.AddHardware ...
- asp.net下载文件方法
/// <summary> /// 下载 /// </summary> /// <param name="url"></param> ...