Android学习笔记-ImageView(图像视图)
本节引言:
本节介绍的UI基础控件是:ImageView(图像视图),见名知意,就是用来显示图像的一个View或者说控件! 官方API:ImageView;本节讲解的内容如下:
- ImageView的src属性和blackground的区别;
- adjustViewBounds设置图像缩放时是否按长宽比
- scaleType设置缩放类型
- 最简单的绘制圆形的ImageView
1.src属性和background属性的区别:
在API文档中我们发现ImageView有两个可以设置图片的属性,分别是:src和background
常识:
①background通常指的都是背景,而src指的是内容!!
②当使用src填入图片时,是按照图片大小直接填充,并不会进行拉伸
而使用background填入图片,则是会根据ImageView给定的宽度来进行拉伸
1)写代码验证区别:
写个简单的布局测试下:
<LinearLayout xmlns:android="http://schemas.android.com/apk/res/android"

    xmlns:tools="http://schemas.android.com/tools"

    android:id="@+id/LinearLayout1"

    android:layout_width="match_parent"

    android:layout_height="match_parent"

    android:orientation="vertical"

    tools:context="com.jay.example.imageviewdemo.MainActivity" >

    <ImageView

        android:layout_width="wrap_content"

        android:layout_height="wrap_content"

        android:background="@drawable/pen" />

    <ImageView

        android:layout_width="200dp"

        android:layout_height="wrap_content"

        android:background="@drawable/pen" />

    <ImageView

        android:layout_width="wrap_content"

        android:layout_height="wrap_content"

        android:src="@drawable/pen" />

    <ImageView

        android:layout_width="200dp"

        android:layout_height="wrap_content"

        android:src="@drawable/pen" />

</LinearLayout>
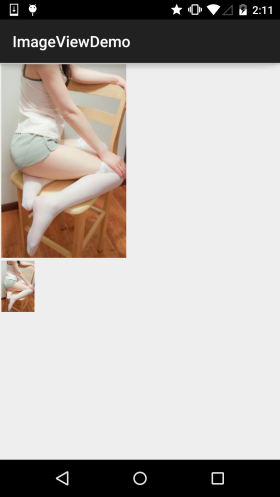
效果图如下:
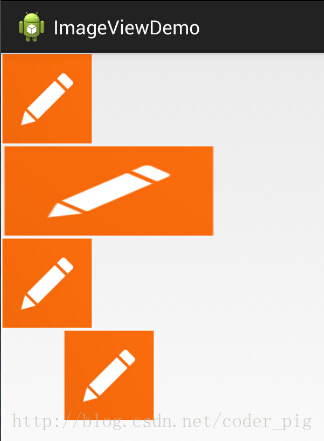
结果分析:
宽高都是wrap_content那就一样,是原图大小,但是,当我们固定了宽或者高的话, 差别就显而易见了,blackground完全填充了整个ImageView,而src依旧是那么大, 而且他居中了哦,这就涉及到了ImageView的另一个属性scaleType了! 另外还有一点,这里我们说了只设置width或者height哦!加入我们同时设置了 width和height的话,blackground依旧填充,但是,src的大小可能发生改变哦! 比如,我们测试下下面这段代码:
<ImageView

        android:layout_width="100dp"

        android:layout_height="50dp"

        android:src="@drawable/pen" />
运行效果图:
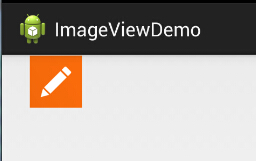
PS:scaleType下面会讲~
2)解决blackground拉伸导致图片变形的方法
在前面的效果图中的第二个Imageview中我们可以看到图片已经被拉伸变形了, 正方形变成了长方形,对于和我一样有轻微强迫症的人来说,显然是不可接受的, 有没有办法去设置呢?答案肯定是有的,笔者暂时知道的有以下两种方式:
这个适用于动态加载ImageView的,代码也渐渐,只要在添加View的时候,把大小写死就可以了
LinearLayout.LayoutParams layoutParam = new LinearLayout.LayoutParams(48, 48);

        layout.addView(ibtnPen, layoutParam);
除了动态加载view,更多的时候,我们还是会通过xml布局的方式引入ImageView的 解决方法也不难,就是通过drawable的Bitmap资源文件来完成,然后blackground属性设置为该文件即可! 这个xml文件在drawable文件夹下创建,这个文件夹是要自己创建的哦!!
pen_bg.xml:
<bitmap

    xmlns:android="http://schemas.android.com/apk/res/android"

    android:id="@id/pen_bg"

    android:gravity="top"

    android:src="@drawable/pen"

    android:tileMode="disabled" >

</bitmap>
上述代码并不难理解,估计大家最迷惑的是titleMode属性吧,这个属性是平铺,就是我们windows设置 背景时候的平铺,多个小图标铺满整个屏幕捏!记得了吧!不记得自己可以试试!disabled就是把他给禁止了!
就是上面这串简单的代码,至于调用方法如下:
动态: ibtnPen.setBacklgroundResource(R.drawable.penbg);
静态: android:background = "@drawable/penbg"
3)设置透明度的问题
说完前面两个区别,接着再说下setAlpha属性咯!这个很简单,这个属性,只有src时才是有效果的!!
4)两者结合妙用:
网上的一张图:
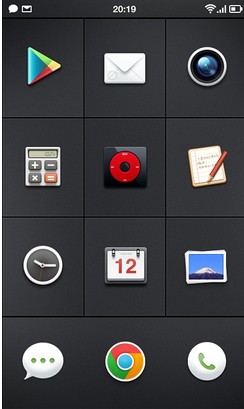
一看去是一个简单的GridView,每个item都是一个ImageView,但是细心的你可能发现了, 上面的ICON都不是规则的,而是圆形,圆角矩形等等,于是乎这里用到了src + background了! 要实现上述的效果,你只需要两个操作: 找一张透明的png图片 + 设置一个黑色的背景 (当然你也可以设置png的透明度来实现,不过结果可能和预想的有出入哦!) 我们写个简单例子:
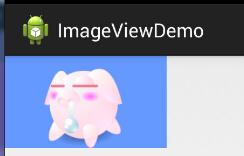
如图,呆萌呆萌的小猪就这样显示到ImageView上了,哈哈,blackground设置了蓝色背景!
实现代码:
<ImageView

    android:layout_width="150dp"

    android:layout_height="wrap_content"

    android:src="@drawable/pig"

    android:background="#6699FF" />
PS: 当然你也可以用selctor实现点击效果,设置不同的情况设置不同的图片,以实现点击或者触摸效果!
5)Java代码中设置blackground和src属性:
前景(对应src属性):setImageDrawable( );
背景(对应background属性):setBackgroundDrawable( );
2.adjustViewBounds设置缩放是否保存原图长宽比
ImageView为我们提供了adjustViewBounds属性,用于设置缩放时是否保持原图长宽比! 单独设置不起作用,需要配合maxWidth和maxHeight属性一起使用!而后面这两个属性 也是需要adjustViewBounds为true才会生效的~
- android:maxHeight:设置ImageView的最大高度
- android:maxWidth:设置ImageView的最大宽度
代码示例:
<LinearLayout xmlns:android="http://schemas.android.com/apk/res/android"

    xmlns:tools="http://schemas.android.com/tools"

    android:layout_width="match_parent"

    android:layout_height="match_parent"

    android:orientation="vertical"

    tools:context=".MainActivity">

    <!-- 正常的图片 -->

    <ImageView

        android:id="@+id/imageView1"

        android:layout_width="wrap_content"

        android:layout_height="wrap_content"

        android:layout_margin="5px"

        android:src="@mipmap/meinv" />

    <!-- 限制了最大宽度与高度,并且设置了调整边界来保持所显示图像的长宽比-->

    <ImageView

        android:id="@+id/imageView2"

        android:layout_width="wrap_content"

        android:layout_height="wrap_content"

        android:layout_margin="5px"

        android:adjustViewBounds="true"

        android:maxHeight="200px"

        android:maxWidth="200px"

        android:src="@mipmap/meinv" />

</LinearLayout>
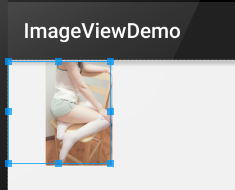
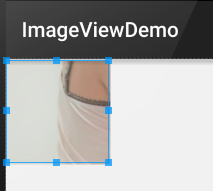
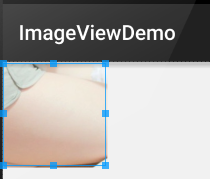
运行效果图:
结果分析: 大的那个图片是没有任何处理的图片,尺寸是:541374;而下面的那个的话我们通过maxWidth和maxHeight 限制ImageView最大宽度与高度为200px,就是最多只能显示200200的图片,我们又设置了一个 adjustViewBounds = "true"调整我们的边界来保持图片的长宽比,此时的ImageView宽高为是128*200~
3.scaleType设置缩放类型
android:scaleType用于设置显示的图片如何缩放或者移动以适应ImageView的大小 Java代码中可以通过imageView.setScaleType(ImageView.ScaleType.CENTER);来设置~ 可选值如下:
- fitXY:对图像的横向与纵向进行独立缩放,使得该图片完全适应ImageView,但是图片的横纵比可能会发生改变
- fitStart:保持纵横比缩放图片,知道较长的边与Image的编程相等,缩放完成后将图片放在ImageView的左上角
- fitCenter:同上,缩放后放于中间;
- fitEnd:同上,缩放后放于右下角;
- center:保持原图的大小,显示在ImageView的中心。当原图的size大于ImageView的size,超过部分裁剪处理。
- centerCrop:保持横纵比缩放图片,知道完全覆盖ImageView,可能会出现图片的显示不完全
- centerInside:保持横纵比缩放图片,直到ImageView能够完全地显示图片
- matrix:默认值,不改变原图的大小,从ImageView的左上角开始绘制原图, 原图超过ImageView的部分作裁剪处理
接下来我们一组组的来对比:
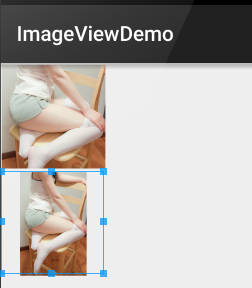
1)1.fitEnd,fitStart,fitCenter
这里以fitEnd为例,其他两个类似:
示例代码:
<!-- 保持图片的横纵比缩放,知道该图片能够显示在ImageView组件上,并将缩放好的图片显示在imageView的右下角 -->

    <ImageView

        android:id="@+id/imageView3"

        android:layout_width="300px"

        android:layout_height="300px"

        android:layout_margin="5px"

        android:scaleType="fitEnd"

        android:src="@mipmap/meinv" />
运行效果图:
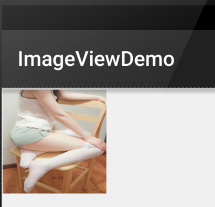
2)centerCrop与centerInside
- centerCrop:按横纵比缩放,直接完全覆盖整个ImageView
- centerInside:按横纵比缩放,使得ImageView能够完全显示这个图片
示例代码:
<ImageView

        android:layout_width="300px"

        android:layout_height="300px"

        android:layout_margin="5px"

        android:scaleType="centerCrop"

        android:src="@mipmap/meinv" />

    <ImageView

        android:layout_width="300px"

        android:layout_height="300px"

        android:layout_margin="5px"

        android:scaleType="centerInside"

        android:src="@mipmap/meinv" />
运行效果图:
3)fitXY
不按比例缩放图片,目标是把图片塞满整个View
示例代码:
<ImageView

        android:layout_width="300px"

        android:layout_height="300px"

        android:layout_margin="5px"

        android:scaleType="fixXY"

        android:src="@mipmap/meinv" />
运行效果图:
好吧,明显扁了=-=~
4)matrix
从ImageView的左上角开始绘制原图,原图超过ImageView的部分作裁剪处理
示例代码:
<ImageView

        android:layout_width="300px"

        android:layout_height="300px"

        android:layout_margin="5px"

        android:scaleType="matrix"

        android:src="@mipmap/meinv" />
运行效果图:
5)center
保持原图的大小,显示在ImageView的中心。当原图的size大于ImageView的size,超过部分裁剪处理。
示例代码:
<ImageView

        android:layout_width="300px"

        android:layout_height="300px"

        android:layout_margin="5px"

        android:scaleType="center"

        android:src="@mipmap/meinv" />
运行效果图:
4.绘制圆形的ImageView
相信大家对圆形或者圆角的ImageView不陌生吧,现在很多的APP都很喜欢圆形的头像是吧~
实际项目的话可以考虑用Github上牛人写的控件,比如下面这两个:
文章参考自:http://www.runoob.com/w3cnote/android-tutorial-imageview.html
Android学习笔记-ImageView(图像视图)的更多相关文章
- Android 开发笔记___图像视图__简单截屏
<?xml version="1.0" encoding="utf-8"?> <LinearLayout xmlns:android=&quo ...
- Android 开发笔记___图像视图
<?xml version="1.0" encoding="utf-8"?> <LinearLayout xmlns:android=&quo ...
- Android学习笔记之图像颜色处理(ColorMatrix)
对图像进行颜色方面的处理,通过使用颜色矩阵(ColorMatrix)来实现.从而可以达到很多特效如黑白老照片.泛黄旧照片等等. 1.颜色矩阵(ColorMatrix) 这里有详细的介绍:http:// ...
- Android学习笔记(27):日历视图Calendar
日历视图CalendarView可用于显示和选择日期. 能够调用setOnDateChangedListener()方法绑定事件监听器. 经常使用XML属性和相关方法: XML属性 相关方法 说明 a ...
- Android学习笔记36:使用SQLite方式存储数据
在Android中一共提供了5种数据存储方式,分别为: (1)Files:通过FileInputStream和FileOutputStream对文件进行操作.具体使用方法可以参阅博文<Andro ...
- 【转】 Pro Android学习笔记(七四):HTTP服务(8):使用后台线程AsyncTask
目录(?)[-] 5秒超时异常 AsyncTask 实现AsyncTask抽象类 对AsyncTask的调用 在哪里运行 其他重要method 文章转载只能用于非商业性质,且不能带有虚拟货币.积分.注 ...
- 【转】 Pro Android学习笔记(七五):HTTP服务(9):DownloadManager
目录(?)[-] 小例子 保存在哪里下载文件信息设置和读取 查看下载状态和取消下载 文章转载只能用于非商业性质,且不能带有虚拟货币.积分.注册等附加条件,转载须注明出处:http://blog.csd ...
- 【转】 Pro Android学习笔记(二二):用户界面和控制(10):自定义Adapter
目录(?)[-] 设计Adapter的布局 代码部分 Activity的代码 MyAdapter的代码数据源和构造函数 MyAdapter的代码实现自定义的adapter MyAdapter的代码继续 ...
- Android学习笔记进阶17之LinearGradient
具体的看一下博文:Android学习笔记进阶15之Shader渲染 package xiaosi.BitmapShader; import android.app.Activity; import a ...
随机推荐
- 安装npm及cnpm(Windows)
[工具官网] Node.js : http://nodejs.cn/ 淘宝NPM: https://npm.taobao.org/ [安装步骤] 一.安装node.js 1.前往node.js官网下载 ...
- Bash内置命令
Bash有很多内置命令,因为这些命令是内置的,因此bash不需要在磁盘上为它们定位,执行速度更快. 1)列出所有内置命令列表$enable 2)关闭内置命令test$enable -n test 3) ...
- iframe 父页面与子页面之间的方法的相互调用
<!DOCTYPE html PUBLIC "-//W3C//DTD XHTML 1.0 Transitional//EN" "http://www.w3.org/ ...
- Go 从入门到精通(三)字符串,时间,流程控制,函数
一.strings和strconv的使用 strings strings.HasPrefix(s string,preffix string) bool:判断字符串s是否以prefix开头 stirn ...
- 搭建phabricator代码审核工具
phabricator 依赖环境 系统centos,mysql,php,nginx 1.下载安装脚本 https://secure.phabricator.com/source/phabricator ...
- 【T-SQL进阶】03.执行计划之旅-1
到大牛们说执行计划,总是很惶恐,是对知识的缺乏的惶恐,所以必须得学习执行计划,以减少对这一块知识的惶恐,下面是对执行计划的第一讲-理解执行计划. 本系列[T-SQL]主要是针对T-SQL的总结. T- ...
- thinkphp之获取客户端IP地址
/** * 获取客户端IP地址 * @param integer $type 返回类型 0 返回IP地址 1 返回IPV4地址数字 * @return mixed */ function get_cl ...
- SharePoint 2016 安装配置流程及需要注意的地方
1. 安装域, 安装后创建一个用户用于之后的安装配置, 例如 SPAdmin@XXXXX.com 2. 安装sql server 2016 将要安装sql server 的服务器加入域, 并将域账 ...
- JavaScript深入之从原型到原型链(本文转载)
JavaScript深入之从原型到原型链(本文转载) https://github.com/mqyqingfeng/Blog.原文地址 构造函数创建对象 我们先使用构造函数创建一个对象: functi ...
- 1.0 配置 appium + java的环境
1. 配置 appim的环境前面中写到. 2. 在eclipse中配置 java 环境, 具体步骤: <1>:在 eclipse 中新建 一个java 项目. ...