学习Nginx(一)
实验目的
通过nginx实现反向代理的功能,类似apache反向代理和haproxy反向代理
有些公司从web服务器到反向代理,都使用nginx。nginx在1.9版本加入了tcp的反向代理功能
甚至安全策略:nginx+lua 完全可以搞定。
打开nginx官网

nginx做反向代理,安装命令如下,使用www用户运行nginx
|
1
2
3
4
5
6
7
8
9
|
useradd -s /sbin/noglogin -M wwwwget http://nginx.org/download/nginx-1.9.12.tar.gztar zxf nginx-1.9.12.tar.gzcd nginx-1.9.12./configure --prefix=/usr/local/nginx-1.9.12 \--user=www --group=www --with-http_ssl_module \--with-http_stub_status_module --with-file-aiomake && make installln -s /usr/local/nginx-1.9.12/ /usr/local/nginx |
检查语法
|
1
2
3
4
|
[root@linux-node2 nginx-1.9.12]# /usr/local/nginx/sbin/nginx -tnginx: the configuration file /usr/local/nginx-1.9.12/conf/nginx.conf syntax is oknginx: configuration file /usr/local/nginx-1.9.12/conf/nginx.conf test is successful[root@linux-node2 nginx-1.9.12]# |
检查服务器有无其它服务占用80端口,可以关闭了。
|
1
|
[root@linux-node1 ~]# /usr/local/httpd/bin/apachectl -k stop |
配置nginx反向代理,修改主配置文件
gzip是默认关闭的
长连接默认打开的
sendfile 默认打开的
|
1
2
3
4
5
6
7
8
9
10
11
12
13
14
15
16
17
18
19
20
21
22
23
24
25
26
27
28
29
30
31
32
33
34
35
36
37
38
39
40
41
42
43
44
45
46
47
48
49
50
51
52
53
54
55
56
57
58
59
60
61
62
63
64
65
66
67
68
69
70
71
72
73
74
75
76
77
78
79
80
81
82
83
84
85
86
87
88
89
90
91
92
93
94
95
96
97
98
99
100
101
102
103
104
105
106
107
108
109
110
111
112
113
114
115
116
117
118
119
120
121
122
123
124
125
|
[root@linux-node1 conf]# cat nginx.conf#user nobody;worker_processes 1;#error_log logs/error.log;#error_log logs/error.log notice;#error_log logs/error.log info;#pid logs/nginx.pid;events { worker_connections 10240;}http { include mime.types; default_type application/octet-stream; #log_format main '$remote_addr - $remote_user [$time_local] "$request" ' # '$status $body_bytes_sent "$http_referer" ' # '"$http_user_agent" "$http_x_forwarded_for"'; #access_log logs/access.log main; sendfile on; #tcp_nopush on; #keepalive_timeout 0; keepalive_timeout 65; #gzip on; upstream backend { server 10.0.1.105:8080 weight=1 max_fails=3 fail_timeout=30s; server 10.0.1.106:8080 weight=2 max_fails=3 fail_timeout=30s; } server { listen 80; server_name www.nginx-nmap.com; #charset koi8-r; #access_log logs/host.access.log main; location / { root html; index index.html index.htm; proxy_pass http://backend; } #error_page 404 /404.html; # redirect server error pages to the static page /50x.html # error_page 500 502 503 504 /50x.html; location = /50x.html { root html; } # proxy the PHP scripts to Apache listening on 127.0.0.1:80 # #location ~ \.php$ { # proxy_pass http://127.0.0.1; #} # pass the PHP scripts to FastCGI server listening on 127.0.0.1:9000 # #location ~ \.php$ { # root html; # fastcgi_pass 127.0.0.1:9000; # fastcgi_index index.php; # fastcgi_param SCRIPT_FILENAME /scripts$fastcgi_script_name; # include fastcgi_params; #} # deny access to .htaccess files, if Apache's document root # concurs with nginx's one # #location ~ /\.ht { # deny all; #} } # another virtual host using mix of IP-, name-, and port-based configuration # #server { # listen 8000; # listen somename:8080; # server_name somename alias another.alias; # location / { # root html; # index index.html index.htm; # } #} # HTTPS server # #server { # listen 443 ssl; # server_name localhost; # ssl_certificate cert.pem; # ssl_certificate_key cert.key; # ssl_session_cache shared:SSL:1m; # ssl_session_timeout 5m; # ssl_ciphers HIGH:!aNULL:!MD5; # ssl_prefer_server_ciphers on; # location / { # root html; # index index.html index.htm; # } #}}[root@linux-node1 conf]# |
负载均衡配置时的2个参数:fail_timeout和max_fails
这2个参数一起配合,来控制nginx怎样认为upstream中的某个server是失效的当在fail_timeout的时间内,某个server连接失败了max_fails次,则nginx会认为该server不工作了。
同时,在接下来的 fail_timeout时间内,nginx不再将请求分发给失效的server。
比如失败3次,那么接下来10秒不会之内不会把请求发个这个认为失败的机器。然后过了30秒后,这个机器继续收到探测请求.一般生产中设置为30秒
|
1
2
3
4
|
upstream backend { server 10.0.1.105:8080 weight=1 max_fails=3 fail_timeout=30s; server 10.0.1.106:8080 weight=2 max_fails=3 fail_timeout=30s; } |
关于nginx反向代理功能由下面模块提供


检测语法,启动或者reload。查看监听状态
|
1
2
3
4
5
6
7
8
|
[root@linux-node1 conf]# /usr/local/nginx/sbin/nginx -tnginx: the configuration file /usr/local/nginx-1.9.12/conf/nginx.conf syntax is oknginx: configuration file /usr/local/nginx-1.9.12/conf/nginx.conf test is successful[root@linux-node1 conf]# /usr/local/nginx/sbin/nginx -s reload[root@linux-node1 conf]# netstat -lntp | grep 80tcp 0 0 0.0.0.0:80 0.0.0.0:* LISTEN 27141/nginx: master tcp6 0 0 :::8080 :::* LISTEN 20130/httpd [root@linux-node1 conf]# |
浏览器测试


|
1
2
3
|
[root@linux-node2 nginx-1.9.12]# systemctl stop httpd[root@linux-node2 nginx-1.9.12]# systemctl start httpd[root@linux-node2 nginx-1.9.12]# |
关于会话保持


重启
|
1
2
3
4
5
|
[root@linux-node1 conf]# /usr/local/nginx/sbin/nginx -tnginx: the configuration file /usr/local/nginx-1.9.12/conf/nginx.conf syntax is oknginx: configuration file /usr/local/nginx-1.9.12/conf/nginx.conf test is successful[root@linux-node1 conf]# /usr/local/nginx/sbin/nginx -s reload[root@linux-node1 conf]# |

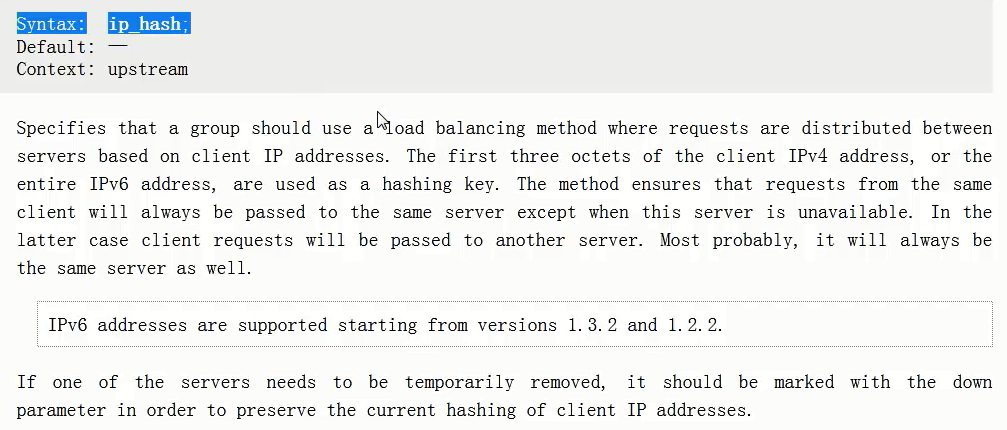
关于nginx的负载均衡算法有很多,自行百度
学习Nginx(一)的更多相关文章
- Nginx学习---Nginx的详解_【all】
1.1. Nginx简介 1.什么是nginx nginx:静态的,开源的www软件,可以解析静态的小文件(低于1M ),支持高并发占用较发少的资源(3W并发,10个进程,内存150M),跨平台 te ...
- Nginx学习——Nginx简单介绍和Linux环境下的安装
一:Nginx的简介 百科百科:Nginx Nginx 是一个俄罗斯的哥们开发的,并将其进行了开源. Nginx是一款轻量级的Web 服务器/反向代理服务器及电子邮件(IMAP/POP3)代理服务器, ...
- 【转】Nginx学习---Nginx&&Redis&&hcache三层缓存架构总结
[原文]https://www.toutiao.com/i6594307974817120782/ 摘要: 对于高并发架构,毫无疑问缓存是最重要的一环,对于大量的高并发,可以采用三层缓存架构来实现,n ...
- 安装学习nginx记录
通过查看nginx目录下的log文件,发现80端口没有权限使用 查找文章发现: netstat -aon|findstr ":80" 有的进程ID占用多了80端口,看监听的端口 启 ...
- Nginx学习——Nginx基本配置
1.Nginx的配置文件总览 Nginx配置文件详解 : http://www.cnblogs.com/hunttown/p/5759959.html nginx.conf 基本格式: worker_ ...
- Nginx学习——Nginx启动、停止、重启和信号控制以及平滑升级
1.Nginx 启动与停止 (1)启动方式 启动格式:Nginx可执行文件地址 -c Nginx配置文件地址 /etc/local/nginx/sbin/nginx -c /root/dufy/ngi ...
- 一脸懵逼学习Nginx及其安装,Tomcat的安装
1:Nginx的相关概念知识: 1.1:反向代理: 反向代理(Reverse Proxy)方式是指以代理服务器来接受internet上的连接请求,然后将请求转发给内部网络上的服务器,并将从服务器上得到 ...
- 学习 nginx (持续更新)
什么是代理与反向代理,有什么应用场景? 平常经常听别人说代理与反向代理,那么这二者到底有什么区别呢? 代理 场景:我需要访问一个服务器C,但是由于某些原因我无法访问到它,(典型的就是你FQ,然后fai ...
- 学习 NGINX
At a high level, configuring NGINX Plus as a web server is a matter of defining which URLs it handle ...
- Nginx学习——Nginx进程间的通信
nginx进程间的通信 进程间消息传递 共享内存 共享内存还是Linux下提供的最主要的进程间通信方式,它通过mmap和shmget系统调用在内存中创建了一块连续的线性地址空间,而通过munmap或者 ...
随机推荐
- 【windows 访问控制】二、安全描述符(Security Descriptors,SD)
安全描述符(Security Descriptors,SD) 定义 安全描述符是与安全对象的安全信息,它含有这个对象所有者的SID,以及一个访问控制列表(ACL,Access Control List ...
- VT 入门篇——最小 VT 实现(上)
写在前面 此系列是本人一个字一个字码出来的,包括示例和实验截图.由于系统内核的复杂性,故可能有错误或者不全面的地方,如有错误,欢迎批评指正,本教程将会长期更新. 如有好的建议,欢迎反馈.码字不易, ...
- Python:numpy.ma模块
翻译总结自:The numpy.ma module - NumPy v1.21 Manual 前言 ma是Mask的缩写,关于Mask的解释,如果有PS的基础,可以理解为蒙版,如果有计算机网络的基础, ...
- HarmonyOS方舟开发框架容器类API的介绍与使用
作者:liuxin,华为高级工程师 容器类,顾名思义就是存储的类,用于存储各种数据类型的元素,并具备一系列处理数据元素的方法.在方舟开发框架中,容器类采用了类似静态的语言来实现,并通过NAPI框架对外 ...
- LeetCode-098-验证二叉搜索树
验证二叉搜索树 题目描述:给定一个二叉树,判断其是否是一个有效的二叉搜索树. 假设一个二叉搜索树具有如下特征: 节点的左子树只包含小于当前节点的数. 节点的右子树只包含大于当前节点的数. 所有左子树和 ...
- vue的拖拽vuedraggable组件使用方法
<template> <div id="app"> <vuedraggable class="wrapper" ...
- Linux-系统的延时和定时
1.系统的延时任务 at 时间 时间后回车 就可以进入编辑了 完成后按ctrl+d提交 at 09:46 #设定任务的执行时间 at> touch /mnt/file{1..9} #任务的动作 ...
- 05tensorflow分布式会话
一. tensorflow分布式 1. 概念 分布式Tensorflow是由高性能的gRPC框架作为底层技术来支持的.这是一个通信框架gRPC(google remote procedure ...
- Linux环境下安装RocketMQ
最近在学习消息队列,针对RocketMQ进行了初步研究,这里记录下安装配置的过程,与大家共同分享 一.选择合适的版本 注:安装.运行过程中需要依赖JDK,因此安装之前需要保证当前linux环境下具备上 ...
- WPF 可视化树的用途
1.可视化树的主要用途: 1.可以使用样式改变可视化树中的一个元素.可以使用Style.TargetType属性选择希望修改 的特定元素.甚至当控件属性发生变化时,可以使用触发器自动完成更改. 2.可 ...
