Nginx学习安装配置和Ftp配置安装
- 什么是代理?
- 什么是正向代理?
- 什么是反向代理?
- Nginx与负载均衡有什么联系?
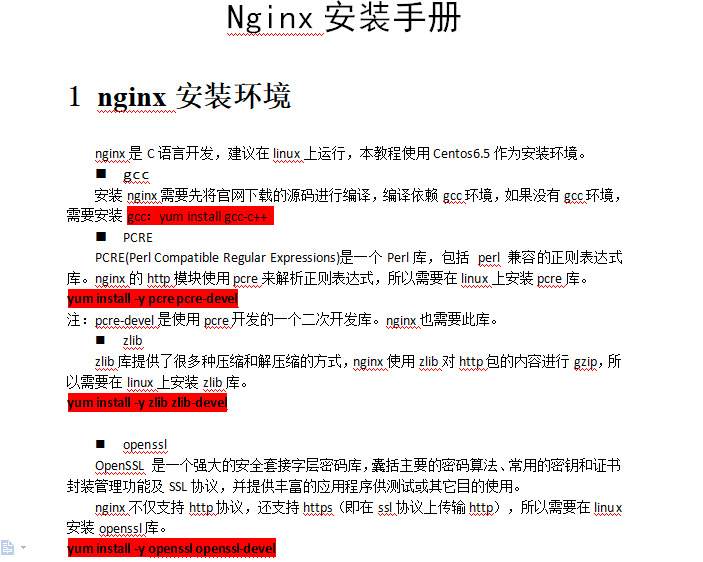
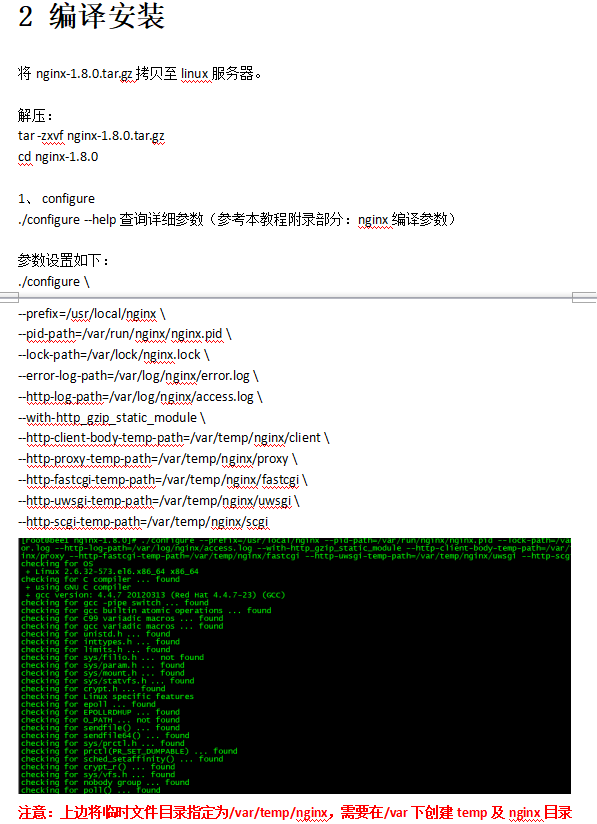
- 如何在centos7 中安装Nginx-------------安装配置-----------------------------
- --------------------------------------------------------------------干货https://www.cnblogs.com/fengff/p/8892590.html--------
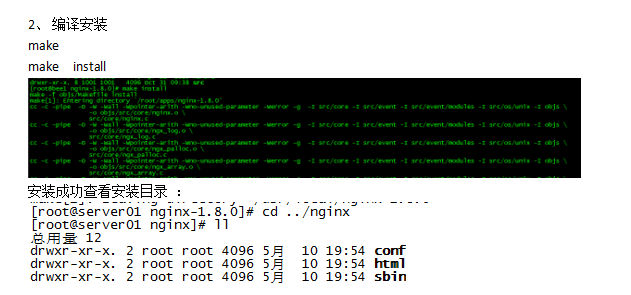
- PS:nginx 的安装路径 /usr/local/nginx
- Ngxin默认端口是80
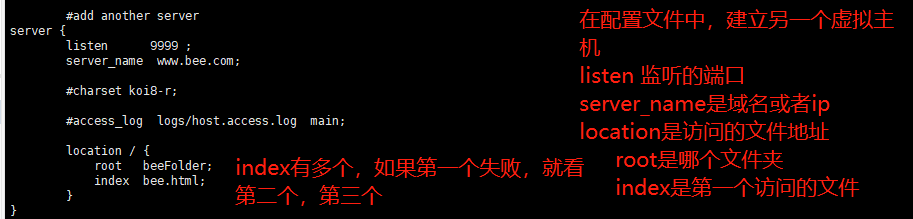
PS: nginx 配置虚拟主机的三种方法
PS:
html就是基础的root目录
sbin放置脚本文件的地方,启动和关闭
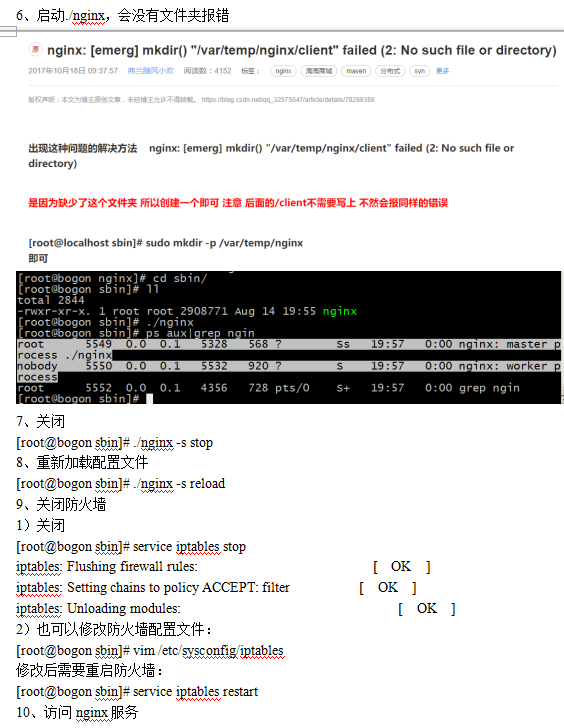
PS:安装时候遇见的问题
1.无法访问客户端
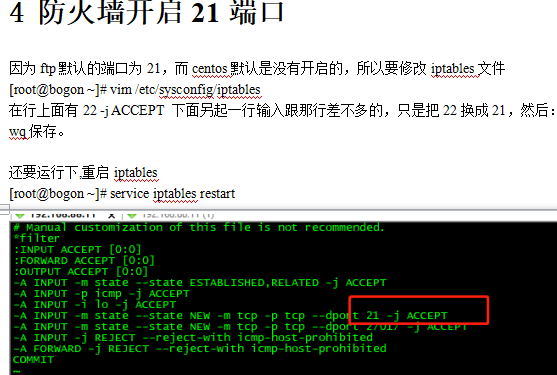
解决办法: 把防火墙关掉
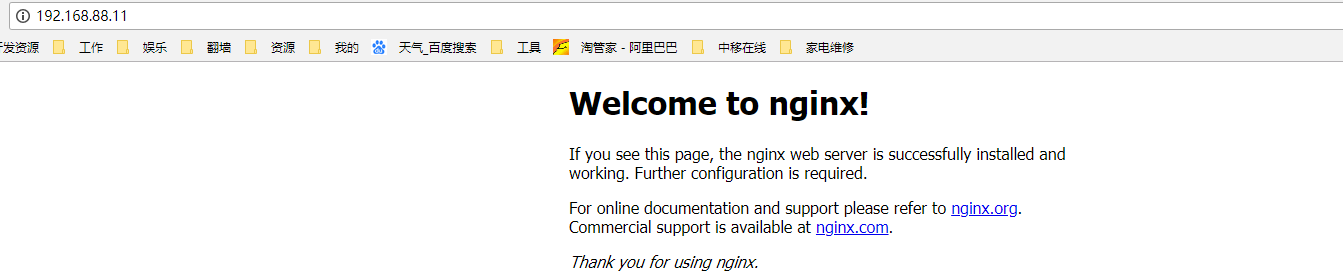
2.不显示nginx页面,在nginx 配置页面添加 index.html
Ps:最最重要的就是看日志
----------------------配置文件讲解

PS: 一个Server就是一个虚拟主机

PS: 生产上会有F5,F5下面会挂载几个nginx,nginx会跳转不同节点上(跳转就是在本地配置的),upstream实现不同机器的配置
下面演示nginx配置访问
1.docker启动两个节点

2.nginx配置,访问那两个节点; 访问localhost:80/login的时候跳转到我的那两个节点
#user  nobody;

worker_processes  1;

#error_log  logs/error.log;

#error_log  logs/error.log  notice;

#error_log  logs/error.log  info;

#pid        logs/nginx.pid;

events {

    worker_connections  1024;

}

http {

    include       mime.types;

    default_type  application/octet-stream;

    #log_format  main  '$remote_addr - $remote_user [$time_local] "$request" '

    #                  '$status $body_bytes_sent "$http_referer" '

    #                  '"$http_user_agent" "$http_x_forwarded_for"';

    #access_log  logs/access.log  main;

    sendfile        on;

    #tcp_nopush     on;

    #keepalive_timeout  0;

    keepalive_timeout  65;

    #gzip  on;

    upstream site {

        ip_hash;

        server 192.168.88.11:8081;

        server 192.168.88.11:8082;

    }

    server {

        listen       80;

        server_name  localhost;

        #charset koi8-r;

        #access_log  logs/host.access.log  main;

        location /login {

            proxy_pass http://site;

        }

        #error_page  404              /404.html;

        # redirect server error pages to the static page /50x.html

        #

        error_page   500 502 503 504  /50x.html;

        location = /50x.html {

            root   html;

        }

        # proxy the PHP scripts to Apache listening on 127.0.0.1:80

        #

        #location ~ \.php$ {

        #    proxy_pass   http://127.0.0.1;

        #}

        # pass the PHP scripts to FastCGI server listening on 127.0.0.1:9000

        #

        #location ~ \.php$ {

        #    root           html;

        #    fastcgi_pass   127.0.0.1:9000;

        #    fastcgi_index  index.php;

        #    fastcgi_param  SCRIPT_FILENAME  /scripts$fastcgi_script_name;

        #    include        fastcgi_params;

        #}

        # deny access to .htaccess files, if Apache's document root

        # concurs with nginx's one

        #

        #location ~ /\.ht {

        #    deny  all;

        #}

    }

    # another virtual host using mix of IP-, name-, and port-based configuration

    #

    #server {

    #    listen       8000;

    #    listen       somename:8080;

    #    server_name  somename  alias  another.alias;

    #    location / {

    #        root   html;

    #        index  index.html index.htm;

    #    }

    #}

    # HTTPS server

    #

    #server {

    #    listen       443 ssl;

    #    server_name  localhost;

    #    ssl_certificate      cert.pem;

    #    ssl_certificate_key  cert.key;

    #    ssl_session_cache    shared:SSL:1m;

    #    ssl_session_timeout  5m;

    #    ssl_ciphers  HIGH:!aNULL:!MD5;

    #    ssl_prefer_server_ciphers  on;

    #    location / {

    #        root   html;

    #        index  index.html index.htm;

    #    }

    #}

}
3.访问验证

-------------------------------------------------------------------------------------------------------


PS: 一旦链接,secureCRT的链接就断开了

Nginx学习安装配置和Ftp配置安装的更多相关文章
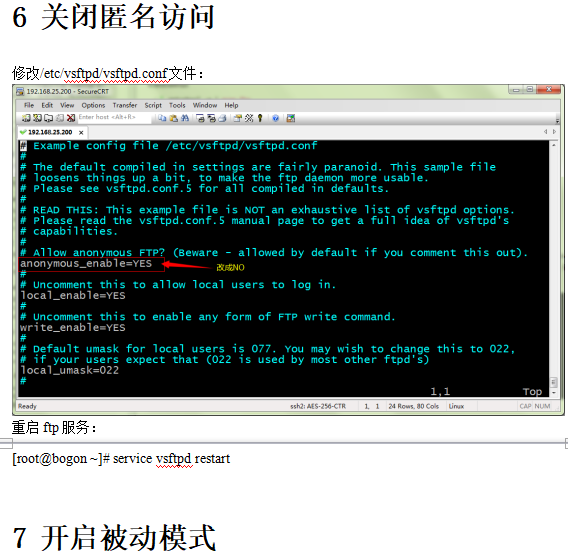
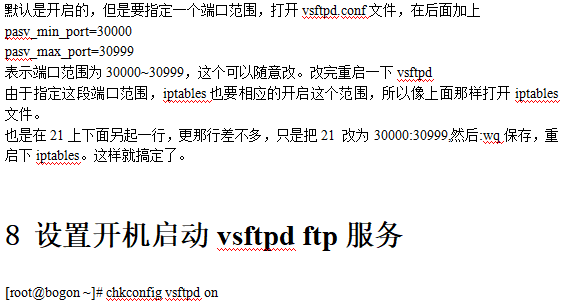
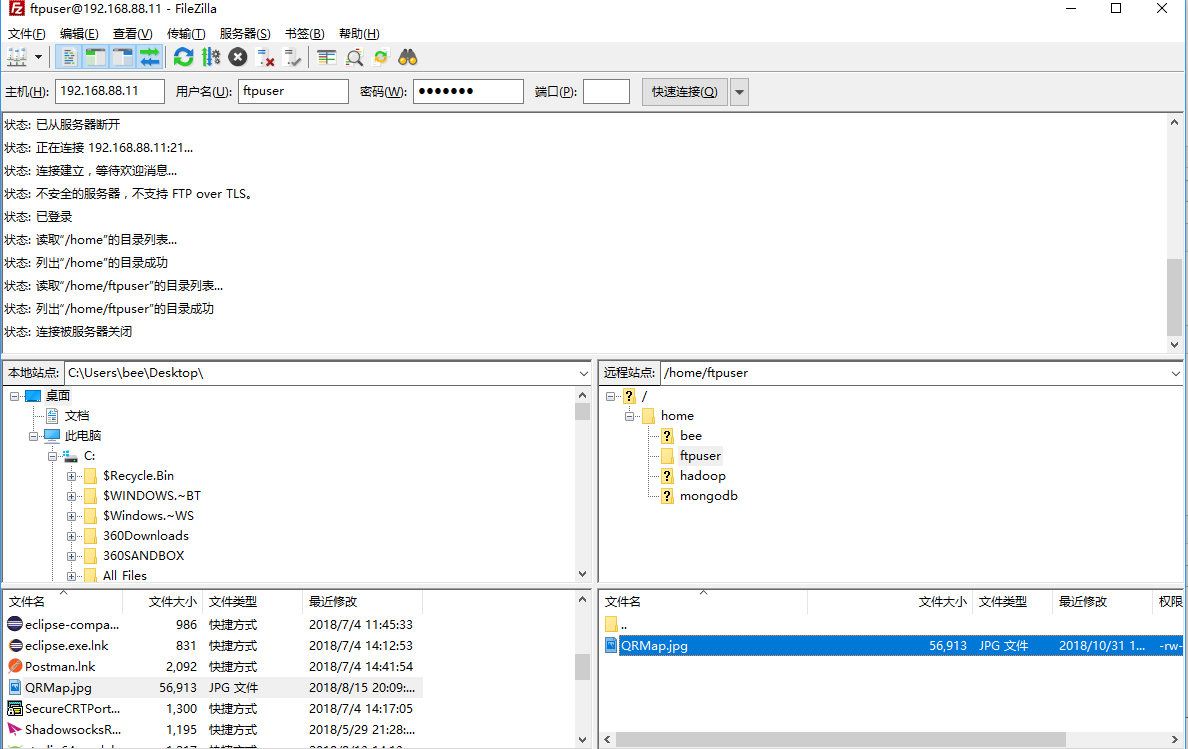
- centos7: vsftpd安装及启动: ftp配置(以虚拟用户为例)
centos7: vsftpd安装及启动: ftp配置 1安装: yum -y install vsftpd /bin/systemctl start vsftpd.service #启动 /bin/ ...
- nginx学习(一):基本安装
转载自http://summervast.blog.51cto.com/690507/385511 注意:可能因版本不同,个别指令不起作用,需要注意版本灵活安装,我在安装时也遇到过此问题 开始学习ng ...
- Nginx学习笔记(二)--- 配置虚拟主机
Linux下安装Nginx https://www.cnblogs.com/dddyyy/p/9780705.html 1.虚拟主机介绍 一台服务器分成多个"独立"的主机,每台虚 ...
- Nginx学习之HTTP/2.0配置
哎呀,一不小心自己的博客也是HTTP/2.0了,前段时间对网站进行了https迁移并上了CDN,最终的结果是这酱紫的(重点小绿锁,安全标示以及HTTP/2.0请求). 科普 随着互联网的快速发展,HT ...
- Nginx学习(1)--- 介绍与安装
1.基础介绍 常用功能 1.HTTP服务 动静分离.WEB缓存.虚拟主机设置.URL Rewrite 2.负载均衡 3.反向代理 4.正向代理 5.邮件服务器 优点 高扩展.高可用.支持高并发.低资源 ...
- nginx学习之——信号控制和配置
一.信号控制 1)TERM, INT Quick shutdown \\麻溜停掉(暴力停止),一般不常用 // 启动和停止nginx 当前目录:/usr/local/bin/nginx 启动: ...
- linux ftp配置及实操
一.基础知识: 1.ftp:file transfer protocal 及文件传输协,工作与应用层. 2.ftp协议的实现: 服务器端实现软件:vsftpd,pureftpd,filezilla s ...
- LNMP下安装Pureftpd开启FTP服务以及修改FTP端口的方法
LNMP 环境包 1.2 内置了 Pureftpd 的安装程序. 安装 Pureftpd 进入lnmp解压后的目录,执行:./pureftpd.sh 会显示如下图: 按提示输入当前MySQL的root ...
- FTP文件上传以及获取ftp配置帮助类
帮助类: using QSProjectBase; using Reform.CommonLib; using System; using System.Collections.Generic; us ...
随机推荐
- day2-python工具的选择使用
Python 编辑工具的选择 在Python的交互式命令行写程序,好处是一下就能得到结果,坏处是没法保存,下次还想运行的时候,还得再敲一遍. 所以,实际开发的时候,我们总是使用一个编辑器来写代码,写完 ...
- OOP⑷
1.对象数组: /** *学生类 */ public class Student { // 创建一个对象数组保存3名学生的信息 Student[] stus = new Student[3]; int ...
- python 最小二乘拟合,反卷积,卡方检验
import numpy as np # from enthought.mayavi import mlab ''' ogrid[-1:5:6j,-1:5:6j] [array([[-1. ], [ ...
- B2C B2B C2C O2O模式的介绍
b2c:天猫 商家对客户 c2c:淘宝 客户到客户(卖家也是阿里公司的客户) o2o:美团 线上花费,下 ...
- 记录搭建ssm项目
搞java也快3年了,搭建一个ssm居然有点吃力. 参考链接:https://blog.csdn.net/gebitan505/article/details/44455235/ 环境准备:jdk8. ...
- STM32之RTC配置与初始化
void rtc_init() { //让电源和后备寄存器使能 RCC_APB1PeriphClockCmd(RCC_APB1Periph_PWR|RCC_APB1Periph_BKP,ENABLE) ...
- http协议相关
HTTP请求方法 HTTP消息头 HTTP请求头 HTTP响应头 HTTP cookie机制和实现原理 HTTP请求方法 超文本传输协议(HTTP, HyperText Transfer Protoc ...
- urlencode urldecode
1.urlencode()函数原理就是首先把中文字符转换为十六进制,然后 在每个字符前面加一个标识符%. urldecode()函数与urlencode()函 数原理相反,用于解码已编码的 URL 字 ...
- win10---cmd终端下连接ubantu--SSH SERVER服务
在win10 cmd终端下输入 SSH ubantu@192.168.124.134 之后输入yes 在输入yes
- mysql创建用户以及授权
Mysql新建用户操作 方法一: mysql> insert into mysql.user(Host,User,Password) values("localhost", ...