consul-template + nginx部署高可用负载均衡
一、Consul-Template简介
Consul-Template是基于Consul的自动替换配置文件的应用。在Consul-Template没出现之前,大家构建服务发现系统大多采用的是Zookeeper、Etcd+Confd这样类似的系统。
Consul官方推出了自己的模板系统Consul-Template后,动态的配置系统可以分化为Etcd+Confd和Consul+Consul-Template两大阵营。Consul-Template的定位和Confd差不多,Confd的后端可以是Etcd或者Consul。
Consul-Template提供了一个便捷的方式从Consul中获取存储的值,Consul-Template守护进程会查询Consul实例来更新系统上指定的任何模板。当更新完成后,模板还可以选择运行一些任意的命令。
Consul-Template的使用场景
Consul-Template可以查询Consul中的服务目录、Key、Key-values等。这种强大的抽象功能和查询语言模板可以使Consul-Template特别适合动态的创建配置文件。例如:创建Apache/Nginx Proxy Balancers、Haproxy Backends、Varnish Servers、Application Configurations等。
Consul-Template特性
- Quiescence:Consul-Template内置静止平衡功能,可以智能的发现Consul实例中的更改信息。这个功能可以防止频繁的更新模板而引起系统的波动。
- Dry Mode:不确定当前架构的状态,担心模板的变化会破坏子系统?无须担心。因为Consul-Template还有Dry模式。在Dry模式,Consul-Template会将结果呈现在STDOUT,所以操作员可以检查输出是否正常,以决定更换模板是否安全。
- CLI and Config:Consul-Template同时支持命令行和配置文件。
- Verbose Debugging:即使每件事你都做的近乎完美,但是有时候还是会有失败发生。Consul-Template可以提供更详细的Debug日志信息。
项目地址:https://github.com/hashicorp/consul-template
二、Consul-Template安装
Consul-Template和Consul一样,也是用Golang实现。因此具有天然可移植性(支持 Linux、windows 和macOS)。安装包仅包含一个可执行文件。Consul-Template安装非常简单,只需要下载对应系统的软件包并解压后就可使用。
只需要下载可执行文件:https://releases.hashicorp.com/consul-template/
将执行文件解压放到/usr/local/bin/下即可,如下:
我下载的是:consul-template_0.20.0_linux_amd64.tgz
- [root@localhost consul-template]# tar -xvf consul-template_0.20.0_linux_amd64.tgz
- consul-template
- [root@localhost consul-template]# ll
- 总用量 12696
- -rwxr-xr-x. 1 501 games 9451232 2月 20 08:39 consul-template
- -rw-r--r--. 1 root root 3543379 3月 22 09:57 consul-template_0.20.0_linux_amd64.tgz
- [root@localhost consul-template]# cd consul-template
- -bash: cd: consul-template: 不是目录
- [root@localhost consul-template]# cp consul-template /usr/local/bin
- [root@localhost consul-template]# consul-template -v
- consul-template v0.20.0 (b709612c)
- [root@localhost consul-template]#
三、Consul-Template使用帮助
查看帮助
执行consul-template -h即可看到consul-temple的使用参数
-auth=<user[:pass]> 设置基本的认证用户名和密码-consul=<address> 设置Consul实例的地址-max-stale=<duration> 查询过期的最大频率,默认是1s-dedup 启用重复数据删除,当许多consul template实例渲染一个模板的时候可以降低consul的负载-ssl 使用https连接Consul使用SSL-ssl-verify 通过SSL连接的时候检查证书-ssl-cert SSL客户端证书发送给服务器-ssl-key 客户端认证时使用的SSL/TLS私钥-ssl-ca-cert 验证服务器的CA证书列表-token=<token> 设置Consul API的token-syslog 把标准输出和标准错误重定向到syslog,syslog的默认级别是local0。-syslog-facility=<f> 设置syslog级别,默认是local0,必须和-syslog配合使用-template=<template> 增加一个需要监控的模板,格式是:'templatePath:outputPath(:command)',多个模板则可以设置多次-wait=<duration> 当呈现一个新的模板到系统和触发一个命令的时候,等待的最大最小时间。如果最大值被忽略,默认是最小值的4倍。-retry=<duration> 当在和consul api交互的返回值是error的时候,等待的时间,默认是5s。-config=<path> 配置文件或者配置目录的路径-pid-file=<path> PID文件的路径-log-level=<level> 设置日志级别,可以是"debug","info", "warn" (default), and "err"-dry Dump生成的模板到标准输出,不会生成到磁盘-once 运行consul-template一次后退出,不以守护进程运行-reap 子进程自动收割
Consul-Template模版语法
Consul-Template模板文件的语法和Go Template的格式一样,Confd也是遵循Go Template的。
下面看看配置模板到底怎么写,模板文件的语法和Go template的格式一样,confd也是遵循Go template的。
先看看API 功能语法:
datacenters:在consul目录中查询所有的datacenters,{{datacenters}}file:读取并输出本地磁盘上的文件,如果无法读取,则报错,{{file "/path/to/local/file"}}key:查询consul中该key的值,如果无法转换成一个类字符串的值,则会报错,{{key "service/redis/maxconns@east-aws"}} east-aws指定的是数据中心,{{key "service/redis/maxconns"}}key_or_default:查询consul中该key的值,如果key不存在,则使用指定的值代替,{{key_or_default "service/redis/maxconns@east-aws" "5"}}ls:在consul中查询给定前缀的key的顶级域值,{{range ls "service/redis@east-aws"}} {{.Key}} {{.Value}}{{end}}node:查询consul目录中的单个node,如果不指定node,则是当前agent的,{{node "node1"}}nodes:查询consul目录中的所有nodes,你也可以指定datacenter,{{nodes "@east-aws"}}service:查询consul中匹配的service组,{{service "release.web@east-aws"}}或者{{service "web"}},也可以返回一组HealthService服务{{range service "web@datacenter"}} server {{.Name}} {{.Address}}:{{.Port}}{{end}},默认值返回健康的服务,如果你想返回所有服务,则{{service "web" "any"}}services:查询consul目录中的所有services,{{services}},也可以指定datacenter:{{services "@east-aws"}}tree:查询consul中给定前缀的所有K/V值,{{range tree "service/redis@east-aws"}} {{.Key}} {{.Value}}{{end}}
再看看辅助函数语法:
byKey、byTag、contains、env、explode、in、loop、trimSpace、join、parseBool、parseFloat、parseInt、parseJSON、parseUint、regexMatch、regexReplaceAll、replaceAll、split、timestamp、toJSON等函数可以使用,具体用法看官文
四、Consul-Template使用实例
在进行以下测试前,你首先得有一个Consul集群。如果你还没有,可参考「consul分布式集群搭建」 一文搭建一个。当然单节点Consul环境也是可以的,如果你只想做一下简单的测试也可以参考「Consul入门」一文先快速搭建一个单节点环境。
4.1、命令行方式
1、输出已注册服务的名称和Tags。
接着《consul分布式集群搭建》文章后面的service-front示例,通过命令行方式输出已经注册服务的名称和Tags,如下:
- [root@localhost consul-template]# curl http://10.200.110.90:8500/v1/catalog/service/service-front
- [{"ID":"d1b05900-4f8f-b956-5ba6-5a3c798d93d3","Node":"10.200.110.91","Address":"10.200.110.91","Datacenter":"shenzhen","TaggedAddresses":{"lan":"10.200.110.91","wan":"10.200.110.91"},"NodeMeta":{"consul-network-segment":""},"ServiceKind":"","ServiceID":"service-front-10-200-110-100-8001","ServiceName":"service-front","ServiceTags":["front-dev,这是个前置应用,网关层","duan"],"ServiceAddress":"10.200.110.100","ServiceWeights":{"Passing":1,"Warning":1},"ServiceMeta":{},"ServicePort":8001,"ServiceEnableTagOverride":false,"ServiceProxyDestination":"","ServiceProxy":{},"ServiceConnect":{},"CreateIndex":11382,"ModifyIndex":11382},{"ID":"382f88c2-4482-e1f7-1453-28f94ff65108","Node":"10.200.110.97","Address":"10.200.110.97","Datacenter":"shenzhen","TaggedAddresses":{"lan":"10.200.110.97","wan":"10.200.110.97"},"NodeMeta":{"consul-network-segment":""},"ServiceKind":"","ServiceID":"front1","ServiceName":"service-front","ServiceTags":["local-dev"],"ServiceAddress":"","ServiceWeights":{"Passing":1,"Warning":1},"ServiceMeta":{},"ServicePort":8001,"ServiceEnableTagOverride":false,"ServiceProxyDestination":"","ServiceProxy":{},"ServiceConnect":{},"CreateIndex":11976,"ModifyIndex":11976}][root@localhost consul-template]#
2、通过consul-template生成nginx配置文件
2.1、创建模板文件
- [root@localhost config]# vi tmpltest.ctmpl
- [root@localhost config]# cat tmpltest.ctmpl
- {{range services}}
- {{.Name}}
- {{range .Tags}}
- {{.}}{{end}}
- {{end}}
- [root@localhost config]
- [root@localhost config]# consul-template -consul-addr 10.200.110.90:8500 -template "tmpltest.ctmpl:result" -once
- [root@localhost config]#
命令说明:
-consul-addr:指定Consul的API接口 ,默认是8500端口。
-template:模板参数,第一个参数是模板文件位置,第二个参数是结果输出位置。
-once:只运行一次就退出。
查看模板渲染的结果
- [root@localhost config]# ll
- 总用量 8
- -rw-r--r--. 1 root root 143 3月 22 11:08 result
- -rw-r--r--. 1 root root 66 3月 22 11:05 tmpltest.ctmpl
- [root@localhost config]# cat result
- consul
- service-consumer
- service-demo
- jar
- service-front
- duan
- front-dev,这是个前置应用,网关层
- local-dev
- service-producter
- [root@localhost config]#
输出结果说明:
- consul是系统自带的服务;
- service-front是通过consul的配置方式注册的服务,其Tags为【duan front-dev,这是个前置应用,网关层 local-dev】;
2.3、根据已注册的服务动态生成Nginx配置文件
新建Nginx配置模板文件
- [root@localhost config]# vi nginx.conf.ctmpl
- [root@localhost config]# cat nginx.conf.ctmpl
- {{range services}} {{$name := .Name}} {{$service := service .Name}}
- upstream {{$name}} {
- zone upstream-{{$name}} 64k;
- {{range $service}}server {{.Address}}:{{.Port}} max_fails=3 fail_timeout=60 weight=1;
- {{else}}server 127.0.0.1:65535; # force a 502{{end}}
- } {{end}}
- server {
- listen 80 default_server;
- location / {
- root /usr/share/nginx/html/;
- index index.html;
- }
- location /stub_status {
- stub_status;
- }
- {{range services}} {{$name := .Name}}
- location /{{$name}} {
- proxy_pass http://{{$name}};
- }
- {{end}}
- }
- [root@localhost config]#
调用模板文件生成Nginx配置文件
- [root@localhost config]# consul-template -consul-addr 10.200.110.90:8500 -template="nginx.conf.ctmpl:default.conf" -once
- [root@localhost config]# cat default.conf
- upstream consul {
- zone upstream-consul 64k;
- server 10.200.110.90:8300 max_fails=3 fail_timeout=60 weight=1;
- server 10.200.110.91:8300 max_fails=3 fail_timeout=60 weight=1;
- server 10.200.110.93:8300 max_fails=3 fail_timeout=60 weight=1;
- }
- upstream service-consumer {
- zone upstream-service-consumer 64k;
- server 10.200.110.89:8091 max_fails=3 fail_timeout=60 weight=1;
- server 10.200.110.90:8091 max_fails=3 fail_timeout=60 weight=1;
- }
- upstream service-demo {
- zone upstream-service-demo 64k;
- server 10.200.110.97:8071 max_fails=3 fail_timeout=60 weight=1;
- }
- upstream service-front {
- zone upstream-service-front 64k;
- server 10.200.110.97:8001 max_fails=3 fail_timeout=60 weight=1;
- }
- upstream service-producter {
- zone upstream-service-producter 64k;
- server 10.200.110.95:8081 max_fails=3 fail_timeout=60 weight=1;
- }
- server {
- listen 80 default_server;
- location / {
- root /usr/share/nginx/html/;
- index index.html;
- }
- location /stub_status {
- stub_status;
- }
- location /consul {
- proxy_pass http://consul;
- }
- location /service-consumer {
- proxy_pass http://service-consumer;
- }
- location /service-demo {
- proxy_pass http://service-demo;
- }
- location /service-front {
- proxy_pass http://service-front;
- }
- location /service-producter {
- proxy_pass http://service-producter;
- }
- }
- [root@localhost config]#
如果想生成Nginx配置文件后自动加载配置,可以这样:
- [root@localhost config]# consul-template -consul-addr 10.200.110.90:8500 -template="nginx.conf.ctmpl:/usr/local/nginx/conf/conf.d/default.conf:service nginx reload" -once
- [root@localhost config]#
生成的nginx配置如下:
- [root@localhost config]# cat /usr/local/nginx/conf/conf.d/default.conf
- upstream consul {
- zone upstream-consul 64k;
- server 10.200.110.90:8300 max_fails=3 fail_timeout=60 weight=1;
- server 10.200.110.91:8300 max_fails=3 fail_timeout=60 weight=1;
- server 10.200.110.93:8300 max_fails=3 fail_timeout=60 weight=1;
- }
- upstream service-consumer {
- zone upstream-service-consumer 64k;
- server 10.200.110.89:8091 max_fails=3 fail_timeout=60 weight=1;
- server 10.200.110.90:8091 max_fails=3 fail_timeout=60 weight=1;
- }
- upstream service-demo {
- zone upstream-service-demo 64k;
- server 10.200.110.97:8071 max_fails=3 fail_timeout=60 weight=1;
- }
- upstream service-front {
- zone upstream-service-front 64k;
- server 10.200.110.97:8001 max_fails=3 fail_timeout=60 weight=1;
- }
- upstream service-producter {
- zone upstream-service-producter 64k;
- server 10.200.110.95:8081 max_fails=3 fail_timeout=60 weight=1;
- }
- server {
- listen 80 default_server;
- location / {
- root /usr/share/nginx/html/;
- index index.html;
- }
- location /stub_status {
- stub_status;
- }
- location /consul {
- proxy_pass http://consul;
- }
- location /service-consumer {
- proxy_pass http://service-consumer;
- }
- location /service-demo {
- proxy_pass http://service-demo;
- }
- location /service-front {
- proxy_pass http://service-front;
- }
- location /service-producter {
- proxy_pass http://service-producter;
- }
- }
- [root@localhost config]#;
- }
- location /service-demo {
- proxy_pass http://service-demo;
- }
- location /service-front {
- proxy_pass http://service-front;
- }
- location /service-producter {
- proxy_pass http://service-producter;
- }
- }
- [root@localhost config]#
注意,/usr/local/nginx/conf/nginx.conf的配置里增加一行,加载conf.d目录下的其它动态生成的配置文件:
- [root@localhost sbin]# vi ../conf/nginx.conf
- worker_processes 1;
- #error_log /var/log/nginx/error.log warn;
- #pid /var/run/nginx.pid;
- events {
- worker_connections 1024;
- }
- http {
- #include /etc/nginx/mime.types;
- default_type application/octet-stream;
- log_format main '$remote_addr - $remote_user [$time_local] "$request" '
- '$status $body_bytes_sent "$http_referer" '
- '"$http_user_agent" "$http_x_forwarded_for"';
- #access_log /var/log/nginx/access.log main;
- sendfile on;
- #tcp_nopush on;
- server_tokens off;
- underscores_in_headers on;
- keepalive_timeout 65;
- gzip on;
- gzip_min_length 1024;
- gzip_buffers 4 1k;
- #gzip_http_version 1.0;
- gzip_comp_level 8;
- gzip_types text/plain application/json application/javascript application/x-javascript text/css application/xml text/javascript image/jpeg image/gif image/png;
- gzip_vary off;
- gzip_disable "MSIE [1-6]\.";
- include /usr/local/nginx/conf/conf.d/*.conf;
- }
consul-template的模板如下:
- [root@localhost config]# cat tmplconsumer.ctmpl
- ## Settings for a TLS enabled server.
- upstream frontend {
- {{range service "service-consumer" }} {{$name := .Name}}
- ##upstream {{$name}}
- ##zone upstream-{{$name}} 64k;
- server {{.Address}}:{{.Port}} max_fails=3 fail_timeout=60 weight=1;
- {{else}}server 127.0.0.1:65535; # force a 502
- {{end}}
- }
- server {
- listen 80;
- server_name localhost; #appci.mydomain.net;
- #location /h5/ {
- #index index.html
- #root /usr/share/nginx/html/h5;
- #proxy_pass http://xxxxxoms/;
- #}
- location / {
- #if ($request_method ~ ^(HEAD)$) {
- # access_log off;
- #}
- add_header 'Access-Control-Allow-Origin' '*';
- add_header Access-Control-Allow-Methods 'GET, POST, OPTIONS';
- add_header Access-Control-Allow-Headers 'DNT,X-Mx-ReqToken,Keep-Alive,User-Agent,X-Requested-With,If-Modified-Since,Cache-Control,Content-Type,Authorization';
- if ($request_method = 'OPTIONS') {
- return 204;
- }
- proxy_pass http://frontend/;
- #Proxy Settings
- proxy_set_header Host $host;
- proxy_set_header Referer $http_referer;
- proxy_set_header Cookie $http_cookie;
- proxy_set_header X-Real-IP $remote_addr;
- proxy_set_header X-Forwarded-For $proxy_add_x_forwarded_for;
- proxy_connect_timeout 90;
- proxy_send_timeout 90;
- proxy_read_timeout 90;
- proxy_buffer_size 4k;
- proxy_buffers 4 32k;
- proxy_busy_buffers_size 64k;
- proxy_temp_file_write_size 64k;
- }
- error_page 404 /404.html;
- location = /40x.html {
- }
- error_page 500 502 503 504 /50x.html;
- location = /50x.html {
- }
- }
- [root@localhost config]#
执行
- [root@localhost config]# consul-template -consul-addr 10.200.110.90:8500 -template="tmplconsumer.ctmpl:/usr/local/nginx/conf/conf.d/default.conf:service nginx reload" -once
生成的nginx配置文件如下:
- ## Settings for a TLS enabled server.
- upstream frontend {
- ##upstream service-consumer
- ##zone upstream-service-consumer 64k;
- server 10.200.110.89:8091 max_fails=3 fail_timeout=60 weight=1;
- ##upstream service-consumer
- ##zone upstream-service-consumer 64k;
- server 10.200.110.90:8091 max_fails=3 fail_timeout=60 weight=1;
- }
- server {
- listen 80;
- server_name localhost; #appci.mydomain.net;
- #location /h5/ {
- #index index.html
- #root /usr/share/nginx/html/h5;
- #proxy_pass http://xxxxxoms/;
- #}
- location / {
- #if ($request_method ~ ^(HEAD)$) {
- # access_log off;
- #}
- add_header 'Access-Control-Allow-Origin' '*';
- add_header Access-Control-Allow-Methods 'GET, POST, OPTIONS';
- add_header Access-Control-Allow-Headers 'DNT,X-Mx-ReqToken,Keep-Alive,User-Agent,X-Requested-With,If-Modified-Since,Cache-Control,Content-Type,Authorization';
- if ($request_method = 'OPTIONS') {
- return 204;
- }
- proxy_pass http://frontend/;
- #Proxy Settings
- proxy_set_header Host $host;
- proxy_set_header Referer $http_referer;
- proxy_set_header Cookie $http_cookie;
- proxy_set_header X-Real-IP $remote_addr;
- proxy_set_header X-Forwarded-For $proxy_add_x_forwarded_for;
- proxy_connect_timeout 90;
- proxy_send_timeout 90;
- proxy_read_timeout 90;
- proxy_buffer_size 4k;
- proxy_buffers 4 32k;
- proxy_busy_buffers_size 64k;
- proxy_temp_file_write_size 64k;
- }
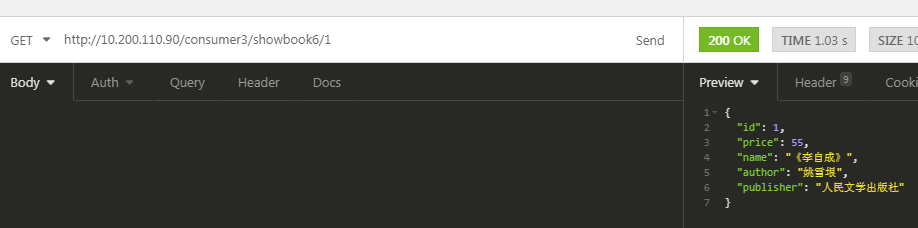
用浏览器访问测试:http://10.200.110.90/consumer3/showbook6/1
如果不生效,可以如下排查:
首先,检查生成的nginx配置文件中是否有了对应的服务的配置信息。
再检查,nginx是否重加载成功,可以[root@localhost config]# /usr/local/nginx/sbin/nginx -s reload试试。
多台nginx+consul-template
上面的示例中的nginx是单节点的,有单点故障的问题。那么再+nginx时,是怎样的呢?
先放一个图:
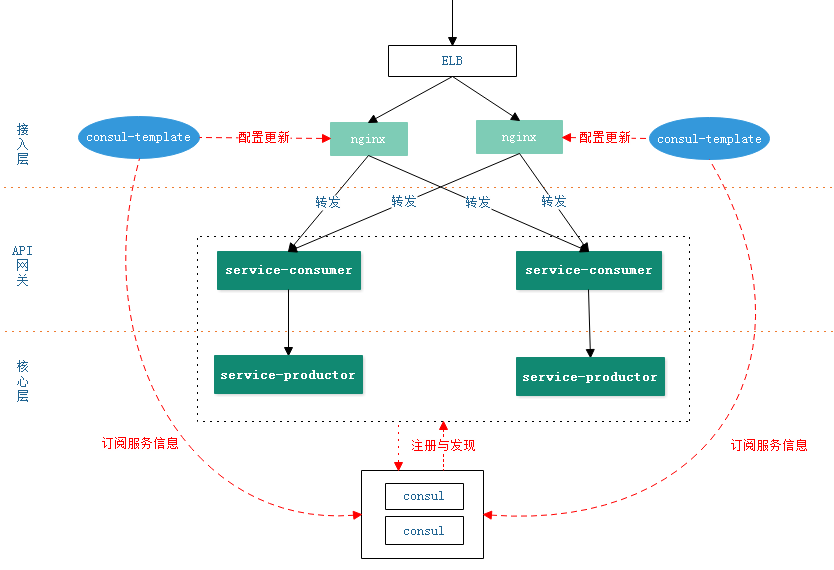
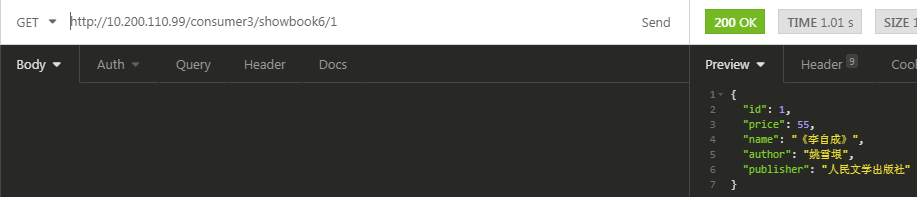
将consul-template的虚拟机克隆下,新ip为99,在启动consul-template,consul关联的还是90(consul-template和consul可以不再同一台机器上,但consul-template和nginx必须同一台机器)
- consul-template -consul-addr 10.200.110.90: -template="tmplconsumer.ctmpl:/usr/local/nginx/conf/conf.d/default.conf:service nginx reload" -once
访问如下,也是成功的。
consul-template以服务方式运行
上面两个例子都是consul-template运行一次后就退出了,如果想运行为一个服务可以这样:
- consul-template -consul-addr=10.200.110.90:8500 -template "tmpltest.ctmpl:test.out"
查询Consul实例同时渲染多个模板,然后重启相关服务。如果API故障则每30s尝试检测一次值,consul-template运行一次后退出。
- consul-template \
- -consul-addr=10.200.110.90:8500 \
- -retry 30s \
- -once \
- -template "nginx.ctmpl:/etc/nginx/nginx.conf:service nginx restart" \
- -template "redis.ctmpl:/etc/redis/redis.conf:service redis restart" \
- -template "haproxy.ctmpl:/etc/haproxy/haproxy.conf:service haproxy restart"
查询一个实例,Dump模板到标准输出。主要用作测试模板输出。
4.2、配置文件方式
以上参数除了在命令行使用也可以直接配置在文件中,下面看看Consul-Template的配置文件,简称HCL(HashiCorp Configuration Language),它是和JSON兼容的。下面先看看官方给的配置文件格式:
- consul {
- auth {
- enabled = true
- username = "test"
- password = "test"
- }
- address = "192.168.2.210:8500"
- token = "abcd1234"
- retry {
- enabled = true
- attempts = 5
- backoff = "250ms"
- }
- ssl {
- enabled = true
- verify = false
- cert = "/path/to/client/cert"
- key = "/path/to/client/key"
- ca_cert = "/path/to/ca"
- ca_path = "path/to/certs/"
- server_name = "my-server.com"
- }
- }
- reload_signal = "SIGHUP"
- dump_signal = "SIGQUIT"
- kill_signal = "SIGINT"
- max_stale = "10m"
- log_level = "warn"
- pid_file = "/path/to/pid"
- wait {
- min = "5s"
- max = "10s"
- }
- vault {
- address = "https://vault.service.consul:8200"
- token = "abcd1234"
- unwrap_token = true
- renew_token = true
- retry {
- # ...
- }
- ssl {
- # ...
- }
- }
- syslog {
- enabled = true
- facility = "LOCAL5"
- }
- deduplicate {
- enabled = true
- prefix = "consul-template/dedup/"
- }
- exec {
- command = "/usr/bin/app"
- splay = "5s"
- env {
- pristine = false
- custom = ["PATH=$PATH:/etc/myapp/bin"]
- whitelist = ["CONSUL_*"]
- blacklist = ["VAULT_*"]
- }
- reload_signal = ""
- kill_signal = "SIGINT"
- kill_timeout = "2s"
- }
- template {
- source = "/path/on/disk/to/template.ctmpl"
- destination = "/path/on/disk/where/template/will/render.txt"
- contents = "{{ keyOrDefault \"service/redis/maxconns@east-aws\" \"5\" }}"
- command = "restart service foo"
- command_timeout = "60s"
- perms = 0600
- backup = true
- left_delimiter = "{{"
- right_delimiter = "}}"
- wait {
- min = "2s"
- max = "10s"
- }
- }
更多详细的参数可以参考这里: https://github.com/hashicorp/consul-template#configuration-file-format
注意: 上面的选项不都是必选的,可根据实际情况调整。为了更加安全,token也可以从环境变量里读取,使用CONSUL_TOKEN和VAULT_TOKEN。强烈建议你不要把token放到未加密的文本配置文件中。
接下来我们看一个简单的实例,生成Nginx配置文件并重新加载:
- vim nginx.hcl
- consul {
- address = "10.200.110.90:8500"
- }
- template {
- source = "nginx.conf.ctmpl"
- destination = "/usr/local/nginx/conf/conf.d/default.conf"
- command = "service nginx reload"
- }
注:nginx.conf.ctmpl模板文件内容还是和前面的一样。
执行以下命令就可渲染文件了:
- consul-template -config "nginx.hcl"
更多官方例子可参考:https://github.com/hashicorp/consul-template/tree/master/examples
===============================================================================================
五、Consul-Template的redis读写分离的一个应用(转载,未验证)
此处假定一个高可用redis集群读写分离的场景,存在一个业务服务BusinessService.Sample,通过对配置文件XXX.BusinessService.Sample.Redis.json中Redis的集群信息的读取来维持Redis客户端的正常读写,配置文件中的数据发生变化时。Redis客户端会进行更新(假定场景- -只表达大致意思,勿喷)。

XXX.BusinessService.Sample.Redis.json中的配置信息假定为

- {
- "redis":{
- "servers": ["127.0.0.1:6378""127.0.0.1:6379"],
- "master": "127.0.0.1:6378"
- }
- }
注册Redis健康监测及配置中心维护Redis的Master节点信息
将Redis的所有节点注册到Consul,并应用Consul进行健康监测。
- {
- "services": [{
- "id":"redis1",
- "name":"redis",
- "tags":["redis1"],
- "address": "127.0.0.1",
- "port":6378,
- "checks": [
- {
- "Tcp": "127.0.0.1:6378",
- "interval": "3s"
- }
- ]
- },{
- "id":"redis2",
- "name":"redis",
- "tags":["redis2"],
- "address": "127.0.0.1",
- "port":6379,
- "checks": [
- {
- "Tcp": "127.0.0.1:6379",
- "interval": "3s"
- }
- ]
- }
- ]
- }
Redis正常运行的状态如下:

对于Master的节点信息,这里采用配置中心进程存储

到这里基本工作算是完成了
创建Consul-template模板并注册
consul-template会通过Http请求从Consul中读取集群中的数据,数据发生变更时 consul-template会触发更新指定配置文件的操作。此处根据XXX.BusinessService.Sample.Redis.json的数据格式创建.ctmpl模板文件,内容如下(配置格式参考 Consul-template文档):
- {
- "redis":{
- "servers": [{{range service "redis" "passing"}}"{{.Address}}:{{.Port}}"{{end}}],
- "master": "{{key "service/redis/master"}}"
- }
- }
然后进行注册(此处以windows作为实例,Linux操作一样)
consul-template.exe -consul "127.0.0.1:8500" -template="C:\Users\admin\Desktop\consul064\consul-temp\templates\XXX.BusinessService.Sample.Redis.json.ctmpl:C:\Users\admin\Desktop\BusinessService.Sample\BusinessService.Sample\BusinessService.Sample\XXX.BusinessService.Sample.Redis.json">> C:\Users\admin\Desktop\consul064\consul-temp\templates\logs\consul.log 2>&1
-consul后是consul的webui接口 ,用web管理consul就用的8500端口。
-template 后面是模板参数 第一个是模板地址 。冒号后的第二个参数是输出位置。
>> 后为日志输出路径
注册完成后即可动态触发XXX.BusinessService.Sample.Redis.json文件的动态修改了,比如关闭一个Redis实例或者Master节点发生变更时即可及时完成更新。
Redis的Master节点更新
master节点的更新此处可以通过监听redis哨兵的+switch-master事件监听,触发修改Consul配置中心中指定Redis Key完成。
consul-template + nginx部署高可用负载均衡的更多相关文章
- 使用Ansible实现nginx+keepalived高可用负载均衡自动化部署
本篇文章记录通过Ansible自动化部署nginx的负载均衡高可用,前端代理使用nginx+keepalived,端web server使用3台nginx用于负载效果的体现,结构图如下: 部署前准备工 ...
- [转]搭建Keepalived+Nginx+Tomcat高可用负载均衡架构
[原文]https://www.toutiao.com/i6591714650205716996/ 一.概述 初期的互联网企业由于业务量较小,所以一般单机部署,实现单点访问即可满足业务的需求,这也是最 ...
- Keepalived + Nginx + Tomcat 高可用负载均衡架构
环境: 1.centos7.3 2.虚拟ip:192.168.217.200 3.192.168.217.11.192.168.217.12上分别部署Nginx Keepalived Tomcat并进 ...
- Keepalived+Nginx实现高可用负载均衡集群
一 环境介绍 1.操作系统CentOS Linux release 7.2.1511 (Core) 2.服务keepalived+nginx双主高可用负载均衡集群及LAMP应用keepalived-1 ...
- Nginx+Keepalived高可用负载均衡
转自 https://www.jianshu.com/p/da26df4f7d60 Keepalived+Nginx实现高可用Web负载均衡 Master backup vip(虚拟IP) 192.1 ...
- 【Nginx】如何实现Nginx的高可用负载均衡?看完我也会了!!
写在前面 不得不说,最近小伙伴们的学习热情是越来越高,不断向冰河提出新的想学习的技术.这不,又有小伙伴问我:冰河,你在[Nginx专题]写的文章基本上都是Nginx单机版的,能不能写一篇关于Nginx ...
- Consul&Nginx&Registrator&ConsulTemplate部署高可用负载均衡
1. Consul Server 创建consul server虚拟主机 docker-machine create consul 出现如下内容即创建成功 Running pre-create che ...
- 基于MySQL+MHA+Haproxy部署高可用负载均衡集群
一.MHA 概述 MHA(Master High Availability)是可以在MySQL上使用的一套高可用方案.所编写的语言为Perl 从名字上我们可以看到.MHA的目的就是为了维护Master ...
- LVS+Keepalived+Nginx+Tomcat高可用负载均衡集群配置(DR模式,一个VIP,多个端口)
一.概述 LVS作用:实现负载均衡 Keepalived作用:监控集群系统中各个服务节点的状态,HA cluster. 配置LVS有两种方式: 1. 通过ipvsadm命令行方式配置 2. 通过Red ...
随机推荐
- array的方法 没记住的
reserve() 是倒叙: sort() 拍序,按字符编码排序,可以传一个参数 reduce() 实例:判断一个数组里参数的个数 var arr = ["apple"," ...
- HDU 1260:Tickets(DP)
Tickets Time Limit: 2000/1000 MS (Java/Others) Memory Limit: 65536/32768 K (Java/Others) Total Su ...
- java-Random类
1.Random类的概述和方法使用 * A:Random类的概述 * 此类用于产生随机数 * 如果用相同的种子创建两个 Random 实例,则对每个实例进行相同的方法调用序列,它们将生成并返回相同的数 ...
- 获奖感想和JAVA阶段性学习总结
一.获奖感想 事实上,这次能够获得小黄衫,实在是出乎我的意料.毕竟班级中还有不少比我优秀的人,但我不会妄自菲薄.我知道,这件小黄衫不仅仅是老师对我的奖励,更是对我的一种鞭策,一种激励.它要求我要在以后 ...
- 《DSP using MATLAB》Problem 5.5
代码: %% ++++++++++++++++++++++++++++++++++++++++++++++++++++++++++++++++++++++++++++++++ %% Output In ...
- IDEA 热部署- 自动编译设置
原文:https://www.cnblogs.com/TechSnail/p/7690829.html && https://blog.csdn.net/qq_3129357 ...
- Js 向表单中添加多个元素
@{ ViewBag.title = "地图导航"; } @model YT.XWAJ.Public.Application.MapNavigation.Dto.MapNaviga ...
- nginx实现集群高可用
大家知道NGINX作为反向代理服务器可以实现负载均衡,同时也可以作为静态文件服务器,它的特点就是并发支持大,单机可同时支持3万并发,现在很多网站都把NGINX作为网关入口来统一调度分配后端资源.但是如 ...
- java.lang.NoClassDefFoundError: org/apache/jute/CsvOutputArchive
1. 问题 看到上面的错误 你怎么想? 包冲突?我这里不是.项目用到了zookeeper,这个类是zookeeper的核心包里的类. 控制台一直打印这个错误 但是项目不影响使用,奇怪! 2. 解决办法 ...
- classLoader卸载与jvm热部署
以下的相关介绍都是在未使用dcevm的情况 classLoader的卸载机制 jvm中没有提供class及classloader的unload方法.那热部署及osgi中是通过什么机制来实现的呢?实现思 ...