Android 中指纹识别
Android从6.0系统开始就支持指纹认证功能了,指纹功能还需要有硬件支持才行
指纹与手机系统设置的指纹进行匹配
如图:
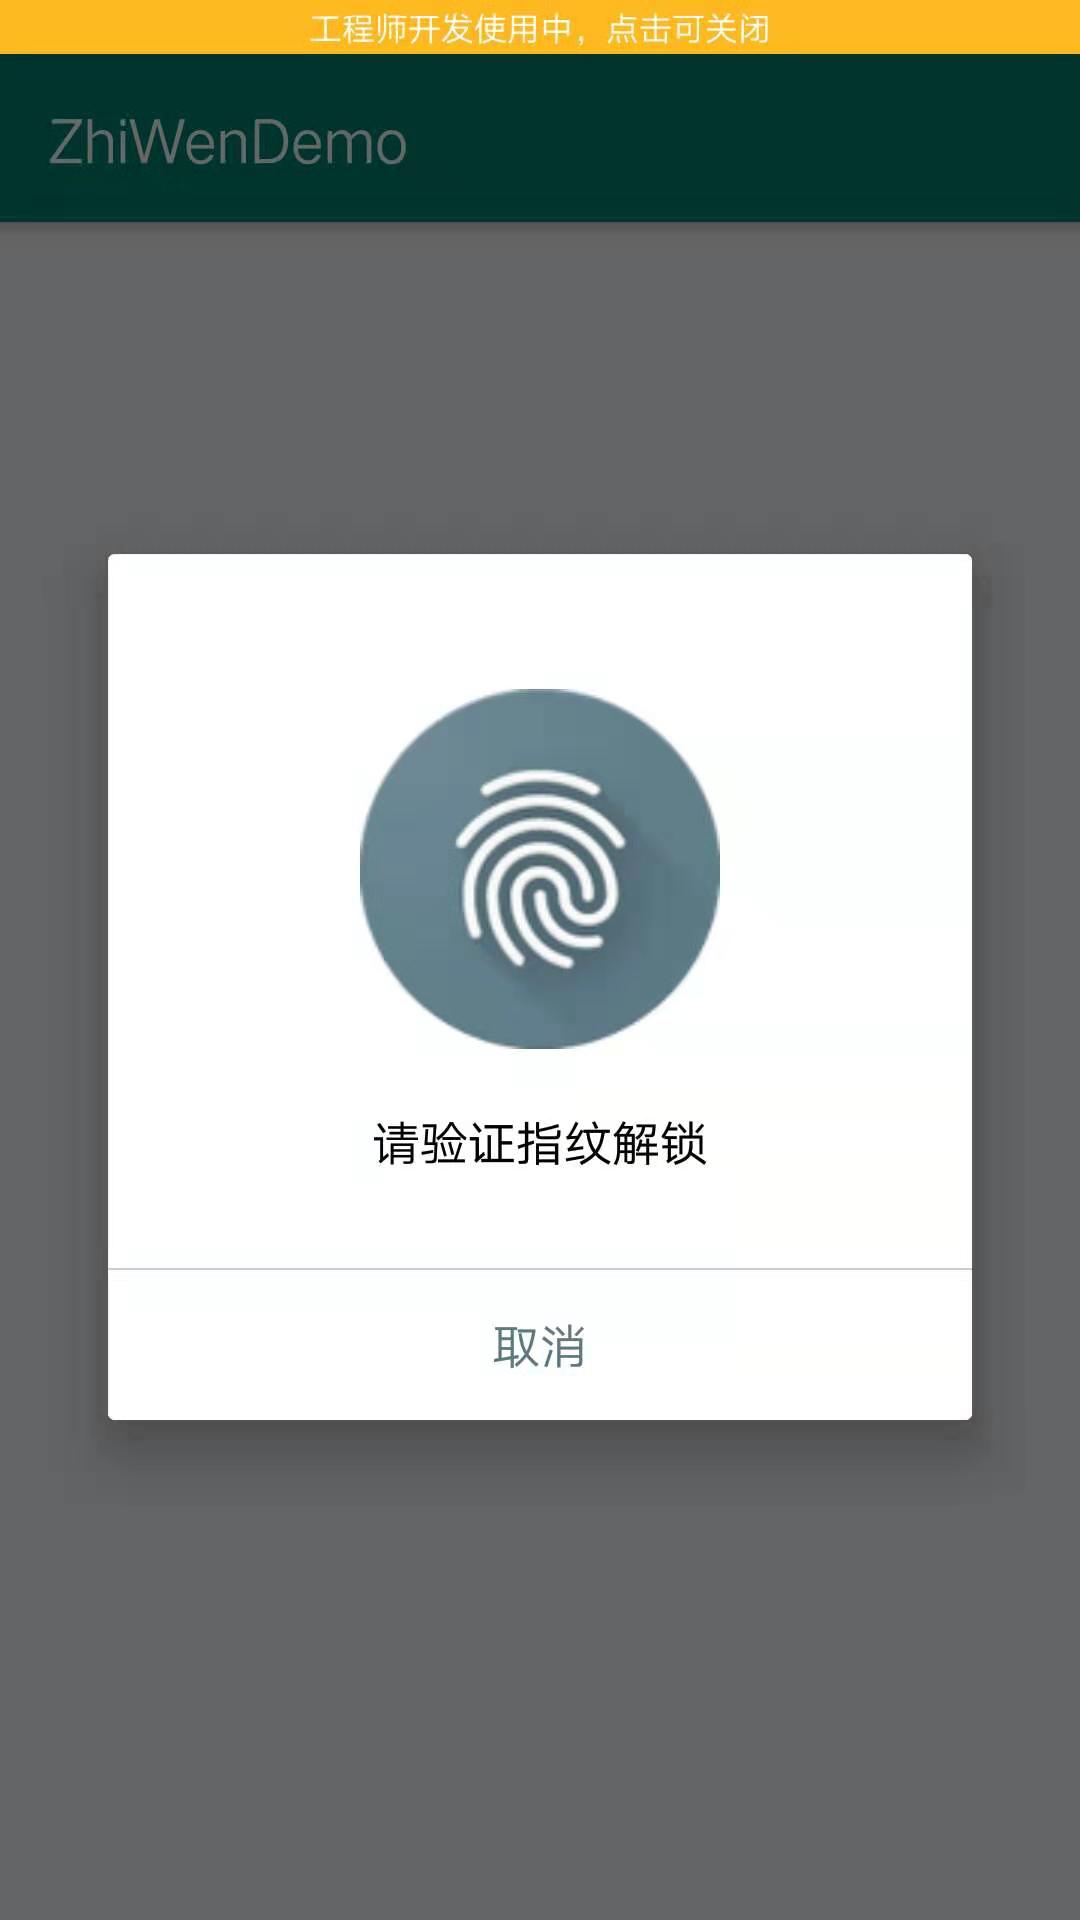
在LoginActivity 中弹出指纹验证Fragment,验证成功进入MainActivity中
代码:
创建FingerprintDialogFragment 继承 DialogFragment
package com.chuanye.zhiwendemo;

import android.annotation.SuppressLint;

import android.content.Context;

import android.hardware.fingerprint.FingerprintManager;

import android.os.Bundle;

import android.os.CancellationSignal;

import android.support.annotation.Nullable;

import android.support.v4.app.DialogFragment;

import android.view.LayoutInflater;

import android.view.View;

import android.view.ViewGroup;

import android.widget.TextView;

import android.widget.Toast;

import javax.crypto.Cipher;

public class FingerprintDialogFragment extends DialogFragment {

    private FingerprintManager fingerprintManager;

    private CancellationSignal mCancellationSignal;

    private Cipher mCipher;

    private LoginActivity mActivity;

    private TextView errorMsg;

    /**

     * 标识是否是用户主动取消的认证。

     */

    private boolean isSelfCancelled;

    public void setCipher(Cipher cipher) {

        mCipher = cipher;

    }

    @Override

    public void onAttach(Context context) {

        super.onAttach(context);

        mActivity = (LoginActivity) getActivity();

    }

    @SuppressLint("NewApi")

    @Override

    public void onCreate(Bundle savedInstanceState) {

        super.onCreate(savedInstanceState);

        fingerprintManager = getContext().getSystemService(FingerprintManager.class);

        setStyle(DialogFragment.STYLE_NORMAL, android.R.style.Theme_Material_Light_Dialog);

    }

    @Nullable

    @Override

    public View onCreateView(LayoutInflater inflater, @Nullable ViewGroup container, Bundle savedInstanceState) {

        View v = inflater.inflate(R.layout.fingerprint_dialog, container, false);

        errorMsg = v.findViewById(R.id.error_msg);

        TextView cancel = v.findViewById(R.id.cancel);

        cancel.setOnClickListener(new View.OnClickListener() {

            @Override

            public void onClick(View v) {

                dismiss();

                stopListening();

            }

        });

        return v;

    }

    @Override

    public void onResume() {

        super.onResume();

        // 开始指纹认证监听

        startListening(mCipher);

    }

    @Override

    public void onPause() {

        super.onPause();

        // 停止指纹认证监听

        stopListening();

    }

    @SuppressLint({"MissingPermission", "NewApi"})

    private void startListening(Cipher cipher) {

        isSelfCancelled = false;

        mCancellationSignal = new CancellationSignal();

        fingerprintManager.authenticate(new FingerprintManager.CryptoObject(cipher), mCancellationSignal, 0, new FingerprintManager.AuthenticationCallback() {

            @Override

            public void onAuthenticationError(int errorCode, CharSequence errString) {

                if (!isSelfCancelled) {

                    errorMsg.setText(errString);

                    if (errorCode == FingerprintManager.FINGERPRINT_ERROR_LOCKOUT) {

                        Toast.makeText(mActivity, errString, Toast.LENGTH_SHORT).show();

                        dismiss();

                    }

                }

            }

            @Override

            public void onAuthenticationHelp(int helpCode, CharSequence helpString) {

                errorMsg.setText(helpString);

            }

            @Override

            public void onAuthenticationSucceeded(FingerprintManager.AuthenticationResult result) {

                Toast.makeText(mActivity, "指纹认证成功", Toast.LENGTH_SHORT).show();

                mActivity.onAuthenticated();

            }

            @Override

            public void onAuthenticationFailed() {

                errorMsg.setText("指纹认证失败,请再试一次");

            }

        }, null);

    }

    @SuppressLint("NewApi")

    private void stopListening() {

        if (mCancellationSignal != null) {

            mCancellationSignal.cancel();

            mCancellationSignal = null;

            isSelfCancelled = true;

        }

    }

}
布局
<?xml version="1.0" encoding="utf-8"?>

<LinearLayout xmlns:android="http://schemas.android.com/apk/res/android"

    android:orientation="vertical"

    android:layout_width="match_parent"

    android:layout_height="match_parent">

    <ImageView

        android:layout_width="wrap_content"

        android:layout_height="wrap_content"

        android:layout_gravity="center_horizontal"

        android:src="@drawable/ic_fp_40px"

        />

    <TextView

        android:layout_width="wrap_content"

        android:layout_height="wrap_content"

        android:layout_gravity="center"

        android:layout_marginTop="20dp"

        android:text="请验证指纹解锁"

        android:textColor="#000"

        android:textSize="16sp"

        />

    <TextView

        android:id="@+id/error_msg"

        android:layout_width="wrap_content"

        android:layout_height="wrap_content"

        android:layout_gravity="center"

        android:layout_marginTop="5dp"

        android:maxLines="1"

        android:textSize="12sp"

        android:textColor="#f45"

        />

    <View

        android:layout_width="match_parent"

        android:layout_height="0.5dp"

        android:layout_marginTop="10dp"

        android:background="#ccc"

        />

    <TextView

        android:id="@+id/cancel"

        android:layout_width="match_parent"

        android:layout_height="50dp"

        android:gravity="center"

        android:text="取消"

        android:textColor="#5d7883"

        android:textSize="16sp"

        />

</LinearLayout>
LoginActivity 中
package com.chuanye.zhiwendemo;

import android.annotation.SuppressLint;

import android.annotation.TargetApi;

import android.app.KeyguardManager;

import android.content.Intent;

import android.hardware.fingerprint.FingerprintManager;

import android.os.Build;

import android.security.keystore.KeyGenParameterSpec;

import android.security.keystore.KeyProperties;

import android.support.v7.app.AppCompatActivity;

import android.os.Bundle;

import android.widget.Toast;

import java.security.KeyStore;

import javax.crypto.Cipher;

import javax.crypto.KeyGenerator;

import javax.crypto.SecretKey;

public class LoginActivity extends AppCompatActivity {

    //https://blog.csdn.net/guolin_blog/article/details/81450114

    private static final String DEFAULT_KEY_NAME = "default_key";

    KeyStore keyStore;

    @Override

    protected void onCreate(Bundle savedInstanceState) {

        super.onCreate(savedInstanceState);

        setContentView(R.layout.activity_login);

        if (supportFingerprint()) {//判断是否支持指纹

            initKey();

            initCipher();

        }

    }

    /**

     * 判断是否支持指纹

     * @return

     */

    @SuppressLint("MissingPermission")

    public boolean supportFingerprint() {

        if (Build.VERSION.SDK_INT < 23) {

            Toast.makeText(this, "您的系统版本过低,不支持指纹功能", Toast.LENGTH_SHORT).show();

            return false;

        } else {

            //键盘锁管理者

            KeyguardManager keyguardManager = getSystemService(KeyguardManager.class);

            //指纹管理者

            FingerprintManager fingerprintManager = getSystemService(FingerprintManager.class);

            if (!fingerprintManager.isHardwareDetected()) {//判断硬件支不支持指纹

                Toast.makeText(this, "您的手机不支持指纹功能", Toast.LENGTH_SHORT).show();

                return false;

            } else if (!keyguardManager.isKeyguardSecure()) {//还未设置锁屏

                Toast.makeText(this, "您还未设置锁屏,请先设置锁屏并添加一个指纹", Toast.LENGTH_SHORT).show();

                return false;

            } else if (!fingerprintManager.hasEnrolledFingerprints()) {//指纹未登记

                Toast.makeText(this, "您至少需要在系统设置中添加一个指纹", Toast.LENGTH_SHORT).show();

                return false;

            }

        }

        return true;

    }

    @TargetApi(23)

    private void initKey() {

        try {

            keyStore = KeyStore.getInstance("AndroidKeyStore");

            keyStore.load(null);

            //秘钥生成器

            KeyGenerator keyGenerator = KeyGenerator.getInstance(KeyProperties.KEY_ALGORITHM_AES, "AndroidKeyStore");

            KeyGenParameterSpec.Builder builder = new KeyGenParameterSpec.Builder(DEFAULT_KEY_NAME,

                    KeyProperties.PURPOSE_ENCRYPT |

                            KeyProperties.PURPOSE_DECRYPT)

                    .setBlockModes(KeyProperties.BLOCK_MODE_CBC)

                    .setUserAuthenticationRequired(true)

                    .setEncryptionPaddings(KeyProperties.ENCRYPTION_PADDING_PKCS7);

            keyGenerator.init(builder.build());

            keyGenerator.generateKey();

        } catch (Exception e) {

            throw new RuntimeException(e);

        }

    }

    @TargetApi(23)

    private void initCipher() {

        try {

            SecretKey key = (SecretKey) keyStore.getKey(DEFAULT_KEY_NAME, null);

            Cipher cipher = Cipher.getInstance(KeyProperties.KEY_ALGORITHM_AES + "/"

                    + KeyProperties.BLOCK_MODE_CBC + "/"

                    + KeyProperties.ENCRYPTION_PADDING_PKCS7);

            cipher.init(Cipher.ENCRYPT_MODE, key);

            showFingerPrintDialog(cipher);

        } catch (Exception e) {

            throw new RuntimeException(e);

        }

    }

    private void showFingerPrintDialog(Cipher cipher) {

        FingerprintDialogFragment fragment = new FingerprintDialogFragment();

        fragment.setCipher(cipher);

        fragment.show(getSupportFragmentManager(), "fingerprint");

    }

    public void onAuthenticated() {

        Intent intent = new Intent(this, MainActivity.class);

        startActivity(intent);

        finish();

    }

}
activity_main.xml布局
<?xml version="1.0" encoding="utf-8"?>

<FrameLayout

    xmlns:android="http://schemas.android.com/apk/res/android"

    android:layout_width="match_parent"

    android:layout_height="match_parent">

    <TextView

        android:layout_width="wrap_content"

        android:layout_height="wrap_content"

        android:text="已进入App主界面"

        android:textSize="18sp"

        android:layout_gravity="center"

        />

</FrameLayout>
最后添加权限
<uses-permission android:name="android.permission.USE_FINGERPRINT"></uses-permission>
注意,通常为了让用户清楚的知道现在需要进行指纹认证,Google官方建议最好使用一个通用的指纹图标,而不应该由各APP制作自己的指纹图标。为此,Google也特意提供了一套指纹认证的组图,可以 点击这里 查看和下载。
指纹认证不能单独使用,必须要配合着图案或其他认证方式一起来使用,因为一定要提供一个在设备不支持指纹情况下的其他认证方式
另外FingerprintManager在最新的Android 9.0系统上已经被废弃了因为Android 9.0系统提供了更加强大的生物识别认证功能,包括指纹识别、面部识别、甚至是虹膜识别等等,因此仅仅只能用于指纹识别的FingerprintManager已经不能满足新系统的强大需求了。
参考与郭神的https://blog.csdn.net/guolin_blog/article/details/81450114
Android 中指纹识别的更多相关文章
- Android中的指纹识别
转载请注明出处:http://blog.csdn.net/wl9739/article/details/52444671 评论中非常多朋友反映,依据我给出的方案,拿不到指纹信息这个问题,在这里统一说明 ...
- Android指纹识别深入浅出分析到实战(6.0以下系统适配方案)
指纹识别这个名词听起来并不陌生,但是实际开发过程中用得并不多.Google从Android6.0(api23)开始才提供标准指纹识别支持,并对外提供指纹识别相关的接口.本文除了能适配6.0及以上系统, ...
- Android开发学习之路-指纹识别api
在android6.0之后谷歌对指纹识别进行了官方支持,今天还在放假,所以就随意尝试了一下这个api,但是遇到了各种各样的问题 ①在使用FingerPrintManager这个类实现的时候发现了很多问 ...
- Android指纹识别API讲解,让你有更好的用户体验
我发现了一个比较怪的现象.在iPhone上使用十分普遍的指纹认证功能,在Android手机上却鲜有APP使用,我简单观察了一下,发现Android手机上基本上只有支付宝.微信和极少APP支持指纹认证功 ...
- Android指纹识别深入浅出分析到实战
指纹识别这个名词听起来并不陌生,但是实际开发过程中用得并不多.Google从Android6.0(api23)开始才提供标准指纹识别支持,并对外提供指纹识别相关的接口.本文除了能适配6.0及以上系统, ...
- android指纹识别、拼图游戏、仿MIUI长截屏、bilibili最美创意等源码
Android精选源码 一个动画效果的播放控件,播放,暂停,停止之间的动画 用 RxJava 实现 Android 指纹识别代码 Android仿滴滴打车(滴滴UI)源码 Android高仿哔哩哔哩动 ...
- 检查Android是否支持指纹识别以及是否已经录入指纹
原文:检查Android是否支持指纹识别以及是否已经录入指纹 Android M 开始,系统中加入了指纹相关功能. 主要用到的类为:FingerprintManager 只提供三个方法: 返回值 方法 ...
- Android指纹识别
原文:Android指纹识别 上一篇讲了通过FingerprintManager验证手机是否支持指纹识别,以及是否录入了指纹,这里进行指纹的验证. //获取FingerprintManager实例 F ...
- WAF指纹识别和XSS过滤器绕过技巧
[译文] -- “Modern Web Application Firewalls Fingerprinting and Bypassing XSS Filters” 0x1 前言 之前在乌云drop ...
随机推荐
- Linux中raid磁盘阵列
一.磁盘阵列(Redundant Arrays of Independent Disks,RAID) 有“独立磁盘构成的具有冗余能力的阵列”之意. 磁盘阵列是由很多价格较便宜的磁盘,以硬件(RAID卡 ...
- liteos分散加载(十四)
1. 概述 1.1 基本概念 分散加载是一种实现特定代码快速启动的技术,通过优先加载特定代码到内存,达到缩短从系统开机到特定代码执行的时间.可被应用来实现关键业务的快速启动. 嵌入式系统通过uboot ...
- Ubuntu16.04初始配置
Ubuntu16.04初始化 清理系统 删除libreoffice:sudo apt-get remove libreoffice-common 删除Amazon链接:sudo apt-get rem ...
- 卷积层输出feature maps尺寸的计算
默认feature maps的宽和高相等. 常规卷积 输入的feature maps尺寸为i,卷积核的尺寸为k,stride为s,padding为p,则输出的feature maps的尺寸o为 当pa ...
- 【洛谷P1963】[NOI2009]变换序列(二分图匹配)
传送门 题意: 现有一个\(0\)到\(n-1\)的排列\(T\),定义距离\(D(x,y)=min\{|x-y|,N-|x-y|\}\). 现在给出\(D(i, T_i)\),输出字典序最小的符合条 ...
- 初学JavaScript正则表达式(五)
范围类 [ ] 例: 'a1b1c1s1v1d1f1'.replace(/[a-z]/g,'q') //q1q1q1q1q1q1q1 将a-z范围内的字符替换为q 'a1b1c1s1v1d1f1AKS ...
- php安全字段和防止XSS跨站脚本攻击过滤函数
function escape($string) { global $_POST; $search = array ( '/</i', '/>/i', '/\">/i', ...
- python3.5.3rc1学习九:正则表达式
# 正则表达式 ''''' 正则表达式是有一些特殊字符组成,能够帮你找到一些符合一定规则的字符串 先来了解几个符号所代表的意思 \d 匹配所有的数字 \D 匹配所有,但是数字除外 \s 空格 \S 匹 ...
- 【Eureka篇三】Eureka比Zookeeper好在哪里?(8)
Eureka遵守AP,Zookeeper遵守CP RDBMS(oracle/mysql.sqlServer) ====> ACID, 关系型数据库遵循ACID原则 NoSQL(redis/mon ...
- 关于一个.2lf和.2f的战争!(貌似书上错了,静待打脸。)
在山东理工oj上做题,谈到了输入数据... double i: scanf(“%lf”,&i): 谨记呀,lf时,可以输入任何类型的数据,而.2f,只能输入符合其规格的数据. 再谈输出,dou ...