React-leaflet在ant-design pro中的基本使用
react-leaflet的github地址:https://github.com/PaulLeCam/react-leaflet
react-leaflet-markercluster点聚合github地址 :https://github.com/YUzhva/react-leaflet-markercluster
本篇案例github地址:https://github.com/GugaLiz/ant-design-react-ProDemo
一、react-leaflet显示多个marker点并显示多行popup
1.注意点:安装leaflet。 命令:npm install leaflet

2.装好环境以后这里有两个难点,①marker图标重新引入。②popup多行显示。
因为之前有踩过vue结合leaflet的坑、所以第一个问题这次跟vue里面重新引用图标一样解决了。第二个问题其实也不难、就是要灵活一点去试吧。因为官方文档没有写这种情况,只是很简单的示例。我先着重贴一下解决方案的代码、后面有整体代码结合理解。最后有我自己整理的github链接可以方便在实际开发中参考。
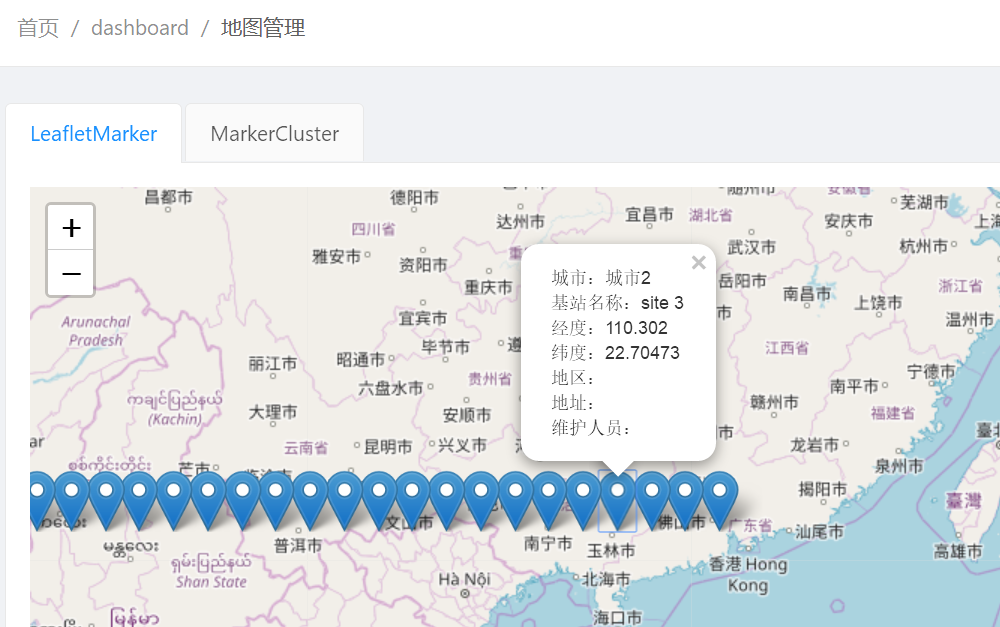
效果:

①。解决marker图标重新引入,第一import Leaflet,第二把leaflet模块中的markers文件夹复制到src路径下的asset静态资源文件夹中,第三重新引入图标。
②。解决第二问题,第一把每一个marker需要多行显示的popup的每一行都做成一个obj,这样在第二步进行处理的时候就可以分开与样式融合到一起。第二步处理popup
//处理popup的内容
整体代码参上:
import React, { PureComponent, Fragment } from 'react';

import { render } from 'react-dom';

import { connect } from 'dva';

import { Row, Col, Card, Tooltip, Menu, Dropdown, Icon, Button,Layout } from 'antd';

import styles from './MapTest.less';

import L from 'leaflet';

import { Map, TileLayer,Marker,Popup } from 'react-leaflet';

import "leaflet/dist/leaflet.css";

const {Content} = Layout;

//把图标重新引入

delete L.Icon.Default.prototype._getIconUrl

L.Icon.Default.imagePath = ''

L.Icon.Default.mergeOptions({

      iconRetinaUrl: require('../../assets/markers/marker-icon-2x.png'),

       iconUrl: require('../../assets/markers/marker-icon.png'),

      shadowUrl: require('../../assets/markers/marker-shadow.png')

})

//处理每一个marker的显示

const PopupMarker = ({ children,position }) => {

const items = children.map((item) => (<span key={item.key}>{item.string}<br /></span>))

return  <Marker position={position}>

  <Popup><div>

  {items}

  </div></Popup>

</Marker>

}

//处理markerlist

const MarkersList = ({markers}) => {

  const items = markers.map(({ key,...props}) => (

    <PopupMarker key={key} {...props} />

  ))

  return <div>{items}</div>

}

export default class SiteMap extends PureComponent {

  render() {

    const position = [22.7047, 113.302];  //中心点

    //模拟数据

   const dataList = [];

   for (let i = 0; i < 46; i += 1) {

     dataList.push({

       id: i,

       Province: '',

       Name: `site ${i}`,

       Lat: 22.7047 + `${i}`,

       Lng: 113.302 - `${i}`,

       currentValue: Math.floor(Math.random() * 1000),

       status: Math.floor(Math.random() * 10) % 2,

       purchaseDate: new Date(`2017-07-${Math.floor(i / 2) + 1}`),

       create_time: new Date(`2017-07-${Math.floor(i / 2) + 1}`),

       progress: Math.ceil(Math.random() * 100),

       Province: Math.floor(Math.random() * 10) % 2 ? '省份1' : '省份2',

       City: Math.floor(Math.random() * 10) % 2 ? '城市1' : '城市2',

     });

   }

    let cellPoints = [];

    dataList.map(item => {

      let lng = Number.parseFloat(item.Lng);

      let lat = Number.parseFloat(item.Lat);

      let name = item.Name;

      let city = item.City || '';

      let district = item.District || '';

      let address = item.Address || '';

      let maintainer = item.Maintainer || '';

      let popupContent = [{key:city,string:`城市:${city}`},

      {key:name,string:`基站名称:${name}`},

      {key:lng,string:`经度:${lng}`},

      {key:lat,string:`纬度:${lat}`},

      {key:district,string:`地区:${district}`},

      {key:address,string:`地址:${address}`},

      {key:maintainer,string:`维护人员:${maintainer}`},

    ]

      cellPoints.push({key:name,position:[lat, lng],children:popupContent});

    });

    const style= {

      width: '100%',

      height: '600px',

    }

    return (

            <Content>

            <div className="ant-card-bordered" style={style}>

            <Map center={position} zoom={13} style={{width: '100%', height: '100%'}}>

                <TileLayer

                url="https://{s}.tile.openstreetmap.org/{z}/{x}/{y}.png"

                />

                <MarkersList markers={cellPoints} />

                </Map>

            </div>

            </Content>

    );

  }

}
LeafletMarker.js
二、使用react-leaflet-markercluster点聚合显示坐标点。
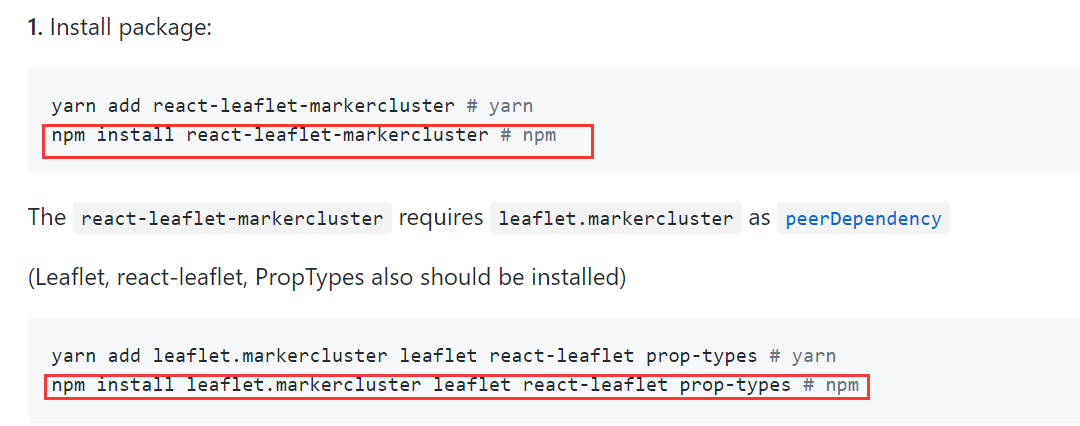
1.注意点:按照github上使用方法安装好。 命令:
npm install react-leaflet-markercluster
npm install leaflet.markercluster leaflet react-leaflet prop-types

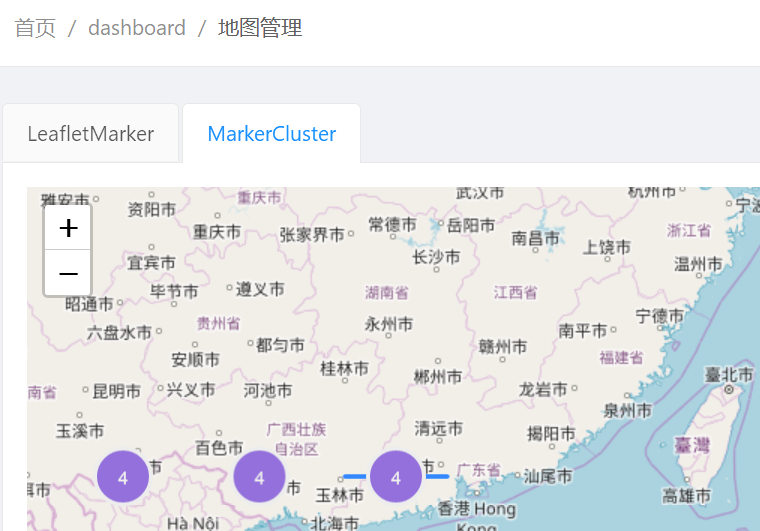
2.确保两个都安装上就可以使用了、文档还蛮全的也是案例型、容易使用。我这里也只是简单引用点聚合。我这里的方式是先定义marker样式,然后引用,注意这里要在less文件里写好聚合点样式噢。

import React, { PureComponent, Fragment } from 'react';

import { render } from 'react-dom';

import { connect } from 'dva';

import { Row, Col, Card, Tooltip, Menu, Dropdown, Icon, Button,Layout } from 'antd';

import styles from './MapTest.less';

import L from 'leaflet';

import { Map, TileLayer } from 'react-leaflet';

import MarkerClusterGroup from 'react-leaflet-markercluster';

import "leaflet/dist/leaflet.css";

const {Content} = Layout;

//把图标重新引入

delete L.Icon.Default.prototype._getIconUrl

L.Icon.Default.imagePath = ''

L.Icon.Default.mergeOptions({

      iconRetinaUrl: require('../../assets/markers/marker-icon-2x.png'),

       iconUrl: require('../../assets/markers/marker-icon.png'),

      shadowUrl: require('../../assets/markers/marker-shadow.png')

})

// @connect(({ site, loading }) => ({

//   site,

//   loading: loading.models.site,

// }))

export default class SiteMap extends PureComponent {

  // componentDidMount() {

  //   const { dispatch } = this.props;

  //   dispatch({

  //     type: 'site/fetch',

  //   });

  // }

  render() {

  //  const { site:{data}, loading } = this.props;

    const position = [22.7047, 113.302];

    //const dataList = { data }.data.list;

    const dataList = [];

    for (let i = 0; i < 46; i += 1) {

      dataList.push({

        id: i,

        Province: '',

        Name: `site ${i}`,

        Lat: 22.7047 + `${i}`,

        Lng: 113.302 - `${i}`,

        currentValue: Math.floor(Math.random() * 1000),

        status: Math.floor(Math.random() * 10) % 2,

        purchaseDate: new Date(`2017-07-${Math.floor(i / 2) + 1}`),

        create_time: new Date(`2017-07-${Math.floor(i / 2) + 1}`),

        progress: Math.ceil(Math.random() * 100),

        Province: Math.floor(Math.random() * 10) % 2 ? '省份1' : '省份2',

        City: Math.floor(Math.random() * 10) % 2 ? '城市1' : '城市2',

      });

    }

    let cellPoints = [];

    const sytlep = {

      width:'100%',

    }

    dataList.map(item => {

      let lng = Number.parseFloat(item.Lng);

      let lat = Number.parseFloat(item.Lat);

      let name = item.Name;

      let city = item.City || '';

      let district = item.District || '';

      let Address = item.Address || '';

      let maintainer = item.Maintainer || '';

      let popupDiv = `<div style={stylep}>

      <span>城市:${city}</span>

      <br />

      <span>基站名称:${name}</span>

      <br />

      <span>经度:${lng}</span>

      <br />

      <span>纬度:${lat}</span>

      <br />

      <span>地区:${district}</span>

      <br />

      <span>地址:${Address}</span>

      <br />

      <span>维护人员:${maintainer}</span>

      <br />

      </div>`

      cellPoints.push({position:[lat, lng],popup:popupDiv});

    });

    const style= {

      width: '100%',

      height: '600px',

    }

    //定义聚合点样式

    const createClusterCustomIcon = function (cluster) {

      return L.divIcon({

        html: `<span>${cluster.getChildCount()}</span>`,

        className: styles.markercustom,

        iconSize: L.point(40, 40, true)

      });

    };

    return (

            <Content>

            <div className="ant-card-bordered" style={style}>

            <Map className={styles.markercluster} center={position} zoom={13} style={{width: '100%', height: '100%'}}>

                <TileLayer

                url="https://{s}.tile.openstreetmap.org/{z}/{x}/{y}.png"

                />

                <MarkerClusterGroup

                spiderfyDistanceMultiplier={2}

                iconCreateFunction={createClusterCustomIcon}

                markers={cellPoints}

                />

                </Map>

            </div>

            </Content>

    );

  }

}
markercluster
总结:
这里要注意记得把marker的图片文件夹放入src/assets里面,不然会跑不起来的。
两种用法文档都有比较详细的代码可以参考。如果出不来效果多研究研究。
具体项目中的使用可以参考我的github的demo,会持续更新丰富。
React-leaflet在ant-design pro中的基本使用的更多相关文章
- Ant Design Pro中Transfer穿梭框的实际用法(与后端交互)
Ant Design Pro中Transfer穿梭框的实际用法(与后端交互) 该控件的属性以及属性的作用在ADP的官方文档中都有介绍,但没有讲如何与后端交互,本文旨在讲解该控件与后端的交互. Ant ...
- 实战 ant design pro 中的坑
1.替换mock数据: 1.将:.roadhogrc.mock.js 中的代理模式替换 当不使用代理的时候就会将所有 /api/的链接换成 http://localhost:8080/ export ...
- 把antd的组件源码搬到Ant Design Pro中使用
把组件源码搬过来后,样式死活不生效,经过1天的努力,有说less-loader的,有说webpack配置,还有说babel配置的,最后,我自己找到了方法 就是在global.less中使用@impor ...
- ant design pro (八)构建和发布
一.概述 原文地址:https://pro.ant.design/docs/deploy-cn 二.详细 2.1.构建 当项目开发完毕,只需要运行一行命令就可以打包你的应用: npm run buil ...
- ant design pro (七)和服务端进行交互
一.概述 原文地址:https://pro.ant.design/docs/server-cn Ant Design Pro 是一套基于 React 技术栈的单页面应用,我们提供的是前端代码和本地模拟 ...
- ant design pro(二)布局
一.概述 参看地址:https://pro.ant.design/docs/layout-cn 其实在上述地址ant-design上已经有详细介绍,本文知识简述概要. 页面整体布局是一个产品最外层的框 ...
- Ant Design Pro快速入门
在上一篇文章中,我们介绍了如何构建一个Ant Design Pro的环境. 同时讲解了如何启动服务并查看前端页面功能. 在本文中,我们将简单讲解如何在Ant Design Pro框架下实现自己的业务功 ...
- Ant Design Pro 学习笔记:数据流向
在讲这个问题之前,有一个问题应当讲一下: Ant Design Pro / umi / dva 是什么关系? 首先是 umi / dva 的关系. umi 是一个基于路由的 react 开发框架. d ...
- ant design pro (十五)advanced 使用 API 文档工具
一.概述 原文地址:https://pro.ant.design/docs/api-doc-cn 在日常开发中,往往是前后端分离的,这个时候约定好一套接口标准,前后端各自独立开发,就不会被对方的技术难 ...
- ant design pro (十一)advanced Mock 和联调
一.概述 原文地址:https://pro.ant.design/docs/mock-api-cn Mock 数据是前端开发过程中必不可少的一环,是分离前后端开发的关键链路.通过预先跟服务器端约定好的 ...
随机推荐
- 企查查app (完结)
在经历前两次探索之后,终于可以把所有的加密关键参数搞定了. 已删除!!!! 好了现在基本结束了. 根据这个我写了一自动抓取企查查每日新增数据,需要的话可以去看看 企查查app新增企业数据抓取 关注小白 ...
- springBoot项目配置日志打印管理(log4j2)
1.修改pom文件引用log4j2相关jar包 依赖代码: <!-- log4j2 start --><!-- Spring Boot log4j2依赖 --><depe ...
- Docker学习总结(七)--Docker私有仓库
创建私有仓库 1) 拉取私有仓库镜像 docker pull registry 2)启动私有仓库容器 docker run -di --name-registry -p 5000:5000 regis ...
- TextCNN 代码详解(附测试数据集以及GitHub 地址)
前言:本篇是TextCNN系列的第三篇,分享TextCNN的优化经验 前两篇可见: 文本分类算法TextCNN原理详解(一) 一.textCNN 整体框架 1. 模型架构 图一:textCNN 模型结 ...
- python入门(六)二次编码与文件操作
二次编码 密码本: ascii -- 没有中文 英文1字节 gbk -- 英文 8b(位) 1B(字节) 中文 16b 2B unicode -- 英文32b 4B 中文32b 4B utf-8 -- ...
- HelloDjango 第 13 篇:分类、归档和标签页
作者:HelloGitHub-追梦人物 文中涉及的示例代码,已同步更新到 HelloGitHub-Team 仓库 侧边栏已经正确地显示了最新文章列表.归档.分类.标签等信息.现在来完善归档.分类和标签 ...
- 刨死你系列——HashMap(jdk1.8)
本文的源码是基于JDK1.8版本,在学习HashMap之前,先了解数组和链表的知识. 数组:数组具有遍历快,增删慢的特点.数组在堆中是一块连续的存储空间,遍历时数组的首地址是知道的(首地址=首地址+元 ...
- Java 从入门到进阶之路(五)
之前的文章我们介绍了 Java 的循环结构,本章我们来看一下 Java 的数组 数组对于每一门编程语言来说都是重要的数据结构之一,当然不同语言对数组的实现及处理也不尽相同. 数组 - 相同数据类型的元 ...
- Codeforces 832 D Misha, Grisha and Underground
Misha, Grisha and Underground 题意:Misha 和 Grisha 是2个很喜欢恶作剧的孩子, 每天早上 Misha 会从地铁站 s 通过最短的路到达地铁站 f, 并且在每 ...
- HDU2276 Kiki & Little Kiki 2 矩阵快速幂
Kiki & Little Kiki 2 Time Limit: 2000/1000 MS (Java/Others) Memory Limit: 32768/32768 K (Java ...
