spring学习笔记之---bean管理的注解方式
bean管理的注解方式
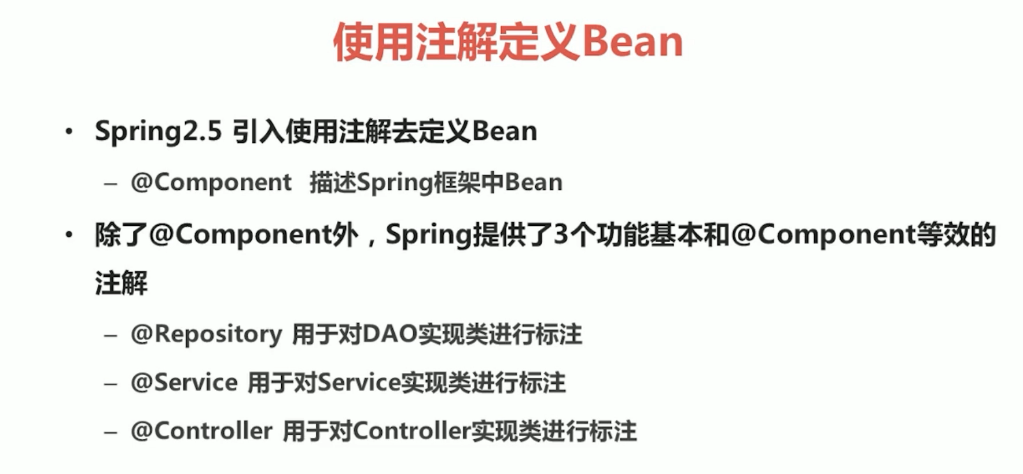
(一)使用注解定义bean
(1)常用注解
(2)实例
1.在pom.xml中进行配置
<dependencies>

  <dependency>

    <groupId>org.springframework</groupId>

    <artifactId>spring-jdbc</artifactId>

    <version>5.1.5.RELEASE</version>

  </dependency>

  <dependency>

    <groupId>org.springframework</groupId>

    <artifactId>spring-context</artifactId>

    <version>5.1.5.RELEASE</version>

  </dependency>

  <dependency>

    <groupId>org.springframework</groupId>

    <artifactId>spring-aop</artifactId>

    <version>5.1.5.RELEASE</version>

  </dependency>

  <dependency>

    <groupId>org.springframework</groupId>

    <artifactId>spring-core</artifactId>

    <version>5.1.5.RELEASE</version>

  </dependency>

  <dependency>

    <groupId>org.springframework</groupId>

    <artifactId>spring-beans</artifactId>

    <version>5.1.5.RELEASE</version>

  </dependency>

  <dependency>

    <groupId>org.springframework</groupId>

    <artifactId>spring-tx</artifactId>

    <version>5.1.5.RELEASE</version>

  </dependency>

  <dependency>

    <groupId>junit</groupId>

    <artifactId>junit</artifactId>

    <version>4.11</version>

  </dependency>

</dependencies>
2.创建一个类,在类中写一个方法,在类上加一个注解@Component
package service;

import org.junit.Test;

import org.springframework.stereotype.Component;

import sun.misc.Contended;

@Component("UserService")

public class UserService {

    public String Hello(){

        return "hello";

    }

}
3.创建一个applicationContext.xml,在里面配置包扫描
<?xml version="1.0" encoding="UTF-8"?>

<beans xmlns="http://www.springframework.org/schema/beans"

       xmlns:xsi="http://www.w3.org/2001/XMLSchema-instance"

       xmlns:context="http://www.springframework.org/schema/context" xsi:schemaLocation="

        http://www.springframework.org/schema/beans http://www.springframework.org/schema/beans/spring-beans.xsd

        http://www.springframework.org/schema/context http://www.springframework.org/schema/context/spring-context.xsd">

    <!--开启注解扫描=======================-->

    <context:component-scan base-package="service"></context:component-scan>

        </beans>
4.创建一个log4j.properties
### direct log messages to stdout ###

log4j.appender.stdout=org.apache.log4j.ConsoleAppender

log4j.appender.stdout.Target=System.err

log4j.appender.stdout.layout=org.apache.log4j.PatternLayout

log4j.appender.stdout.layout.ConversionPattern=%d{ABSOLUTE} %5p %c{1}:%L - %m%n

### direct messages to file mylog.log ###

log4j.appender.file=org.apache.log4j.FileAppender

log4j.appender.file.File=c\:mylog.log

log4j.appender.file.layout=org.apache.log4j.PatternLayout

log4j.appender.file.layout.ConversionPattern=%d{ABSOLUTE} %5p %c{1}:%L - %m%n

### set log levels - for more verbose logging change 'info' to 'debug' ###

log4j.rootLogger=info, stdout
5.创建一个测试类
package test;

import org.junit.Test;

import org.springframework.context.ApplicationContext;

import org.springframework.context.support.ClassPathXmlApplicationContext;

import service.UserService;

public class UserTest {

    @Test

    public void hellotest(){

        ApplicationContext applicationContext=new ClassPathXmlApplicationContext("applicationContext.xml");

        UserService userService=(UserService)applicationContext.getBean("UserService");

        String s=userService.Hello();

        System.out.println(s);

    }

}
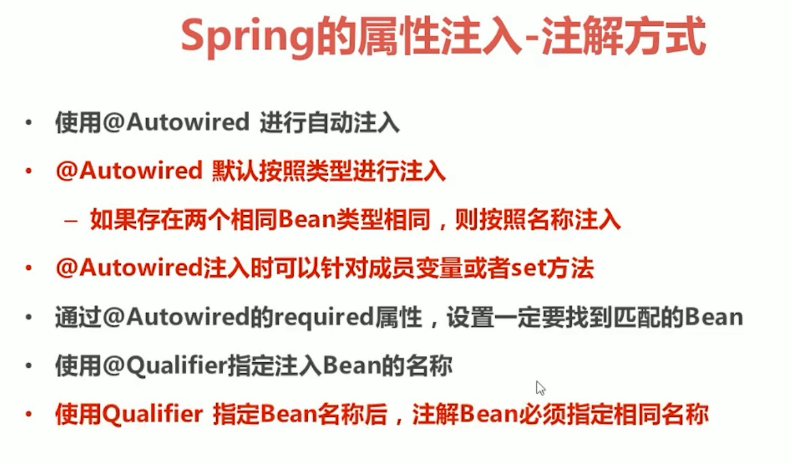
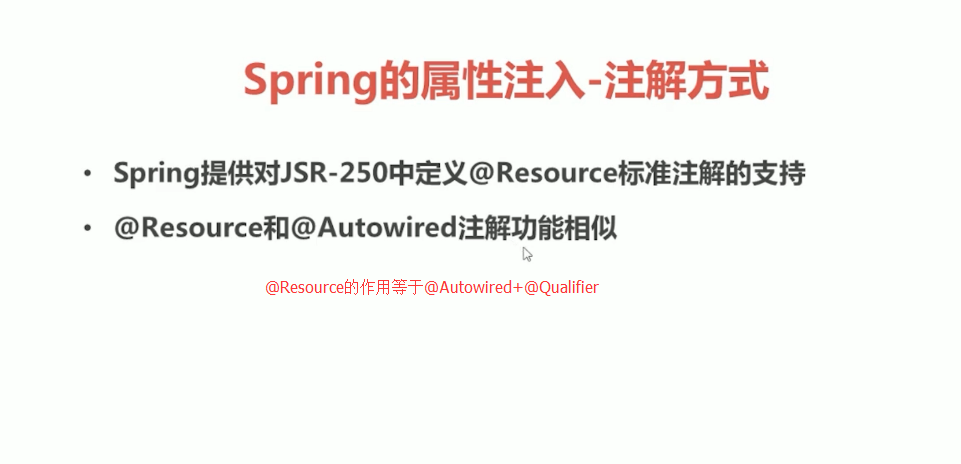
(二)属性注入的注解
(1)常用注解
1.属性注入
package service;

import org.junit.Test;

import org.springframework.beans.factory.annotation.Value;

import org.springframework.stereotype.Component;

import sun.misc.Contended;

@Component("UserService")

public class UserService {

    @Value("小欢")

    private String name;

    public String Hello(){

        return "hello"+name;

    }

}
2.类注入
(a)UserService.java
package service;

import dao.UserDao;

import org.junit.Test;

import org.springframework.beans.factory.annotation.Value;

import org.springframework.stereotype.Component;

import sun.misc.Contended;

import javax.annotation.Resource;

@Component("UserService")

public class UserService {

    @Value("小欢")

    private String name;

    @Resource(name="UserDao")

    private UserDao userDao;

    public String Hello(){

        System.out.println("service中的hello");

        return "hello"+name;

    }

}
(b)UserDao.java
package dao;

import org.springframework.stereotype.Repository;

@Repository("UserDao")

public class UserDao {

    public void Hello(){

        System.out.println("dao 中的hello");

    }

}
(c)applicationContext.xml
<?xml version="1.0" encoding="UTF-8"?>

<beans xmlns="http://www.springframework.org/schema/beans"

       xmlns:xsi="http://www.w3.org/2001/XMLSchema-instance"

       xmlns:context="http://www.springframework.org/schema/context" xsi:schemaLocation="

        http://www.springframework.org/schema/beans http://www.springframework.org/schema/beans/spring-beans.xsd

        http://www.springframework.org/schema/context http://www.springframework.org/schema/context/spring-context.xsd">

    <!--开启注解扫描=======================-->

    <context:component-scan base-package="service,dao"></context:component-scan>

        </beans>
(d)UserTest.java
package test;

import org.junit.Test;

import org.springframework.context.ApplicationContext;

import org.springframework.context.support.ClassPathXmlApplicationContext;

import service.UserService;

public class UserTest {

    @Test

    public void hellotest(){

        ApplicationContext applicationContext=new ClassPathXmlApplicationContext("applicationContext.xml");

        UserService userService=(UserService)applicationContext.getBean("UserService");

        String s=userService.Hello();

        System.out.println(s);

    }

}
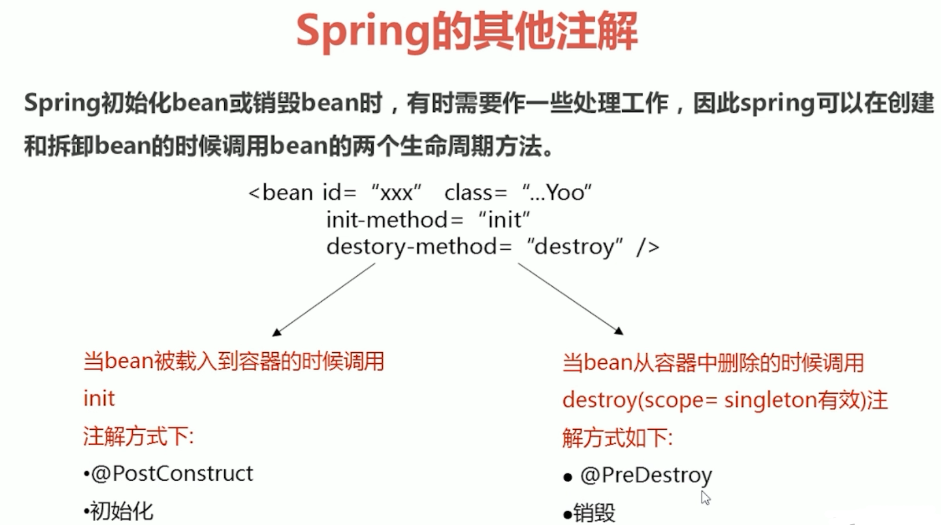
(三)其他注解
(四)xml和注解整合开发
1.UserService2.java
package service;

import dao.UserDao2;

import org.springframework.stereotype.Repository;

import javax.annotation.Resource;

public class UserService2 {

    @Resource(name="UserDao2")

    private UserDao2 userDao2;

    public void He(){

        userDao2.He();

        System.out.println("userservice2中的he");

    }

}
2.UserDao2.java
package dao;

public class UserDao2 {

    public void He(){

        System.out.println("userdao2中的he");

    }

}
3.applicationContext.xml
<?xml version="1.0" encoding="UTF-8"?>

<beans xmlns="http://www.springframework.org/schema/beans"

       xmlns:xsi="http://www.w3.org/2001/XMLSchema-instance"

       xmlns:context="http://www.springframework.org/schema/context" xsi:schemaLocation="

        http://www.springframework.org/schema/beans http://www.springframework.org/schema/beans/spring-beans.xsd

        http://www.springframework.org/schema/context http://www.springframework.org/schema/context/spring-context.xsd">

    <context:annotation-config/>

    <bean id="UserService2" class="service.UserService2"/>

    <bean id="UserDao2" class="dao.UserDao2"/>

        </beans>
4.UserTest.java
package test;

import org.junit.Test;

import org.springframework.context.ApplicationContext;

import org.springframework.context.support.ClassPathXmlApplicationContext;

import service.UserService;

import service.UserService2;

public class UserTest {

    @Test

    public void hetest(){

        ApplicationContext applicationContext=new ClassPathXmlApplicationContext("applicationContext.xml");

        UserService2 userService2=(UserService2)applicationContext.getBean("UserService2");

        userService2.He();

    }

}
spring学习笔记之---bean管理的注解方式的更多相关文章
- spring学习笔记之---bean管理
bean管理(xml) (一)spring的工厂类 FileSystemXmlApplicationContext 读取磁盘配置文件 (二)bean实例化的三种方式 (1)使用类构造器实例化(默认无参 ...
- (转)Spring的bean管理(注解方式)
http://blog.csdn.net/yerenyuan_pku/article/details/69663779 Spring的bean管理(注解方式) 注解:代码中的特殊标记,注解可以使用在类 ...
- Spring 的 Bean 管理(注解方式)
Spring 的 Bean 管理(注解方式) 1. 导入必要的 jar 包和 xml 文件 使用注解需要导入 spring-aop 的 jar 包. applicationContext.xml 文件 ...
- Spring学习笔记1——IOC: 尽量使用注解以及java代码(转)
在实战中学习Spring,本系列的最终目的是完成一个实现用户注册登录功能的项目. 预想的基本流程如下: 1.用户网站注册,填写用户名.密码.email.手机号信息,后台存入数据库后返回ok.(学习IO ...
- Spring学习笔记1——IOC: 尽量使用注解以及java代码
在实战中学习Spring,本系列的最终目的是完成一个实现用户注册登录功能的项目. 预想的基本流程如下: 1.用户网站注册,填写用户名.密码.email.手机号信息,后台存入数据库后返回ok.(学习IO ...
- Spring的bean管理(注解方式)
注解:代码中的特殊标记,注解可以使用在类.方法.属性上面,使用注解可实现一些基本的功能.注解的写法是@注解名称(属性=属性值). 使用注解创建对象 第一步,创建Web项目,引入Spring的开发包 第 ...
- Spring学习笔记(三)—— 使用注解配置spring
一.使用步骤 1.1 导包 1.2 为主配置文件引入新的命名空间(约束) 在applicationContext.xml中引入context约束 1.3 编写相关的类 public class Use ...
- (四)Spring 的 bean 管理(注解方式)
目录 前言 使用 aop 的配置文件写法 开启注解扫描 利用注解创建对象 注解方式注入属性 配置文件和注解混合使用 前言 注解可以写在 类.方法.属性 上 : 使用 注解,需要导入 aop 包: 使用 ...
- Spring学习笔记(3)——Bean的注入方式
依赖注入 依赖注入支持属性注入.构造函数注入.工厂注入. 属性注入: 属性注入即通过setXxx()方法注入Bean的属性值或依赖对象 属性注入要求Bean提供一个默认的构造函数(无参构造函数),并为 ...
随机推荐
- MyBatis从入门到精通(五):MyBatis 注解方式的基本用法
最近在读刘增辉老师所著的<MyBatis从入门到精通>一书,很有收获,于是将自己学习的过程以博客形式输出,如有错误,欢迎指正,如帮助到你,不胜荣幸! 1. @Select 注解 1.1 使 ...
- 微服务SpringCloud之服务调用与负载均衡
上一篇我们学习了服务的注册与发现,本篇博客是在上一篇的基础上学习服务的调用.上一博客主要创建了Eureka的服务端和一个Client,该Client包含了一个Controller用来提供对外服务供外部 ...
- scrapy基础知识之 RedisCrawlSpider:
这个RedisCrawlSpider类爬虫继承了RedisCrawlSpider,能够支持分布式的抓取.因为采用的是crawlSpider,所以需要遵守Rule规则,以及callback不能写pars ...
- scrapy基础知识之 parse()方法的工作机制思考:
1.因为使用的yield,而不是return.parse函数将会被当做一个生成器使用.scrapy会逐一获取parse方法中生成的结果,并判断该结果是一个什么样的类型: 2.如果是request则加入 ...
- SpringBoot项目构建成jar运行后,如何正确读取resource下的文件
SpringBoot项目构建成jar运行后,如何正确读取resource下的文件 不管你使用的是SpringBoot 1.x还是SpringBoot2.x,在开Dev环境中使用eclipse.IEAD ...
- 控制反转&依赖注入
IoC(Inversion of Control,控制反转).这是spring的核心,贯穿始终.所谓IoC,对于spring框架来说,就是由spring来负责控制对象的生命周期和对象间的关系.这是什么 ...
- Cookie起源与发展
上一篇我们在讲优酷弹幕爬虫的时候,引入了一个新的知识点:Cookie,由于篇幅有限当时只是简单的给大家介绍了一下它的作用,今天我们就来全面了解一下Cookie(小饼干)以及相关的知识! 相信很多同学肯 ...
- Python入门基础(7)
这一篇来介绍一下函数里面的一些东西 函数的参数 必须参数:必须参数必须以正确的顺序传入函数.调用时的数据必须和声明时的一样 如果根据参数名来传入参数值,则无须遵守定义形参的顺序,这种方式被称为关键字( ...
- 硬件笔记之Thinkpad T470P更换2K屏幕
0x00 前言 手上的Thinkpad T470P屏幕是1920x1080的屏幕,色域范围NTSC 45%,作为一块办公用屏是正常配置,但是考虑到色彩显示和色域范围,计划升级到2K屏幕. 2k屏幕参数 ...
- Centos7 下nginx 搭建文件图片服务器
现在服务器部署nginx yum install -y epel-release yum install nginx -y 安装完成之后 访问ip 由此可见nginx服务是可用的 修改nginx的配置 ...