centos7 只需两步安装rabbitmq
# yum -y install rabbitmq-server
# systemctl start rabbitmq-server  && systemctl enable rabbitmq-server

------------------------------------------------------------------------------

参考内容

参考https://computingforgeeks.com/installing-rabbitmq-on-centos-6-centos-7/

添加用户
# rabbitmqctl add_user admin NUaiMe0k

Adding user "admin" ...

# rabbitmqctl set_user_tags admin administrator

# rabbitmqctl list_users

Listing users ...

admin [administrator]

guest [administrator]
Delete User:
rabbitmqctl delete_user user
Change User Password:
rabbitmqctl change_password user strongpassword
Add virtualhost:
rabbitmqctl add_vhost /my_vhost
List virtualhosts:
rabbitmqctl list_vhosts
Delete virtualhost:
rabbitmqctl delete_vhost /my_vhost
Grant user permissions for vhost:
rabbitmqctl set_permissions -p /my_vhost user ".*" ".*" ".*"
List vhost permissions:
rabbitmqctl list_permissions -p /my_vhost
To list user permissions:
rabbitmqctl list_user_permissions user
Delete user permissions:
rabbitmqctl clear_permissions -p /my_vhost user
nable RabbitMQ UI
You can enable Management Plugin to use a web-based interface to administer RabbitMQ.
# rabbitmq-plugins enable rabbitmq_management

# systemctl restart rabbitmq-server

 or for CentOS 6:

# service rabbitmq-server restart
Open ports on the firewall:
# firewall-cmd --add-port={4369/tcp,25672}/tcp --permanent
With Iptables:
# iptables -A INPUT -p tcp -m tcp --dport 4369 -j ACCEPT

# iptables -A INPUT -p tcp -m tcp --dport 25672 -j ACCEPT
==========================================================================
参考 https://www.howtoforge.com/tutorial/how-to-install-rabbitmq-server-on-centos-7/
In this tutorial, we will install RabbitMQ on CentOS 7 server.
Prerequisite
- Minimal CentOS 7 server
- Root privileges. This guide is written as the root user, if you are logged in as sudo user, run sudo -i.
Update Base System
Before installing any package it is recommended that you update the packages and repository using the following command.
yum -y updateOnce your system is updated, proceed further to install Erlang.
Install Erlang
RabbitMQ is written in Erlang Language, in this tutorial we will install the latest version of Erlang into the server. Erlang is not available in default YUM repository, hence you will need to install EPEL repository. Run the following command for same.
yum -y install epel-releaseyum -y updateNow install Erlang using following command.
yum -y install erlang socatYou can now check the Erlang version using the following command.
erl -versionYou will get the following output.
[root@liptan-pc ~]# erl -version

Erlang (ASYNC_THREADS,HIPE) (BEAM) emulator version 5.10.4
To switch to Erlang shell, you can type the following command.
erlThe shell will change and you will get the following output.
Erlang R16B03-1 (erts-5.10.4) [source] [64-bit] [async-threads:10] [hipe] [kernel-poll:false]

Eshell V5.10.4  (abort with ^G)

1>
You can exit from the shell by pressing ctrl + C twice. Erlang is now installed on your system, you can now proceed to install RabbitMQ.
Install RabbitMQ
RabbitMQ provides RPM package for enterprise Linux systems which are precompiled and can be installed directly. The only required dependency was to install Erlang into the system. As we have installed Erlang we can proceed further to download RabbitMQ. Download the Erlang RPM package by running.
wget https://www.rabbitmq.com/releases/rabbitmq-server/v3.6.10/rabbitmq-server-3.6.10-1.el7.noarch.rpmIf you do not have wget installed, you can run yum -y install wget. You can always find the link to the latest version of RabbitMQ download page.
Import the GPG key by running:
rpm --import https://www.rabbitmq.com/rabbitmq-release-signing-key.ascInstall the RPM package by running:
rpm -Uvh rabbitmq-server-3.6.10-1.el7.noarch.rpmRabbitMQ is now installed on your system.
Starting RabbitMQ
You can start RabbitMQ server process by running the following command.
systemctl start rabbitmq-serverTo automatically start RabbitMQ at boot time, run the following command.
systemctl enable rabbitmq-serverTo check the status of RabbitMQ server, run:
systemctl status rabbitmq-serverYou should get the following output if started successfully.
? rabbitmq-server.service - RabbitMQ broker

   Loaded: loaded (/usr/lib/systemd/system/rabbitmq-server.service; enabled; vendor preset: disabled)

   Active: active (running) since Sat 2017-07-15 18:59:14 UTC; 3min 22s ago

 Main PID: 29006 (beam.smp)

   Status: "Initialized"

   CGroup: /system.slice/rabbitmq-server.service

           ??29006 /usr/lib64/erlang/erts-9.0/bin/beam.smp -W w -A 64 -P 1048576 -t 5000000 -stbt db -zdbbl 32000 -K tr...

           ??29149 /usr/lib64/erlang/erts-9.0/bin/epmd -daemon

           ??29283 erl_child_setup 1024

           ??29303 inet_gethost 4

           ??29304 inet_gethost 4

Jul 15 18:59:13 centos rabbitmq-server[29006]: Starting broker...

Jul 15 18:59:14 centos rabbitmq-server[29006]: systemd unit for activation check: "rabbitmq-server.service"

Jul 15 18:59:14 centos systemd[1]: Started RabbitMQ broker.

Jul 15 18:59:14 centos rabbitmq-server[29006]: completed with 0 plugins.
Modify Firewall and SELinux Rules
If you have firewalld installed and running, you will have to allow port 8161 through the firewall. Run the following command for same.
firewall-cmd --zone=public --permanent --add-port=4369/tcp
firewall-cmd --zone=public --permanent --add-port=25672/tcp
firewall-cmd --zone=public --permanent --add-port=5671-5672/tcp
firewall-cmd --zone=public --permanent --add-port=15672/tcp
firewall-cmd --zone=public --permanent --add-port=61613-61614/tcp
firewall-cmd --zone=public --permanent --add-port=1883/tcp
firewall-cmd --zone=public --permanent --add-port=8883/tcp
firewall-cmd --reloadIf you have SELinux enabled, you will have to run the following command to allow RabbitMQ service.
setsebool -P nis_enabled 1Access Web Console
Enable RabbitMQ web management console by running:
rabbitmq-plugins enable rabbitmq_managementProvide ownership of RabbitMQ files to the RabbitMQ user by running:
chown -R rabbitmq:rabbitmq /var/lib/rabbitmq/Now you will need to create an administrative user for RabbitMQ web management console. Run the following commands for same.
rabbitmqctl add_user admin StrongPassword
 rabbitmqctl set_user_tags admin administrator
 rabbitmqctl set_permissions -p / admin ".*" ".*" ".*"
Change admin to your preferred username for administrator user. Be sure to change StrongPassword to a very strong password.
To access the administrative panel of RabbitMQ, use your favourite web browser and open the following URL.
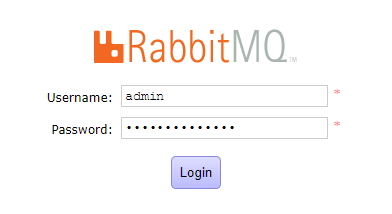
http://Your_Server_IP:15672/You will see following login page.
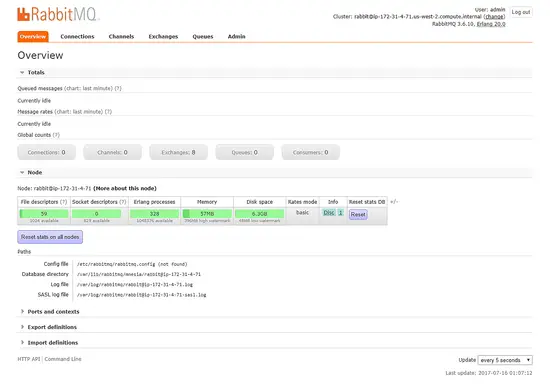
Once you are logged in, you will see the administrative dashboard.
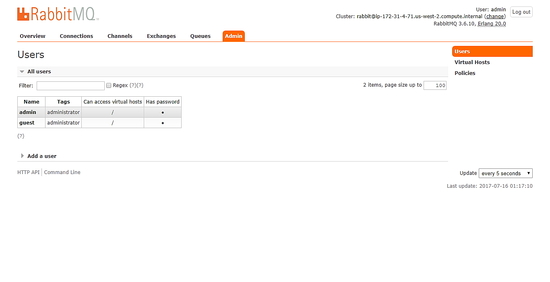
You can find the list of users, virtual hosts, policies at Admin tab of the dashboard. You should delete the Guest user for security considerations.
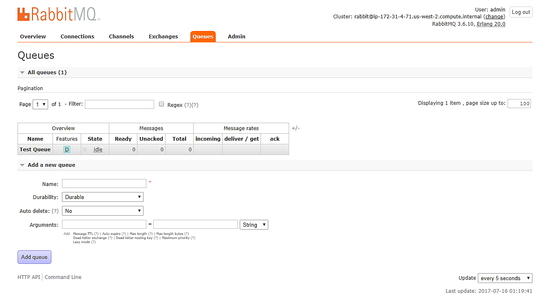
You can find the list of message queues at Queues tab. You can create a new queue or delete an existing one through this interface.
You can find the list of current connection on Connections tab
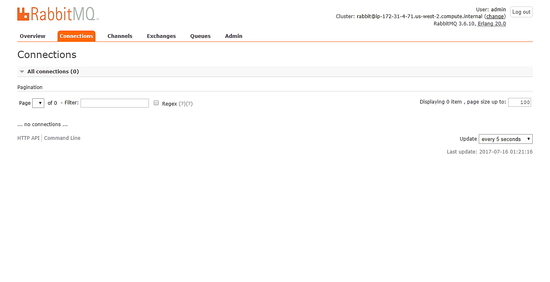
Similarly, you can find the channels and exchanges at their respective tabs.
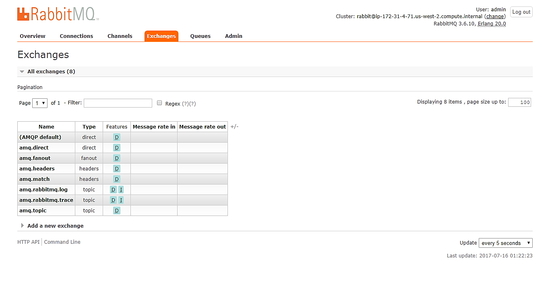
//////////////整理

参考 https://www.howtoforge.com/tutorial/how-to-install-rabbitmq-server-on-centos-7/#install-erlang

安装erlang

yum -y update

yum -y install epel-release

yum -y update

yum -y install erlang socat

erl -version

[root@liptan-pc ~]# erl -version
Erlang (ASYNC_THREADS,HIPE) (BEAM) emulator version 5.10.4

输入 erl

Erlang R16B03-1 (erts-5.10.4) [source] [64-bit] [async-threads:10] [hipe] [kernel-poll:false]

Eshell V5.10.4  (abort with ^G)
1>
/////////////////////////////////////////////////////////////////////////

安装 RabbitMQ

1:
wget https://www.rabbitmq.com/releases/rabbitmq-server/v3.6.10/rabbitmq-server-3.6.10-

1.el7.noarch.rpm

2: Import the GPG key by running:

rpm --import https://www.rabbitmq.com/rabbitmq-release-signing-key.asc

3:Install the RPM package by running:

rpm -Uvh rabbitmq-server-3.6.10-1.el7.noarch.rpm

Starting RabbitMQ

systemctl start rabbitmq-server

systemctl start rabbitmq-server

systemctl status rabbitmq-server

调整防火墙

firewall-cmd --zone=public --permanent --add-port=4369/tcp
firewall-cmd --zone=public --permanent --add-port=25672/tcp
firewall-cmd --zone=public --permanent --add-port=5671-5672/tcp
firewall-cmd --zone=public --permanent --add-port=15672/tcp
firewall-cmd --zone=public --permanent --add-port=61613-61614/tcp
firewall-cmd --zone=public --permanent --add-port=1883/tcp
firewall-cmd --zone=public --permanent --add-port=8883/tcp

firewall-cmd --reload

setsebool -P nis_enabled 1

启用web Access Web Console

rabbitmq-plugins enable rabbitmq_management

chown -R rabbitmq:rabbitmq /var/lib/rabbitmq/

添加用户
rabbitmqctl add_user admin StrongPassword
 rabbitmqctl set_user_tags admin administrator
 rabbitmqctl set_permissions -p / admin ".*" ".*" ".*"

http://Your_Server_IP:15672/
////////////////////////////////////////////////////////////////////////////////////////////
删除erlang

如果yum install
 的就执行

 yum list installed | grep erlang

 yum remove erlang*    删除所有包

编译安装的需要删除 whereis erlang 找他然后删除
rm -rf /usr/local/erlang/
centos7 只需两步安装rabbitmq的更多相关文章
- 【代码更新】单细胞分析实录(21): 非负矩阵分解(NMF)的R代码实现,只需两步,啥图都有
1. 起因 之前的代码(单细胞分析实录(17): 非负矩阵分解(NMF)代码演示)没有涉及到python语法,只有4个python命令行,就跟Linux下面的ls grep一样的.然鹅,有几个小伙伴不 ...
- 只需两步!Eclipse+Maven快速构建第一个Spring Boot项目
随着使用Spring进行开发的个人和企业越来越多,Spring从一个单一简介的框架变成了一个大而全的开源软件,最直观的变化就是Spring需要引入的配置也越来越多.配置繁琐,容易出错,让人无比头疼, ...
- CentOS安装Yarn只需两步就搞定
Yarn 是一个依赖管理工具.它能够管理你的代码,并与全世界的开发者分享代码.Yarn 是高效.安全和可靠的,你完全可以安心使用.代码是通过包(有时也被称为组件). 在每一个包中会定义一个 packa ...
- 只需两步在Linux系统安装百度网盘--Ubuntu20
Linux Ubuntu系统安装百度网盘 百度网盘已支持Linux系统下载和使用.使用Linux系统下载并安装一个百度网盘是非常简单的,只需要以下两个步骤: 第一步 进入官网下载.deb类型的百度网盘 ...
- LoTVideo:只需两步,让HTML5原生态的Video茁壮成长
开源地址:https://github.com/dunitian/LoTHTML5/tree/master/LoTVideo 第一步引入lotvideo.js(先确认在这个前面引入了jq包) 第二步: ...
- 如何将cordova导入Android studio,只需两步即可
Cordova的技术交流新群 微信公众号:
- cordova 实现拨打电话-只需两步(H5)
cordova 实现拨打电话: 第一步配置conf.xml在cordova中所有的URL Schemes 都是服从于白名单的,所以a tel 在这无法正常使用.解决方法是在项目config.xml中添 ...
- vue 使用font-awesome 只需两步
npm 安装font-awesome 以及需要的所有依赖 cnpm install less less-loader css-loader style-loader file-loader font- ...
- eolinker——分享项目只需两步
登陆后打开项目概况 然后进入到分享项目界面,可根据自己的需求进行设置
随机推荐
- html-loldemo
百度版lol百科小样 <!DOCTYPE html> <html lang="en"> <head> <title>英雄联盟百科&l ...
- CCNA2.0笔记_HSRP
什么是HSRP协议? HSRP也叫热备份路由协议,即第一跳冗余协议,第一跳实际就是网关.从而实现网关的冗余和自动切换.该协议确保了当网络边缘设备或接入链路出现故障时,用户通信能迅速并透明地恢复,并以此 ...
- PHP学习笔记(8)验证码使用session对比
知识点: 1. session获取其他页面的变量: (1)先在画验证码php里开启session_start(),$_SESSION['随便起名']=验证码字符串, (2)再在submit提交到act ...
- 如何在openwrt上实现 U盘的自动挂载
U盘的自动挂载,分为两种场景 1.路由器先上电,然后插上U盘并自动挂载 2.路由器先插上U盘,然后上电并自动挂载 上述场景的实现,需要如下几个步骤: 1.支持如下模块: USB驱动模块:USB OHC ...
- ubus
openwrt提供了一个系统总线ubus,类似linux桌面操作系统的d-bus,目标是提供系统级的进程间通信(IPC)功能. 为了提供各种后台进程和应用程序之间的通信机制,ubus被开发出来,由3部 ...
- cocos html5 资讯
1.visual assistx vs 插件 http://www.cr173.com/soft/32656.html 2. Box2D物理引擎 3. csdnhttp://www.csdn. ...
- zend studio 10.6.2 字体大小 设置
如果汉化的:窗体-->常规-->外观-->颜色和字体-->基本-->文字字体 点击编辑 如果未汉化:Window->Preferences->General ...
- CI 框架购物车问题
因为CI 是外国的框架.购物逻辑和中国的不一样.所以需要改进ci 框架的 cart 类: (1)先把 cart类拷贝一份到application/libaries/下 (2)因为cart中购车中的商品 ...
- hdu 4706:Children's Day(模拟题,模拟输出大写字母 N)
Children's Day Time Limit: 2000/1000 MS (Java/Others) Memory Limit: 32768/32768 K (Java/Others)To ...
- memset陷阱
最近在实现差分进化算法的时候,发现数据异常,查了好久,才知道是memset惹的祸! #include <iostream> #include <cstring> using n ...
