CentOS7 下安装 NFS,Linux/Windows 作为客户端
一、简介
1. 定义
NFS (Network File System),最初由 Sun Microsystems 于1984年开发的分布式系统协议,允许客户端上的用户通过网络访问文件,其方式与访问本地存储的方式类似。基于 Open Network Computing Remote Procedure Call (ONC RPC) 协议,NFS 是通过 Request for Comments(RFC) 定义的开放标准,允许任何人实现该协议。
2. 版本和变化
| Version | RFC | Date | Variations |
|---|---|---|---|
| NFSv2 | RFC 1094 | March 1989 | UDP,无状态;32位,仅允许读取文件的前2GB |
| NFSv3 | RFC 1813 | June 1995 | 支持TCP;64位,突破2GB;异步写入;在许多响应报文中额外增加文件属性 |
| NFSv4 | RFC 3010 | December 2000 | 集成了对文件锁定和挂载协议的支持;增加了对强安全性(及其协商)、复合操作、客户端缓存和国际化的支持 |
| NFS 4.1 | RFC 5661 | January 2010 | 会话、目录委托、并行NFS (pNFS) |
| NFS 4.2 | RFC 7862 | November 2016 |
3. 部署说明
本文描述如何在 CentOS 7 上安装 NFS,并在 Linux 和 Windows 下使用 NFS 客户端进行连接。
| hostname | ip | role | 描述 |
|---|---|---|---|
| nfs-server | 192.168.0.135 | server | Linux nfs server |
| nfs-client | 192.168.0.136 | client | Linux client |
| Windows | 192.168.0.120 | client | Windows client |

二、服务端
1. 关闭防火墙
# systemctl stop firewalld

# systemctl disable firewalld
2. 安装 nfs
# yum -y install nfs-utils
3. 配置说明
通过文件 /etc/exports 来对 NFS 进行配置。
It follows the following syntax rules:
- Comments start with the hash mark (#).
- Blank lines are ignored by default.
- Each host’s options must be placed in parentheses directly after the host identifier, without any spaces separating the host and the first parenthesis.
- Each exported file system should be on its own individual line.
- A list of authorized hosts needs to be separated by space characters.
- Long lines can be wrapped with a backslash ().
NFS export default options are:
ro: The exported file system is read-only and remote hosts cannot make any changes to the files shared on the file system. To allow hosts to make both reads and writes, specify therwoption instead.sync: Aith this option, NFS server does not reply to requests before changes made by previous requests are written to disk. To enable asynchronous writes instead, specify the optionasync.root_squash: This prevents root users that connect remotely from having root privileges. Instead, the NFS server will assign them the user ID nfsnobody. This effectively “squashes” the power of the remote root user to the lowest local user, preventing possible unauthorized writes on the remote server. To disable root squashing, specifyno_root_squash.- To squash every remote user (including root), use
all_squash. To specify the user and group IDs that the NFS server should assign to remote users from a particular host, use theanonuidandanongidoptions.wdelay: This reduces disk write overhead by delaying writing to the disk if it suspects another write request is imminent. This can be disabled usingno_wdelay, when default sync is on.subtree_check: This option enables subtree checking. It can be disabled usingno_subtree_check.
4. 配置共享目录
(1)修改 exports
这里将 /mnt/data 作为共享目录,开放读写权限
# vi /etc/exports

/mnt/data 192.168.0.0/24(rw,no_root_squash)
注:这里的共享目录可以使用 Ceph 块设备挂载的文件夹,关于如何使用块设备,请参考 块设备快速入门
(2)使配置生效
# exportfs -r
(3)查看 exports
# exportfs -v

/mnt/data     	192.168.0.0/24(rw,sync,wdelay,hide,no_subtree_check,sec=sys,secure,no_root_squash,no_all_squash)
5. 启动服务
(1)启动 rpcbind
//开机启动

# systemctl enable rpcbind

//启动

# systemctl start rpcbind

//重启

# systemctl restart rpcbind
(2)启动 nfs-server
//开机启动

# systemctl enable nfs-server

//启动

# systemctl start nfs-server

//重启

# systemctl restart nfs-server
6. 确认启动成功
# rpcinfo -p
# exportfs

/mnt/data     	192.168.0.0/24
三、Linux 客户端
1. 安装 nfs
# yum -y install nfs-utils
2. 启动 rpcbind
//开机启动

# systemctl enable rpcbind

//启动

# systemctl start rpcbind

//重启

# systemctl restart rpcbind
3. 挂载
创建目录
# mkdir /data
挂载 nfs,-o 指定版本
# mount -t nfs -o vers=3 192.168.0.135:/mnt/data /data

or

# mount -t nfs -o vers=4 192.168.0.135:/mnt/data /data
查看挂载结果
# df -hT | grep /data

192.168.0.135:/mnt/data nfs        17G  985M   17G    6% /data

or

192.168.0.135:/mnt/data nfs4       17G  985M   17G    6% /data
# dh -h

文件系统                 容量  已用  可用 已用% 挂载点

192.168.0.135:/mnt/data   17G  982M   17G    6% /data
4. 自动挂载
磁盘被手动挂载之后,需要把挂载信息写入
/etc/fstab这个文件中,否则下次开机启动时仍然需要重新挂载。
例如对于 NFSv3,修改 /etc/fstab
192.168.0.135:/mnt/data  /data nfs defaults,vers=3 0 0

or

192.168.0.135:/mnt/data /data nfs vers=3,proto=tcp,hard,intr,rsize=32768,wsize=32768,noatime 0 0
执行挂载命令
# mount -a
查看挂载结果
# df -hT | grep /data

192.168.0.135:/mnt/data nfs        17G  985M   17G    6% /data
5. 解挂
# umount /data
四、Windows 客户端
1. 打开NFS服务
(1)Windows 功能 - 启用或关闭 Windows 功能

(2)通过命令提示符显示 NFS 服务器
showmount -e 192.168.0.135

/mnt/data                          192.168.0.0/24
2. 挂载
方法1:映射网络驱动器

方法2:通过命令挂载
mount 192.168.0.135:/mnt/data Z:
3. 查看
方式1:打开我的点脑,就可以在网络位置看到 Z:盘了
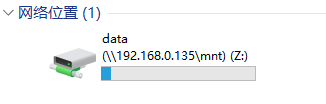
方式2:通过命令查看
mount

本地    远程                                 属性

-------------------------------------------------------------------------------

Z:       \\192.168.0.135\mnt\data               UID=-2, GID=-2

                                                rsize=262144, wsize=262144

                                                mount=soft, timeout=3.2

                                                retry=1, locking=yes

                                                fileaccess=755, lang=GB2312-80

                                                casesensitive=no

                                                sec=sys
4. 修改权限
对挂载盘进行写操作时,提示权限不足!
如果出现这种情况,解决办法:
(1)在运行中输入regedit,打开注册表编辑器。
(2)进入 HKEY_LOCAL_MACHINE\SOFTWARE\Microsoft\ClientForNFS\CurrentVersion\Default 条目。
(3)选择新建 QWORD,新建 AnonymousUid,AnonymousGid 两个值,值为0。
(4)重启 NFS 服务 或 电脑。
5. 解挂
umount Z:
参考链接
https://wiki.archlinux.org/index.php/NFS
https://en.wikipedia.org/wiki/Network_File_System
https://computingforgeeks.com/configure-nfsv3-and-nfsv4-on-centos-7/
CentOS7 下安装 NFS,Linux/Windows 作为客户端的更多相关文章
- Ubuntu下安装nfs,Windows下访问
Linux 下: 1. 在终端输入 sudo apt-get install portmap nfs-common nfs-kernel-server 2.建立客户机访问目录 sudo mkdir ...
- Windows和Linux(Centos7)下安装Nginx
安装Nginx 这篇记录只不过做了一个简单总结,如果对这块没什么概念的话可以看一下知乎的这篇文章 https://zhuanlan.zhihu.com/p/83890573 window下安装 win ...
- Linux CentOs7 下安装 redis
Linux CentOs7 下安装 redis 请将以下命令放入linux命令行中运行 如果安装过程前没有安装GCC请先安装 命令如下 $ yum install gcc-c++ $ wget ht ...
- Linux CentOS7下安装Zookeeper-3.4.10服务(最新)
Linux CentOS7下安装Zookeeper-3.4.10服务(最新) 2017年10月27日 01:25:26 极速-蜗牛 阅读数:1933 版权声明:本文为博主原创文章,未经博主允许不得 ...
- (转)LINUX CENTOS7下安装PYTHON
LINUX CENTOS7下安装PYTHON 原文:http://www.cnblogs.com/lclq/p/5620196.html Posted on 2016-06-27 14:58 南宫羽香 ...
- Linux(CentOS7)下安装jdk1.8
Linux(CentOS7) 下安装 jdk1.8 操作过程. 一.检查是否自带jdk rpm -qa|grep java 如果存在则用下面命令删除,xxx yyy zzz代表查询出来的自带jdk名称 ...
- CentOS7 下安装 iSCSI Target(tgt) ,使用 Ceph rbd
目录 一.iSCSI 介绍 1. iSCSI 定义 2. 几种常见的 iSCSI Target 3. 优缺点比较 二.安装步骤 1. 关闭防火墙 2. 关闭selinux 3. 通过 yum 安装 t ...
- CentOS7下使用NFS文件共享给Window server 2012
CentOS7下使用NFS文件共享给Window server 2012 2018年08月24日 23:15:54 疼迅扣扣 阅读数:443 出自https://blog.csdn.net/u013 ...
- docker(一) Centos7下安装docker
docker(一) Centos7下安装dockerdocker(二) windows10下安装dockerdocker(三) 镜像和容器常用命令 docker(四) 使用Dockerfile构建镜像 ...
随机推荐
- hibernate之helloword(环境搭建)
环境搭建 hibernate.cfg.xml <?xml version="1.0" encoding="UTF-8"?> <!DOCTYPE ...
- poj 2676 如何填满九宫格
Sudoku Time Limit: 2000 MS Memory Limit: 65536 KB 64-bit integer IO format: %I64d , %I64u Java class ...
- 4.动态HTML处理和机器图像识别
Selenium Selenium是一个Web的自动化测试工具,最初是为网站自动化测试而开发的,类型像我们玩游戏用的按键精灵,可以按指定的命令自动操作,不同是Selenium 可以直接运行在浏览器上, ...
- iOS_URI跳转方式多种地图导航的代码实践
先来看一下我们要达到什么效果,就是当我们点导航的时候,会弹出下面这个选择列表. 当然,如果没有安装某个地图APP,那么对应的选项是不会出现的.检测APP是否安装,只要调用下面这个方法就可以了 [[UI ...
- 使用PerfView监测.NET程序性能(四):折叠,过滤和时间范围选择
在上一篇文章中,我们使用了Perfview的分组功能.分组功能旨在对某些函数按照某个格式进行分组,以减少视图中的各种无关函数的数量.但仅有分组还不够,有时我们想将一些函数调用信息按某些条件过滤掉,例如 ...
- WPF实现窗体中的悬浮按钮
WPF实现窗体中的悬浮按钮,按钮可拖动,吸附停靠在窗体边缘. 控件XAML代码: <Button x:Class="SunCreate.Common.Controls.FloatBut ...
- 知物由学 | 见招拆招,Android应用破解及防护秘籍
本文来自网易云社区. “知物由学”是网易云易盾打造的一个品牌栏目,词语出自汉·王充<论衡·实知>.人,能力有高下之分,学习才知道事物的道理,而后才有智慧,不去求问就不会知道.“知物由学”希 ...
- python收集jvm数据
之前前辈用 java 写的收集 jvm 脚本, 不太方便组内小伙伴维护, 遂用 python 重写了 #!/usr/bin/env python # -*- coding: utf-8 -*- # F ...
- JS获取浏览器URL中查询字符串的参数
首先要知道Location这个对象以及这个对象中的一些属性: href:设置或返回完整的url.如本博客首页返回http://www.cnblogs.com/wymninja/ host:设置或返回主 ...
- 浅谈ES6原生Promise
浅谈ES6原生Promise 转载 作者:samchowgo 链接:https://segmentfault.com/a/1190000006708151 ES6标准出炉之前,一个幽灵,回调的幽灵,游 ...