SSM_CRUD新手练习(2)配置文件
配置之前现需要引入依赖的jar包:
*Spring
*SpringMvc
*Mybatis
*数据库连接池,驱动包
*其他(jstl,Servlet ,Junit..)
1.poxm.xml
- <project xmlns="http://maven.apache.org/POM/4.0.0" xmlns:xsi="http://www.w3.org/2001/XMLSchema-instance" xsi:schemaLocation="http://maven.apache.org/POM/4.0.0 http://maven.apache.org/xsd/maven-4.0.0.xsd">
- <modelVersion>4.0.0</modelVersion>
- <groupId>com.atguigu</groupId>
- <artifactId>ssm_crud</artifactId>
- <version>0.0.1-SNAPSHOT</version>
- <packaging>war</packaging>
- <dependencies>
- <dependency>
- <groupId>junit</groupId>
- <artifactId>junit</artifactId>
- <version>3.8.1</version>
- <scope>test</scope>
- </dependency>
- <!-- PageHelper -->
- <dependency>
- <groupId>com.github.pagehelper</groupId>
- <artifactId>pagehelper</artifactId>
- <version>5.0.0</version>
- </dependency>
- <dependency>
- <!-- MBG -->
- <groupId>org.mybatis.generator</groupId>
- <artifactId>mybatis-generator-core</artifactId>
- <version>1.3.5</version>
- </dependency>
- <dependency>
- <groupId>log4j</groupId>
- <artifactId>log4j</artifactId>
- <version>1.2.16</version>
- <scope>compile</scope>
- </dependency>
- <!-- Spring jdbc -->
- <dependency>
- <groupId>org.springframework</groupId>
- <artifactId>spring-jdbc</artifactId>
- <version>4.3.7.RELEASE</version>
- </dependency>
- <dependency>
- <groupId>org.springframework</groupId>
- <artifactId>spring-webmvc</artifactId>
- <version>4.3.7.RELEASE</version>
- </dependency>
- <dependency>
- <groupId>org.springframework</groupId>
- <artifactId>spring-aspects</artifactId>
- <version>4.3.7.RELEASE</version>
- </dependency>
- <!-- https://mvnrepository.com/artifact/org.springframework/spring-test -->
- <dependency>
- <groupId>org.springframework</groupId>
- <artifactId>spring-test</artifactId>
- <version>4.3.7.RELEASE</version>
- </dependency>
- <dependency>
- <groupId>org.mybatis</groupId>
- <artifactId>mybatis</artifactId>
- <version>3.4.2</version>
- </dependency>
- <dependency>
- <groupId>org.mybatis</groupId>
- <artifactId>mybatis-spring</artifactId>
- <version>1.3.1</version>
- </dependency>
- <dependency>
- <groupId>c3p0</groupId>
- <artifactId>c3p0</artifactId>
- <version>0.9.1</version>
- </dependency>
- <!-- https://mvnrepository.com/artifact/mysql/mysql-connector-java -->
- <dependency>
- <groupId>mysql</groupId>
- <artifactId>mysql-connector-java</artifactId>
- <version>5.1.6</version>
- </dependency>
- <dependency>
- <groupId>jstl</groupId>
- <artifactId>jstl</artifactId>
- <version>1.2</version>
- </dependency>
- <!-- https://mvnrepository.com/artifact/javax.servlet/javax.servlet-api -->
- <dependency>
- <groupId>javax.servlet</groupId>
- <artifactId>javax.servlet-api</artifactId>
- <version>3.0.1</version>
- <scope>provided</scope>
- </dependency>
- </dependencies>
- </project>
2.本项目还使用了BootStrap前端框架,故到官网下载Bootstrap。在webapp目录下创建static文件保存我们的静态文件。同时将我们下载的Bootstrap解压到该目录下。
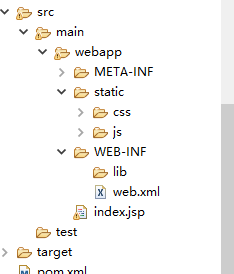
3.编写SSM整合的关键配置文件
web.xml
- <?xml version="1.0" encoding="UTF-8"?>
- <web-app xmlns:xsi="http://www.w3.org/2001/XMLSchema-instance" xmlns="http://java.sun.com/xml/ns/javaee" xsi:schemaLocation="http://java.sun.com/xml/ns/javaee http://java.sun.com/xml/ns/javaee/web-app_2_5.xsd" id="WebApp_ID" version="2.5">
- <display-name>Archetype Created Web Application</display-name>
- <!-- 启动Spring的容器 -->
- <!-- needed for ContextLoaderListener -->
- <context-param>
- <param-name>contextConfigLocation</param-name>
- <param-value>classpath:applicationContext.xml</param-value>
- </context-param>
- <!-- Bootstraps the root web application context before servlet initialization -->
- <listener>
- <listener-class>org.springframework.web.context.ContextLoaderListener</listener-class>
- </listener>
- <!-- SpringMVC的前端控制器 -->
- <!-- The front controller of this Spring Web application, responsible for
- handling all application requests -->
- <servlet>
- <servlet-name>dispatcherServlet</servlet-name>
- <servlet-class>org.springframework.web.servlet.DispatcherServlet</servlet-class>
- <load-on-startup>1</load-on-startup>
- </servlet>
- <!-- Map all requests to the DispatcherServlet for handling -->
- <servlet-mapping>
- <servlet-name>dispatcherServlet</servlet-name>
- <url-pattern>/</url-pattern>
- </servlet-mapping>
- <!-- 字符编码过滤器 -->
- <filter>
- <filter-name>CharacterEncodingFilte</filter-name>
- <filter-class>org.springframework.web.filter.CharacterEncodingFilter</filter-class>
- <init-param>
- <param-name>encoding</param-name>
- <param-value>utf-8</param-value>
- </init-param>
- <init-param>
- <param-name>forceRequestEncoding</param-name>
- <param-value>true</param-value>
- </init-param>
- <init-param>
- <param-name>forceResponseEncoding</param-name>
- <param-value>true</param-value>
- </init-param>
- </filter>
- <filter-mapping>
- <filter-name>CharacterEncodingFilte</filter-name>
- <url-pattern>/*</url-pattern>
- </filter-mapping>
- <!-- 使用Rest风格的URI 将页面post请求转化为指定的delete或者put -->
- <filter>
- <filter-name>HiddenHttpMethodFilter</filter-name>
- <filter-class>org.springframework.web.filter.HiddenHttpMethodFilter</filter-class>
- </filter>
- <filter-mapping>
- <filter-name>HiddenHttpMethodFilter</filter-name>
- <url-pattern>/*</url-pattern>
- </filter-mapping>
- <!-- 加载log4j配置文件 -->
- <context-param>
- <param-name>log4jConfigLocation</param-name>
- <param-value>classpath:log4j.properties</param-value>
- <!-- <param-value>/WEB-INF/log4j.xml</param-value> -->
- </context-param>
- <listener>
- <listener-class>org.springframework.web.util.Log4jConfigListener</listener-class>
- </listener>
- </web-app>
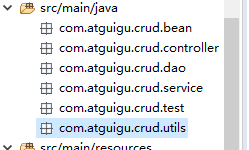
4.在WEB-INF目录下创建dispatcherServlet-servlet.xml(spring mvc的配置文件)文件,,同时在java目录下创建我们需要的包,配置如下:
- <?xml version="1.0" encoding="UTF-8"?>
- <beans xmlns="http://www.springframework.org/schema/beans"
- xmlns:xsi="http://www.w3.org/2001/XMLSchema-instance"
- xmlns:context="http://www.springframework.org/schema/context"
- xmlns:mvc="http://www.springframework.org/schema/mvc"
- xsi:schemaLocation="http://www.springframework.org/schema/mvc http://www.springframework.org/schema/mvc/spring-mvc-4.3.xsd
- http://www.springframework.org/schema/beans http://www.springframework.org/schema/beans/spring-beans.xsd
- http://www.springframework.org/schema/context
- http://www.springframework.org/schema/context/spring-context.xsd
- http://www.springframework.org/schema/mvc
- http://www.springframework.org/schema/mvc/spring-mvc.xsd">
- <!-- Spring mvc 的配置文件,包含网站跳转逻辑的控制、配置 -->
- <context:component-scan base-package="com.atguigu" use-default-filters="false">
- <!-- 只扫瞄控制器 -->
- <context:include-filter type="annotation" expression="org.springframework.stereotype.Controller"/>
- </context:component-scan>
- <!-- 视图解析器,方便页面返回 -->
- <bean class="org.springframework.web.servlet.view.InternalResourceViewResolver">
- <property name="prefix" value="/WEB-INF/views/"></property>
- <property name="suffix" value=".jsp"></property>
- </bean>
- <!-- 两个标准配置 -->
- <!-- 将Spring mvc不能处理的请求将给Tomcat -->
- <mvc:default-servlet-handler/>
- <!-- 能支持Spring MVC更高级的内容 如JSR303校验,快捷的ajax 。。。映射动态请求 -->
- <mvc:annotation-driven/>
- </beans>
5.创建applicationContext.xml(spring的配置文件),同时创建数据库的配置文件dbconfig.properties。
applicationContext.xml
- <?xml version="1.0" encoding="UTF-8"?>
- <beans xmlns="http://www.springframework.org/schema/beans"
- xmlns:context="http://www.springframework.org/schema/context"
- xmlns:xsi="http://www.w3.org/2001/XMLSchema-instance"
- xmlns:tx="http://www.springframework.org/schema/tx"
- xmlns:aop="http://www.springframework.org/schema/aop"
- xsi:schemaLocation="http://www.springframework.org/schema/beans
- http://www.springframework.org/schema/beans/spring-beans.xsd
- http://www.springframework.org/schema/aop
- http://www.springframework.org/schema/aop/spring-aop-4.0.xsd
- http://www.springframework.org/schema/context
- http://www.springframework.org/schema/context/spring-context-4.2.xsd
- http://www.springframework.org/schema/tx
- http://www.springframework.org/schema/tx/spring-tx.xsd">
- <!-- sping 的配置文件,这里主要配置和业务逻辑相关的 -->
- <!-- ====================================================数据源,事物控制,xxx -->
- <context:component-scan base-package="com.atguigu">
- <context:exclude-filter type="annotation" expression="org.springframework.stereotype.Controller"/>
- </context:component-scan>
- <context:property-placeholder location="classpath:dbconfig.properties"/>
- <bean id="pooledDataSource" class="com.mchange.v2.c3p0.ComboPooledDataSource">
- <property name="jdbcUrl" value="${jdbc.jdbcUrl}"></property>
- <property name="driverClass" value="${jdbc.driverClass}"></property>
- <property name="user" value="${jdbc.user}"></property>
- <property name="password" value="${jdbc.password}"></property>
- </bean>
- <!--=============================================================== 配置和mybatis的整合 -->
- <bean id="sqlSessionFactory" class="org.mybatis.spring.SqlSessionFactoryBean">
- <!-- 制定Mybatis全局配置文件的位置 -->
- <property name="configLocation" value="classpath:mybatis-config.xml"></property>
- <property name="dataSource" ref="pooledDataSource"></property>
- <property name="mapperLocations" value="classpath:mapper/*.xml"></property>
- </bean>
- <!-- 配置扫描器,将mybatis接口的实现加入到ioc容器中 -->
- <bean class="org.mybatis.spring.mapper.MapperScannerConfigurer">
- <!-- 扫瞄所有dao接口的实现,加入到ioc容器中 -->
- <property name="basePackage" value="com.atguigu.crud.dao"></property>
- </bean>
- <!-- 配置一个可以批量操作的sqlSession -->
- <bean id="sqlSession" class="org.mybatis.spring.SqlSessionTemplate">
- <constructor-arg name="sqlSessionFactory" ref="sqlSessionFactory"></constructor-arg>
- <constructor-arg name="executorType" value="BATCH"></constructor-arg>
- </bean>
- <!-- ===================================================================== -->
- <!-- =======================================================================事物控制的配置 -->
- <bean id="transactionManager" class="org.springframework.jdbc.datasource.DataSourceTransactionManager">
- <!-- 控制住数据源 -->
- <property name="dataSource" ref="pooledDataSource"></property>
- </bean>
- <!-- 开启注解的事物,使用xml配置形式的事物(必要主要的使用配置式) -->
- <aop:config>
- <!-- 切入点表达式 -->
- <aop:pointcut expression="execution(* com.atguigu.crud.service..*(..))" id="txPoint"/>
- <!-- 配置事物增强 -->
- <aop:advisor advice-ref="txAdvice" pointcut-ref="txPoint"/>
- </aop:config>
- <!-- 配置事物增强,事物如何切入 -->
- <tx:advice id="txAdvice">
- <tx:attributes>
- <!-- 所有的方法都是事物方法 -->
- <tx:method name="*"/>
- <!-- 以get开始的所有方法都是查询 -->
- <tx:method name="get*" read-only="true"/>
- </tx:attributes>
- </tx:advice>
- <!-- Spring配置文件的核心点(数据源、与mybatis的整合、事物控制) -->
- </beans>
dbconfig.properties
- jdbc.jdbcUrl=jdbc:mysql://localhost:3306/ssm_crud
- jdbc.driverClass=com.mysql.jdbc.Driver
- jdbc.user=root
- jdbc.password=admin
6.mybatis-config.xml文件,同时在resources目录下创建mapper文件夹。
- <?xml version="1.0" encoding="UTF-8" ?>
- <!DOCTYPE configuration
- PUBLIC "-//mybatis.org//DTD Config 3.0//EN"
- "http://mybatis.org/dtd/mybatis-3-config.dtd">
- <configuration>
- <settings>
- <!-- <setting name="mapUnderscoreToCamelCase" value="true"/> -->
- <setting name="logImpl" value="LOG4J"/>
- </settings>
- <typeAliases>
- <package name="com.atguigu.crud.bean"/>
- </typeAliases>
- <plugins>
- <plugin interceptor="com.github.pagehelper.PageInterceptor">
- <property name="reasonable" value="true"/>
- </plugin>
- </plugins>
- </configuration>
至此基本的配置已经完成。
SSM_CRUD新手练习(2)配置文件的更多相关文章
- SSM_CRUD新手练习(3)创建数据库
在上一节我们已经完成了基本的SSM配置,现在需要创建我们数据库. 我们需要两张表分别为tbl_emp(员工表)和tbl_dedpt(部门表).同时d_id是部门表对应dept_id的外键. 需要注意的 ...
- SSM_CRUD新手练习(9)显示分页数据
我们已经做好了用来显示数据的分页模板,现在只需要将我们从后台取出的数据填充好,显示出来. 我们使用<c:forEach>标签循环取出数据,所以需要先导入JSTL标签库 <%@ tag ...
- SSM_CRUD新手练习(8)搭建BootStrap分页页面
经过Spring单元测试模拟请求,我们能够成功的取出数据,接下来,我们就开始写用来显示查询数据的分页页面吧. 我们使用Bootstrap来帮助我们快速开发漂亮的页面,具体怎么用可以查看Bootst ...
- SSM_CRUD新手练习(7)Spring单元测试分页请求
好久没写这个系列博客了是因为本人去公司实习去了,公司用的是Spring+SpingMvc+Hibernate现在有时间了不管怎么样继续把这个项目写完. 因为机器的原因,我的环境变成了IDEA+orac ...
- SSM_CRUD新手练习(6)分页后台控制器编写
经过测试基础环境已经搭建好了,现在我们开始编写CRUD. 我们来看一下查询的逻辑该怎么写: 1.访问index.jsp页面 2.index.jsp页面发送查询员工的请求 3.EmployeeContr ...
- SSM_CRUD新手练习(5)测试mapper
上一篇我们使用逆向工程生成了所需要的bean.dao和对应的mapper.xml文件,并且修改好了我们需要的数据库查询方法. 现在我们来测试一下DAO层,在test包下新建一个MapperTest.j ...
- SSM_CRUD新手练习(10)返回分页的JSON数据
我们完成了员工的分页查询,但是现在这种做法只能适应浏览器和服务器的交互模式,但在移动互联网时代,客户端不仅仅只有浏览器,还有安卓和IOS客户端.我们的解决方式是AJAX+JSON方式来实现平台无关性. ...
- SSM_CRUD新手练习(4)修改生成的mapper.xml映射文件
我们为什么要修改呢,这是因为我们查询的时候,我们有时候需要连表查询,例如我们需要查询出员工表的信息(emp_id,emp_name...)与此同时,我们还想查询出该员工所在的部门(dept_name) ...
- SSM_CRUD新手练习(1)创建项目
最近看了SSM框架,网上找了个入门视频的比较简单的小项目熟悉一下框架.现在把整个过程记录下来. 1.创建Maven工程,注意我们选择的是simple project就够了. 这样我们的Maven项目就 ...
随机推荐
- fedora 安装gdal
hese steps worked for me on a Fedora system: 1.) download the 3 files related to oracle instant clie ...
- 可以搜索局域网内的所有IP地址的软件
几乎都用现有的工具,直接扫描,这里我已python为例,搜索一下局域网内所有活动IP,基本原理就是ping,对返回的结果进行分析,从而判断对应ip是否活动,代码很简单,实验环境win10+python ...
- linux通过python设置系统默认编码
import sys sys.reload() sys.getdefaultencoding() # 查看设置前系统默认编码 sys.setdefaultencoding('utf-8') sys.g ...
- 11. pt-heartbeat
pt-heartbeat [OPTIONS] [DSN] --update|--monitor|--check|--stop ------------------------------------- ...
- PHP Cron Expression Parser ( LARAVEL )
The PHP cron expression parser can parse a CRON expression, determine if it is due to run, calcul ...
- Spring 注解(一)Spring 注解编程模型
Spring 注解(一)Spring 注解编程模型 Spring 系列目录(https://www.cnblogs.com/binarylei/p/10198698.html) Spring 注解系列 ...
- c++智能指针(1)
根据muduo开源库作者陈硕的一些文章.对于多线程下C++编程提出了一些观点.主要是多线程下对象的销毁比较困难,但是由于多线程下,mutext是无法保护析构的.而后提出了智能指针的方案并对使用该指针会 ...
- Oracal 学习之用户角色创建分配表空间 给角色分配权限
//创建角色inspur 密码为inspur,默认的表空间为USERS create user inspur identified by inspur default tablespace USERS ...
- .net调用word转换pdf出现80080005错误的解决办法
检索 COM 类工厂中 CLSID 为 {000209FF-0000-0000-C000-000000000046} 的组件时失败,原因是出现以下错误: 80080005. 1:在服务器上安装offi ...
- 【Web】Sublime Text 3 连接sftp/ftp(远程服务器)
在 Win 下常用 Xftp 软件来和远程服务传递文件,但是要是在项目开发的时候频繁的将远程文件拖到本地编辑然后再传回远程服务器,那真是麻烦无比,但是Sublime中SFTP插件,它让这世界美好了许多 ...