MySQL Group Relication 部署环境入门篇
| 端口号 | 数据目录 | group_repplicatoon 通信接口 | |
| 3307 | /data/mysql/mysql_3306{data,logs,tmp} | 23307 | |
| 3308 | /data/mysql/mysql_3307{data,logs,tmp} | 23308 | |
| 3309 | /data/mysql/mysql_3308{data,logs,tmp} | 23309 |
环境的准备:
#my.cnf[client]port = 3307socket = /tmp/mysql3307.sock[mysql]prompt="\\u@\\h:\\p [\\d]>#pager="less -i -n -S"#tee=/home/mysql/query.logno-auto-rehash[mysqld]#miscuser = mysqlbasedir = /usr/local/mysqldatadir = /data/mysql/mysql_3306/dataport = 3306socket = /tmp/mysql3306.sockevent_scheduler = 0tmpdir=/data/mysql/mysql_3306/tmp#timeoutinteractive_timeout = 300wait_timeout = 300#character setcharacter-set-server = utf8open_files_limit = 65535max_connections = 100max_connect_errors = 100000#explicit_defaults_for_timestamp#logslog-output=fileslow_query_log = 1slow_query_log_file = slow.loglog-error = error.loglog_error_verbosity=3pid-file = mysql.pidlong_query_time = 1#log-slow-admin-statements = 1#log-queries-not-using-indexes = 1log-slow-slave-statements = 1#binlogbinlog_format = rowlog-bin = /data/mysql/mysql_3306/logs/mysql-binbinlog_cache_size = 1Mmax_binlog_size = 200Mmax_binlog_cache_size = 2Gsync_binlog = 0expire_logs_days = 10#group replicationserver_id=1013307gtid_mode=ONenforce_gtid_consistency=ONmaster_info_repository=TABLErelay_log_info_repository=TABLEbinlog_checksum=NONElog_slave_updates=ONbinlog_format=ROWtransaction_write_set_extraction=XXHASH64loose-group_replication_group_name="3db33b36-0e51-409f-a61d-c99756e90155"loose-group_replication_start_on_boot=offloose-group_replication_local_address= "192.168.5.100:23307" ###注意端口号,要区分开,不要和我们默认的3306混淆了loose-group_replication_group_seeds= "192.168.5.100:23307,192.168.5.100:23308,192.168.5.100:23309"loose-group_replication_bootstrap_group= offloose-group_replication_single_primary_mode=offloose-group_replication_enforce_update_everywhere_checks=on#relay logskip_slave_start = 1max_relay_log_size = 500Mrelay_log_purge = 1relay_log_recovery = 1#slave-skip-errors=1032,1053,1062#buffers & cachetable_open_cache = 2048table_definition_cache = 2048table_open_cache = 2048max_heap_table_size = 96Msort_buffer_size = 2Mjoin_buffer_size = 2Mthread_cache_size = 256query_cache_size = 0query_cache_type = 0query_cache_limit = 256Kquery_cache_min_res_unit = 512thread_stack = 192Ktmp_table_size = 96Mkey_buffer_size = 8Mread_buffer_size = 2Mread_rnd_buffer_size = 16Mbulk_insert_buffer_size = 32M#myisammyisam_sort_buffer_size = 128Mmyisam_max_sort_file_size = 10Gmyisam_repair_threads = 1#innodbinnodb_buffer_pool_size = 100Minnodb_buffer_pool_instances = 1innodb_data_file_path = ibdata1:100M:autoextendinnodb_flush_log_at_trx_commit = 2innodb_log_buffer_size = 64Minnodb_log_file_size = 256Minnodb_log_files_in_group = 3innodb_max_dirty_pages_pct = 90innodb_file_per_table = 1innodb_rollback_on_timeoutinnodb_status_file = 1innodb_io_capacity = 2000transaction_isolation = READ
#mysql>SET SQL_LOG_BIN=0#mysql>CREATE USER rpl_user@'%';#mysql>GRANT REPLICATION SLAVE ON *.* TO 'rpl_user'@'%' identified by '123456';#mysql>SET SQL_LOG_BIN=1
change master to master_user='rpl_user',MASTER_PASSWORD='123456' for channel 'group_replication_recovery';
install plugin group_replication soname 'group_replication.so';

#mysql> set global group_replication_bootstrap_group=ON; # 只在第一个节点使用
#mysq>START GROUP_REPLICATION;
stop group_replication;
select * from performance_schema.replication_group_members;

创建一个测试库
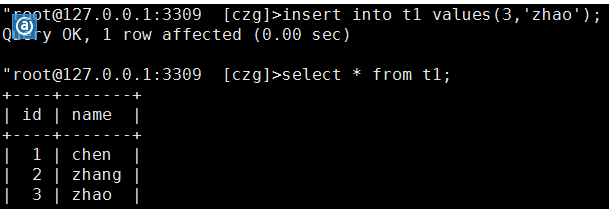
create database czg;use czg;create table t1 (id int not null,name varchar(32), primary key(id));insert into t1 values(1,'chen'),('2','zhang');
./mysqld --defaults-file=/data/mysql/mysql_3308/my_3308.cnf --initialize-insecure
#mysql>SET SQL_LOG_BIN=0#mysql>CREATE USER rpl_user@'%';#mysql>GRANT REPLICATION SLAVE ON *.* TO 'rpl_user'@'%' identified by '123456';#mysql>SET SQL_LOG_BIN=1
change master to master_user='rpl_user',MASTER_PASSWORD='123456' for channel 'group_replication_recovery';
install plugin group_replication soname 'group_replication.so';
select * from performance_schema.replication_group_members;

第三个节点的安装:
初始化实列
./mysqld --defaults-file=/data/mysql/mysql_3309/my_3309.cnf --initialize-insecure
#mysql>SET SQL_LOG_BIN=0#mysql>CREATE USER rpl_user@'%';#mysql>GRANT REPLICATION SLAVE ON *.* TO 'rpl_user'@'%' identified by '123456';#mysql>SET SQL_LOG_BIN=1
change master to master_user='rpl_user',MASTER_PASSWORD='123456' for channel 'group_replication_recovery';
install plugin group_replication soname 'group_replication.so';

其它两台的机器也会看到新增加数据
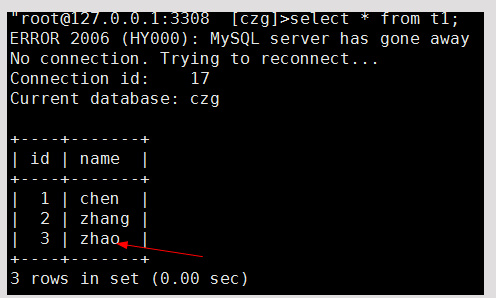
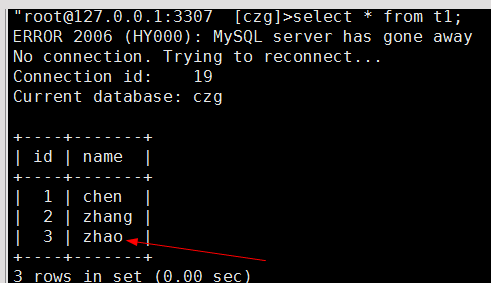
到此我们的主从环境就算搭建完成。
小结:其实环境的搭建还是比较的简单,你只要按文档说明基本能顺利的搭建下来。
注意事项:
select variable_value from performance_schema.global_status where variable_name='group_replication_primary_member';
select variable_value from performacne_schema.global_status where variable_name='group_repliation_primary_member';
另外一个问题就是启动的问题:

看日志就是我们的端口争用。主要是我们的配置文件的时候,没有把端口设置好,设置冲突了。

总结:主从搭建的环境就写到这里,后续还会针对Group Relication 做一个详细的介绍。水平有限,文中如果有不当或者错误之处,欢迎大家拍砖给我发邮件(chenzhaoguang00@126.com)。欢迎转载,转载请注明来源即可。
MySQL Group Relication 部署环境入门篇的更多相关文章
- 使用 gulp 搭建前端环境入门篇(转载)
本文转载自: 使用 gulp 搭建前端环境入门篇
- MGR(MySQL Group Replication)部署测试
1. 环境说明 192.168.11.131 mgr1 主节点 192.168.11.132 mgr2 从节点 192.168.11.133 mgr3 从节点 2. 在mgr1.mgr2.mgr3上安 ...
- 【Mysql sql inject】【入门篇】sqli-labs使用 part 4【18-20】
这几关的注入点产生位置大多在HTTP头位置处 常见的HTTP注入点产生位置为[Referer].[X-Forwarded-For].[Cookie].[X-Real-IP].[Accept-Langu ...
- 【Mysql sql inject】【入门篇】SQLi-Labs使用 part 1【01-11】
人员流动性过大一直是乙方公司痛点.虽然试用期间都有岗前学习,但老员工忙于项目无暇带新人成长,入职新人的学习基本靠自己不断摸索.期望看相关文档就可以一蹴而是不现实的.而按部就班的学习又很难短期内将知识有 ...
- 【Mysql sql inject】【入门篇】sqli-labs使用 part 3【15-17】
Less-15- Blind- Boolian Based- String 1)工具用法: sqlmap -u --batch --technique BEST 2)手工注入 时间盲注放弃用手工了 ...
- 【Mysql sql inject】【入门篇】SQLi-Labs使用 part 2【12-14】
这几关主要是考察POST形式的SQLi注入闭合 ## Less-12 - POST - Error Based- Double quotes- String ### 1)知识点 主要考察报错注入中的双 ...
- CentOS7 + Python3 + Django(rest_framework) + MySQL + nginx + uwsgi 部署 API 开发环境, 记坑篇
CentOS7 + Python3 + Django(rest_framework) + MySQL + nginx + uwsgi 部署 API 开发环境 CentOS7 + Python3 + D ...
- Hadoop生态圈-Hive快速入门篇之Hive环境搭建
Hadoop生态圈-Hive快速入门篇之Hive环境搭建 作者:尹正杰 版权声明:原创作品,谢绝转载!否则将追究法律责任. 一.数据仓库(理论性知识大多摘自百度百科) 1>.什么是数据仓库 数据 ...
- MySQL 5.7.17 Group Relication(组复制)搭建手册【转】
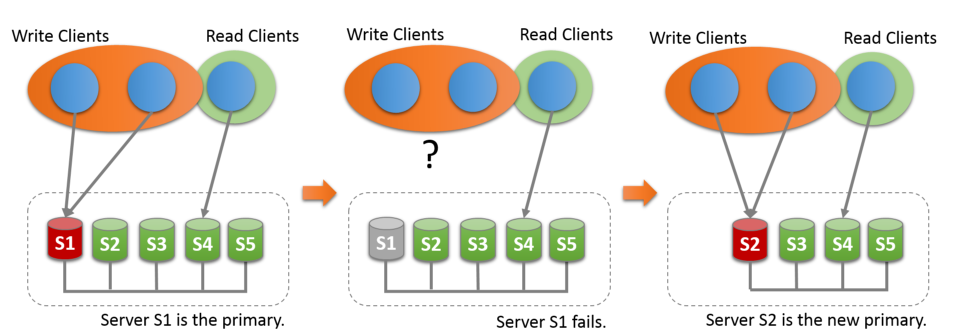
本博文介绍了Group Replication的两种工作模式的架构.并详细介绍了Single-Master Mode的部署过程,以及如何切换到Multi-Master Mode.当然,文末给出了Gro ...
随机推荐
- k60引脚图
/*! 枚举管脚编号 */ typedef enum { /* PTA端口 */ //0~31 PTA0, PTA1, PTA2, PTA3, PTA4, PTA5, PTA6, PTA7, PTA8 ...
- Firefox取消“订阅实时书签”功能
如果你勾选了Firefox“总是用实时书签订阅收取”, 一打开RSS页面就直接弹出添订阅实时书签对话,而当你想在火狐中直接查看RSS页面时,发现不知如何取消“订阅实时书签”功能了.就怨这个关闭功能藏的 ...
- python全栈开发-Day3 字符串
python全栈开发-Day3 字符串 一.按照以下几个点展开字符串的学习 #一:基本使用 1. 用途 #首先字符串主要作用途径:名字,性别,国籍,地址等描述信息2.定义方式 在单引号\双引号\三引 ...
- python初识(二)
伟大的"hello world" print("hello world") 第一个简单的python程序就搞定了 浅谈python语言的特点: 1. 语法简洁: ...
- mysql存储过程(查询数据库内表 游标循环 if判断 插入别的表内)
BEGIN declare f_age int;DECLARE incode1 VARCHAR(100);DECLARE incode2 VARCHAR(100);DECLARE incode3 VA ...
- canvas实现将文字变成颗粒
<!DOCTYPE html> <html> <head> <meta charset="utf-8"> <title> ...
- 笔记:Spring Cloud Eureka 服务发现与消费
服务发现与消费,其服务发现的任务是由Eureka的客户端完成,而服务的消费任务由Ribbon.JerseyClient等完成,Ribbon是一个基于HTTP和TCP的客户端负载均衡器:使用Jersey ...
- 【网络】 应用&传输层笔记
应用层 应用层常用的协议和各自对应的TCP/UDP端口: DNS TCP/UDP 53 HTTP TCP 80 SMTP TCP 25 POP UDP 110 Telnet TCP 23 DHCP U ...
- 【JS】 Javascript与HTML DOM的互动 寻路
JS HTML DOM DOM的全程是Document Object Module,即文档对象模型.一般来说,当一个页面被加载时,浏览器会在内部创建一个当前文档的DOM.就像用python的Etree ...
- 设计模式 --> (13)备忘录模式
备忘录模式 在不破坏封装性的前提下,捕获一个对象的内部状态,并在该对象之外保存这个状态.这样以后就可将该对象恢复到原先保存的状态 示例 玩游戏时都会保存进度,所保存的进度以文件的形式存在.这样下次就可 ...