Qt-QMl-自定义自己想要的TabView
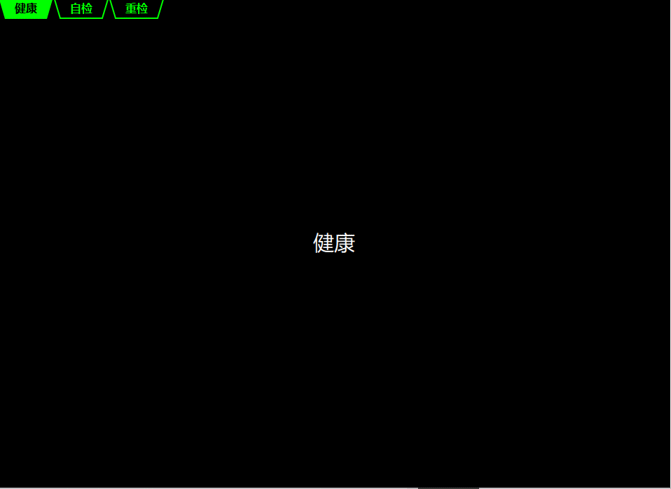
上效果图
上实现源码,这里的代码都是来自Qt官方源码修改其中某一行内容
/*
作者:张建伟
时间:2018年4月8日
简述:自定义TabView,主要实现Tab和实现内容重叠,不在占用独立空间
该文件内容仅适用于某平台显示器使用
*/
importQtQuick2.2
importQtQuick.Controls1.4
importQtQuick.Controls.Styles1.4
importQtQuick.Controls.Private1.0
FocusScope
{
id:root
implicitWidth:240
implicitHeight:150
propertyintcurrentIndex:0//当前标签索引
readonlypropertyintcount:__tabs.count//当前标签数量
propertyboolframeVisible:true//标签边框可见
propertybooltabsVisible:true//标签是否可见
propertyinttabPosition:Qt.TopEdge//标签位置
readonlypropertyaliascontentItem:stack//标签内容视图属性//这里翻译有问题
defaultpropertyaliasdata:stack.data//内容
propertyListModel__tabs:ListModel{}
propertyComponentstyle:Settings.styleComponent(Settings.style,"DTabViewStyle.qml",root)
propertyvar__styleItem:loader.item
onCurrentIndexChanged:__setOpacities()
//添加标签
functionaddTab(title,component)
{
returninsertTab(__tabs.count,title,component)
}
//插入标签
functioninsertTab(index,title,component)
{
vartab=tabcomp.createObject()
tab.sourceComponent=component
tab.title=title
__tabs.insert(index,{tab:tab})
tab.__inserted=true
tab.parent=stack
__didInsertIndex(index)
__setOpacities()
returntab
}
//移除标签
functionremoveTab(index)
{
vartab=__tabs.get(index).tab
__willRemoveIndex(index)
__tabs.remove(index,1)
tab.destroy()
__setOpacities()
}
//移动标签
functionmoveTab(from,to)
{
__tabs.move(from,to,1)
if(currentIndex==from)
{
currentIndex=to
}
else
{
varstart=Math.min(from,to)
varend=Math.max(from,to)
if(currentIndex>=start&¤tIndex<=end)
{
if(from<to)
--currentIndex
else
++currentIndex
}
}
}
//获取标签
functiongetTab(index)
{
vardata=__tabs.get(index)
returndata&&data.tab
}
function__willRemoveIndex(index)
{
if(count>1&&(currentIndex>index||currentIndex==count-1))
--currentIndex
}
function__didInsertIndex(index)
{
if(count>1&¤tIndex>=index)
currentIndex++
}
function__setOpacities(){
for(vari=0;i<__tabs.count;++i)
{
varchild=__tabs.get(i).tab
child.visible=(i==currentIndex?true:false)
}
}
activeFocusOnTab:false
Component
{
id:tabcomp
Tab{}
}
TabBar
{
id:tabbarItem
objectName:"tabbar"
tabView:root
style:loader.item
anchors.top:parent.top
anchors.left:root.left
anchors.right:root.right
}
Loader
{
id:loader
z:tabbarItem.z-1
sourceComponent:style
propertyvar__control:root
}
Loader
{
id:frameLoader
z:tabbarItem.z-1
anchors.fill:parent
//anchors.topMargin:tabPosition===Qt.TopEdge&&tabbarItem&&tabsVisible?Math.max(0,tabbarItem.height-baseOverlap):
anchors.bottomMargin:tabPosition===Qt.BottomEdge&&tabbarItem&&tabsVisible?Math.max(0,tabbarItem.height-baseOverlap):0
sourceComponent:frameVisible&&loader.item?loader.item.frame:null
propertyintbaseOverlap:__styleItem?__styleItem.frameOverlap:0
Item{
id:stack
anchors.fill:parent
anchors.margins:(frameVisible?frameWidth:0)
anchors.topMargin:anchors.margins+(style=="mac"?6:0)
anchors.bottomMargin:anchors.margins
propertyintframeWidth
propertystringstyle
propertyboolcompleted:false
Component.onCompleted:{
addTabs(stack.children)
completed=true
}
onChildrenChanged:{
if(completed)
stack.addTabs(stack.children)
}
functionaddTabs(tabs){
vartabAdded=false
for(vari=0;i<tabs.length;++i){
vartab=tabs[i]
if(!tab.__inserted&&tab.Accessible.role===Accessible.LayeredPane){
tab.__inserted=true
//reparenttabscreateddynamicallybycreateObject(tabView)
tab.parent=stack
//adynamicallyaddedtabshouldalsogetautomaticallyremovedwhendestructed
if(completed)
tab.Component.onDestruction.connect(stack.onDynamicTabDestroyed.bind(tab))
__tabs.append({tab:tab})
tabAdded=true
}
}
if(tabAdded)
__setOpacities()
}
functiononDynamicTabDestroyed(){
for(vari=0;i<__tabs.count;++i){
if(__tabs.get(i).tab===this){
__willRemoveIndex(i)
__tabs.remove(i,1)
__setOpacities()
break
}
}
}
}
onLoaded:{item.z=-1}
}
onChildrenChanged:stack.addTabs(root.children)
states:[
State{
name:"Bottom"
when:tabPosition===Qt.BottomEdge&&tabbarItem!=undefined
PropertyChanges{
target:tabbarItem
anchors.topMargin:-frameLoader.baseOverlap
}
AnchorChanges{
target:tabbarItem
anchors.top:frameLoader.bottom
}
}
]
//style:TabViewStyle
//{
//tab:Rectangle
//{
//id:t_root
////implicitWidth:Math.max(text.width+4,80)
//implicitWidth:
//implicitHeight:
////color:styleData.selected?"steelblue":"lightsteelblue"
//propertyboolselectd:styleData.selected
//Canvas
//{
//id:m_canvas
//anchors.fill:parent
//onPaint:
//{
//}
//}
//}
//}
}
//BaseTabView
//{
//style:TabViewStyle
//{
//}
//Text{
//id:text
//anchors.centerIn:parent
//text:styleData.title
//font.family:"微软雅黑"
//font.pixelSize:
//color:styleData.selected?"black":"green"
//}
//}
//}
//}
这里还有一个是美化的样式表,还是现在还有个问题,这个样式文件无法拷出来,必须还放到Qt的程序目录才可以
/*
作者:张建伟
时间:2018年4月8日
简述:自定义TabViewStyle文件
*/
importQtQuick2.2
importQtQuick.Controls1.2
importQtQuick.Controls.Private1.0
Style{
readonlypropertyTabViewcontrol:__control
propertybooltabsMovable:false
propertyinttabsAlignment:Qt.AlignLeft
propertyinttabOverlap:1
propertyintframeOverlap:2
propertyComponentframe:Rectangle{
color:"#dcdcdc"
border.color:"#aaa"
Rectangle{
anchors.fill:parent
color:"transparent"
border.color:"#66ffffff"
anchors.margins:1
}
}
propertyComponenttab:Item{
scale:control.tabPosition===Qt.TopEdge?1:-1
propertyinttotalOverlap:tabOverlap*(control.count-1)
propertyrealmaxTabWidth:control.count>0?(styleData.availableWidth+totalOverlap)/control.count:0
//implicitWidth:Math.round(Math.min(maxTabWidth,textitem.implicitWidth+20))
implicitWidth:80
implicitHeight:Math.round(textitem.implicitHeight+10)
Item{
id:m_Item
anchors.fill:parent
anchors.bottomMargin:styleData.selected?0:1
Canvas
{
id:m_Canvas
anchors.fill:parent
propertyboolisSelectd:styleData.selected
propertyintm_width:m_Item.width
propertyintm_height:m_Item.height
onPaint:
{
varctx=getContext("2d");
ctx.width=m_width
ctx.clearRect(0,0,2000,2000);
ctx.height=m_height
ctx.lineWidth=2.0;
ctx.lineJoin='miter';
ctx.strokeStyle="#00FF00";
ctx.fillStyle="#00FF00";
ctx.moveTo(1,0);
ctx.lineTo(m_Item.width-1,0);
ctx.lineTo(70,m_Item.height-1);
ctx.lineTo(10,m_Item.height-1);
ctx.lineTo(1,0);
if(isSelectd)
{
ctx.fill();
}
else
{
ctx.stroke();
}
}
}
}
Text{
id:textitem
anchors.fill:parent
anchors.leftMargin:4
anchors.rightMargin:4
verticalAlignment:Text.AlignVCenter
horizontalAlignment:Text.AlignHCenter
text:styleData.title
elide:Text.ElideMiddle
renderType:Settings.isMobile?Text.QtRendering:Text.NativeRendering
scale:control.tabPosition===Qt.TopEdge?1:-1
font.bold:true
font.family:"微软雅黑"
font.pixelSize:16
color:styleData.selected?"black":"#00FF00"
Rectangle{
anchors.centerIn:parent
width:textitem.paintedWidth+6
height:textitem.paintedHeight+4
visible:(styleData.activeFocus&&styleData.selected)
radius:3
color:"#224f9fef"
border.color:"#47b"
}
}
}
propertyComponentleftCorner:null
propertyComponentrightCorner:null
propertyComponenttabBar:null
}
希望对大家有所帮助

Qt-QMl-自定义自己想要的TabView的更多相关文章
- Qt之自定义QLineEdit右键菜单
一.QLineEdit说明 QLineEdit是单行文本框,不同于QTextEdit,他只能显示一行文本,通常可以用作用户名.密码和搜索框等.它还提供了一些列的信号和槽,方便我们使用,有兴趣的小伙伴可 ...
- Qt之自定义搜索框
简述 关于搜索框,大家都经常接触.例如:浏览器搜索.Windows资源管理器搜索等. 当然,这些对于Qt实现来说毫无压力,只要思路清晰,分分钟搞定. 方案一:调用QLineEdit现有接口 void ...
- 【Qt】Qt之自定义搜索框【转】
简述 关于搜索框,大家都经常接触.例如:浏览器搜索.Windows资源管理器搜索等. 当然,这些对于Qt实现来说毫无压力,只要思路清晰,分分钟搞定. 简述 效果 细节分析 Coding 源码下载 效果 ...
- Qt之自定义检索框
1.效果展示 今天这篇文章主要讲解的是自定义搜索框,不仅仅支持搜索,而且可以支持搜索预览,具体请看效果图1.网上也有一些比较简单明了的自定义搜索框,比如Qt之自定义搜索框,讲的也比较详细,不过本文的侧 ...
- Qt之自定义托盘(二)
上一篇文章讲述了自定义Qt托盘,不过不是使用QSystemTrayIcon这个类,而是我们自己完全自定义的一个类,我们只需要处理这个类的鼠标hover.鼠标左键点击.鼠标右键点击和鼠标左键双击,就可以 ...
- Qt之自定义搜索框——QLineEdit里增加一个Layout,还不影响正常输入文字(好像是一种比较通吃的方法)
简述 关于搜索框,大家都经常接触.例如:浏览器搜索.Windows资源管理器搜索等. 当然,这些对于Qt实现来说毫无压力,只要思路清晰,分分钟搞定. 方案一:调用QLineEdit现有接口 void ...
- Qt qml 单例模式
Qt qml 单例模式,没什么好说的,看代码吧.单例模式很适合做全局的配置文件. [示例下载] http://download.csdn.net/detail/surfsky/8539313 [以下是 ...
- Qt qml listview 列表视图控件(下拉刷新、上拉分页、滚动轴)
Qt qml listview下拉刷新和上拉分页主要根据contentY来判断.但要加上顶部下拉指示器.滚动条,并封装成可简单调用的组件,着实花了我不少精力:) [先看效果] [功能] 下拉刷新 ...
- qt qml qchart 图表组件
qt qml qchart 图表组件 * Author: Julien Wintz * Created: Thu Feb 13 23:41:59 2014 (+0100) 这玩意是从chart.js迁 ...
- qt qml中PropertyAnimation的几种使用方法
qml文章 qt qml中PropertyAnimation的几种使用方法 动画应用场景有以下几种: 首先如果一个Rectangle.动画是要改变它的x和y值 1,Rectangle一旦被创建,就要移 ...
随机推荐
- ethereumjs/ethereumjs-blockchain-2-test
https://github.com/ethereumjs/ethereumjs-blockchain/tree/master/test 'use strict' const test = requi ...
- max函数
无论是几维,都只返回一个最大的值 >>> a = [1,2,3] >>> np.max(a) 3 >>> a = [[2,1],[3,4]] &g ...
- 使用MVVM设计模式构建WPF应用程序
使用MVVM设计模式构建WPF应用程序 本文是翻译大牛Josh Smith的文章,WPF Apps With The Model-View-ViewModel Design Pattern,译者水平有 ...
- PAT——1073. 多选题常见计分法(20)
批改多选题是比较麻烦的事情,有很多不同的计分方法.有一种最常见的计分方法是:如果考生选择了部分正确选项,并且没有选择任何错误选项,则得到50%分数:如果考生选择了任何一个错误的选项,则不能得分.本题就 ...
- --oracle删除数据库表(无主键)中重复的记录
--oracle删除数据库表(无主键)中重复的记录 1, CREATE TABLE newtable as SELECT distinct * FROM T_SYSTEM_MENU_PRIV; 2, ...
- 第三月 day03.笔记
函数在调用的时候回形成一个私有作用域,内部变量不会被外面访问,这种保护机制叫做闭包,这就意味着函数调用完了,这个函数形成的栈内存就会被销毁,但有时候我们不希望被销毁. * 函数归属谁和他的调用没有关系 ...
- swiper 仿淘宝详情页面 视频图片切换
1.好兄弟,看一下是否是你需要的 2.废话不多说 直接上代码,复制粘贴一下 自己引用一下swiper.js和css 然后就可以开始玩儿了 <!DOCTYPE html> <html& ...
- 常用PHP方法
个人常用的一些方法记录/** * 返回错误 * * @param int $err_no * @param string $err_msg * @param array $data * @return ...
- day 35初识数据库
一.数据库概述 1.什么是数据库?先来看看百度怎么说的. 数据库,简而言之可视为电子化的文件柜——存储电子文件的处所,用户可以对文件中的数据运行新增.截取.更新.删除等操作. 所谓“数据库”系 ...
- C++ —— 非类中使用const定义常量的初始化,以及#define和typedef的区别
总结一下在非类中使用const关键字定义常量时的初始化问题,亲测VS2015.顺便记录#define宏和typedef的区别. 1 首先对const声明的常量的初始化做简单小结: , w2 = , w ...